
Likes
Comments
Share


@pareto
Follow
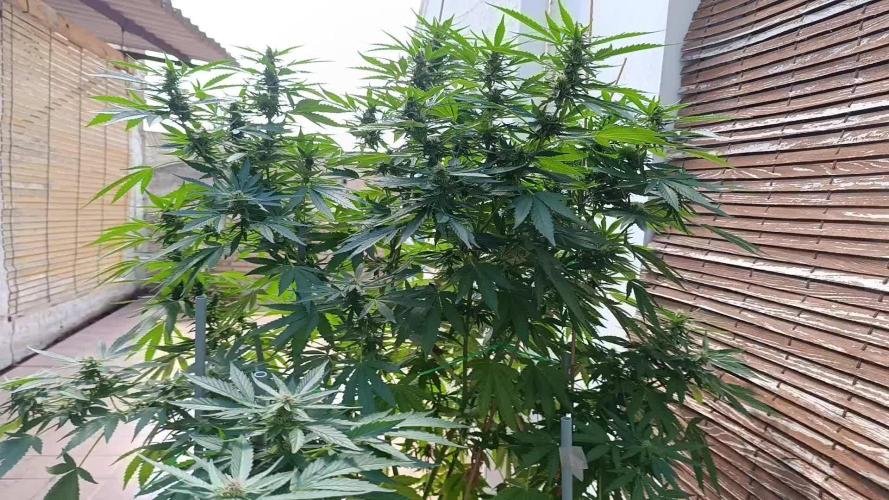
Everything was great. In the beginning she looked a bild small but then she really packed on from top to bottom!
The best yield and the lowest cost per gram I have gotten so far. We had great weather and she got a lot of direct sunshine. I think that helped a lot.
The bag seed was removed in week 4/5. It was either a male or hermed.
Total Runtime: 92 days
--------------------------------------------------------------------------------------------------------------------------------------------------------------------------------
Set up cost (fixed costs)
-Lamp: 40€
-Timer: 3,5€
-Pot: 4€
-Total fixed costs: 47,5€
Given 5 years (or 15 grows) usage time translates to around 3,17€ per grow in materials.
Variable costs:
-Seeds: 3,65€
-Soil: 6€
-Fertilizer: 3,50€
-Power: 21,43€
-Total variable costs: 34,58€
-Total costs per grow: 37,75€
-Cost per gram: 0,76€/g

Likes
13
Share


@Farmerskr
Follow
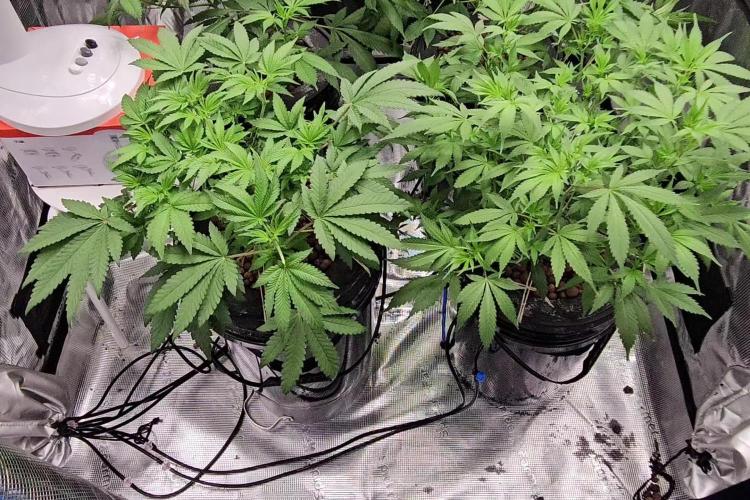
Este es el avance finalizando la 3ra semana, tienen 21 días, ahora les haré una defoliación y una poda de bajos, van maravillosas las Gorilla Banana de BSF Seeds. Planeo pasarlas a floración el día 31 para cerrar con 30 días de vegetación.
Saludos
@farmer.skr 🤙

Processing
Likes
10
Share


@StarletBud21
Follow
Start of week 3 I believe the girls are doing good a few minor worries but that’s at ease for now I think , i have added nutes at a low level and will increase once I see how the plants react to the introduction of the nutes .. Looking into starting lsd on some plants but not too sure wether it’s to early or so . will continue to update the week but for now
Started lst on a few plants day 15 and seen good reactions by day 17 so quite happy with that and will continue this process I will also look into topping my plants as well but not just yet ... they seemed to like the nutes as well so all good week so far
Soo topping done on 4 plants wasn’t as scary as it sounded haha let’s see how they recover ! Going to combine lst as well now
Very good recovery it looks like and the end of week 3 looks promising with the plants
happy growing


Likes
12
Share


@MichaelPearson
Follow
Start April 4th.
Day 1 vega.
Hey! Four seeds have hatched. One is smaller than the others. I planted the seeds in GroBag spilled with clean water ph 6. I'll be back with more information
Day 2
I made a video, it shows that the seeds have taken root well.
Leave your comments. I'll be glad to chat.

Likes
34
Share


@Basementganja
Follow
Stretched vigorously once she started to transition to flower. Developed potency early in flower!
She was LST'd weekly, starting week 2. She was also gently lolipopped a few times, to maintain growth towards 5-6 nodes only.


Likes
3
Share

@myterpygarden
Follow
de las tres plantas dos se cocieron y las arranqué (no vuelvo a poner varias por maceta) la que quedó demostró resistencia y vigor con que la abrí y la entutoré por todo
ésta semana hemos dado un ec de 1.8 (ácidos húmicos y fulvicos, atami VGN, pk de Bac y bibloombastic de Atami)
keep organic ♥️

Likes
2
Share


@Saintvicious
Follow
Keeps going. Etsy seeds coming through. I think soon in the grow a cal mag problem comes up. Chime in when you see it.
Likes
2
Share


@CuriosityWebster
Follow
Good plant overall, wish it was a bigger plant because bud structure is very nice
Had a little bit of spider mites but took care of it quickly, overall handled the heat very well and this one had no bud rot
Will run this stain again since I have some more seeds, hoping for a bigger phenotype next time :)


Likes
199
Share


@CRiSPrGrow
Follow
These came down 11 weeks to the day from seed , this is them on their last day here. Wet weight is 😂 😂 😂 😂 😂 😂 was not expecting so much, it will last me HOURS ! these got wet trimmed now they're on the mat drying , the smell is typical american sweet candy ... was it fun? yes , yes it was fun ! what a plant this one is, my tallest one at 100cm, averaging 85cm , wet weight is.... gonna wait for dry weight, before i jinx it could be dense could be loose ! looks dense + not expecting to loose more than 50% it's all in the cure now ! 🚀


Likes
7
Share

@Cannussy
Follow
7/13/25 - 7/16/25
Flipped as another strain is gonna be a problem otherwise. Very stumpy and thicc lady, already smells very funky and rotten. Now we wait and see what emerges in flower.
7/17/25 - 7/19/25
One hungry girl, she is on 100% feed rn. And god she stinks, really gives u burning nostrils. I know copycat is a sensitive topic in the breeder world but he knows his shit. I am abaolutely going to get more of his shit.


Likes
16
Share


@MrWolfe
Follow
The flowers are smelling great and just fattening, chopped a branch of LSD off the bottom and quick dried it in my food dehydrator at 165* for 45 mins then flip the nug and 45 more minutes, gives you a bowl ready nug that burns smooth and tastes great. For emergency use only though I'm sure it's not great for the material lol.


Likes
18
Share


@Greymangenetics
Follow
These genetics are amazing! So hardy! These are two identical clones taken from the best mother out of a 5 pack of seeds. Still got the mother. This pheno’s Unique aroma is already pushing my carbon filters to the max.
Cannot wait to get some of this dangerously addictive cheese down me gullet!! 😂
Hope you all like the setup have had some very kind compliments from people and I am happy to share my learnings lol.
Peace out A-town!!
Likes
48
Share


@TheCannaProphet
Follow
~ WEDDING CHEESECAKE FAST FLOWER by FastBuds ~
Well fam, here we go again with another epic strain from FastBuds Fast Flowering stable. After having such tremendous success growing their Gorilla Cookies Fast Flower outdoors last year, I've decided to run another of their fast flowering strains outdoors this year... Wedding Cheesecake Fast Flower!
The best description of this awesome cultivar comes directly from my friends at FastBuds which is as follows:
"A delight for the mind and body: Wedding Cheesecake FF (Fast-Flowering) is a delicious strain that offers XXL yields in a 7-8 weeks flowering cycle. This terpene powerhouse produces loads and loads of mouth-watering vanilla-creamy-cookie-scented terps with hints of citrus and cinnamon. In addition to its delicious aromas, this variety grows very well in both indoor and outdoor setups, yielding up to 650 g/m2 without extra maintenance, making it the ideal strain for beginners as it allows you to maximize yields while minimizing work. This super-fast feminized photoperiod version offers upbeat and energetic yet deeply relaxing effects that are perfect for consumers looking for a heavily focused, motivating, and creative high. It’s the ideal strain for those needing that extra energy boost to start a busy day on the right foot.
Wedding Cheesecake FF boasts chunky, large-sized buds with a thick layer of silvery-white resin and bright orange hairs scattered all over: that just screams ‘quality’. The lime-green flowers sparkle with an array of hues ranging from dark to light green, to magenta and purple, and reek of a delicious aroma that’ll remind you of fresh store-bought cheesecake.
This is an XXL hybrid that grows extremely tall in height, reaching up to 3m with one huge main cola and multiple long side branches that can withstand enormous yields of up to 650 g/m2 with ease. Wedding Cheesecake FF is extremely resilient to the elements and can be grown in almost every climate as long as you’ve got the space and basics covered, making her an excellent choice for those looking for large-scale harvests with a quick turnaround time without much effort."
________________________________________________________________________________________________________________________________________________________________________________________________________________________________________________________________________________________________________________________
The Setup:
This is going to be an outdoor grow, but I have started the Wedding Cheesecake FF indoors as our weather is still too cold to put her outside (nighttime temp's dipping regularly into the 30's℉).
The plan is simple... let her grow inside under a 19/5 light schedule until the nighttime temperatures stay above the mid 40's℉, at which point she'll be moved outside and transplanted into the soil which I have already setup and inoculated with beneficial microbes, and then let the fun begin!🤪💚
________________________________________________________________________________________________________________________________________________________________________________________________________________________________________________________________________________________________________________________
Weekly Updates:
6/18- Week 12 and the Wedding Cheesecake Fast Flower from FastBuds is on a mission! The amount of growth happening right now can only be described as explosive, with new shoots appearing and existing branches going crazy with growth!
6/20- Our summer is here and we're under an early heat wave this week with daytime temp's hitting the mid to upper 90's ℉ with heat indexes in the low 100's ℉... in short, IT'S FNG HOT!🔥🔥🔥
I'm watering the Wedding Cheesecake FF daily now with 5-7g of straight well water from the garden hose. I'm watering at sundown so that the water will have some time to soak down into the soil before the heat evaporates it. The coating of straw that I previously spread over the soil has helped a lot as well.
6/22- The weather continues to relentlessly bake everything outside... many thanks for a good A/C!❄️
The daily watering continues and I also went ahead and removed a bunch of foliage that was below the trellis net.
6/24- Today I top dressed the FastBuds Wedding Cheesecake FF with 2 cups each of Gaia Green 4-4-4 and 2-8-4 along with 1 cup of Down To Earth Bio-Fish 7-7-2 and 1/2g of Wiggle Worm castings. After top dressing and working the amendments in by hand I replaced the straw coating over the soil and watered them in with 5g of straight well water via garden hose as usual.
There goes another week for the Wedding Cheesecake FF and it won't be long before she begins to show signs of pre-flowering!
Thank you for checking out my diary, your positive comments and support make it all worthwhile! 💚Growers Love!💚😎🙏
Likes
52
Share


@Santica_Garden
Follow
So this is how the ladies are looking at the end of Week 2 from Seed. Successful Germination, 1st 2 weeks completed and now time for transplanting. I have added a video with better explanation. Happy Growing guys, any questions just ask away. 👍🏾🌱💚😎

Likes
17
Share


@Naujas
Follow
To tell the truth, I am very surprised myself, how amazing she is FastBuds Gorilla cookies, she copes well with a small space:) she drinks 1 liter every day :) everything looks better than expected:) good luck to everyone.
Likes
12
Share


@Northern_Ent
Follow
July 5 Day 22: starting fourth week looking okay. I need to remember to not over-fertilize this auto.
So far so good.
July 9: above 32 C last two days. Spraying grow bag with hose water and foliar spray with seaweed extract and potassium silicate to help beat the heat. Watered with a bit of compost tea.
July 10: still hot but we’re past the peak of the heat wave now. Chemdawg seems to be doing alright.