


Likes
Comments
Share


@Organic473
Follow
Her finally week looking forward to harvest…she emails incredible

Likes
15
Share


@GrapevineGrower2
Follow
Week 9 of Flower and the TKO is just about ripe at 63 days of flower today (5/12). I've never had to time a DWC bucket flush before, so going purely on instinct. Specifically, Trichomes are mostly milky with amber development. I am hoping a 3-5 day flush with ph'd RO water will bring out any potential color AND that Trichomes will continue to ripen bringing amber to about 15-20%.
As for the week in review, I'd say pretty uneventful, which is good. Continued daily water and ppm level drops with stable ph range readings - zero wild swings. She's kicking up some incredibly strong sweet gassy smell mixed with that typical Kush aroma. She's frosty with multiple thick medium-to-large ball shaped colas. Looking forward to completing the DWC bucket flush and harvesting the girl. Next couple of posts (i.e., Harvest & Cure) will end this TKO spring 23 run. Have more of these beans from Ganja Farmer Seeds, so looking forward to running her back in the future.
Likes
19
Share


@nonick123
Follow
Día 20 (13/05) Todas las plantas muestran las preflores!
Día 21 (14/05) Baño de sol de 2 horas!
Día 22 (15/05) N/A
Día 23 (16/05) Riego 750 ml H2O + Regulator 0,15 ml/l + CaMg-Boost 0,25 ml/l + Startbooster 0,25 ml/l - pH 6.2
Día 24 (17/05) Las plantas salen al exterior! 😍 Les aplico heno como mulch (acolchado)
Día 25 (18/05) Riego 250 ml solo agua todas las plantas
Día 26 (19/05) Banana Purple Punch Auto está sedienta!
Riego con 750 ml H2O + Regulator 0,15 ml/l + CaMg-Boost 0,25 ml/l + Startbooster 0,25 ml/l + TopBooster 0,2 ml/l- pH 6.2
💦Nutrients by Aptus Holland - www.aptus-holland.com
🌱Substrate PRO-MIX HP BACILLUS + MYCORRHIZAE - www.pthorticulture.com/en/products/pro-mix-hp-biostimulant-plus-mycorrhizae

Likes
Comments
Share


@SumoStrains
Follow
Sorry for the lack of updates.
Flowerings going well, day 10 now. The kush main colas are pretty much in the light which is a bit problematic but I have the hps dimmed to about 180 watts so its doing ok with being so close.
I'm going to try feeding them a bit more than i have been. I definitely let them get a bit too big before I flowered them!

Likes
5
Share


@pHilosophy420
Follow
She is getting nice and fat next few weeks and it will be harvest time. This strain should taste nice so another strain I'm looking forward to smoke
Likes
3
Share


@RunicKevin58675
Follow
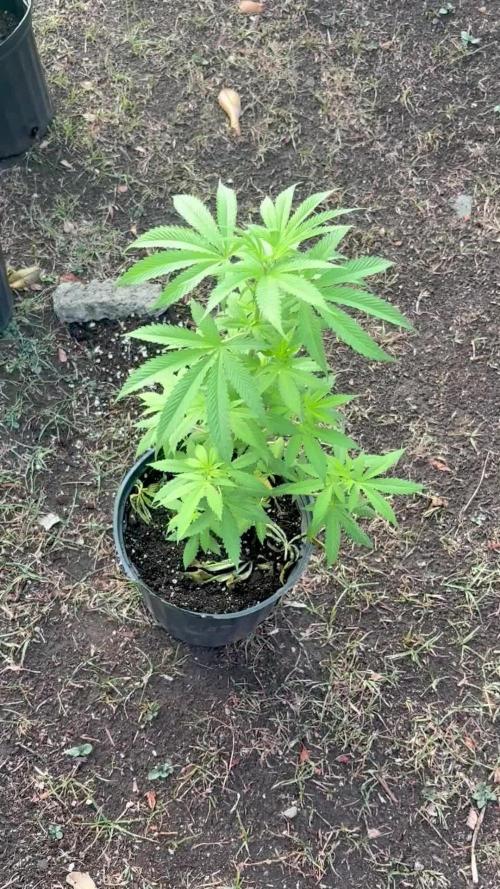
Good evening to all grower :D!! Finally I sent these bad girls into bloom, I noticed a very strong elongation in all 3 plants, there are also some very small pistils!!


Likes
10
Share

Likes
7
Share


Likes
62
Share

@nonick123
Follow
Día 50 (09/12) Busy time
Solo riego!
Día 51 (10/12) CBD Auto 20:1 #1 no para de crecer! ¿Parará el stretch? 💥
OG Kush Auto avanzan las manchas en las hojas... ¿Será deficiencia o carencia?
Día 52 (11/12) CBD Auto 20:1 #1 está demandado más agua. Subo a 1500 ml / día de H2O RO
CBD Auto #2 está ralentizando el consumo de agua (el top se muestra húmedo). ¿Estará entrando en la fase final de floración?. Según FastBuds le quedan 11 a 18 días!
OG Kush Auto también demanda más agua! Subo a 1250 ml / día de H2O RO
Día 53 (12/12) CBD Auto 20:1 #1 es increíble como no para de estirarse y de formar nudos y hojas! Parece una Sativa pura que nunca para de crecer en floración!
CBD Auto #2 empieza a mostrar algunas hojas con senescencia. Se acerca la cosecha!
LSD-25 Auto está haciendo unos cogollos densos y duros como rocas 😍💥 No está tampoco lejos de la cosecha! 💥💨😁
OG Kush Auto produciendo una resina brutal en las hojas de azúcar! 😍
Día 54 (13/12) CBD Auto 20:1 #1 no para el stretch. Le hago una poda de bajos y ligera defoliación
OG Kush Auto está generando una cantidad de tricomas increíble. Además huele a Kush deliciosamente 😍😍😍
Día 55 (14/12) CBD Auto 20:1 #1 para un poco el consumo de agua en ¿Fin del stretch? Casi toca la lámpara de nuevo!
CBD Auto 20:1 #2 empieza a mostrar la senescencia.
Reviso los tricomas con muchos turbios y alguno transparente. ¿Estará en una semana más aproximadamente? 🤔
Día 56 (15/12) OG Kush Auto ha bajado un poco el consumo de agua
La cantidad de tricomas que está haciendo es insana e increíble. Y como huele! 😍
LSD-25 Auto muestra los tricomas trasparentes y algunos turbios. ¿Quizás dos semanas para la cosecha?
💦Nutrients by Bio Tabs - www.biotabs.nl/en/
🌱Substrate PRO-MIX HP BACILLUS + MYCORRHIZAE - www.pthorticulture.com/en-us/products/pro-mix-hp-biofungicide-plus-mycorrhizae
"GDBT420" 15% DISCOUNT code for the BIOTABS Webshop https://biotabs.nl/en/shop/
Likes
1
Share
@Thedibber
Follow
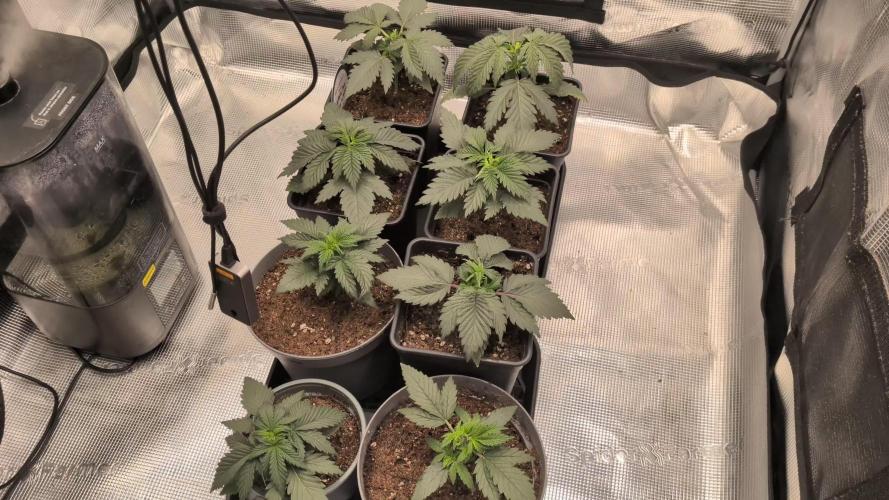
Its been 17days since planting all the seedlings and they are happy except 2 which took a beating yesterday when the humidifer ran out of water but 1 has recovered overnight im sure the other will be fine soon 🙏

Likes
38
Share


@Cariboo_OG
Follow
Utopia Haze is a rare heavily sativa dominant hybrid (90% sativa/10% indica) strain created through back crossing Brazilian Sativa strains. This tasty little bud took home 1st Place for Best Sativa in the 2008 High Times’ Cannabis Cup and for good reason – with its potent 18-22% average THC level and long lasting cerebral effects, Utopia Haze is one powerhouse smoke. The Utopia Haze high comes on soon after you finish your first toke, hitting you with a strong cerebral lift that infuses you with a sense of hazy relaxation.
Type: Feminised/Photoperiod
Cultivation: Indoor/Outdoor
Flowering Time (days): 70-75
Indoor Yield (g): Up to 650
Feminised Outdoor Harvest Month: October
Feminised Outdoor Harvest Month Week: 3rd-4th week
Aroma: Citrus, Woody, Pungent, Mint
Effect: Cerebral Lift, Hazy Relaxation, Sleepy
Welcome Everyone to the Final Entry of my Utopia Haze Grow !
There is so much to discuss ! I have been extremely busy as of late trying to get this Harvest together, but i am happy to have it here for you now !
I Seriously under estimated the amount of time, help from others, and my own necessary skills to pull this off.. and i still kind of screwed it up lol !
But its worth noting i have never actually done this before and trying to document it during....was extremely hard.
It is next to impossible to work an iPhone with rubber gloves on !
First I want to discuss everything step by step so before you jump straight into the comments on how the end product is so small in "quantity"
Rest assured i am happy with its"quality"...and thats all that matters to me because Life is a journey not a destination! and i have learned so much from this grow that I couldn't be any happy even if i messed some things up :)
But at the very least I hope you read through this entry in its entirety with an open mind and focus more on the process, rather than just the outcome!
I ran out of Ice & i was only able to wash three times..(normally I've heard you should go sometimes 5-6 washes)
Preparation is Key & things will be much better next round :)
Photos 1-22
These are pretty self explanatory but for those of you just tuning in now.. this is what happens to a very happy plant when you don't have the necessary tools to monitor key components of growing cannabis.. Ph, as well as EC levels play a very key role in the outcome of your grow lol that being said I was just able to save this plant by purchasing both tools but that doesn't mean the plant didn't suffer because of the prior events.. This was a Huge reason behind me choosing to turn this harvest into what i would consider
"Solventless Hash Rosin" from "Ice water extracted Bubble hash".
Pictures 23
The idea here is the process of using "fresh Frozen Cannabis" this has been discussed many a time online on such sites as instagram and here on grow diaries as well.. I personally have Never tried the process so i decided to try it out and make a judgement for myself..
Video 24
The Cannabis has now been in the freezer for 72 hours making it very well frozen.. as you can tell i struggled getting it all into the 25u Screen Wash Bag. One thing of note i would do differently is i will de-stem my next batch as i also believe this played a part in the amount of plant matter that escaped through the sieves.
Photo/Video's 25-28
The idea here is "ice water Seiving" & especially with the bags that I am using here that are only have screen material on the bottom portion of the bag it is very important to have spaces in-between the screens to allow the water to pass directly through the screens into the bottom bucket with the least amount of resistance.. because the hash is so extremely temperature dependant if it gets warm on the side of the bag.. it will stick there and not make it to the bottom to become use able product..
29
You do not need to use as much Ice as i used here lol... the idea is to keep everything very cold..i certainly achieved that but at the sacrifice of using so much that i ended up grinding product and producing "contaminants" but in the end they are just plant matter that i would be smoking when i rolled up my joint either way so.. I'm not super disappointed..
But it should be noted that what you want to achieve here is a Layering effect where you have the wash bag between two small layers of ice while the "water current" washes the Trichomes away allowing them to be separated by the screens setup below :)
Before Starting the machine you should allow some time (i.e.;10-12minutes pre soak to allow the product to become saturated) before the first cycle.
By video 32 I have just ran out of ice lol..
Video 33-34
Here I have a tip for you.. to separate the screens that you sieve through.. cut 5 gallon buckets to stretch them across nice and tight.. it'll make scooping your Bubble that much easier ! i learned this from the many "Frenchy" videos I have watched :)
Picture 35
Here in lays the problem for most people.. drying your hash without loosing vast amounts of "Terpenes" whilst also stay ever vigilant against mold !
Thanks to all those videos I've watched on youtube.. id like to think this was one of my most successful parts of this process..
Things to Note; Terpenes start to seriously evaporate at temperatures 68F or 20C
you need to stay as cold as possible whilst bringing the Relative Humidity in the space down into the 40-30% to stay away from that nasty mold !
I used my cold storage room in the basement.. with a dehumidifier running to keep the space at 45% RH & staying at a constant 15c.
All while spreading the hash as thin as possible across parchment paper, on top of the white screens with a fan moving air across both sides of the paper.
Pictures 36-38
These are some macros i took in the middle of my drying session I fell in love with the colour.
Yes i know the black spots are plant material but they will get caught when i bag the hash & squish the oil out.
Thing to Note; at this stage it is important to ensure you 'micro plane" the hash down as fine as you can whilst staying weary of the temperature... any "chunks" will hold pockets of moisture.. that lead to potential problems..ie; mold ...
Picture/Video 39-41
Successfully planed bubble hash ready to be bagged and Squished !
Picture 42
Ive decided to follow Pedro.. from Pedros Grow Room and double bag to be on the safe side so i don't have any blow outs.
So thats One 25u bag inside one 160u bag ! :)
Pictures 43
This is almost 3 grams of the bubble hash from above, already melting in the bag.. this is where i ran into trouble again lol things started getting to warm in the house and i was only able to get one of the three squish's i did on video :( things started getting sticky.
Picture 44
This is basically just a photo of the equipment I'm using; 3x5 LowTemp Cage in the frame I built myself, with a 20Ton bottle jack.
Something to note here is this is an older Lowtemp model with only a single heating zone which is which i have it closed here heating Both sides of the press :)
As well as the importance of having adequate pressure on your plates.. my rig is very overkill for the size of hash bags..lol
Video 45
Here is the lovely press video.. its didn't quite work the way i wanted either lol my directional folding wasn't quite tight enough for a big "drip" :)
&the Press was set to 65°c
Photo's 46-50 are pretty self explanatory :) I had a blow out.. but still managed to pull an 80% return from the hash once squished...& yes it tasted amazing :)
Was it worth it in the end... that could be debated.. for some..i understand..its not your thing, but for those of us that are interested in making our own concentrates.. free from Solvents...
I wouldn't make it any other way :)
If even ONE of you reading this diary finds it helpful to reference for ANYTHING.....even if its "what not to do" ill consider it a success !
Thanks again for tagging along on this garden adventure.. its been one heck of a journey !
Much Love from B.C. Canada,
Until Next time,
Cariboo
Likes
1
Share

@Rhah420
Follow
Blütetage 50
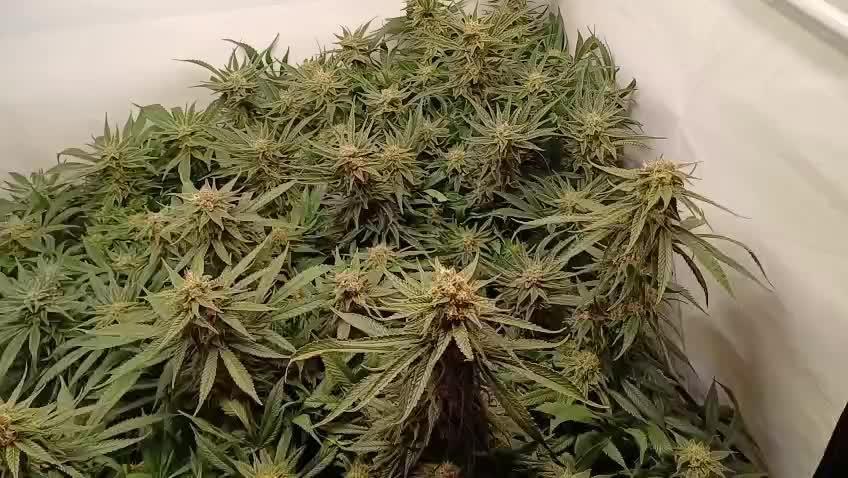
Es wurde Anfang dieser Blütewoche noch einmal mit Dünger wie angegeben gedüngt. Ab Morgen (17.02) wird für 7-14 Tage nur noch mit pH angepassten Wasser gegossen. Die Ladys sehen noch sehr Vital aus. Es gibt aber bereits ca. 30% milchige trichome in den größeren blüten. Ich bevorzuge allerdings eher 30% Bernstein farbene. Es riecht sehr Fruchtig im Zelt und die Ausbeute wird zwar nicht außergewöhnliche, aber ausreichend denke ich. ☺️

Likes
13
Share


@Prozak
Follow
the strain is really strong ,
low temperatures resist , 3 weeks around 12/16º graus and steell growing wel
nice new colos between week 4/6 in flowering.
really good strain to manipulate! 5 stars * * * * *

Likes
8
Share


@Aldo90
Follow
I was going to upload the process, but the wiser side of me said no. So I've edited it out and some of the evaporation process can be seen. Bho/wax/honey whatever we care to call it

Likes
68
Share


@MOSS_FIGURE
Follow
.. Week2 start to use beneficial nutrients and switch the light only 18 hours per day.⏰
{Activities}
(Day 8) First day of the week, i dont't water the plants.
(Day 9) Second day use some nutrients, there're Cal-mag 0.3ml./L. , Bio-heaven 2ml./L. , Acti-vera and Fish-Mix each 1ml./L.
(Day 10) ....Practice the dharma So calm🧘♂️..Just observe them. Nice growing
(Day 11) Use a Root-juice 4ml/2L. I think the roots will not walk to the bottom of the pot if the watering does not reach so I should add 1 liter of water per a plant.
(Day 12) Today I should add more fan for my grow tent so today I'm buying new one , switch the light to 75% and Lamp To Plant Distance 24-26inches .
(Day 13)...This day I'm not do anything about my plants but learning about toping and cloning a plant or other training a plant.
(Day 14) The last day water the plants but use only water.🚿
Hope you like and enjoy my diary.
Thank you so much for checking out my grows. Feel free to leave a comment, push the like or give the follow.
Likes
40
Share


@Ganja_Victoria_Aus
Follow
LITTLE BEAST PLANT. GETTING ALL THE LOVE AND CARE I CAN GIVE THEM!
15 Apr. Finally I close a period of my life. With the previous grow. Got switch light. Now running fluence spyder 2i 630w full blast 70 cm from plant. Plenty c02 even if this version of fluence doesn't requires. I'm watering the plant almost everyday. Growing pretty fast.
Orange Kusk Cake topping 8 main node. I'm about to turn the first one in a monster. Mainling super cropping lst hst all in. I get to know her more close.
16 everything is running smoothly. Amazing computer keep temperature night and day under control also fan speed. Every tools work in redundancy and equality low speed talking each other.
Plant growing beautifully and super lushness. 3 more week of veg. After allingin all of them. Few clones for patient friend. New grower people. Switch to flower. I'm in peace of mind.
17 Apr. I bend and snap practically every node. Poor Lady.
I don't have the right of the music. Please remove it if create trouble.
Likes
5
Share

@GorkedOut
Follow
Week 11
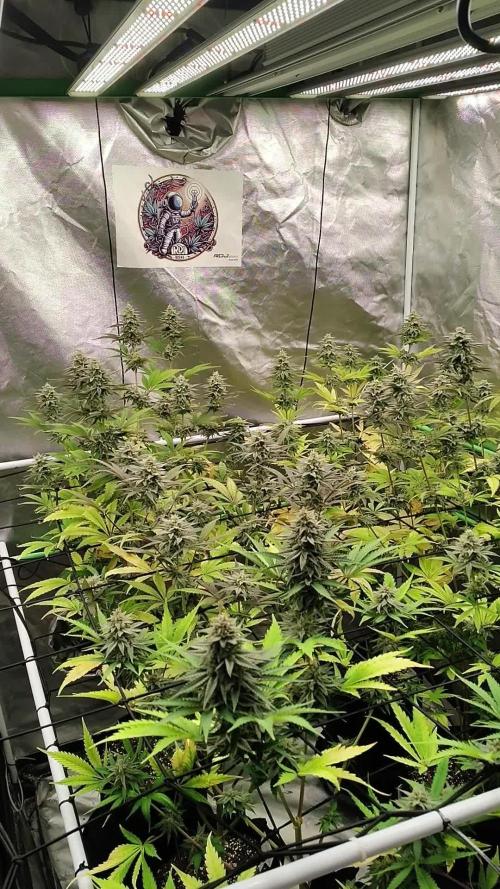
Just noticed that my led wasn't level. Lol only took me 80 freaking days to notice 😂
I tried not to defoliate too much. A bit of yellowing, but my ph meter was off a bit but the new growth seems to be healthy again which is nice.I'll prob feed for 1 more week, followed by 2 weeks of just water. I may change that, but that's my plan as of now.


Likes
17
Share


@Ammazzaporri
Follow
As you can see we are close to the harvest, we are wondering if is better to do first the critical and then the rest or if we better take off all the flowers togheter maybe over keeping the critical
