Likes
10
Share
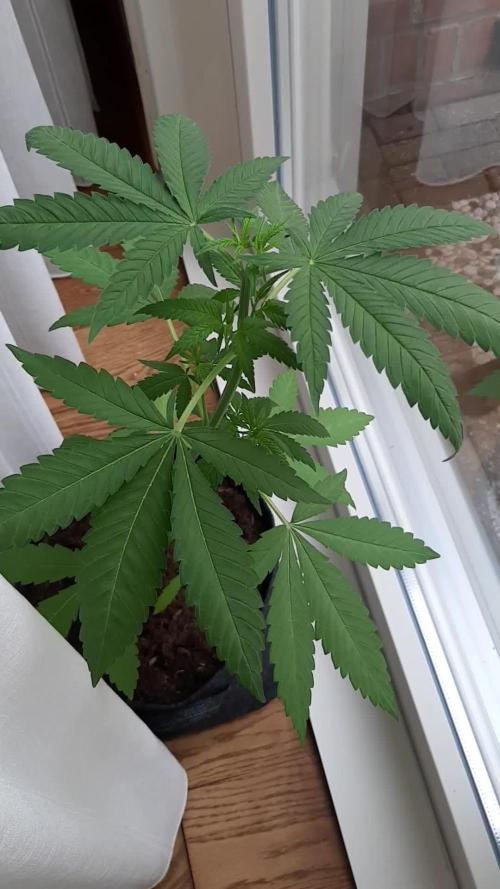
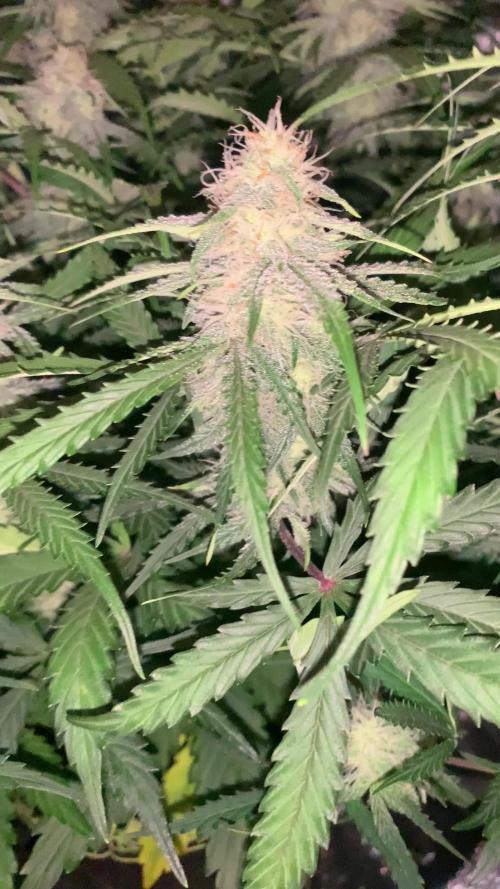
In der dritten Blütewoche legt die Blue Lobster von Cipher Genetics erst richtig los. Der Stretch flacht langsam ab, während die Pflanze ihre gesamte Energie nun fokussiert in die generative Entwicklung steckt. Auf den neuen Bildern ist deutlich zu erkennen, wie sich die unzähligen Blütenansätze prächtig weiterentwickeln und die ersten dichten, weißen Härchen (Pistille) bilden. Am 21. Tag gab es zudem ein gründliches Lollipopping, bei dem das untere Drittel komplett von Schattenblättern und schwachen Trieben befreit wurde, um die Energie gezielt in die Top-Buds zu lenken. Die Umstellung auf Advanced Nutrients zahlt sich weiterhin voll aus: Das Blattwerk glänzt in einem makellosen, gesunden Grün, ohne jede Spur der alten Mangel- oder Knittererscheinungen. Dank des konsequenten Trainings in der Vegi-Phase präsentiert sich die Struktur auf einer perfekt homogenen Ebene, sodass jede einzelne Triebspitze die maximale Lichtausbeute mitnimmt. Ein absolut sauberer Start in die echte Knospenproduktion!
Likes
10
Share
@Naujas
Follow
2 weeks have passed, the girl has a little too much nutrients, but she will get through it :) the girl doesn't seem to be tall, I think she will be more like a bush :) everything looks good, good luck to everyone!
Likes
18
Share
I'm very exciting and a bit worried after move to bigger pot and DWC. I should grow them in DWC bucket at the first place but I have moved them from substrate to DWC. Let's see how it goes. Week #3 Summary: The overall result is good but DWC is a bit better grow than substrate (only water). I did topping one of them to test and trim all of them.
Likes
7
Share
Thricomes starting to move from transparent to white ones, my idea is to harvest when I find any ocurrences of ambar Starting from 2.2 EC and lowering to 0.5, then I will flush with tap water (50ppm) in 3 days before harvest.
Likes
16
Share
NICE BLACK-OUT FADE TIPS BURN HERE & THERE CUD AVE TAKEN HER XTRA MORE WK BUT THE OUTDOOR WEATHER WAS TOO RISKY!!
Likes
18
Share
Bruce became a very pretty lady imo , grew on two nice big colas, other buds are pretty big too imo and really super dense. And above all her colours and her smell are making me a very happy man
Likes
28
Share
101/10 results really happy so far will update with nuggets pictures soon 🌱✨ New Timelapse Video Alert! 🌟 I’m excited to share my latest marijuana grow timelapse on YouTube, showcasing incredible genetics like Square One, Robin Hood, Exotic, and Elev8 in action. 🌿 Watch as these beauties flourish from seed to harvest in 1-litre pots, producing an astonishing 1kg of dry weight! 😱🔥 This grow is all about precision, passion, and next-level results—perfect for growers, enthusiasts, and anyone who loves seeing plants thrive! 🌿💪 👉 Click the link in bio to watch the full video and see the magic unfold! 🎥📲 Don’t forget to like, share, and comment your thoughts—it helps the channel grow! 🚀 🌟 A Huge Thank You to Greenplanet, Atami, and All My Amazing Sponsors! 🌟 I want to take a moment to express my deepest gratitude to each and every one of you for sponsoring my videos, including this one and the exciting projects to come. Your support means the world to me and plays such a vital role in making all of this possible. 🙏🎥 To Greenplanet and Atami, your contributions have truly provided me with the "base nutrients" 🌱 I need to grow, both creatively and professionally. And the "additives" 💡 you bring to the table continue to push my work to new heights! 🌐 Follow me on: 🐦 Grow diaries: 📹 YouTube:
Likes
211
Share
@PapaNugs
Follow
The girls survived. Always the biggest stress in the beginning. Getting sprayed with water twice a day. Gonna do the first watering soon. Hoping for growth!
Likes
15
Share
@Patres
Follow
K.onec 10. Týdne holku jsem dnes pokosil, trichomy plně mléka a občas i nějaký ten Amber. Pupeny jsou tak těžké že při sundávání rostliny se větve samy lámaly pod tíhou palic. Až to bude suché přidám pár fotek hotového produktu. Jinak lepkavou brokolicí bych ohodnotil dobře, snadno se pěstovala, a nebyly s ní žádné větší problémy.
Likes
9
Share
@Headies
Follow
fantastic smells coming out of the tent! The purple punch smells delicious. The sour diesel smells dank. The girl scout cookies smells like GSC
Likes
82
Share
🤖 💙 🍪 👾 💚 👽 🤖 💙 🍪 👾 💚 👽 🤖 💙 🍪 👾 💚 👽 Welcome dear space travelers! 🤖 💙 The new F1 autoflowers have found their way to my grow room and I can't wait to see them fly through space! 😍 ✨ 🛸 Thanks @James for the goodie pack, always an honor and pleasure to grow for RoyalQueenSeeds! 🙏 💚 💨 Thanks @Green_Buzz_Nutrients for sponsoring the nutrients for this grow!! 💚 💚 💚 Amazing product line!! 🌞 🌱 If you like to try them, you can find a generous discount on their products in my setup description!! ⬇️ Thanks @MedicGrowLED 💚 I love the Light!! 🌞 ___________________________________________________________________________________________________________________ Cosmos F1: The World's First F1 CBD Cannabis Variety Cosmos F1 is the largest autoflowering cultivar in our catalogue of F1 hybrids. With her tall, typical Christmas tree structure and bright green foliage, Cosmos F1 is a testament to the beauty and vigour of Cannabis sativa. Plus, thanks to her pure genetics, which descend from a high CBD strain in Oregon, she boasts the highest CBD concentration in our entire F1 seed selection. Aromas, Flavours, and Effects of Cosmos F1: A Vibrant CBD Super Variety True to the pure lineage from which she descends, Cosmos F1 boasts a delicious aroma that combines the freshness of crisp pine with the full-bodied, almost creamy aroma of modern Cookies varieties, and an unmistakable peppery bite. Thanks to her high concentration of CBD and low levels of THC, Cosmos F1 offers a balanced effect without intoxication. Cosmos F1’s terpene profile is dominated by myrcene, farnesene, limonene, pinene, and caryophyllene. Combined with high concentrations of CBD, Cosmos F1 produces a clear, meditative effect that relaxes the body while leaving the mind functioning and focused. Her effects help unite the mind and body, creating a state of cosmic order. Growing Cosmos F1: A True Sativa With Pure F1 Strength F1 hybrid seeds offer unbeatable uniformity and stability, and this is particularly true of Cosmos F1. She exhibits strong hybrid vigour and produces plants that grow to the same height and develop the same tall, elongated structure. She flowers automatically and is harvest-ready in 80 days from germination, at which point her many bud sites will be laden with long, wispy flowers characteristic of her sativa genes. Flowering time: 45-55 days 🚀 https://www.royalqueenseeds.com/f1-hybrid-cannabis-seeds/619-cosmos-f1.html Here's a generous discount of 20% from Royal Queen Seeds on their internationally operating website: GROWERS20 _______________________________________________________________________________ SETUP: 80x80x180 cm Zelsius Medic Grow MINI SUN-2 240W Full Spectrum LED Built-in Timer LCD Display high PPFD of 2300μmol/m2/s @ 6 ’’ in height, efficacy is up to 2.8μmol/J, and PPF is up to 672μmol/s built in controller with timer and dimmer www.medicgrow.com Green Buzz Nutrients Shouts go out to my sponsors @GreenBuzzNutrients, thanks so much for your support! 💚 💚 💚 If anyone would like to try their amazing organic products, use code GD42025 for generous 25% discount (for orders of minimum 75€) ✨ https://greenbuzznutrients.com/ custom exhaust fan 320/270cm³/h Carbon Active Granulate 240cm³/h tab water pH 8 - EC 0,25 with Calmag to 0,5 Advanced Hydroponics pH minus Grow + Bloom to pH 6.2
Likes
27
Share
1/20/2023- So much to do pre grow and over the next 16 days, absolute first order of business is that I have to take down my current Grow---TIMBER-- Then I have a list of things I have to get done in order to be ready to start this grow 1 Feb. With that said T - 2 days until start 48 hour Flush T - 2 days until Start 48 hours of Light T - 4 days until TIMBER!!! Items that need to be done before 1 Feb 2023 1. I need to clean the tent out 2. I need to clean the equipment- Proper Sanitization between grows in Hydro is a must!!! 3. I need to get the hole in the ceiling above my tent repaired- For my last grow I had a deep sink installed in my grow room, to make Hydroponics a little bit easier and have a water source in the same room. The seals on the pipes they were installing broke and leaked through the ceiling causing some damage all the way across my grow room, I was already weeks into my grow and couldn't risk them working above my tent and it would have been very awkward positon for them to be working in as well, so have to get this done quickly between chop and germination. 4. I have to install my new light- I was using a Vivosun 4000 and for this grow I am switching up to a Spider-farmer SF 7000. 1/20/23- For this upcoming grow I am working with M/F photo seeds so I ordered 4 Sex determination kits. I recieved my my 4 Sex determination testing kits from Rimrock Analytics today. I will be using these to test my plants at week 2 of Veg so that when/if I take clones I know I am taking them off females. As well as I don't want to accidently pollinate my tent during this grow I am looking for big beautiful buds not seeded buds. :-) 1/24/2023- Harvest of current grow- Started at 2:00pm and finshed wet trim and firt batch into the freeze dryer. 1/25/2023- Next batch into the freeze dryer and cleaning all my equipment for this Grow. T-1 Day until the workers are supposed to be here to fix the hole in the Grow Room. T-3 days until I instll my new Gorilla Grow Tent and my New Light Spider Farmer SE-7000 for this grow. T-7 Days until Start of Germination 1/26/2023- Harvest is done ran through the Freeze dryer and dry tim completed. 1/27/2023- Grow Room repairs completed. Hole is gone Letting the paint dry before I install the new tent. T-2 days until Install the New Gorilla Grow tent and the new Light T-3 days until I put the hydro equipment in the new tent T-5 days until Germination 1/29/2023- Day 0- Final Pre Germination activities Germination Start T-3 days The paint on the ceiling was dry and it was time to finish prepping for Germination. I got the following items knocked off my list. New 4X4 Gorilla Grow Tent is up and ready New Spider Farmer SE-7000 Light is installed- Thanks Moony Grows for the suggestion and for the Code that got me some money off and free shipping (Moonygrows)!! I turned the lights all the way up to max and set the timer to 18/6 0600-0000. I will keep an eye on the temperature and humidity without my plants and see how hot it gets with the new light. I put my Hydro system back together and put in 40 gallons of water into it, time to monitor for leaks the next few days. I Setup my cloning machine for Germination Days 3-11 1/30/2023 let me break down the situation, ROOM in the TENT.. Enough said.. No really I tried putting my exhaust system up in the new tent with my new light, The light is so big corner to corner that it really didn't give me enough room for the lights be be raised, with the exahust hanging the buckets my plants are Starting in are 2 and 1/2 feet off the ground, great for plenty of room for roots but not so great for upwards space for the plant to grow. In a 6' 11 tent with the exauhst in side and hanging that only gave me a little over 4 feet of grow room to play with. My last grow if you saw my diary, anyone could tell I was struggling to keep the buds off the lights. No good, Since space was such an issue I was running my carbon filter inside on the ground but It really needed to be up sucking the heat out not shooting the cool out. With that setup I was sucking air through the filter and pushing it out the tent at a bottom exhaust hole cold out. Wasn't doing me any good for my heat. I was hitting temps of up to 85 degrees. I bought a portable AC unit and have been running it in the grow room to try and keep temps below 85 and I have had to lower the power on my lights during grow also not ideal.. With that said a friend of mine MoonyGrows (Check out his diary) took the time to look at my issue send me a picture of my grow tent setup with detailed instructions on how to suck the air out from the top but putting my filter and fan on top of my tent so no room issue and I am sucking the air out from the top where the heat is instead of pushing the air out from the bottom where the cool is... THANK YOU MoonyGrows For taking the time to help me get this straightened out.. Now I have room and I have the exhausts working right and now my temps with everything at 100% are topping out at 80 this dropped the temp by 5 + degrees at 100% max. T-2 days until Start of Germination Prepped my seed tray with humidity dome Prepped my Rapid Rooter plugs. I Used RO water, and I added a few drops of Hydrogen peroxide to Oxygenate the water. I then PH balanced between 5.7-6.0 the same that they will be getting in the Cloning Machine and when they get to thier final grow pod. I perfere the 5.8x range and I hit 5.84 for these rapid rooters. If you want to see a complete video on the process HowWeedGrow has an amzing video that shows step by step how to do it and explains it better than I ever could including how to plant the seeds. Which I will cover when I get to that step on Wed. https://www.howweedgrow.com/how-germinate-weed-seeds-cannabis-rapid-rooters/ 1/31/2023 T-1 day until Germination Start All set and ready have my Rapid Rooter plugs ready to go have my seeds out.. Have my seed tray warming up tonight. Tomorrow morning right into the Rapid Rooter then strait into the tray. I will spray the dome to start the humidity in there. 2/1/2023 Germination Day!! Let the games begin! 0600am Put the seeds into the Root Riots. And then put the seeded Root Riots into their first home the Seed tray. I have them under the light 24/7. Sprayed the dome 7:30pm Sprayed the Dome to keep humidity going on the dome. 2/2/2023 Day 1 of Germination Sprayed the Dome in the morning Sprayed the Dome in the evening 2/3/2023 Day 2 of Germination Roots are starting to come out the bottom of the root riot plugs and the heads are slowly popping out of Number 4 just below the surface. Afternoon- Number 4 has popped up Evening- Number 3 has popped up as well. Happy Dance!! 2/4/2023 Day 3 - Germination Surprise Surprise Surprise- all 4 have now poked their heads up.. Happy day!! 100% Germination succeeded. Now major milestone to track is how many are female and how many are male. I will take look at the roots this afternoon/evening and see if they have enough root to go into the cloning machine for the next 7 days before they go into their Hydro Pods. Day 3 - Germination - Evening.. Roots looked good and they were tall enough to make it into the cloning machine. Now that they are all in the cloning machine I have switched the lighting to veg state 18 on 6 off. 2/5/2023 Day 4 - Germination - Morning All the Ladies (fingers crossed) looking great stretching nicely and look nice and green, Photo synthesis underway.... UPDATE!! After a very interesting POD cast on FSTS by Dr. Bruce Bugsbee from Utah University, I have shifted my lighting to 24 hours on through seedling and then I am going to shift to 20 hours on the rest of Veg. 2/6/2023 Day 5 - Germination While Checking on my conditions inside the new tent last night, I found that the Humidity was down to 39 Percent. I added an AquaOasis Cool Mist Humidifier, the reason I selected this humidifier is that I needed one that could be turned on and off utilizing my Inkbird Humidity Controller IHC200 that I have my Pro Breeze Dehumidifier currently running with. Root structures are starting to get there about 1/4 of an inch. 2/7/2023 Day 6 - Germination Everything seems on track more roots poking out of each today. They are each getting a little taller as well. Checked in the evening and number 3 was drooping the Root riot plug on the bottome was dry and the roots were not in the water yet. I raised the water just enough that the longest root that was sticking out is now hitting the water. 2/8/2023 Day 7 - Germination Everything looked good while checking in on them this morning number 3 is now full up and no droop again. 2/9/2023 Day 8 - Germination T-2 days until Plant into Forever Pods and we start week 1 of Veg .. :-) Surprising thing to me is that number 1 and 2 were later in popping then 3 and 4 but the roots are growing longer in 1 and 2. 2/10/2023 Day 9 - Germination Number 1 and Number 2 are definitely ready for transplant today.. Based on how they were yesterday and where they are today I am hoping by tomorrow 3 and 4 are ready. Today they look to me where 1 and 2 did yesterday.. I really hope 3 and 4 catch up by tomorrow since.. T-1 day until transplant to new/ final home for grow. Need the roots long enough to have some clay down in the basket to keep the root riot out of the water and only roots in the water.. 2/11/2023 Day 10 - Germination Today they got placed in thier forever Home, 7 days from Sprout and 7 days until Week 1 Start. PPM- 180 this is water out of the Tap Temp Water: 70.7 Temp Tent: 77 Humidity: 40% I have a humidifier going 24/7 to try and bring this up.. I also have Humidity Domes on each plant. 2/12/2023 Day 11 - Germination Sprayed the domes, all are looking good.. Nothing much to do at this phase but Keep monitoring the PH level in the system and making sure they have a comfortable home. T-6 days until Week 1 start 2/13/2023 Day 12 - Germination Sprayed the domes, They were looking a little yellow today so I moved the light down to assist. Nothing much to do at this phase but Keep monitoring the PH level in the system and making sure they have a comfortable home. T-5 days until Week 1 start 2/14/2023 Day 13 - Germination Sprayed the domes, They were looking a little Florissant yellow today, with what looks like slight burn on the tips, I talked with a fellow grower and we agreed that It was probably that I was drowning them, Yes you can drown you plants even in Hydro, but only early on.. :-) It usually happens with the water being too high, which soaks not only the roots but the medium (root Riot plug in this case). I lowered the water from touching the bottom of the pot to about 1" away. This will probably take 3-4 days to resolve. I will continue my daily monitoring. T-4 days until Week 1 start 2/15/2023 Day 14 - Germination Sprayed the domes, continue my daily monitoring they look a little darker green instead of lime green now that I lowered the water levels in the system, so I think that I might have resolved the issue but it will take a few days for recovery to happen. T-3 days until Week 1 start 2/16/2023 Day 15 - Germination I looked in on them this morning, 3 and 4 look like they are doing well and recovering nicely. Number 1 not so much it has brown spots on the leaves, this very well can still be a side effect of the overwatering but I decide to go ahead and add Nutes earlier than I was planning just incase. I was going to wait until Saturday but I think intervention is necessary now especially after drowning them early on. I added 1/2 what I am planning on adding for week 1 start. I also think I am going to adjust my chart to add 1/2 2 days after plant from now on. I don't think it would hurt it to have some Nutes to pull from. .25ml/Gal Calmag = 12.5ml 1ml/gal GH FloraMicro= 50ml 1ml/gal GH FloraGro = 50ml 1ml/gal GH FloraBloom = 50ml T-2 days until Week 1 start = I will drain the system and start it over on Saturday with Week 1 Nutes. 2/17/2023 Day 16- Germination I didn't even want to post today after looking in on them this morning, 3 of the 4 are now showing signs of dronwing.. Brown spots on the leaves, the water levels were still too high.. I drained about another inch out of the tanks.. Will see how quick they recover.. I start week 1 tomorrow and will have to ensure my water levels are at least 1" away from the basket on this round.
Likes
8
Share
@Kirsten
Follow
31.12.24: I have been readjusting the LST pegs and wire daily. Sometimes, twice a day! (I know, too much time on my hands)! 😆 The plants have responded fantastically! I'm so glad I gave it a go. Some plants have been a bit too tall, and I snapped Do-sì-dos P3, pulling the stem down. Audibly snapped 😬I let it be, though. It seems to have healed mostly, in only 2 days. I have increased the lighting to 70%. They're getting watered a few times a week, with 1 litre of Dechlorinated water, containing the following nutrients and additives; 1ml of Biobizz Bio-Grow, 1ml Biobizz Top Max, 1ml of Biobizz Bloom, 2ml of cal-mag, 1g of Ecothrive Biosys. The plants are responding well to this concoction, so it's all good so far. The leaves are looking greener and are getting darker. Will be monitoring to continue readjusting the LST ties. Also, to monitor the increased lighting level, to make sure they can handle that yet. 1.1.25: Happy New Year! I have continued to readjust the LST wire and plant pegs. Several times a day. Coincidence would have it, I have a 6ft tropical aquarium which was time for cleaning! I always water my Acer tree in the front yard with this water, with beautiful results 😍 👌 🍁 I decided to try it out in my indoor garden. I'll post photos of before and after to see the difference, good or bad 😅 3.1.25: Plants are doing very well, except for PPP3 I'm quite disappointed in that one, as I feel like it's wasting a space. I guess I'll have to keep it, along with the Do-sì-dos that I snapped twice, which refuses to die 😅 I started to lightly defoliate, which is difficult because I always get carried away with it. I'm going to water again with the nutrients in description of this week. 4.1.25: Continuing to defoliate and adjust the LST pegs and wire. Watered today with 1ltr of dechlorinated water PH'd to 6.0. With the following nutrients;- 2ml Biobizz Bloom, 4ml Biobizz Bio-Grow, 2ml Cal-Mag, 2ml Ecothrive Flourish, 0.2 g/ltr of Ecothrive Biosys. I've increased the Nitrogen by adding double the amount of Biobizz Bio-Grow. I'm trying to keep them growing for as long as possible! I really want to keep the strength up and keep the leaves nice and lush green! 💚 Will update here with more photos and videos. Thanks for checking out my diary 🍃 ✌️
Likes
13
Share
Planta hermosa, de estructura resistente y cogollos rocosos y repletos de resina. Resistente bien el entrenamiento LST y topping, pide bastante alimentos y te recomiendo lavar bien las raíces antes de cosechar si has usado fertilizantes. Los frutos desprenden una fragancia exquisita y muy dulce.
Likes
79
Share
-Sensi Seeds Research: The Sensi Seeds Research breeding project has created eleven cannabis seed varieties. How? By combining new cannabis cultivars with a selection of strains from their long-established cannabis gene bank. For the first time in thirty-six years, they are opening the doors of the Sensi Seeds Research and Development Department. Week #11, week #3 of Flowering, flowers opening stage is doing well, white hairs spotted everywhere. It’s also the, week 3 trimming, week where you must clean your legs from all the lowers shoots. Technically everything under the trellis must go away ( see on pictures and video ). This is why I recommend to smash your plants under the trellis (see previous weeks, in week 8) to avoid growing long legs. The plants won’t waste any energy on the bottom, everything will be sent to the top, and it creates an airflow under the canopy ( you can add a small desktop fan ) to avoid any mold due to high RH as they are going to start to drink like maniacs in a week or two and to evaporate all this water. Last week of Veg nutrients to finish the stretch with no deficiency, will switch to Bloom nutrients next week. Adding 1gr/plants of Bactrex (Trichoderma) mixed with the solution. Looking the plants, I feel like it’s gonna turn into a big bad bud factory 😎 (I’m looking for a job in the Cannabis industry as Master Grower, Mineralogist, Quality Control 🐞)
Likes
3
Share
Esta semana hicimos poda de bajos a podas las puntas y una poda de bajos a todas las ramas , se recupera muy bien de las podas la Jack está semana ya arrancamos de a poco con los fertilizantes de flora , así hacemos el último trasplante a 10 litros para pasar a flora , yo creo q ta esta más que bien para entrar en floración ya , pero quiero hacer el último trasplante antes , vamos a ir viendo como vienen las siguientes semanas