


Likes
Comments
Share


@eldruida_lamota
Follow
Vamos familia, actualizamos la tercera semana de floración de estas Granny’s Home de Seedstockers, salieron las 2 de 3, 66% ratio éxito.
Aplicamos varios productos de Agrobeta, que son increíbles para aportar una buena alimentación a las plantas.
Temperatura y humedad dentro de los rangos correctos dentro de la etapa de floración.
La tierra utilizada es al mix top crop, por cambiar.
De 2 ejemplares me quede con los 2 para completar el indoor, también cambie el fotoperiodo a 12/12 y aplique una poda de bajos, se ven bien sanas las plantas, tienen un buen color progresan a muy buen ritmo por el momento, las flores están empezando a formarse, hasta aquí todo.
Agrobeta:
https://www.agrobeta.com/agrobetatiendaonline/36-abonos-canamo
Hasta aquí todo, Buenos humos 💨💨💨.

Likes
5
Share


@Wenz004
Follow
experiment explanation see week1
This week both different living soil experiments Tropicana No2 and No3 did not grow anymore...only the flowers got a bit bigger...especially No3

Likes
Comments
Share

@Cannamethodz
Follow
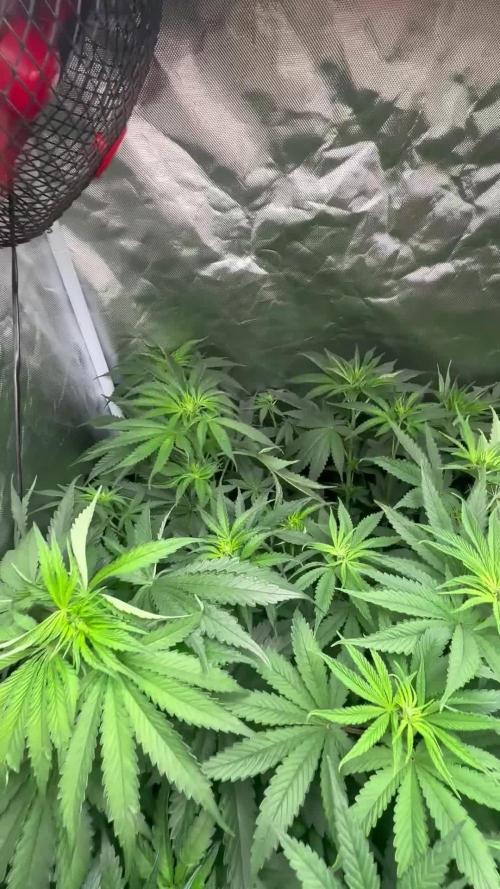
🗓️ Semana 2 de Floración (Día 9 a 12/12) — Estirón de Verano y Nutrición de Precisión (Multivariedad)
¡Buenas a todos, comunidad! Actualizo el diario tras 9 días desde el cambio de fotoperiodo al 12/12. El jardín está en un momento espectacular y las tres genéticas que tengo en el armario —Gary Payton, Mimosa y Queen of Soul— están respondiendo de lujo al inicio de la fase de floración.
✂️ Evolución de la Poda, Canopy y Diferentes Estructuras
La defoliación y el lollipop que les hice justo al pasar a 12/12 han sido un éxito rotundo en las tres variedades. Ninguna ha mostrado signos de estrés; al contrario, han canalizado toda la fuerza hacia las puntas principales:
Gary Payton: Mantiene una estructura súper robusta y compacta, con ramas laterales fuertes y hojas de un verde oscuro precioso.
Mimosa: Muestra un vigor excelente en este inicio de estiramiento, preparándose para formar esas puntas tan características de la variedad.
Queen of Soul: Como buena heredera de su linaje, es la que muestra un estirón más estilizado y elegante. He tenido que jugar un poco con las alturas para mantener la canopia homogénea bajo el panel LED.
Toda la canopia está súper bien nivelada y las hojas lucen increíblemente firmes, apuntando hacia arriba ("rezando") y mostrando una turgencia impecable.
🌡️ Parámetros Ambientales (Cultivo de Julio ☀️)
Cultivar en pleno julio siempre es un reto, pero los parámetros se mantienen bastante controlados gracias a la eficiencia del LED:
Temperatura: 28 °C (bastante estable para la época de verano en la que estamos).
Humedad Relativa (HR): 40%.
Estrategia VPD: Al estar en un ambiente seco y cálido típico de esta época, controlo muy de cerca la transpiración. Para evitar que las plantas absorban demasiadas sales por la alta evaporación foliar, estoy manteniendo riegos muy equilibrados e intercalando agua sola con pH regulado.
Plan de Alimentación (Fase de Transición)
He comenzado esta semana con la primera toma de nutrientes específicos para esta fase:
1. Aptus Regulator (0.15 ml/L): Mi salvavidas para combatir el estrés térmico de los 28 °C y aportar ese silicio clave que dará rigidez a las ramas (vital para la Queen of Soul y la Mimosa en sus fases de estiramiento). (¡Siempre mezclado el primero en el tanque!).
2. BAC Organic Bloom (1 ml/L): Entrando con una dosis suave y orgánica para alimentar el sustrato sin saturarlo.
3. Bud Candy (2 ml/L): Empezamos a aportar carbohidratos y azúcares sencillos para dar energía a la planta y alimentar la microvida.
Nota: El Bloombastic se queda guardado en el armario hasta la semana 4 o 5, cuando los cogollos estén formados y listos para engordar.
La salud general es de 10/10. Las preflores están a punto de estallar en las puntas de todas las genéticas y el flujo de aire en la zona baja es perfecto. ¡Esto promete!
¡Dejad vuestras opiniones, consejos sobre estas variedades y buenas vibraciones en los comentarios! 🌿👇

Likes
12
Share


@gr3g4l
Follow
Sobre el riego decir que puede variar la dosis de alguno de ellos según la EC , priorizo antes la EC que las dosis y en alguna ocasión pueden ser más ml/L de lo que digo.
Con 33 dias me dió por recortar algunas pocas hojas y así ganasen un poco más de luz algunos cogollos bajos que habian quedado en la sombra. Entre quitar hojas o dejarlas obté por hacer esto xd
Likes
7
Share

@DogDoctorOfficial
Follow
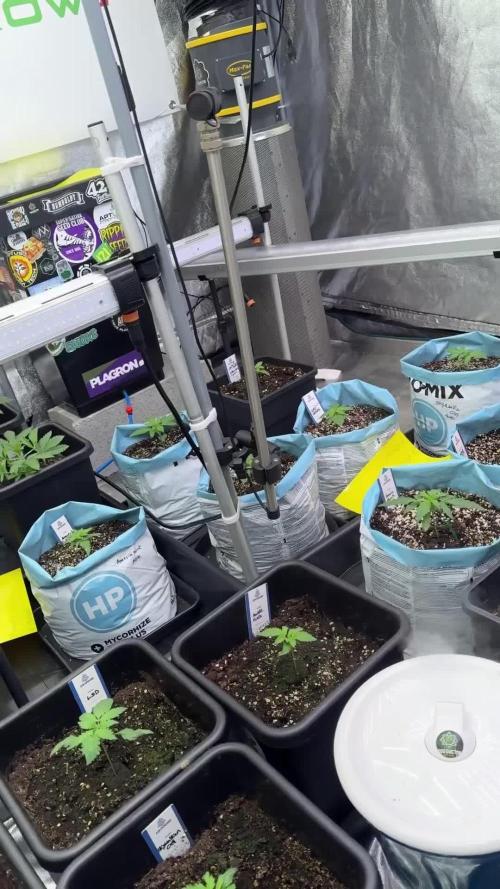
🌱 Animal Mints — Week 3 VEG Report
12/12 from seed | Vegetative phase ongoing
General Overview
Week 3 of vegetative growth closes with Animal Mints standing out for exceptional leaf detail, natural structure, and active branching behavior. Both plants are thriving, each expressing itself according to its own timeline, yet sharing the same healthy rhythm seen across the room.
This is one of those cultivars where detail becomes the story.
⸻
Growth & Structure
• Stage: Vegetative
• Flowering signs: None confirmed
• Pre-flower: Possible very early indication on one plant (not yet definitive)
Plant A — with prior vegetative period
• Veg history: ~15 days under 18h light
• Node count: ~8
• Size: Significantly larger (as expected)
• Branching: Strong and active
• Leaf size: Large, dominant, highly detailed
On this plant, light leaf bending / leaf tucking has begun.
Large fan leaves are gently tucked or repositioned underneath the canopy to:
• Improve light penetration
• Encourage lower branch development
• Balance apical dominance
• Promote a more even structure
This is not aggressive training — no topping, no tying, no stress.
It’s a soft, observational approach, simply guiding leaves out of the way so the plant can express its natural branching potential.
⸻
Plant B — 12/12 from seed
• Node count: ~4
• Size: Smaller, as expected
• Branching: Surprisingly active for its size
• Training: None
Even without any intervention, lower branches on this plant are already reaching upward naturally, showing excellent hormonal balance and structural intent.
⸻
Leaf Expression & Detail
Animal Mints truly shines in leaf morphology:
• Extremely fine serration detail
• Subtle curves along each leaf finger
• Clean edges, no deformation
• Deep, lush green coloration
The level of detail is remarkable — almost sculptural — and clearly genetic rather than environmental stress–related.
⸻
Training Status (Clarified)
• Leaf bending / tucking:
• Applied only on the larger, vegged plant
• Gentle, non-stressful
• Focused on opening the canopy
• No other training performed:
• No topping
• No LST
• No defoliation
The goal remains support, not control.
⸻
Veg vs 12/12 Comparison
This folder offers a clear and valuable comparison:
• The plant that received a veg period is larger and more developed
• The plant run 12/12 from seed is smaller, but structurally similar
• Both show strong natural branching
Notably, the vegged plant is still not flowering, despite already spending three weeks under 12/12. This suggests the plant is still prioritizing structure and energy storage.
⸻
📸 Photo Documentation
This week includes studio-style photos, including images of the plants held close during documentation.
One of the photos features the Plagron jacket, included as a natural thank-you for the nutrition program and gear used throughout the grow.
⸻
Environment — Room Conditions (Week 3)
• Photoperiod: 12/12 from seed
• Day temperature: ~26 °C
• Night temperature: ~18 °C
• Relative Humidity: 60–65%
• VPD: In optimal vegetative range
• Airflow: Gentle, constant, non-stressful
• Solution temperature: ~21 °C
• Substrate temperature: ~21 °C
Environmental stability remains consistent across the room.
⸻
💡 Lighting
• PPFD: ~600–700 (plant-size dependent)
• Plants growing naturally into the light
• No stretch, no light stress
⸻
💧 Watering & Nutrition
• Watering method: Hand-watered
• pH: 6.0
• EC: 1.0
Nutrient program:
• Plagron Terra Grow
• Power Roots
• Pure Zym
• Sugar Royal
Foliar:
• Vita Race
• Used selectively and intentionally
⸻
🔍 What to Expect / What Not to Expect (Next Week)
What to expect:
• Continued vegetative expansion
• Stronger lower branch response on the vegged plant
• Possible clearer pre-flower signals
• Increased structural definition
What not to expect (yet):
• Full flowering
• Explosive stretch
• Need for aggressive training
⸻
Final Thoughts
Animal Mints closes Week 3 as expressive, detailed, and naturally structured. Leaf morphology and autonomous branching are already setting the tone, while gentle leaf tucking is helping guide the canopy without disrupting the plant’s rhythm.
No forcing.
No shortcuts.
Just support, observation, and respect for the process.
FOR DISCOUNT CODES AND MORE JUST FOLLOW THE LINK https://website.beacons.ai/dogdoctorofficial
📲 Don’t forget to Subscribe and follow me on Instagram and YouTube @DogDoctorOfficial for exclusive content, real-time updates, and behind-the-scenes magic. We’ve got so much more coming, including transplanting and all the amazing techniques that go along with it. You won’t want to miss it.
GrowDiaries Journal: https://growdiaries.com/grower/dogdoctorofficial
Instagram: https://www.instagram.com/dogdoctorofficial/
YouTube: https://www.youtube.com/@dogdoctorofficial
⸻
Explore the Gear that Powers My Grow
If you’re curious about the tech I’m using, check out these links:
🔆 Lighting & Environmental Control
• Future of Grow — Advanced LED lighting technology
https://www.futureofgrow.com/
DISCOUNT CODE: DOG20
• Lumiflora — Under-canopy LED lighting
https://lumiflorade.com/
• TrollMaster — Environmental controllers and automation gear (past collaboration)
⸻
Genetics
• Zamnesia Seeds — Genetics used in this project
https://www.zamnesia.com/
⸻
🌱 Soil, Substrates, Boosters & Root Support
• Plagron — Substrates, bio mixes, and supportive products
https://plagron.com/en/
⸻
🎒 Storage, Curing & Preservation
• Grove Bags — Curing and storage solutions
https://grovebags.com/
⸻
📸 Photography Equipment & Tools
(Not sponsors, but part of my creative toolkit)
• Sony A6700
• Sony full-frame macro lens + few more
• Stacking photography workflow - learning
• iPhone (for behind-the-scenes shots)
We’ve got much more coming as we move through the grow cycles. Trust me, you won’t want to miss the next steps, let’s push the boundaries of indoor horticulture together!
As always, this is shared for educational purposes, aiming to spread understanding and appreciation for this plant. Let’s celebrate it responsibly and continue to learn and grow together.
With true love comes happiness. Always believe in yourself, and always do things expecting nothing and with an open heart. Be a giver, and the universe will give back in ways you could never imagine.
💚 Growers love to all 💚
📸 P.S. – The Eye Behind the Lens
All photos in this diary (for now — except for the ones showing the camera, which I took with an iPhone) are taken with a Sony A6700 paired with a Sony full-frame macro lens and a few more.
Photography is part of the story — it’s how we share the fine textures, the glow, and the quiet details that words can’t always capture.
I’ve also started experimenting with photo stacking — a technique where multiple images, each taken at a slightly different focus point, are layered together to create one perfectly sharp image from front to back.
It’s not digital enhancement or AI; it’s pure photography — a way to reveal the plant’s beauty in microscopic depth, from trichome to petal.
You’ll even see a few shots of "ghost me" capturing the shots — camera, lens, setup — because every grow deserves not just to be cultivated, but documented like art.
FOR DISCOUNT CODES AND MORE JUST FOLLOW THE LINK https://website.beacons.ai/dogdoctorofficial
NEW DISCORD - Official Server Invite Link : https://discord.gg/ksjAkA5T74

Likes
5
Share


@Fefa128
Follow
Alright! Here we see the plant in her 3 week, we have a day one and a last day of that week to see in comparison. There's some Spanish in the pics cause I was teaching how to grow from scratch.
At this point the plant was going through treatment, being sprayed twice a day to change sex.


Likes
Comments
Share


@GrowDiaries
Follow
Wrap up of the Award Day at Spannabis 2025 with Adam iLL!
That’s a wrap on an epic awards day at Spannabis! Congrats again to all our growdiaries.com community-voted winners for shining in the growing world! Thanks to everyone who joined us!
#Growdiaries #Awards


Likes
24
Share


@PrairieFrostGrow
Follow
***** Week 4 Veg - December 26/20 to Jan 1/21 *****
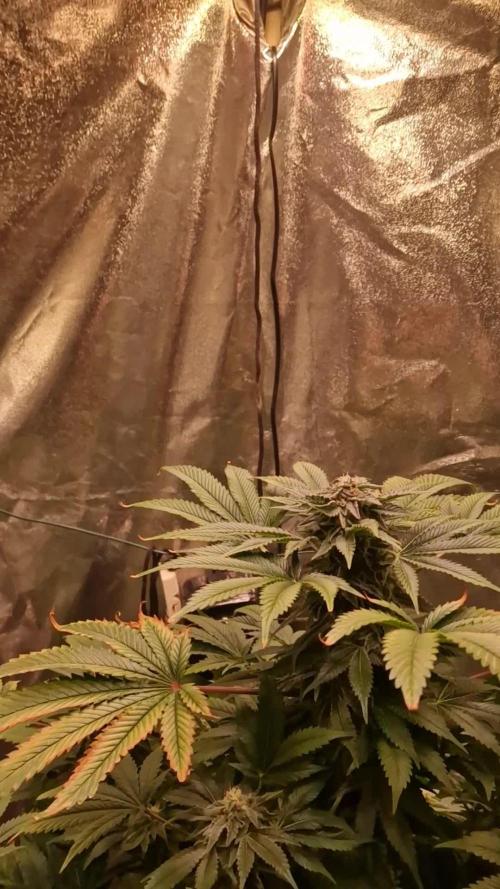
The girls were transplanted on Christmas day, after three weeks in the solo cups from seed. They had been growing well in cups but I must admit that I feel the root mass should have been larger after that time period. I am working with a new nutrient line that I have not used before and have not been adding microbes to the feed schedule thus far.........or hardly any. I feel this is why the root system, while looking healthy, is looking too small. Over the next couple weeks will ensure they get lots of microbes in the 1 gal pots to fill those up with roots before moving to 5 gal pots.......the last upsize for this girls. Counting my weeks for finish I am wishing that I had started these girls a couple of weeks sooner so they may not get to veg in the 5 gal pots for a couple of weeks before flipping to flower.
For these girls it is still pretty early on in their lives and not many exciting things to happen the first month of seedlings. We have done one upsize and another to go. Keep the feeding in line and follow the week 1 veg feeding for these girls, bringing up the ppm closer to 700ppm range.
Overall, happy with first couple of weeks of veg. Need to get more roots going, we will, but otherwise just give them the time to mature and take it easy......they will come along😀 She is looking very nice and even so far and keeps catching my eye when I open the tent😂😎
Little more detail.......
Dec 26/20, Day 22 Veg
- Dry out day after being transplanted yesterday.
- Pots were still heavy.
- Let the microbes in the media do their thing and start pushing root growth harder than what has been happening.
Dec 27/20, Day 23 Veg
- Gave the girls a little splash of the left over nutes from two days ago to add a little oxygen and they can take the extra microbes and bacteria right now😀
- 200ml with Microbial Mass and Piranha @ 2ml/L = 650ppm and 5.7pH
- They are really happy today!!!! Loving the bigger pot to let those valuable roots expand into nice fluffy new coco and soak up the nutrients👍
- This girl has always had wider fan leaf blades than the other two girls. She is shorter but wider.......hell, kind of like me
Dec 28/20, Day 24 Veg
- feeding day today with more water to get some runoff from the 1 gal pots. They have not been watered to runoff yet.😀
- 0.5L each girl with the full line for this week. No other additives, just the IPP line = 700ppm and 5.7pH
- seems a little high to jump from around 300ppm to 700 but will follow the companies recommendations👍
Dec 29/20, Day 25 Veg
- Dry out day.
- they are happy today......not much to add otherwise today
Dec 30/20, Day 26 Veg
- going to give them another day without watering.
- I feel like I should be watering today but I am not as I am not sure how much moisture they will have consumed and the roots need some air to breath so holding off.
- think it is a CalMag only feeding tomorrow.
Dec 31/20, Day 27 Veg
- feed day today since it has been a couple of days.
- 500ml with CalMag @ 2ml, Gold Storm @ 7ml, Sea Storm @ 5ml, Blackstorm @ 2ml, Vitamin B @ 0.5ml = 525ppm and 5.7pH
- keeping the humic and fluvic acids going in, plus Kelp and CalMag👍
- the girls are happy and seeing forward movement everyday, looking for more aggressive though from the girls.
Jan 1/21, Day 28 Veg
- doing very well......like really well💪
- didn’t push them today and left them alone for watering, pots of course still had some weight and I didn’t expect them to need today.
- Optic Folier Overgrow given today. Folier spray to give them just an extra boost since everything is otherwise dialed in👍
Finishing off the week very strong!!!!!! They have been looking very healthy and perky everyday. The roots are a concern and will be taking it easy on the nutrients for another week yet and keep up the microbes and beneficials. Will get them in line......my hope is too keep their time in the 1 gals down to two weeks max......maybe 10 days??
Looking pretty good ETS as we move through the first upsize and get veg going here. She has been very steady right from the start and continues with steady growth in early veg. Her branching is growing laterally and keeping short node spacing in her growth, perfect!......again, still pretty early on but its all good so far😎


Likes
101
Share


@biggreens420
Follow
Did a little move around as the gorillas we're taking over the light so we get better light spread buds packing up nice and tight not much else to report....added the 3rd light not a hps though a mars hydro 960 thougt id better do it due to the gorillas taking over and just trying it out gonna try one for the last week in my gorilla and gsc diaries also see what there like thanks for reading happy growing guys

Likes
18
Share


@GreenEldritchGardens
Follow
Candy citrus smell intensifies!
One of my best smelling autoflowers yet, you can clearly smell the Skittles from her.
Her trichomes are showing already some going reddish so in 1-2 weeks should be harvested. Only giving her water from now on. Cannot wait!





Likes
29
Share


@TonyTrichomes
Follow
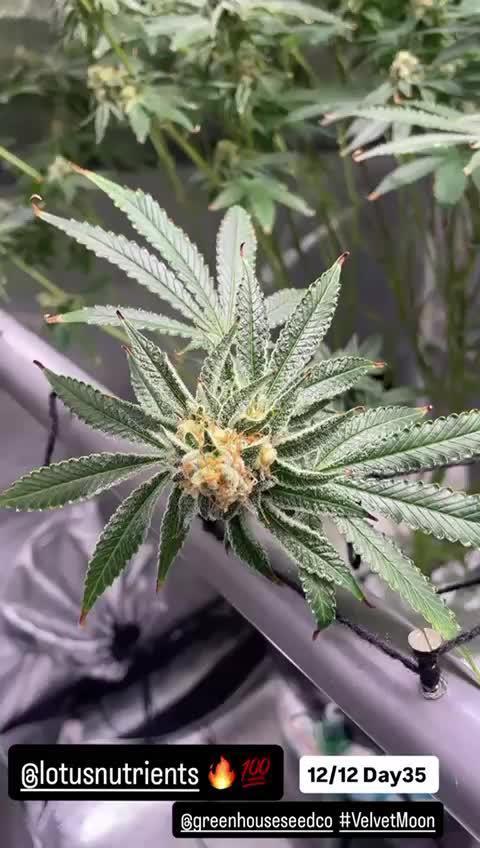
Not an overly impressive strain and I would say she was not that hard to grow. If I even grew this one again I would let it go naturally with some LST. Wanted more grape flavours but they don't really come through in the smoke. There's a bit of a sharp fruity smell that's sort of piney with a hint of fuel at the end. The smoke is not too flavourful in my opinion but that just means I didn't grow it well. Super tight nugs so be careful with humidity as stated above. Also she's a bit of a light feeder so be careful with your nutes. As you can see I burnt her tips and over fed her a lot. Not a bad yield though! I've only really smoked the lowers on this one so far so that gave me a bit of a racey high, just slightly racey. I would accredit that to the lowers not being mature enough at chop. The plant is super dense and since I mainlined it the lowers didn't receive enough light. I tried to let the lowers mature more but the plant stopped maturing when I chopped the tops, this caused stress and the plant just shut down basically. Not sure if I would grow Blimburn's GDP again until I grow the real GDP.

Likes
28
Share


@OrganicPower
Follow
Week 8 flower and the Sour Diesel is still fattening up and looks like about 2 weeks to go. Going to swell good I think. Lots of frost and getting thick. Turned the lights down now to 50% and they seem to be happy with that. Still just water through the drip and hand water once a week. Gnats suck and need to take care of them before next grow and do a better job moving forward. These TSW 2000’s from Mars Hydro are awesome and with two of them side by side are more than enough for this space. Blimburn Sour Diesel are turning out really good and smell like gas and are strong on the nose! Thanks for the view
Likes
Comments
Share

@Eniiamrej_01
Follow
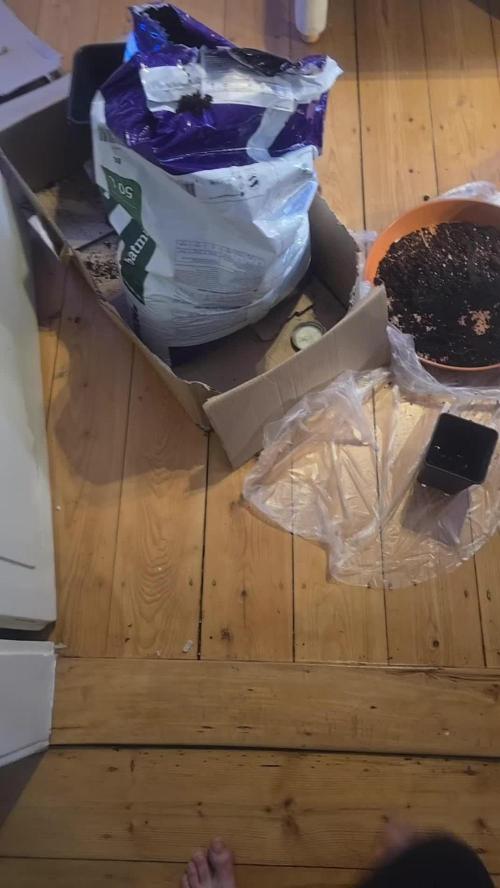
Umtopfung erfolgreich.
Aber es wurde ein Mutant entdeckt mal sehrn wie der sich macht ansonsten wird dieser aussortiert.
Deshalb sieht man noch noch eine plant mehr als angegeben. Das war die cherry poppers
Likes
57
Share


@Kmikaz420
Follow
Alors aujourd'hui je fais du BHO et pour vous remercier de votre fidélité je vais vous montrer ma méthode (que j utilisé dans le passé (j ai depuis acheter du matériel un peut plus professionnel ;)
Alors pour tous sa il vous faudra
=1..2 seringue de 300ml ou plus dispo sur mamazon
= des filtres à café (NON BLANCHIE !!!)
=des colier de serrage pour fixer les filtres.
= et bien sûr du gaz (butane et en général je prend du gaz filtrer 12x pour éviter les saleté qu il peut y avoir dans certain gaz .
=et enfin il vous faudra un bol pour récupérer tous le nectar^^
(J UTILISE DES MOULES A GÂTEAUX EN SILICONE (rien qui accroche)
Mais si vous utilisez un extracteur en plastique et ou un moule en silicone il faudra absolument prendre du butane et non pas DME =CAR LE DME ENMENE DES PARTICULES DE SILICONES EY DE PLASTIQUE LORS DU GAZAGE
Voilà voilà je vais commencer et prendre des vidéo au fur et à mesure que je vais poster pour vous montrer .
Après 1heure de dégazage vous aurez une fine couche ai fond qu il va falloir travailler pour y faire rentrer de l air (ne t inquiète pas j vais poster une vidéo se soir ou tu pourra voir comment faire..)
Le crumble est je pense la seul sorte de bho que l on peut faire sans trop d équipement (pour le reste il faudrais evaporatrice rotative ou autre etc )
Avec le crumble c est votre main qui fais le travail = l objectif est que l air touche toute les partie de la patte comme sa le gaz sort et l air oxyde les trichome etc etc