Likes
Comments
Share
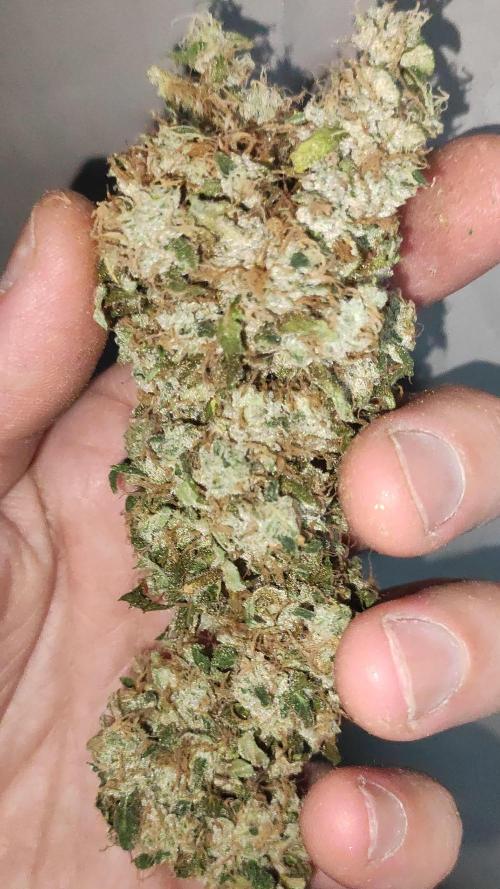
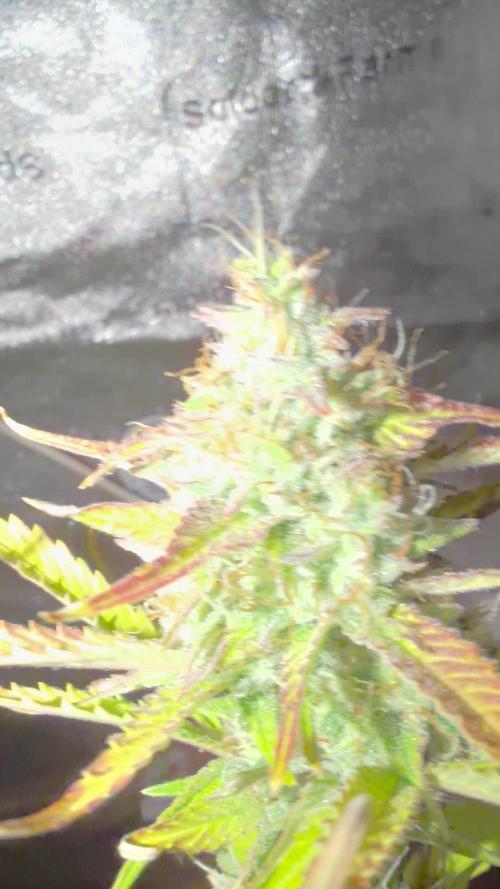
4/15/25 This plant is blowing my freaking mind. Long stacked colas. Even the lower buds are plumping up like golf balls. This is an exceptional plant so far. Shes starting to show the classic "sherbert" purple that ive noticed shows up with anything that has sunset sherbert in the lineage. Some of the leaves are starting to fade slightly and the purple is coming in. The rs11 that this seed came from, produced the most from a single plant out of all plants ive grown and trained and kept that small. She yielded 3.5 ounces or a 1/4lb of top nugs from a plant that was only about 18 inches tall and vegged for 6 weeks before flip. Once i start to clear out all of the fan leaves later on in flower, its just going to be buds running the length of the stems 4/18/25 I really believe this may be a keeper. She is absolutely stunning. Just everything is perfect. She has super long stacking of buds up and down the stems. Im actually super stoked to see how she finishes up. One of the craziest parts is that shes in a plastic 2 or 3 gallon pot and this plant is going to yield insane.
Likes
13
Share
Transfer chosen into dwc’…2 most vigorous will be kept for breeding into r2 strains the remaining 4 will be vegged for flowering to test run the new strains
Likes
16
Share
Gorila cookies from fast buds this baby is strong and nice,they have a discount if you use —-GD420— you will get a discount for you lovely seeds from fast buds Peace!🤘
Likes
11
Share
Hallo zusammen 🤙. Sie wächst sehr schön und macht keine Probleme.
Likes
56
Share
Once again, I welcome you back to my summer grow🙂💚 Still adding more bloom and PK boost to the nutrients mix and also bumping up the light a bit 😎🤙🏻 I started to add UV/IR for one hour a day, mainly before lights go out 🙂 Happy growing y’all 💚 ------------------------------------------------------------------------------------------------------- SpectrumX LED🔥 @medicgrow 880 Watt⚡️ 2x UV/IR LED panels 💥 2.7 μmol/J🔥 Full Spectrum V1,F1,VS,FS🌈 Display with PPFD & Live spectrum Light measurement: Apogee MQ-610 & Apogee DLI-600. Fertiliser: Organics Nutrients https://www.organicsnutrients.com/en/ Green Buzz Nutrients Discount Code: GD42025 Grants 25% with a minimum Order value at 75 Euro. https://greenbuzzliquids.com/en/shop/
Likes
3
Share
Processing
Likes
37
Share
@MG2009
Follow
09/12/2018 Purple tip cutting seems to be taking .#1 is filling out well lots of fresh flowers stacking up nicely.#2,#3,#4 all doing well👍hope they finish up in 4weeks🙏 No feeding this week just molasses for soil microbes, 09/17/2019 Did some defoiliating and green tie 's to spread out lower branches on #1 . she is a beast. Seeing, some differences between #2,#3,#4 .#4 being darker green, #3 is paler green #2 not as pale, #1 lighter green but not pale at all. Given deep soaking today, and I noticed phase 3 flowering is starting!🙏 should start stacking them fat buds for next couple of weeks hope she done at 10 weeks fingers crossed.
Likes
10
Share
Wet paper towel germination process took about two days for them to sprout a little bit and going to transplant on Christmas
Likes
60
Share
@SooSan
Follow
Gros changement de plans ! Mars Hydro m'a sponsorisé, je vais donc tourner à 100% en Mars Hydro ! J'ai donc une nouvelle tente, la 2in1 90x60x140 Mars Hydro ! Et un FC-E 4800 devrais bientôt arriver 😍 En attendant j'utilise mon ancien Spyder Lm301h + 660/730nm 75w J'ai divisée la 90x60x140 en 3 parties (et donc 3 Diaries) : 1️⃣ 🏠 60x60x140 ☀️ FC-E 4800 🍁 1x Black Bomb / Philosopher Seed 2x Amnesia Lemon / PEV Seeds 1x Blueberry / PEV Seeds 1x Blueberry / 00 Seeds 1x Wappa / Paradise Seed 1x Dark Phoenix / Green House Seed 1x Quick Sherbet / Exotic Seeds 1x Mango Cream / Exotic Seeds 1x Banana Frosting / Sensi Seed 1x Hindu Kush / Sensi Seed 1x Fast Mix / Sweet Seed 📎 https://growdiaries.com/diaries/122084-grow-journal-by-soosan 2️⃣ 🏠 30x60x90 ☀️ TS1000 🍁 4x Fast Mix - Sweet Seed 📎 3️⃣ 🏠 30x60x50 ☀️TS1000 🍁 4x Quick Sherbet 📎 https://growdiaries.com/diaries/122080-grow-journal-by-soosan
Likes
111
Share
@DreamIT
Follow
🍋🥧🏎️ LEMON PIE AUTO BY FAST BUDS 🏎️🥧🍋 🍋 19.3 we have reached the first week of flowering, I removed Hesi TNT and add Hesi Bloom and irrigated 2 liters. the situation got a bit out of hand, I certainly exaggerated with the tops without considering too much the size of my vase, tomorrow I'll see how to continue, yeah! 🍋 20.3 ... 🍋 21.3 ... 🍋 22.3 ... 🍋 23.3 ... 🍋 24.3 ... 🍋 25.3 Today 2 liters of fertilized water, tomorrow I try to fix it and adjust the canopy to the same height ... yeah! ____________________________________________________________________________________ ❌❓Not sure where to buy your seeds? 😮 Fast buds literally ships all over the world, check out their site! http://bit.ly/FastBudsgood __________________________________________________________________________________ 📜 A look at the details of what I'm growing 📜 🍋🥧🏎️Lemon Pie Auto 🏎️🥧🍋 ⚧ Gender ▪️ Feminised ➰ Genes ▪️ 50% Indica / 50% Sativa 🎄 Genetics ▪️ Lemon Pie X Autoflowering Genetics 🚜Harvest ▪️ 450 - 550 g / m² 🌱Vegetation ▪️30 - 35 days 🌷Flowering ▪️ 30-35 days ✨THC ▪️ 24.0% ✅CBD ▪️ 1.0% 🏡Room Type ▪️ Indoor 🌄Room Type ▪️ Outdoor 🕋Room Type ▪️ Greenhouse 🎂Release Year ▪️ 2020 __________________________________________________________________________ 📷🥇 Follow the best photos on Instagram 🥇📷 https://www.instagram.com/dreamit420/ 🔻🔻Leave a comment with your opinions if you pass by here🔻🔻 🤟🤗💚Thanks and Enjoy growth 💚🤗🤟
Likes
29
Share
Finales de la semana 8 en cultivo ecológico. El proceso ha sido relativamente fácil y sin problemas de no ser por el exceso de nutrientes en la mezcla del supersoil casero, culpa mia por probar cosas nuevas, aunque me ha valido para aprender y he conseguido rectificar a tiempo sacando una gran cosecha. La calidad de las flores se puede apreciar en las fotos, la pena es que no se pueda apreciar el olor, afrutado y muy potente, huele a pura vida. La cantidad de tricomas es considerable como para hacer buenas extracciones. En resumen una gran productora de flores de muy alta calidad, Totalmente recomendable.
Likes
15
Share
Day 28 I’ve been training the girls branches this week and they are filling out nicely.Watered with recharge and ph 6.5 they still are not drinking heavy but watering when pots are dry.I increased the light intensity to 50 percent power and they are taking it well.Ive noticed signs of flower development so i will top dress with 50/50 Gaia green power bloom/gaia green 4,4,4 and water with recharge.
Likes
15
Share
@Nmatz
Follow
No disease & easy strain to grow so far (even for beginners) Got some little balls in the lower buds sadly but the tase, smell & high are so epic that i dont care 🤪 Some friends described the taste as something like pepper, others as something like lavender, but hey, we smokin on killer weed :o Lovely dense buds covered in trichs ty HSO
Likes
13
Share
Likes
10
Share
Gracias al equipo de Zamnesia, Marshydro, XpertNutrients y Trolmaster sin ellos esto no sería posible. 💐🍁MAC 1: La MAC 1 es una variedad muy solicitada, creada originalmente por Capulator y distribuida solamente a determinados criadores y cultivadores. ¡Pero ahora ya puedes cultivar este tesoro en casa y disfrutar de sus cogollos densos, jugosos y potentes! Gracias a su densa copa y vigor, la MAC 1 es una opción ideal para LST, poda apical y otras técnicas de entrenamiento (incluido el lollipopping). Cuando entra en floración, las plantas de la MAC 1 se estiran bastante y una vez maduras pueden alcanzar una altura de 160cm en interior y más de 180cm en exterior. De media, las plantas feminizadas de la MAC 1 necesitan un total de 9-10 semanas para terminar la floración, momento en el que estarán repletas de cogollos índica pequeños y compactos. 🌻🚀 Consigue aqui tus semillas: https://www.zamnesia.es/10906-zamnesia-seeds-mac-1.html Código Descuento 20%: ZAMMIGD2023 💡TS-3000 + TS-1000: se usaran dos de las lámparas de la serie TS de Marshydro, para cubrir todas las necesidades de las plantas durante el ciclo de cultivo, uso las dos lámparas en floracion para llegar a toda la carpa de 1.50 x 1.50 x 1.80. https://marshydro.eu/products/mars-hydro-ts-3000-led-grow-light/ 🏠 : Marshydro 1.50 x 1.50 x 1.80, carpa 100% estanca con ventanas laterales para llegar a todos los lugares durante el grow https://marshydro.eu/products/diy-150x150x200cm-grow-tent-kit 🌬️💨 Marshydro 6inch + filtro carbon para evitar olores indeseables. https://marshydro.eu/products/ifresh-smart-6inch-filter-kits/ 💻 Trolmaster Tent-X TCS-1 como controlador de luz, optimiza tu cultivo con la última tecnología del mercado, desde donde puedes controlar todos los parametros. https://www.trolmaster.com/Products/Details/TCS-1 🍣🍦🌴 Xpert Nutrients es una empresa especializada en la producción y comercialización de fertilizantes líquidos y tierras, que garantizan excelentes cosechas y un crecimiento activo para sus plantas durante todas las fases de cultivo. Consigue aqui tus Nutrientes: https://xpertnutrients.com/es/shop/ 📆 Semana 3: Ha sido una buena semana, ella ha dado un gran cambio en su lugar definitivo 😎. Se le ha aplicado un tratamiento insecticida con agua + tierra de diatomeas ( 1 cucharadita por litro de agua), también se le aplica un tratamiento fungicida con una infusión de cola de caballo para evitar futuro moho. A partir de ahora se riega manualmente con las dosis recomendadas por el fabricante.
Likes
Comments
Share
@Tower84
Follow
🇩🇪🌱🍒 Woche 1 – Keimung | Cherry Limeade by Doja 🍒🍋 Eigentlich wollte ich diesen Sommer eine Indoor-Pause machen 😅. Aber ich konnte einfach nicht die Finger von meinem neuen Living-Soil-Beet lassen und musste es unbedingt ausprobieren. Außerdem bin ich schon lange auf der Jagd nach einem Strain mit einem echten Kirscharoma 🍒🤞. Die Wahl fiel deshalb auf Cherry Limeade von Doja, eine Kreuzung aus Lime Sickle und Lemon Cherry Gelato 🍋🍒. Nach nur 3,5 Tagen hat der Samen direkt im 130-Liter-Living-Soil-Beet das Licht der Welt erblickt 🌱✨. Ein besserer Start hätte kaum sein können! ? Die Erde wurde am 24. April selbst angemischt aus: 🔸 50 L Bio Canna Terra Plus 🔸 30 L Bimsstein 🔸 10 L Living Bio Char 🔸 10 L Reishülsen 🔸 10 L Kompost 🔸 20 L Wurmhumus 🔸 Universal Amendment Mix von Almicanna für 130 Liter 🔸 150 g Alfalfa Pellets 🌱 🔸 100 g Kelp 🌊 🔸 300 g Malted Barley 🌾 Bis auf die Bio Canna Terra Plus stammen alle Zutaten von Almicanna ❤️. Die Mischung wurde auf einer 4 × 4 m Plane vorbereitet und mit etwa 25 Litern Wasser aus dem Gloria-Drucksprüher angefeuchtet 💦. Anschließend durfte die Erde für 14 Tage abgedeckt in der Garage reifen. Danach wurde das 50 × 50 cm Almicanna-Beet befüllt und die Cover-Crop-Mischung ausgesät 🌿. Anschließend wurden SF-Nematoden von Öre Protect gegossen ?. Die Oberfläche bekam eine Mulchschicht aus Hanfspänen und zusätzlich zog eine Handvoll Kompostwürmer aus meiner Wurmbox ein ?❤️. Nachdem das Cover Crop schön gewachsen war, wurden zwei Arten von Raubmilben eingesetzt: 🕷️ Hypoaspis miles 🕷️ Amblyseius cucumeris Das Beet durfte anschließend etwa einen Monat lang einfahren ⏳. In dieser Zeit gab es einmal selbstgemachtes Ackerschachtelhalm-Brennnessel-Ferment 🍵 und einmal Komposttee ☕. Mittlerweile ist das Bodenleben regelrecht explodiert 💥. Wenn man vorsichtig die Erde zur Seite schiebt, sieht man jede Menge Springschwänze, Würmer und Milben. Genau so habe ich mir ein lebendiges Ökosystem vorgestellt ❤️🌎. Die Bewässerung erfolgt über vier Blumat Maxi Tropfer 💧, gespeist aus einem 30-Liter-Tank. Die Bodenfeuchtigkeit überwache ich mit einem MMM TXSU Tensiometer (20 cm) und peile etwa 100 mbar in der Vegetationsphase und 120 mbar in der Blüte an 📈. Während der Sämlingsphase wird das Klima über den AC Infinity Controller im VPD-Modus geregelt 🌡️💨. Zielbereich sind 0,6–0,8 kPa. Die sanlight ist auf Stufe 2 eingestellt (200 PPFD). Vor der Aussaat wurde ein Großteil des Cover Crops kleingeschnitten und als Mulch auf dem Beet belassen 🌿✂️. Anschließend kam ein einzelner Cherry-Limeade-Samen direkt in die Mitte des Beetes. Und heute, nach nur 3,5 Tagen, hat die Kleine ihren Kopf aus der Erde gesteckt 🌱. Nach Monaten der Vorbereitung beginnt nun endlich das eigentliche Abenteuer. Ich freue mich riesig auf dieses Projekt und bin gespannt, ob mich diese Dame am Ende tatsächlich mit dem erhofften Kirscharoma belohnen wird 🍒🤞❤️. ⸻ 🇬🇧🌱🍒 Week 1 – Germination | Cherry Limeade by Doja 🍒🍋 I originally planned to take a break from indoor growing this summer 😅, but I simply couldn’t resist testing my new living soil bed. Besides that, I’ve been chasing a strain with a truly authentic cherry aroma for quite some time 🍒🤞. That’s why I chose Cherry Limeade by Doja, a cross between Lime Sickle and Lemon Cherry Gelato 🍋🍒. After just 3.5 days, the seed emerged directly in the 130-liter living soil bed 🌱✨. Couldn’t ask for a better start! ? The soil mix was prepared on April 24th using: 🔸 50 L Bio Canna Terra Plus 🔸 30 L pumice 🔸 10 L Living Bio Char 🔸 10 L rice hulls 🔸 10 L compost 🔸 20 L worm castings 🔸 Almicanna Universal Amendment Mix for 130 liters 🔸 150 g alfalfa pellets 🌱 🔸 100 g kelp 🌊 🔸 300 g malted barley 🌾 Everything except the Bio Canna Terra Plus came from Almicanna ❤️. The mix was prepared on a 4 × 4 m tarp and moistened with about 25 liters of water using a Gloria pressure sprayer 💦. It was then left covered in the garage for two weeks to mature. After that, the 50 × 50 cm Almicanna bed was filled and seeded with a cover crop blend 🌿. SF nematodes from Öre Protect were applied ?, followed by a hemp mulch layer and a handful of compost worms from my own worm bin ?❤️. Once the cover crop was established, two beneficial predatory mite species were introduced: 🕷️ Hypoaspis miles 🕷️ Amblyseius cucumeris The bed was then allowed to cycle for about one month ⏳. During that time, it received one watering with homemade horsetail and nettle ferment 🍵 and one compost tea ☕. Soil life has absolutely exploded 💥. Every time I gently move aside the mulch, I can see countless springtails, worms and mites. Exactly what I hoped for in a thriving living soil ecosystem ❤️🌎. Watering is handled by four evenly distributed Blumat Maxi drippers 💧 connected to a 30-liter reservoir. Soil moisture is monitored with an MMM TXSU tensiometer (20 cm depth), targeting around 100 mbar during veg and 120 mbar during flower 📈. Humidity and VPD are controlled by the AC Infinity controller 🌡️💨, maintaining a VPD range of 0.6–0.8 kPa during the seedling stage. Before planting, most of the cover crop was chopped and dropped as mulch 🌿✂️. One single Cherry Limeade seed was planted directly in the center of the bed. And today, after just 3.5 days, she finally broke through the surface 🌱. After months of preparation, the real adventure finally begins. I’m incredibly excited about this grow and can’t wait to see if this lady will reward me with the authentic cherry aroma I’ve been searching for 🍒🤞❤️.
Likes
170
Share
Bonjour à tous les padawans et maîtres jedis jour84 arrosage avec 25 centilitres d'eau ph6.3 Jour87 arrosage avec 30 centilitres d'eau ph6.3 Jour88 pratique de la techniques du tronc fendu (videos explicatives) et arrosage avec 20 centilitres d'eau ph6.3 COMMENT FENDRE LES TIGES DE VOTRE PLANT DE CANNABIS Pour fendre les tiges de votre plant de cannabis, il vous faudra : Une lame propre et aiguisée (une lame de cutter fonctionne bien) Un mètre ruban Une ficelle ou un adhésif pour marquer les coupures que vous ferez le long de la tige Un crayon, une baguette ou une brochette pour séparer la tige une fois fendue 1. Tout d'abord, commencez par mesurer la partie de la tige que vous allez fendre. Il faut faire une incision d'environ 10–20 cm juste sous la branche la plus basse de votre plant. Utilisez un ruban adhésif ou de la ficelle pour marquer le début et la fin de l'incision. 2. Ensuite, prenez votre lame et faites une incision en travers de la tige, en commençant par le haut. Attention à faire une coupe propre, jusqu'au centre de la tige. 3. Utilisez votre lame pour tailler en descendant vers le bas, jusqu'à la marque inférieure de la mesure que vous avez prise auparavant. Essayez de tailler aussi droit que possible. Une fois que vous avez atteint votre marque du bas, laissez la lame au centre de la tige, puis utilisez un crayon/baguette/brochette pour ouvrir la partie coupée, puis sortez votre lame. QUEL EST LE MEILLEUR MOMENT POUR FENDRE LES TIGES ? Il existe de nombreuses théories sur le meilleur moment pour passer votre tige au couteau, mais la plupart des cultivateurs suggèrent de le faire à la dernière semaine de floraison. Même si certains cultivateurs recommandent de le faire dans les 3 derniers jours avant la récolte, nous recommandons de le faire un peu plus tôt (7–10 jours avant la récolte). QUELS SONT LES RISQUES À FENDRE LES TIGES ? Fendre les tiges est une technique à stress élevé très agressive que nous ne recommandons qu'aux cultivateurs expérimentés. Nous ne recommandons également pas de fendre les tiges sur les variétés à autofloraison, car cela peut être bien trop intense pour elles. FENDRE LES TIGES, ÇA MARCHE VRAIMENT ? Il existe un solide ensemble de cultivateurs expérimentés qui déclarent que le fait de fendre les tiges peut produire de bons résultats. Malheureusement, peu de données qualitatives le prouvent. Cependant, il semble que la fente des tiges soit originaire des Pays-Bas, où elle est pratiquée par des cultivateurs néerlandais experts depuis les années 1970.
Likes
42
Share
@datrox
Follow
DAY 1 - Finally, the girls are ready for bloom stage. I mixed 75 grams of biobloom manure with soil, each for a 25-liter pot. I used schwazzing technique for defoliation. I gave short flowering fertilizer for indica genetics, also i gave for sativa long flowering fertilizer in half a dose. DAY 4 - Girls began to consume nutrients very quickly.