


Likes
Comments
Share


@Sense63
Follow
Mal sehen was wird ..was wird 👉😏
Gude zusammen,
am 8.4.25 wir eine 30l Wassertank und mit einem Tropf-Blumat und 3 Verteiltropfer pro Topf angeschlossen nach etwas einzustellen bin ich jetzt in einem Bereich von 5-6
bei der Blueberry OG ist echt gut was los 😑👉
Mal sehen was wird ..was wird 👉😏
Stay High
Let's see what will happen ..what will happen 👉😏
Gude together,
on 8.4.25 we connected a 30l water tank and with a drip blumat and 3 distribution drippers per pot after some adjustment I am now in a range of 5-6
the Blueberry OG is really good 😑👉
Stay high

Likes
10
Share


@HegauHillsFarmers_M11
Follow
Tag 63 - Ende der 9. Woche.
Die Blüten entwickeln sicher super und duften extrem. Der Hauptstamm wird schwer, sodass ich die Pflanzen etwas stützen muss, damit sie nicht biegen. Das Harz an den Blüten hat diese Woche nochmal deutlich zugelegt.
In dieser Woche habe ich den Dünger angepasst und Big Bud durch Overdrive ausgetauscht um die Blüten zu härten.
Diesen Vorgang werde ich vermutlich nächste Woche nochmal wiederholen und dann langsam aber sicher mit dem spülen beginnen.
Wir beginnen nun mit der 7. Blütenwoche.
An Tag 57 wurde die Pflanze gedüngt.
Nährstofflösung:
2 ml/l - B-52 Advanced Nutrients.
4 ml/l - pH Perfect Sensi Bloom Part A
4 ml/l - pH Perfect Sensi Bloom Part B
2 ml/l - Bud Candy Advanced Nutrients.
2 ml/l - Overdrive Advanced Nutrients.
Davon hat die Pflanze 1l an Tag 57 erhalten.

Likes
29
Share


@Kushycat
Follow
So now we’re in the first week of flowering, and I’m really happy with how things are going. The plants are constantly putting on more leaf mass, so I have to prune them every few days to remove the light-stealers and the small shoots that keep popping up. They take it all in stride and reward me by stretching nicely. 😄
The lights are now running at 60% power. My goal is to reach 80–90% during flowering weeks 5–6, and then gradually dial them back again for a nice fade.
A very kind person sent me a few very special treats, so I already have some of the ingredients for the next run ready to go. But more on that once this one starts winding down. 😉

Processing
Likes
24
Share


@MadeInGermany
Follow
Hi everyone 🤗
We are in the second week after changing the lighting time to 12/12 h.
The actual proper flowering begins in the next 3-7 days, but the flowering days are counted 😊.
It developed very nicely in the current week and got a real growth spurt 😍.
Next week I'm going to take the bottom shoots that don't make it upstairs, so that she puts her energy in the upper part of the plant and not in the lower popcorn buds 👍.
She will get Canna Vega Bio this week, and next week when the flowers start to develop, she will get Canna Flores.
I wish you all a nice start into the new week, stay healthy 🙏🏻 and let it grow 🌱
You can buy this Strain at :
www.Zamnesia.com
Type:
Runtz
☝️🏼
Genetics:
Zkittlez x Gelato
👍
Vega lamp: 2 x Todogrow Led
Quantum Board 100 W
💡
Bloom Lamp : 2 x Todogrow Led
Cxb 3590 COB 3500 K 205 W
💡💡☝️🏼
Soil : Canna Bio
☝️🏼
Nutrients : Canna Bio
☝️🏼🌱
Water: Osmosis water mixed with normal water (24 hours stale that the chlorine evaporates) to 0.2 EC. Add Cal / Mag to 0.4 Ec Ph with Organic Ph - to 6.0 - 6.3

Likes
6
Share


@GoldenWeedGrower
Follow
Legend
Timestamp: 📅
EC - pH: ⚗️
Temp - Hum: 🌡️
Water: 🌊
Food: 🍗
pH Correction: 💧
Actions: 💼
Thoughts: 🧠
Events: 🚀
Media: 🎬
D: DAY, G: GERMINATION, V: VEGETATIVE, B: BLOOMING, R: RIPENING, D: DRYING, C: CURING
______________
📅 D36/V32 - 21/05/24
⚗️ EC: 1.0 pH: 6.0
🌡️ T: 20°C H: 70%
🌊
🍗
💧
💼 LST
🧠
🚀
🎬 1 TL in her new home and one TL of LST job
______________
📅 D37/V33 - 22/05/24
⚗️ EC: 1.0 pH: 5.4
🌡️ T: 20°C H: 70%
🌊
🍗
💧
💼 LST
🧠
🚀
🎬 1 TL video and one TL of LST job
______________
📅 D38/B01 - 23/05/24
⚗️ EC: 1.0 pH: 5.3
🌡️ T: 20°C H: 70%
🌊 2L
🍗
💧
💼
🧠 As I saw clear signs of blooming, I need to pass to bloom phase so I put B01, in the header.
🚀 Clearly she's starting flowering
🎬 1 TL video and 1 LST video
______________
📅 D39/B02 - 24/05/24
⚗️ EC: 1.1 pH: 5.3
🌡️ T: 20°C H: 70%
🌊
🍗
💧
💼
🧠
🚀
🎬 1 TL video and 1 LST video
______________
📅 D40/B03 - 25/05/24
⚗️ EC: 0.2 pH: 5.3
🌡️ T: 20°C H: 70%
🌊 15L
🍗
💧
💼 Flush for two days and then flowering nutes
🧠 I think no more LST, she's now full blooming
🚀
🎬 1 TL video
______________
📅 D41/B04 - 26/05/24
⚗️ EC: 0.2 pH: 5.3
🌡️ T: 20°C H: 70%
🌊
🍗
💧
💼 Flush for two days and then flowering nutes
🧠 I think no more LST, she's now full blooming
🚀
🎬 1 TL video
______________
📅 D42/B05- 27/05/24
⚗️ EC: 1.1 pH: 6
🌡️ T: 20°C H: 60%
🌊 15L
🍗 Calmag - Bloom A-B - Bud Candy - B52 - Big Bud - Seaweed
💧
💼 👉👉👉 Changed res and added nutes
🧠 I think no more LST, she's now full blooming
🚀
🎬 1 TL video

Likes
6
Share


@Ts1Ko
Follow
Feb 25 watered with nutrients, everything seems to be going fine. Had problems with some COB lights, but fixed everything today.
Feb 27 got another feeding
Mar 1 flushed with clean water

Likes
15
Share


Likes
25
Share


@KivzBudz
Follow
Letzte Woche Samstag habe ich das Licht auf 12-12 umgestellt also startete die Woche am Montag mit dem dritten Tag der Blütephase. Läuft bis jetzt immer noch alles sehr gut, hoffen wir es bleibt dabei. Ende der Woche erstes Video hinzugefügt. :)

Processing
Likes
17
Share


@scooter112
Follow
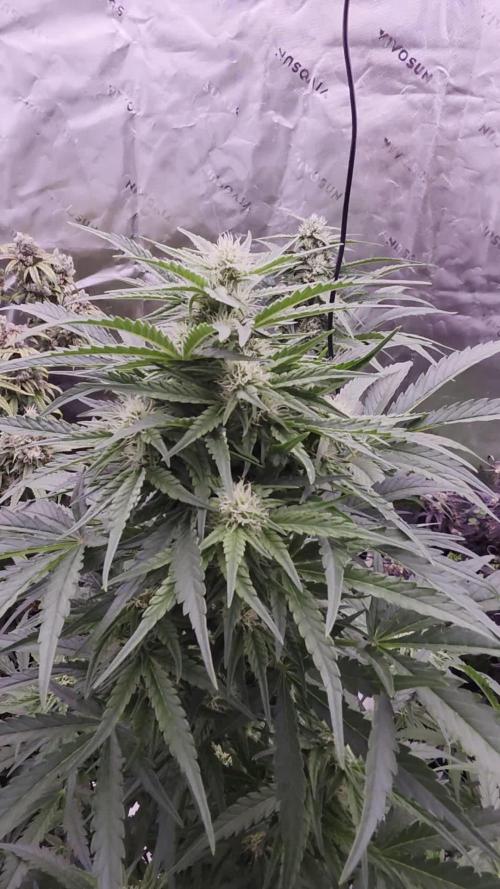
Watering has jumped up to every 2 days ph 6.3-6.8 with 20% runoff
Flower Fuel has been added to AP,GG and ZK watering's.
Lights have been lowered to 24-28 inches.
White Widow just started flower at end of the week. Still waiting on the Cream Cookie.
Doing light Defoliation to expose bud sites to the lights.


Likes
Comments
Share


@AutomataClub
Follow
La alegria que se palpita es mucha! Siempre soñe con tener cogollos oscuros y esta es la primera vez! Es notable la diferencia entre la planta fertilizada con namaste y la de feeding, aunque con este solo utilize el Grow y el Booster. Esta ultima tiene un aroma mas plano, sutil, pero gana en volumen. En cambio con la que utilize namaste destaca mas la precencia de ese aroma como a frutos del bosque, dulce y terroso.
A comienzos de pre flora aparecieron unos gusanos verdes que se multiplican muy rápido. La mayoria la elimine a mano, pero lo ideal es utilizar jabon potasico + Aceite de neem para eliminarlos inmediatamente.

Likes
9
Share


@pzwags420
Follow
On day 1 I transplanted 2 BB clones into 3 gal smart pots with coco coir. I watered them in with veg formula and set up my blumat watering system with week 1 flower nutes. I raised PPFD to 600-700.
On day 2 the reservoirs PH was adjusted from 6.4 to 6.0. The rez is 823 ppm. The tops are 16.5" from the grow light. The blumats have not started watering yet and I will monitor to ensure it goes smoothly. I have the blumats set at 1.25 carrots on left plant and 1 carrot on right plant. The average PPFD of my 16 tops is 703 PPFD. I increased temps to 85 day 81 night to get leaf surface around 80 f during day.
On day 3 the reservoirs PH is 6.2. The rez is 782 ppm. The blumats have started watering and I will monitor closely over the next few days.
On day 4 the reservoirs PH was adjusted from 6.3 to 6.1. The rez is 717ppm.
On day 5 the reservoirs PH is steady at 6.1. The rez is 706 ppm. The highest top is 15.25" from the light. I defoliated to bring in more air and light to deeper into the canopy. I increased the flow rate of blumat by .5 carrot on the right plant as it was a little to dry for my liking. The Clones are preforming well.
On day 6 the reservoir PH is going down so I adjusted up from 6.0 to 6.2. The rez is 730 ppm. The highest cola is 14.75" from the light. The left plant had a runaway so I reduced blumat by 1 carrot. I increased flow of blumat on right plant by .5 carrot as it is still drier than I would like.
On day 7 the reservoirs PH was adjusted from 6.3 to 6.0. The highest cola is 14.25". I reset rez with nutes.
Likes
3
Share


@Bluemels
Follow
Tag 67: Ich gebe keinen Dünger mehr und in einer Woche wird dann geerntet.
Likes
16
Share


@Mrs_Larimar
Follow
2022-11-21
The Glassskull and the Platiccup plants doing very well, both are happy and bushy
and nice flowers appear
website for for my Fertilisers:
https://greenbuzzliquids.com/en/shop/
Code: mrs_larimar
Breeder Info:
👉Black Sugar is an indica dominant hybrid of Black Domina, L. A. OG and Critical.
It has kept the medicinal properties of L. A OG, a good flowering rate on the Black Domina lineage,
and the compact size of the classic Critical strain. With its small growth, the strain produces large yields
of up to 600gr/m2 on bushy branches. The buds are very dense and stinky.
Black Sugar has a high THC level. The variety has a fruity citrus aroma. Dense smoke gives the effect of relaxation and body buzz.
Good for Smoking before going to bed. It can become one of your favorite Seedsman strain
Genetics Black Domina x L.A OG x Critical
Harvest 450 - 500 g/m²
Flowering 50 - 55 days
THC 20.0%
CBD 1.0%
Likes
13
Share

@PEAKYPLANTERS
Follow
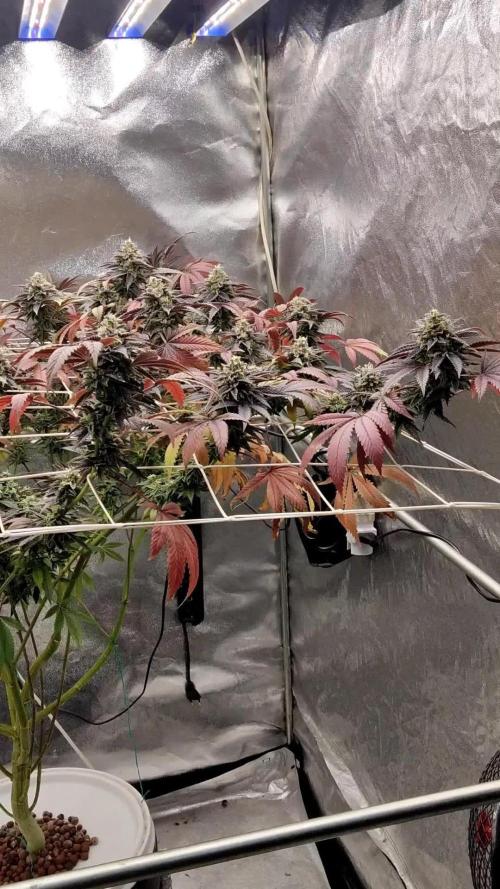
Cuando comencé a cultivar nunca pensé que tendría éxito en semejante empresa, con esta incluso tuve éxito en dos... La primera es alimentar mi boca con una sola planta,Y la segunda fue estudiar, aprender y practicar botánica en el agua...Y créeme cuando te digo que en mi vida nunca me ha gustado la escuela, pero me encantan nuestras plantas y tuve que aprender sobre ellas (por mi cuenta).Esto me hizo comprender muchas cosas, especialmente a creer en mí mismo.
Likes
9
Share

@Riseandshine
Follow
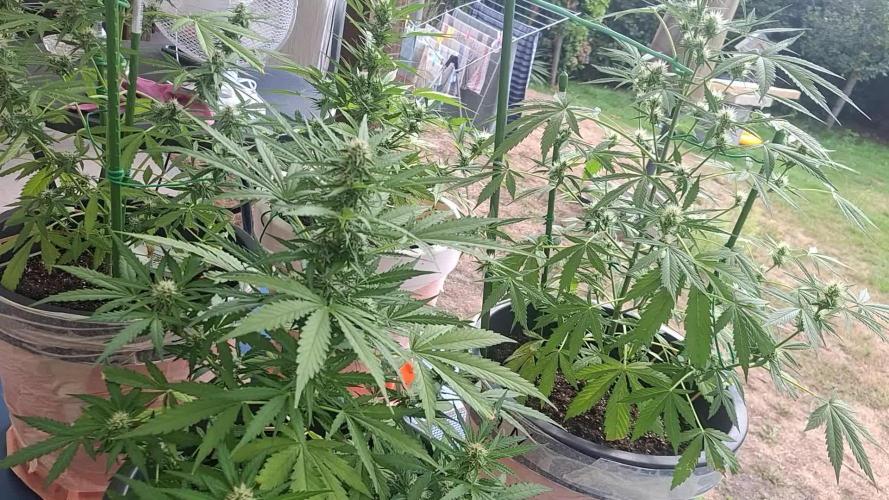
Dag 49 van mijn dames. 😁🌱☘️☘️☘️
Nieuwe week# nieuwe bloei.🌱☘️?
Ze hebben gisteren alle 4 hun liter water zeer goed geïncasseerd en staan trots te blinken in de zon.
Vandaag toch 27 graden en kurkdroog, dus ze staan in openlucht eindelijk.😎🤘🤟
Ik hoop gelijk dat ze tegen morgen droog staan, want dan krijgen ze 2x voeding deze week. Ik ben voorzichtig, maar sta te popelen om nog pk te geven. Is goed voor de dikte van mijn toppen, dus ja, je snapt mijn gedachten wel.😊😅 We zullen zien, maar bij het begin van deze week! Geef ik ze alle 4 een dikke vette tien! 😊
Dag 50 van de knapste plantjes dat ik ooit heb gezien.🌲🌲🌲🌲🌿🌿🌿🌿🌴🌴🌴🌴
And I think to myself!
What i wonderfull world. 🤩🤩🤩
Vandaag perfect weer voor den belgiqeu en een aangenaam briesje.
Ze hebben vanaf 10 uur tot 20 uur in openlucht op hun troon gestaan. Koninginnen zijn het.
Zjan gaat me verassen met haar main cola vrees ik. Die is langzaam aan het komen en ik word er gelijk gelukkig van. Hun liter water van zondag is mooi verteerd, dus ik heb hun vandaag voeding gegeven. Daarna chill de berging in bij hun, ondertussen vertrouwde ventilator. Luchtvochtigheid hou ik daar echt onder de 60 dus dat blijft ook dik oke.
Kijk er al naar uit om hun morgen gaan te begroeten....
I love them so much.😊
Keep on smiling people and don't forget!
Dag 51 van de hofdames.☀️🔥🌝
De dames hun pistels en calyxen ontploffen letterlijk bij gaadkloempke. 💣💣💣💥💥💥
Geen zorgen over de rest, want die ontploffen mee hoor. Echt mooi hoe hard hun toppen met de dag verandering brengen. Die bloom 2 en die pk is inderdaad andere kwaliteit dan mijn substral voor gerariums. 😊😂😂😂 Ach ja, alle begin is moeilijk en ik zal die fout dus niet meer maken. 😊
Heel mooi weer deze nm gehad, dus ze hebben toch echt 8 uurs zon kunnen pakken vandaag. 😁
Deze vm stonden ze wegens reden onder het afdak.
27 graden vandaag, dus lekker.😎😎😎
Morgen zelfs 30, maar das nog afwachten.
Ik zal ze met plezier verhuizen als dat kan.
Vandaag geen water, want ze wogen nog zwaar.
Wat kijk ik nu al uit naar morgen.
Verzorg jullie schatjes goed mensen.
Liefde loont in dit vak blijkbaar.💗💓💞💕❤️🔥
Dag 52 van mijn, mother fucking, beautiful girls!❤️🔥
Zeer lekkere zomerse dag hier. Prachtige 29 graden en een lekker briesje. Plantjes hadden ook meer dan dorst genoeg, dus die liter zuiver lauw water zit dus lekker in hun buikje.
Verder blijven hun toppen met de dag groeien en zwellen!
Dus deze jongen blijft in zijn geluk zwemmen.
Ik begin zwaar uit te kijken naar een trekske van hun bloemen. 🙈🙈🙈😁
Ik zit opnieuw zwaar te kloten met mijn luchtvochtigheid in hun nachtplaats tedju.😅😔😬
Heb daar nu 3 grote en 2 kleine vochtvreter staan en 2 ventilators strategisch gezet op zwenkstand.
Ik moet da op peil krijgen, want ik wordt daar intern ziek van in mijne kop. 😬🤐
Geduld is de beste raadgever, dus morgen vroeg weet ik daar wel meer info over.
Verder blijf ik mooi met mijn handjes van hun hemelse lichamen en kijk vol bewondering, onze resterende tijd, samen met een glimlach tegemoet. 🌱🌿🍀🌲🌲🌲🌲🌲🌲😁
Verder zijn ze alle 4 gestopt met groeien!
Dus laat ze nu maar volop bloeien!😁
Dag 53 van een bang kwekerke😬😅🤯
De luchtvochtigheid swingt hier de pan uit en nu is er buiten verdomme ook nog geen wind.😬🤕
Ik heb er buiten direct ne ventilator bijgezet, zolang dat er geen wind is. Ik hoop echt op geen onverwachts bezoek, want ik krijg het hier kwa vochtvreter en ventilators nie meer gecamoufleerd. 😅😂😂😂😂😂
Hoeft ook niet hoor! De plantjes zijn sowieso prioriteit nummero 1. 😁
Na mijne fuck update van deze morgend, was het de hele dag miserie. Een serieuse stortbui en door de wind melleke een ferm drats gehad. Ocharme dat kind! 😅 Ikke mee, een haardroger op zachte stand en koude lucht, toch een dikke 30 min dat sukkeltje staan drogen. 😬😂😂😂😂
Nu kan ik ermee lachen, maar daarstraks was het iets anders.😅🤕😭😭😭
Dan, omdat er geen wind was buiten, bijna een hele dag daar de ventilator erbij.
Dan ondertussen in die berging zitten kloten met die luchtvochtigheid! Nu blijkt dat dat aan die aardgasketel licht. 😅
Dus met die planten anders te plaatsen en die ventilators te swichen van plaats!
Is die fucking bitch eindelijk aan het zakken en kan ik ook glimlachen.
Ik heb ook gelijk nog 1 grote steunstok geplaatst bij zjan en gaadkloempke en extra draad om ze te steunen. De wind blaasde mijn hoofdtoppen mottig naar Jeruzalem daarstraks. 😂😂😂😂
Ik dacht gelijk alle stress in 1 fles!
Kunnen ze morgen terug chillen.
Ook terug droog weer en zon morgen. Hopelijk betekent dat openlucht.🌴🌴🌴🌴🌲🌲🌲🌲
Alee in ieder geval morgen nieuwe rise en nieuwe shine. 😎😎😎😎😎
Dag 54 van mijn groene bende. 💪😁👌👌👌
Het was fantastisch om deze morgend te ontwaken .
De luchtvochtigheid zat toch al terug op 67 en da was fijn. Nu dat we weten dat het aan de aardgas ketel ligt, mag die om 17 uur zijn portie wind zeker verwachten. 👊👊👊
Deze vm heb ik mijn dames lekker kunnen laten genieten van een dijk van een zon. 😎😎
Da was om 12 uur dus ook weer gedaan en dus maar onder het afdak. Daar zet ik sinds gisteren wel een blazer bij. Die moet hun 1 keer, 15 min per uur een windje geven. Kwestie dat die toppen geen stilstaande lucht krijgen. 🤕
Maar de liefde is sterk, dus ik probeer echt met alles rekening te houden nu.❤️?❤️?❤️?
Wat een ervaring dat ik dit jaar nog heb gekregen. En dan weten dat alles is begonnen met een gekregen zaadje en letterlijk los verzopen uit onkunde.?
Met echt de nodige hartpijn tot gevolg.
Dus 4 sensi seeds gekocht, beginnen opzoeken als ne zot en nu ontroerd het me, hoever we al zijn geraakt. Dus ik blijf vechten tegen mogelijke toprot, want anders wordt deze jongen ook ZOT. 😅😂😂😂
Vandaag geen voeding wegens potten niet licht genoeg. Belgische kutweer, ze drinken weinig.
Morgen wel zonnig en kurkdroog, dus hopelijk morgen avond wel aan de toog.😂😂😂😂😂
Fight for your right en u planten mensen.🌱🌱🌱🌱🍃🍃🍃🍃🍃🌴🌴🌴🌴🌴🌴🌴🌴🌴
Dag 55 van mijn godinnen 😁🙃😁
Lieve mensen, nog iets dat ik dus geleerd heb.
Steek u geld zeker in een deftige luchtontvochtiger.😊😊😊
Bij wisselvallig weer, ist het me niet gelukt met 3 ventilators en 5 vochtvreters om te winnen van moeder natuur. 😅😊😬
Ik heb dus van mijn super lief vrouwke(hoewel ze zelf niet blowst is ze zeer begrip vol) een elektrische mogen kopen bij bol.com. 😁
Voor 120 euro eentje die 40 meters makkelijk onder de duim houdt. 😎😎😎
Dinsdag staat hij voor de deur en dan ben ik eindelijk terug chill aan het kweken. Ik krijg echt stress van die luchtvochtigheid. En mijne agenda staat vol, dus kan echt niet elke avond een strijd gaan leveren die ik toch niet kan winnen. 😊
Verder krijgen mijn schatjes deze avond voeding! Das me dan 2 x gelukt deze week en dat maakt me gelukkig. Nog max 2 weken voeding dus gaaaaas erop. Dat ze mooi dicht groeien! 🌴🌴🌴🌴🌿🌿🌿🌿🌾🌾🌾🌾🍀🍀🍀🍀🍀🍀🍀🍀🍀?????
Heb daarstraks bij gaadkloempke in een top geknepen in verband met toprot.
Zaaaaaalige geur aan mijn 2 vingers en ze plakten al aardig van de hars. 😁🤩🤩🤩🤩😛
Voor de rest blijf ik eraf met mijn vettige handjes.😅😂😂😂😂
Dus beste mensen knalt ze nog lekker fleurig vandaag!
Knal ik straks terug een liter in elk hun maag.😁
Bedankt voor ook deze week mijne zever te lezen en hopelijk heb je nog interesse in hun dol dwaze avonturen en kom je stiekem in hun dagboek gluren.
Liefs Zjan Beir Melleke & Gaadkloempke?☘️☘️☘️
#sensiseeds
#whitedieselhaze
Ps: da poëtische ligt aan de amnesia den hasj bij ons vader.😬😂😂😂😂😂
Rise and shine mensen😎💥🌱🌱🌱

Processing
Likes
25
Share


@TegridyCal
Follow
The Gelato has responded well to the topping, the new brunches are growing and the main leaves have opened to collect maximum light, it looks a bit like purple lemonade as a vegetative growth.


Likes
10
Share


@Naujas
Follow
great!!! the girl has gained momentum in growth:) she looks small, but she really has a lot of branches :) So far everything looks really good!! :) good luck to everyone.

Likes
17
Share


@OrganicBuds030
Follow
Mir gefällt Melonade Runtz bis jetzt sehr gut. Sie hat einen schnellen Wachstum und macht den Anschein als würde sie dicke fette Buds produzieren. Ich bin sehr gespannt wie dieser Run wird. Bis jetzt hatte keine Pflanze irgendwelche Mangelerscheinungen. Stabile Genetik von Dutch Passion 💚

Likes
13
Share


@Phaleg
Follow
In this week I can easily recognise the positive impact on the growth of moving the plants to the bigger pots, they increased the growth rate so much.
#1 is 55cm tall (21+ inches), it still displays 9 pointed leaves above the internode where it started as reported in previous week diary page
#2 is 54cm tall (21 inches), it displays couple leaves with 8 points and one or 2 new leaves seems to have 9 as well, I will confirm once they grow more
#3 is 34cm tall (13 inches), this is the one that got problem in beginning (read previous page for more details), it is doing its best to recover and get to the same level of the other 2. I see only max 7 pointed leaves so far.
Please share with me your thoughts about it, here's a n00b that likes to learn!