


Likes
Comments
Share


@EZgrower
Follow
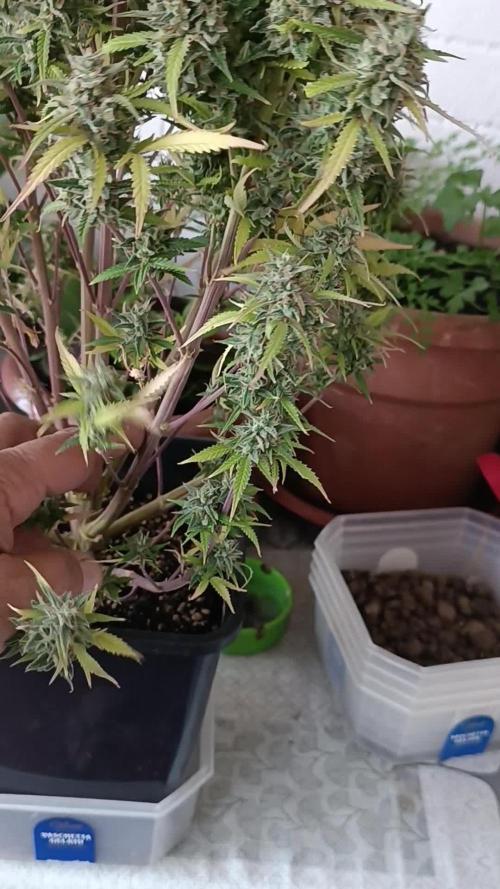
Day 63 - add about 0,5l of soil. weight of pot from 3,0kg to 3,6kg
Day 64 - Filling. ppm 460. weight of pot from 3,2kg to 4.3kg (1100 ml)
Day 66 -filling. ppm470, weight of pot from 3,15kg to 4.15kg (1000 ml)
Day 67 - fiiling. ppm490. weight of pot from 3,15kg to 4.15kg (1000 ml)


Likes
6
Share




Likes
7
Share


@PrinceOfHerbs
Follow
The plants are growing beautifully and the first signs of flowering can be seen.
Flowering day 10💚


Likes
5
Share


@MrFriday
Follow
26.08.2024
1. RDWC: I run a DIY system made of 4 Buckets 17L+separated control/tank bucket (12L operational water per bucket used) fallponic plus underwater current. I don't know why I have made such system I just wanted to be sure that I have included every possible option. I'm not sure but maybe I'll upgrade it to rainponic it's not that hard of a job. I'm not using my 100L reservoir this run becose it needs replacement old one made a small flood in my garden.
2. TENT AC Infinity 5x5
3. Airpump Hailea ACO 388 D 70L/min.
4. Water chiller: hailea water chiller hc-150a.
5. LED GROW light Grand Master Level Tarantula voyager 1500W 2 chanel's plus controller (it will be my first run with this monster it just arrived).
6. INLINE FAN: AC Infinity cloudline S6 carbon filter.
7. CLIP FAN: AC infinity Cloudray S6 3 pcs. For low middle and over the LED air movement.
8. Humidifier AC INFINITY T3 (I don't need stronger one naturally the humidity here is around 65-70%)
9. TENT CONTROLLERS: controller 69 PROX2
10. Germination/humidity dom by AC infinity with germination lamps 40W Ionabeam S11 only for the first 2 weeks before VEG.
DAY 1
Closed in a box hiden in a dark boiler room.
Room temperature 25C
EC 850
RH 90%
Instruments used for measuring:
AC Infinity Hydroponic Meter PRO
AC infinity VPD thermometer
DAY 2 5/6 seeds have start to crack open I guess tomorrow or the day after they will be all ready for the cubes.
DAY 3
ROOM TEMPERATURE 26 C
Relative Humidity 83%
5/6 seeds are showing signs of life. The 6th one is a little bit slower it's cracked as it can be seen on the picture but it refuses to show it's tale. I believe tomorrow it will be ready. On day 4 I'll put them in the "Root Riot" cubes and after that I'll just monitor the RH and RT until I see the sprouts.
DAY4
ROOM TEMPERATURE 24.5
RH 94%
6/6 seeds have germinated so far. Today I'll move them in the Humidity dom where they will stay until they become seedlings and I'll keep them there until they are ready to be moved in the RDWC system and coco coir. In the video I have show my method of preparing the cubes for the seeds next update will be tomorrow probably only for temperature and humidity.
DAY 5
ROOM TEMPERATURE 25-27.
RH 89-95
I can't believe that I'm seeing first sprout today. Maybe this strain is one who can take a little push 🤣🤣🤣 I'll keep in mind and I'll se how much I can push it. Unfortunately I still don't have CO2 for veg and flower but I can try other different little tricks. I'm happy with this seeds obviously 42 Fast Buds are giving a really quality seeds. Let's see what kind of buds will come out of this seeds. I hope tomorrow everything will be sprout out and i will turn on the lamps.
DAY 6
PPFD 120
ROOM TEMPERATURE 24.5
RH 92.1
It's day six 4/5 seeds are successfully germinated. Maybe the next two will pop out but for one of them I'm not so sure. Anyway I have one spare seed that I can pop out for the coco project plus I have one Papaya Cookies Auto for the fifth bucket so that's no problem. The seeds ar under the light AC Infinity Ionabeam S11 on level 3 equal to 115 ppfd plus the DOM extension.
DAY 7
ROOM TEMPERATURE 25C
RH 82%
I have 4/6 successfully germinated seedlings. Tomorrow I'll open up the humidity dom a little bit. It's good to have spare seeds. Now I'll have to plant my spare peace of gorilla cookies and probably one Papaya Cookies Auto (gift) becose my plans were for 6 plants. Anyway this 4 soon will be transplanted in the RDWC flowering pot. Let's see what tomorrow have to say.
DAY 8
ROOM TEMPERATURE 25C
RH 82%
Amazing root development, I wasn't expecting this kind of speed but obviously tomorrow I'll transplant them in the RDWC even before the VEG state. Maybe I'll keep them a few more days when the first set of leaves is all out.
DAY9
ROOM TEMPERATURE 24.1
RH 58%
Today is the last day in the humidity Dom. I delayed the move becose i wanted to have a longer stems and becose my fertilizers got lost in the depo so ill receive them tomorrow. We have very healthy baby's with a lot of tiny roots so it will be perfect to start then from day 10.
DAY 10
ROOM TEMPERATURE 26-27C
RH 70%
EC 115
pH 7
This is the fastest seeds I ever see. I have never transferred seedlings in to RDWC so far, usually I make this procedure around day 17-20. While I was transferring them one of the seedlings accidently snapped a little bit but I hope it was not fatal enough and maybe it will survive, only the time will show, anyway I have another one in coco so I can always transfer it in to RDWC if needed. EC is only 115 for today becose of the little bit of ATHENA BALANCE I dropped in the water, so far the roots are not touching the water so i can add the fertilizers tomorrow while I'm fresh.
DAY 11
Water Temperature 18C
Room temperature 28C
EC 120
pH 7
PPFD 200
RH 70%
They look nice and healthy still not enough signs of roots for picture but so far the seedlings look fresh. One more day in the Formulex+tap water and they will go in the Athena by day 13.
DAY 12
Water temperature 18C
Room temperature 27C
pH 7
PPFD 220
RH 70
AC 240
Everything is going g quick and perfect. So far this run is going smooth as never. I never had root development that quick as this with this seeds. I'm almost in love with them. After a quick summary with my previous runs I decided to double the AC before tomorrow when I'll change the water and I'll replace it with 6.0 pH RO water and the full athena program for the RDWC. So far so good let's see what the Athena nutrients will show after one week.
DAY 13
RH 70
Room temperature 27-28
EC 290
pH 6.1
Water Temperature 20C
PPFD 300
Light cicle 20/4
I couldn't resist to flip the fertilizer to athena. After all as soon as I teach em what its better. Full water change of the tank and new suplements. Formulex is amazing suplement for the first two weeks maybe it can carry most people to whole VEG if it's in soil or coco, but I want the real food in RDWC. So far all the plants have amazing small roots so that means the system work well. Let's see the progress tomorrow, but I beleave in the middle of the week this plants will be already in official VEG period.
DAY 14
RH 70
Room temperature 26C
EC 290
pH 6.0
Water temperature 19.5-20C
PPFD 350-400
Light cicle 20/4
I needed a little bit more light. I don't know how to explain it but its a grower thing and now my seedlings are looking better than the morning. They were looking a little bit "dizzy" if I can use this terminology. So basically in perfect water temperature, perfect fertilizer level and good aeration, there was nothing left beside the light. As I'm saying you can't feed a lot if you don't have enough light. I added the spider farmer SF 1000 EVO over the water container, becose the big fixture is too far from them, but I can't put them under the Voyager, becose my previous grow is in the final week. So now they are on a separate light 🤣🤣 🤣 370-400 PPFD is a little bit much but I beleave they will manage it. After all the plan of this run is to reach 1000 PPFD in the final days.
DAY 15
RH 70
Room temperature 26C
EC 290
pH 6.0
Water temperature 19.5-20C
PPFD 350-400
Light cicle 20/4
So far the progress is mainly on roots and some new leafes are coming out. Probably next set of leafes is going to be the first that will mark the veg stage. I have added a little bit of ATHENA clense today and by far notging ha e changed since yesterday.
DAY 16
RH 70
Room temperature day 26C
Room temperature night 23C
EC 290
pH 6.1
Water temperature 19.5-20C
PPFD 350-400
Light cicle 20/4
As I was expecting most of the job is pre-veg, what I mean is that the results we can see are mostly in root development and ohh boy this is a crazy root spike in just 24 hours. I don't know is it becose of the Athena or just the genetics of the seedling but Im really amazed. In just 11 days from first seedling until today and I'm seeing some crazy root development. I truly beleave that the next set of leaves will be marking the vegetative stage and then we can start the game.
DAY 17
RH 55-60
Room temperature day 26C
Room temperature night 21-23C
EC 320
pH 6.18
Water temperature 19.5-20C
PPFD 350-400
Light cicle 20/4
I decided to add a little bit more Athena Ca-mag. It feels like that my little ladies are struggling for it. I'll see the results tomorrow.
DAY 17
RH 55-60
Room temperature day 26C
Room temperature night 21-23C
EC 320
pH 6.18
Water temperature 19.5-20C
PPFD 350-400
Light cicle 20/4
I decided to add a little bit more Athena Ca-mag. It feels like that my little ladies are struggling for it. I'll see the results tomorrow.
DAY 17
RH 55-60
Room temperature day 26C
Room temperature night 21-23C
EC 320
pH 6.18
Water temperature 19.5-20C
PPFD 350-400
Light cicle 20/4
I decided to add a little bit more Athena Ca-mag. It feels like that my little ladies are struggling for it. I'll see the results tomorrow.
DAY 18
RH 55-60
Room temperature day 26C
Room temperature night 21-23C
EC 320
pH 6.18
Water temperature 19.5-20C
PPFD 350-400
Light cicle 20/4
Okay two more days and we will be in veg. It's Not like we are not in veg today I just want to keep the update from Sunday to Sunday.
DAY 19
RH 55-60
Room temperature day 26C
Room temperature night 21-23C
EC 320
pH 6.18
Water temperature 19.5-20C
PPFD 350-400
Light cicle 20/4
We are in veg tomorrow so today we change nothing. Tomorrow will be great day.
Likes
4
Share

@Borberad
Follow
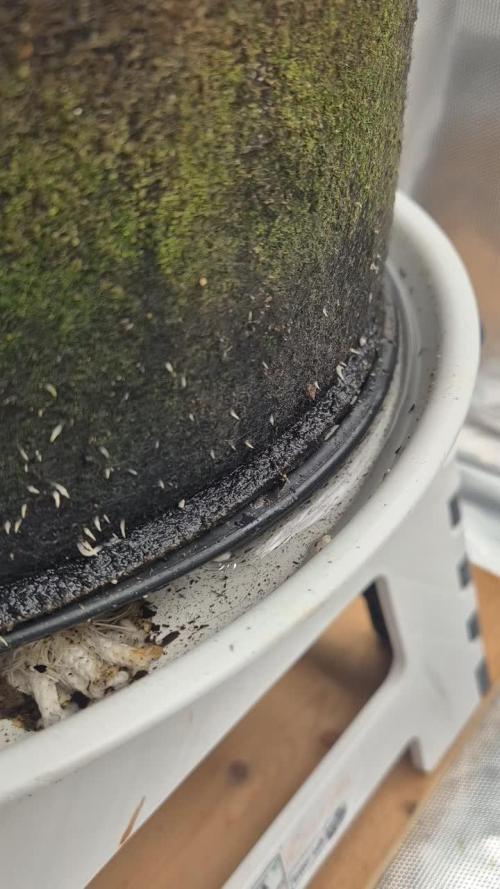
Umstellung an Tag 44. Nach einer 20h Nacht wird in die Blütephase gewechselt.
Likes
8
Share


@SkunkyDog420
Follow
Hallo zusammen 🤙. Habe heute das letzte mal gedüngt ab Tag 78 nur noch Wasser 2 Wochen lang.
Likes
27
Share


@Smokwiri
Follow
Nice development, i left the lights on lowest (4w) for half week, so letting IT grow another week
I have some discount codes for the light on Amazon, it's one best led brands around, pricing for us/ca market is very sharp, design is very slick and yields bomb.
Amazon: http://url-9.cn/0y9i
Amazon US: https://amzn.to/3e0P2bk
Amazon CA: https://amzn.to/3bTnEJC
Amazon discount Code:
it10smokwiri XS1000 10%
XSsmokwiri XS1500 8%
it20smokwiri XS2000 5%
it40smokwiri XS4000 5%
ViparSpectra 8% DISCOUNT CODE on the viparspectra websites (.com/.eu)
RUFFSELEKTAH

Likes
8
Share


@Die_Growbox
Follow
Nährstoffe bekomme ich nicht geregelt Blätter werden gelb von umtern nach oben gegossen wird nach gieß Plan von growers .ch mit Leitungswasser
Ph werde Erde 5,5-6,5
Da die Feuchtigkeit nicht gesenkt werden konnte sind jetzt nur noch 3 Pflanzen im Zelt
Likes
9
Share


@GrowStiga
Follow
a planta vem sendo regada com água de torneira desde a germinação vem se desenvolvendo muito bem nas ultimas semanas, na proxima semana a planta irá mudar de ciclo para floração veremos...💫💨💨💨
Likes
2
Share


@Ctrellis90
Follow
Alright, it's the end of week 2 veg and we're starting to take off!
Have you ever seen a plant with the mutation mine has? She doesn't have a main stalk lol but instead has two! Plus her fan leaves are looking a bit screwy lol. I'm a fan of mutated cannabis though and love to see how they do so she's definitely staying around.
I'm not a big auto grower myself so I don't have that high of expectations but I'm sure these ladies will look great once they get another week or two under their belts.
We're continuing the alfalfa Ferment from Growing Organic (discount code CollinT), these girls have craft blend mixed into their medium so we won't be top dressing until late veg early flower. Then we'll throw down some castings and more craft for transition/early bloom. We'll see how well we do.
Thanks for stopping by and we'll see ya next week.

Likes
92
Share


@DogDoctorOfficial
Follow
Week 9 - First Week of Flowering 🌸
The dark period has ended, and these ladies came back into the light fully energized and ready for action! It’s just the first week of flower, and they’re all praying, stretching, and absolutely thriving—filling up every inch of the tent. This grow space is officially packed from wall to wall, with each plant competing for its share of light and showing off some of the biggest, healthiest leaves I’ve seen yet! 🌱
A few strategic plucks here and there have kept airflow smooth and light penetration balanced. Those big leaves? They’re a sign of happy, healthy growth. Large leaves help the plant capture maximum light energy, essential during this stage, especially as they start focusing on developing those flowers. When plants grow huge, vibrant leaves like these, it means they’re well-nourished and content in their environment—a true testament to the well-balanced conditions we’ve got going in the tent!
Flowering Parameters 🌡️
Room Environment:
• Temperature: 26.7°C
• Humidity: 63.3%
• CO2: 960 ppm
• VPD: 1.29 kPa (prime zone for flowering health!)
Lighting:
• Light Intensity: 835 PPFD (ideal for boosting flower growth)
• Solution: pH 5.96, TDS 460 ppm, temp 21.1°C
• Medium: Moisture: 100%, TDS: 520 ppm, Temp: 21.6°C
Carbon Filter Installation & Smell Management 🌬️🌱
With the transition to flower, the scent profile is already starting to kick in—crazy for the first week, right? 🌸 To keep everything fresh and under wraps, I’ve set up a carbon filter system. Here’s how it’s working: I’ve connected the filter to my Aerofan, which pulls air directly from the tent. This air is cleaned by the filter and released into the main room, where it then passes through another filter before exiting my space. This dual-filter setup means no scent escapes into the wild, keeping things stealthy and the grow room a peaceful, scent-contained environment. Perfect for anyone concerned about keeping their home free from that telltale aroma! 🕶️🌬️
Enhanced Lighting with Emerson Effect 🌞
This week, I’ve introduced an extra 15 minutes of red light at the beginning and end of each light cycle. Why? Well, this red boost taps into the Emerson effect, enhancing photosynthesis efficiency, especially during the flowering stage. By stimulating a little extra wake-up and wind-down light, we’re mimicking the natural sunrise and sunset experience for these plants, which can help reduce flowering time. Not only does it encourage smoother transitions into day and night, but in theory, it’ll help these ladies finish a bit faster, while giving them a little nudge to build more substantial, quality flowers. 🌇
Nutrient Adjustments 🌱
Now that we’re in flower, I’ve swapped out the Start Booster for P-Boost and TopBooster to specifically support flowering needs. Here’s why:
• P-Boost brings in additional phosphorus, vital for energy transfer and cell division as the plant channels more resources into budding sites.
• TopBooster supports the flowering phase by improving flower quality and density, helping to build those big, aromatic buds we’re after.
These changes bring the nutrient mix in line with what’s most beneficial at this stage. All this precise dialing in is easy to manage thanks to the TrolMaster system. From pH to nutrient scheduling, the TrolMaster ecosystem and ThinkGrow LEDs have been the ultimate teammates in this grow journey, giving me real-time data, fine control, and peace of mind. 💯
(Not introducing UV light just yet, but stay tuned as that’s coming soon for an added boost!)
Looking Forward 🌟
Next week, we’ll be upping the reds, giving us an even greater chance of activating those flowering signals for a smoother, faster transition through the cycle. I’ll keep tweaking and fine-tuning every parameter to make sure these ladies get exactly what they need to thrive.
Big thanks to the TrolMaster system for keeping everything in balance and optimized, along with the supportive Grow Fam following this journey! Your enthusiasm, advice, and support are a huge part of this grow’s success. Keep following for more updates, and stay tuned for what’s next! 🌿✨
P.S. Deep Dive: TrolMaster’s MBS-S8 CO₂ Sensor & Smoke Detector 🚨
The MBS-S8 CO₂ Sensor from TrolMaster is a powerhouse for growers, especially when it comes to optimizing plant growth and efficiency in a controlled environment. This sensor continuously monitors CO₂ levels and integrates directly with the TrolMaster ecosystem, giving you real-time data on CO₂ concentration. Ideal levels of CO₂ can significantly boost growth and yield during certain stages, so understanding and managing CO₂ is key. With the MBS-S8, I can control CO₂ levels precisely, keeping them within the optimal range for photosynthesis. This sensor is a game-changer because it adjusts CO₂ delivery automatically, giving plants exactly what they need without any extra monitoring from me.
Meanwhile, TrolMaster’s Smoke Detector is an essential safety device, especially in spaces with electrical equipment, lights, and heat-generating components. This detector can be set up to alert me instantly via the TrolMaster app if any smoke is detected, allowing me to respond immediately to any potential issues. Fires and smoke are rare in controlled grow setups but having this safety measure provides peace of mind and lets me focus on the plants without constant worry. It’s an incredible tool for any grower prioritizing safety and proactive monitoring.
Discount Codes so you can save big on your next check out 💚💚💚
Kannabia - DOGDOCTOR 30% off
SeedsmanSeeds - DOGDOCTOR 10% off
CannaKan- DOGDOCTOR 15% off
terpyz.eu - DOCTOR 15% off
The Neutralizer - PORKIT5-DOG 15% off
As always thank you all for stopping by, for the love and for it all , this journey of mine wold just not be the same without you guys, the love and support is very much appreciated and i fell honored and so joyful with you all in my life 🙏
With true love comes happiness 💚🙏 Always believe in your self and always do things expecting nothing and with an open heart , be a giver and the universe will give back to you in ways you could not even imagine so 💚
Friendly reminder all you see here is pure research and for educational purposes only
Growers Love to you all 💚💚💚


Likes
81
Share


@organically
Follow
25.05 - Pre-Flowering start.
27.05 - Force Flowering.
01.06 - Pre-Flowering done.
10.06 - Flowering Week 1 / Day 1.
14.06 - Lollipopping.


Likes
26
Share


@donutgrower
Follow
Big week! I got my new EarthBoxes and a bunch of goodies. I picked up the Probiotic Farmer's Alliance kit from BuildASoil, so I also got some EM-1, Kashi Blend, dolomite lime and Malibu compost. Alongside that I picked up Colorado Worm Compost (vermicompost), Gnarley Barley (malted barley, corn and hemp) and Craft Blend (aprox 3-5-2 organic mix). Unfortunately there was a bag of soil missing, so I ended up using my own mix though I am somewhat scared of it being too clay-heavy for the SIP. I inoculated with EM-1 and began fermenting a batch of activated EM-1 to make the bottle last longer.
It looks about a week from LST, after that I hope to set up a two-tier SCROG setup and begin growing the bushes. I will begin spraying AEM-1/EM-FPE/EM-5 alternatively once a week for IPM, I will try to avoid using neem this round (unless I find this approach lacking). I also brewed a batch of EM-FPE with aloe that smells incredible, I can't wait to give it a go.


Likes
5
Share


@NoProbation4Weed
Follow
Light hitting with around 850 PPFD
The stinkyness of this lady is insane! one of the loudest plants ever grown.
She takes her time but I am fine with that.
Overwatered 1 time this week but she took it like a champ.
Likes
13
Share


@Phaleg
Follow
Another good week of growth has passed, +20cm (+8 inches) and counting
I noticed that the 3 plants react different to the darkness at night, one of the 2 tallest is the only one to bend the leaves downwards during the night, while the others keep leaves straight.
Plant 1 = 88cm (34")
Plant 2 = 86cm (34")
Plant 3 = 66cm (26")
Likes
11
Share


@Sup3rNov4
Follow
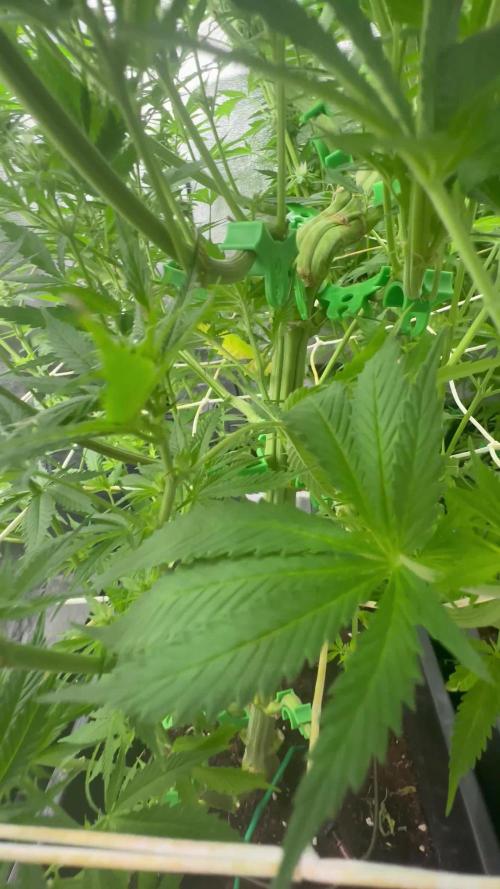
Slow and steady wins the race Juan has slowed right down
Finally the leaves are starting to turn, this is the latest in flower the leaves have lasted me. Shame she isn’t fattening up


Likes
14
Share


@eldruida_lamota
Follow
Que pasa familia, vamos con la cosecha de estas Gorilla Zkittlez Auto de FastBuds.
Por dónde empezar, es una autofloreciente que es normalita de cultivar, tiene un periodo corto de crecimiento y de floración igual no es largo, o igual tendría que haberla dejado alguna semana más no entiendo bien.
En cuanto a la alimentación , pues la aplique una vez por semana y a sido suficiente, se a comportado bien en interior, la flor pues no es muy prieta porque no deja de ser una autofloreciente, pero es una flor que va repleta de tricomas.
El periodo de luz pues de principio a fin a 18 horas, fue suficiente para completar el ciclo de vida como esperaba.
Agrobeta:
https://www.agrobeta.com/agrobetatiendaonline/36-abonos-canamo
Hasta aquí todo, Buenos humos 💨💨💨