Likes
21
Share
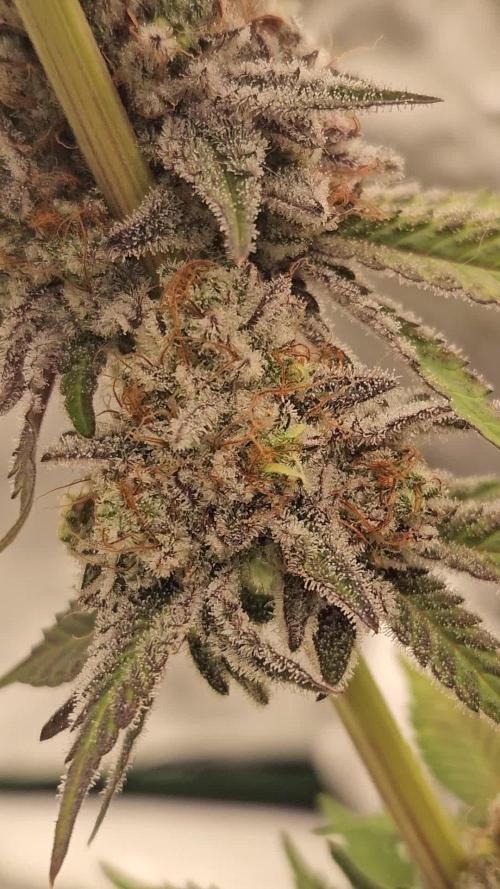
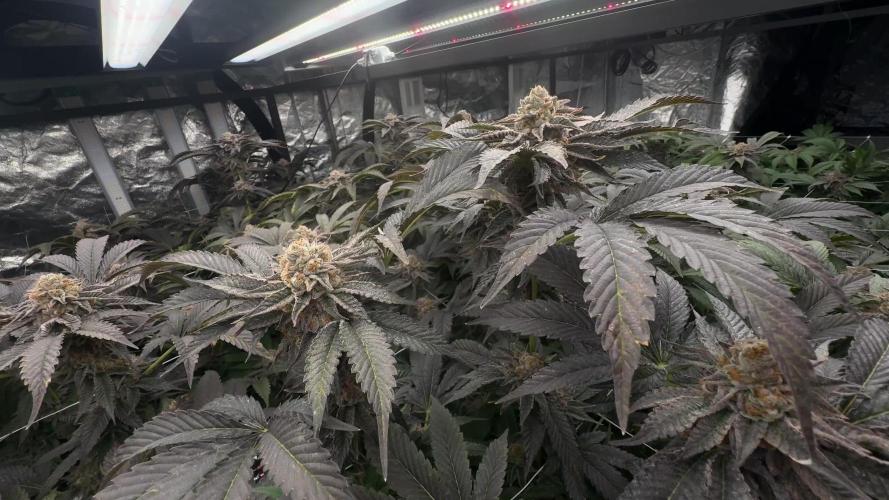
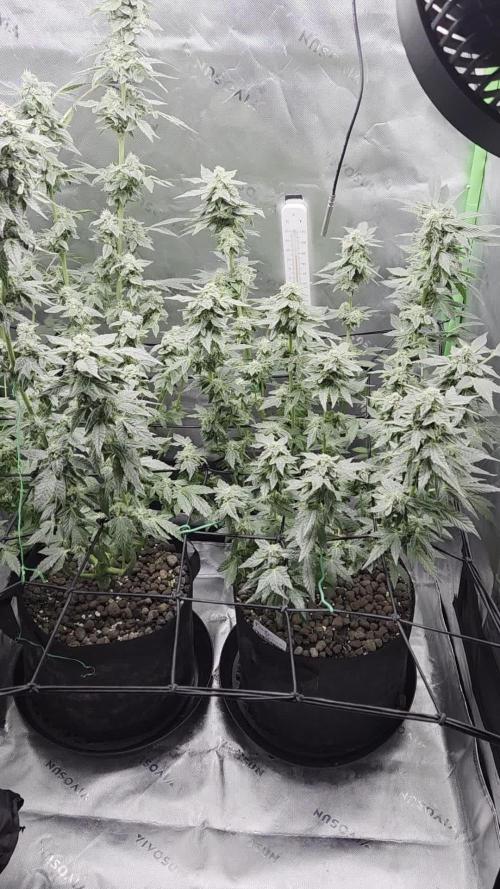
The buds are really starting to stack and bulk up, and man… the frost is coming in nicely. Some of those tops are getting properly coated, and the smell hits you the second you open the tent. You can clearly see the contrast between the plants — the NLs are staying nice and dark green with heavy frost, while the Critical Mass fades out into those limey/yellow tones. Not perfect, but at this stage I’m letting them ride. The flowers themselves are developing well, and that’s what counts. Structure-wise, I’m pretty happy. The canopy is fairly even, multiple solid tops across the board, and everything is getting good light exposure. Stats so far: 💧 Watering: Every third day 🌡️ Temp: 26–28°C 💦 Humidity: 60% RH 📈 VPD: ~1.18 kPa 💡 Light: ~700 PPFD
Likes
15
Share
They have started to stop their stretch and started to work on the flowers! You can already see trichromes starting to show some cover! You can smell the terpenes getting stronger by the day! It’s another level of excitement from here! Stay tuned.
Likes
8
Share
@RakonGrow
Follow
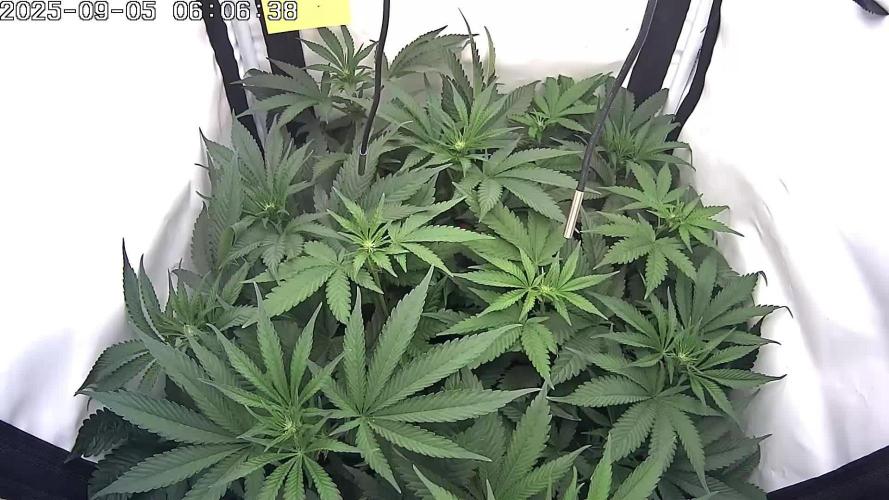
+ Day 14: 2.5 Liter Water and Rhizotonic 2ml/L , Final PH 6.8 . Air : 75% at 26°C . She looks really small , really lol . Day 13: next full 3 finger leaves Day 12: ongoing 3 finger leaves Day 10: good progress !!! Day 9: growing Day 8: growing +
Likes
9
Share
This smoke absolutely stunned me first this was a clone sent to me from California to Virginia in the mail in the middle of winter didn't think it was gna make it but she prevailed and turned out to be so gassy and funky with a zing and it jus lays you down but puts you in a good mood too not a groggy couch lock but a good couch lock lol tastes like candy on the exhale nugs are super dense and the cure and dry came out perfect she was definitely a box
Likes
3
Share
@SWITCH420
Follow
Hi folks, I'm coming here to start the process of ending this grow journal. I harvested about three months ago and the weed is definitely cured. Photos are about to come — I'm doing a real studio photo shoot for those buds, they deserve it! While waiting for the shots, I made some pretty damn dank hash temple balls using the iced water extraction method (solvent-free) with my little washing machine. It's a mix of the 8 strains I grew here — never ideal to mix different kinds of resin... but man, this is some serious dedicated work, so I'm making myself happy with that 14g shiny temple ball in the end 😉 Here are a few details about my process for you guys (and don't forget — you can do it with fresh material! Fresh frozen is always tastier. Also, the drying process is much more efficient and faster with a freeze dryer, but... you need the budget for that. I don't, so I go with the air drying method — check it out below): 1. Get your dry trim, then cure it properly for at least a month (I did 3 months). Smell it — mmh, sweet, dried to perfection. ✅ 2. Freeze it, delicately wrapped in a freezer bag. 3. Let a large amount of tap water sit for at least 24h to remove chemicals like chlorine, then use it to make plenty of ice cubes — don't be shy, especially if you're not working in a cool environment. 4. Prep your washing machine: add trim between two layers of ice, fill up with clean water (as much as you can, large vortex is better than a smaller one), then make it seat for 30 min (45 min for thicker buds) the time that the dried green material gets wet again. 5. Prep your filtering tools: catch bag, different mesh bags, spoon, etc. 6. Wash as many times as you can before green contaminants appear, as these lower the quality of your hash — don't hesitate to go up to 8 to 12 washes if the resin still looks clean! Important: each wash has its own specific duration, and they get progressively longer as you advance through the process. Frenchy Cannoli (a true hash legend) provides a detailed timetable for this — from as little as 30 seconds to 1 minute for the first wash, all the way up to around 25 minutes by wash 8. Make sure to follow that schedule rather than using the same duration for every run or running it too long the first wash !! It could breaks to quickly your precious material before you collect all the trich's and the quality would be lower in the end. 7. Collect the wet resin in the mesh bags with a frozen metal spoon, make patties with the resin, and let them sit over some towels in order to drain as much water as possible (place a tissue made for hash collecting over the towel). 8. When the patties are a little dry to the touch, wrap them as they are in the tissue and place them in the freezer for 48h or more. 9. With an iron strainer, microplane your patties over the biggest flat surface you can get! It's important that your micro pieces of hash dry widely and don't get too compacted. Any failure in the air drying process will nucleate rot, ruining your hash in the end and making it a poor product — eventually something to throw away. Sad when you think about all the phases of the process to get to this point! 10. So, in order to air dry properly, you must — it's not optional — lower the RH of your dry room to 35% or slightly below, never above and let it dry as long as needed until the material feels like dry sand. For myself, I found 10 to 15 days is ideal. The room must be very lightly ventilated (not directly on your resin!) and in complete darkness — the goal is to preserve all those delicious terpenes! Ideally, temps around 60°F or 16°C 11. Now that it's dry, collect your resin with a large thin spatula! Make a little mound between two layers of PaperHash, boil some water, and fill up a wine bottle with it! ⚠️ From this point on, to avoid exposing your carefully dried resin to a more humid environment — which could ruin all your hard work — everything must happen in the same drying room. Keep working at 35% RH until your temple ball is tightly and airtight wrapped in PaperHash. (And don't forget to drink water — it's dry in there! 💧) 12. Start to slowly press your resin. Magical moment. Finally.... 13. Press 3 times for 10 to 15 minutes in order to really decarb your hash — because that's what it's all about! Between each press, try as best you can to shape a patty... until the final press, when you'll be able to form that magical shiny temple ball (it only shines with gloves on, guys 😄) 14. You are now allowed to try it — for quality control purposes only, of course! 15. Because you want to age your hash for the sweetest 5-star smoking experience: wrap your temple ball in a large piece of PaperHash — if you can get that brand it's ideal, or another kind (check https://thepressclub.co) as long as it's organic! 16. Place the wrapped temple ball in a glass jar and store it in a dark, cool place. 17. Wait a minimum of 3 months before opening it. 18. Open, smell, touch — you'll be amazed. Roll it up with some weed or tobacco or both (I do both) / Or get a Hooka... you are smoking some true primo aged hash made by yourself! Taste the difference and realize all the path from choosing the seeds online until this first amazing puff ... 🙏 I want to credit my inspiration for making this kind of hash to the great Frenchy Cannoli, who has shared all his knowledge through amazingly rich tutorial content that you can find online with a bit of searching. 😉 Peace Frenchy 🕊️☮️
Likes
49
Share
5/24 Woke up on payday to find that my father is in the hospital. My house was robbed a few days before so I guess the hits keep coming. The plants are doing good though. I'm glad I kept them in as we had a frost last night. I moved my cage yesterday onto the asphalt and put the big pallet in. I just need to sanitize the others before they go in the cage. I'm being super cautious. I think tomorrow will be the day I make the switch to the garage while they fill out these 3's.OK. 5/25 Plants were all moved to the garage with the door open for indirect light. It's 54 degrees. At night I'll pull them back in and give them a few more hours under the hps which will also help with heat. Knocked a stem sideways but it'll pop back. Feels good to get things moving. HST seems to being going good. UPDATE: Went back over at one and noticed that the plant I hit with a wire (or something I didn't see what happened) was almost sideways and really loose. I had tied it to a clip with flagging. That didn't work. I asked a friend and I ended up pinching off the first true leaves then mounded happy drug up around it to keep it upright. It LOOKS much happier. Of course that shit happens to your biggest healthiest plants. Oh well all the 10th planet are doing phenomenal. Can't wait to move these girls to there final homes. Plants went under lights at seven. I'm acclimenting them to the right light schedule. I don't want to jump from 18/6 to 15 hours. They did really good in the cold Temps and wind. The big one I had to fix looks like it's doing great. Once they are hardened and fill these pots they go in their final home. 5/26 Plants did great being in direct sunlight for a few hours and staying in the garage at night. They look super healthy. I'm planning on watering tomorrow. Wondering if I should start to add some silica to strengthen the stalks. Also wondering if I should add more soil to some of the pots like I did to the other one as the stretched a little. This is something I may do tomorrow before I water. Went back over to switch the lights on and pull the plants back and lock up at 7:30. Forgot my phone of course and these girls were looking amazing. I have to water tomorrow. I coukd add more soul to some of the pots but I'm reluctant due to stem rot. They'll get buried much deeper in there final homes. Don't want to mount up soil and then water and promote rot. Anyway plants are adapting amazing. Dialing the light closer to normal here. This is a great transition place for them to he. I've noticed a few wrinkled leaves but thats to be expected. Oh, I got my free pure Michigan seeds from premium cultivars!!! 5/27 WATERED EVERYTHING TODAY WITH HALF A Powerade BOTTLE APPROX. 16OZ. Plants are in direct light in the mornings and I haven't seem any burning yet. I noticed a small spot on one of the first true leaves but I think it's just a bite from an insect. Everything is green as hell. I'm wondering if I should add fresh soil to the pots but I didn't want to do it on a watering day. Plus the plants will be going in there final homes shortly. Very happy with progress this far. UPDATE Went over at 1230 and everything looked great. I sanitized the cage AND the pallets. Also bought 3 more 30 gallon grow bags. Once they go in there they will explode! I can't wait. I'm considering ordering netting for moths. Depending on price i might get some. If not I'll keep using the BT. UPDATE: Went and checked around 430. Temps were in the 70's and they had a few hours of direct sun. No burns evident as of yet. Pallets fit in the cage like puzzle pieces. Now I need to sanitize my grade stakes bamboo and trellis and setthat stuff up. I'm going to screw the grade stakes to the pallets and attach garden rods and bamboo with zip ties and I'll have a horizontal trellis. Once branches are a little bigger I'll begin LST. The plants that I topped AND the ones I FIMed are doing great. The FIMed ones with at least three colas some have four. Hoping the plants took that time growing roots. 5/28 Plants are all standing up tall. They loved that water. Haven't noticed any burns and they get direct sunlight in the mornings. Soon I can put them in the cage and start setting up my trellis and supports. Fan leaves on soms are bigger than my hands. These girls are probably the healthiest plants I've grown. I usually do clones and end up starting with problems. This is great starting with seeds and have no problems. UPDATE: Went back around two because Temps had reached 92f and rh was only 20%. Nights cool off greatly so it's a dramatic temperature shift. Plants looked great. All standing up looking great. Put plants in at 7:30 ,and continue the light until 9 and have it turn on at 4am. Then they are out by sunrise. Did notice some burning on one of my plants a large fan leaf. What can I say? It was extremely hot. I'm surprised they did as well as they did. 5/29 Everything standing up perfectly looking great. Plantscget an extra hour of sun at night and morning and are on 19/7 with the extra added light. Trying to acclimate and finish hardening off this week. I'd love to be able to at least put them in full sunlight for the day. I think they'd be fine. I'm really impressed with how they are growing. Second guessing not HST all of them. However I think I might light dep a couple. We'll see. I've still got work to do. UPDATE: put the plants in around 7. One of my lights shit the bed. They are just 150 watt hps but I was using them to finish hardening off my plants and slowly adjust them to the natural light. The on/off switch fell off. I'm sure my cousin can fix it bit the one is pe9bably fine as I'm only going fir a few more days. The thing about having this many plants to choose from is that I can pheno hunt and put the VERY best into the final containers and if I decide too I could light dep. 5/30 WATERED EVERYTHING TODAY WITH HALF A POWERADE BOTTLE. My cousin can probably fix the other light but I don't think it will matter. Within a week I'm going to have these girls in their final homes. I just need to sanitize the trellis and posts and then screw them to the pallets. I'll have this all taken care of before the plants go in the hole. I did notice another burn on a leaf. Def glad I'm taking the time to do this right. UPDATE: I put the girls in the barn around 7:30 and flicked the one 150 watt HPS light I have working on. I added a half hour more of darkness to try to acclimate them quicker. Light stays on until 9 qnd came back on at four but i changed it to 4:30. I'm usually there by 5. I'm looking through my surveillance cameras and it doesn't even look like the light is on. Of course its super bright out but I should be able to see from that image. Luckily the building the go in has massive windows up top to let light in and windows on every side so the light is probably unnecessary. However due to my bullshit luck last year I'm being as cautious as I can. Tomorrow is supposed to be extremely hot again as is the next day. I think I'll leave the door down a little, open the other and move the plants back so they have no direct sunlight and adding a fan. That way they can continue to recover. They seem bigger everything I see them. 5/31 Another hot day. I figure a few more days (under a week) and I can transplant these girls! Supposed to be 85 today and 90 tomm. It was 45 when I got here. These girls are doing well handling this bipolar weather. UPDATE: IM AN IDIOT AND THIS IS AN 8 DAY WEEK lol. Maybe I'll do a six day week next time to get back on track. Went back over at two and noticed some burns. Sent a video to a friend andcwith the sun we've had and the weather in the 90's he agreed the damage was minimal. However there was someone there working who opened more doors which let a lot more light in. It's supposed to be in the 90s tomorrow too. I may leave the doors shut. There are windows on everyside and an enormous cone at the top so the get plenty of sun. He also grows and I've been careful to not let anyone that grows go around my plants. I'm going to have to talk with family about this. To be honest I'm kinda pissed. Next watering I may add some kelp me kelp you and start a small nute regimen. UPDATE Went back over at seven after having a panic attack. Half stoned half asleep. Stupidly I was looking at a plant and thought "shit" the FIM must not have took but in reality I was just stoned and tired so I topped a plant that had already been fimmed so we'll see how that goes. Purple punch is so far behind everything else it's not even funny. There might be one that's doing pretty well and that of course is the one with no HST. Branches on the other strains are thick and ready for LST though. What I think I'll do is transplant the 10th planets and the blueberry cheese ones that are ready and hold off on the rest for a while. Hopfully I'll be able to show plants in final homes next week.
Likes
6
Share
@Alvareas
Follow
Woche 4 / Vegi Woche 3 Der Grow: Am Anfang der Woche wurde das erste Mal getoppt. Ziel des toppen war es, 6 neue Haupttriebe zu haben. Da die Triebe der ersten Nodien viel kleiner waren, als die der zweiten, habe ich solange gewartet, bis die Triebe der vierten Nodien, so große Blätter hatten, dass sie nachdem toppen, gleich mit Photosynthese beginnen können. Dann wurde über den vierten Nodien getoppt und die Triebe, samt Blätter, der ersten Nodien entfernt. Die Pflanze hat das toppen gut verkraftet. Ich mache von jeder Woche Zeitrafferaufnahmen und man konnte sehen, dass alle Triebe gleich nach dem toppen weitergewachsen sind. Den Rest der Woche, habe ich die Pflanze, einfach wachsen lassen. Die Triebe haben sich gut entwickelt und die Pflanze ist wie erwartet kompakt geblieben und extrem buschig geworden. Vermutlich werde ich in der nächsten Woche, die 6 Haupttriebe erneut toppen, um auf 12 Haupttriebe zukommen. Dazu aber im nächsten Update mehr. Im letzten Update hatte ich geschrieben, dass ich die Bodenfeuchtigkeit, versuche bei 55% zuhalten. Dies scheint jedoch zu viel zu sein. Nachdem ich die 55% einige Zeit gehalten habe, wurde der Topf, in der Drainageschicht, sehr nass. Ich hatte zwar noch keinen Drain, aber das der Topf in dem Bereich sehr nass war, hat mir gezeigt das sich dort Wasser sammelt. Aber eigentlich sollte der Bereich trocken sein. Deshalb habe ich die Bodenfeuchtigkeit langsam gesenkt und peile jetzt die 50% an. Man konnte auch sehen, dass sich die Blätter im Verlauf des Tages nicht mehr komplett aufgestellt haben. Sondern ehr leicht nach unten hingen. Was für eine beginnende Überwässerung spricht. Mittlerweile ist der Bereich der Drainageschicht, wieder komplett trocken. Den VPD habe ich im laufe der Woche langsam erhöht, bis auf 1,4kpa am Ende der Woche am Tag und auf 1kpa in der Nacht. Diese Werte werde ich jetzt so weiter fahren, bis zur Umstellung auf die Blüte. Der DLI wurde am Anfang der Woche auf 30 erhöht. Die Parameter in Woche 4: Durchschnittliche Tagestemperatur: 27 Grad Durchschnittliche Nachttemperatur: 22 Grad Durchschnittliche Luftfeuchtigkeit Tag: 63% Durchschnittliche Luftfeuchtigkeit Nacht: 61% Durchschnittliche Bodenfeuchtigkeit: 53% LED Leistung: 30% = 110 Watt Beleuchtungsdauer: 18 Stunden DLI: 30 Controller Einstellung Tag: Advanced AI VPD 1,4 Controller Einstellung Nacht: Advanced AI VPD 1,0 Durchschnittlicher VPD Tag: 1,3 Durchschnittlicher VPD Nacht: 1,0 Umluft: Stufe 1 oszillierend
Likes
3
Share
I’ve almost reached the end of this journey. My caution has kept me one step behind, but it has paid off in terms of scent and aroma. I think the harvest window will open a bit later — probably at the end of next week. For now, I’m not seeing any amber trichomes. This first experience with RQS F1 genetics has been very positive so far. The plants have always been strong, vigorous, and full of life. Everything went smoothly. They stayed compact in size but were productive and very consistent in expressing their phenotype. Milky Way has also proven to be an excellent variety — it has developed trichomes that look like the bristles of a brush.
Processing
Likes
15
Share
@Deli_Weed
Follow
Ya casi por finalizar 😃 estoy muy emocionado por el resultado final, todo pinta bien 👌🏻💯 se puede mejorar aún más pero estoy conforme con el resultado de esta planta 🌱 Esta semana fui bajando la ec poco a poco hasta llegar a pura agua, la semana que viene será de puro flush 🚿 ya para cosechar 🤩
Likes
10
Share
@L_Choppa
Follow
I had some Explosive growth this week at least to me it seams like it haven’t seen my girls in a week I must say I’m Impressed this crazy how I’m better with clones then Germinating seeds anyway that’s it tell next week with these girls oh yeah regular water for next feed for my record
Likes
38
Share
Day 106 12/25/2021 being of a new week and this will be more than likely the last week this lady gets any nutrients thinking Wednesday. After that will start flush with collected rain water. After checking trichomes they were about 85% cloudy about 10% clear and 5% amber which is right where she should be since the end is coming fast. Day 110 12/29/2021- Started flush today and will continue to just feed rain water until next Wednesday. Will cut her down next Friday 01/07/2022.
Processing
Likes
15
Share
The girls are starting to fill out pretty nice. We are at 14 days since switching the lights to 12/12. The grandaddy black seems to be one of the slower ones to transition to flower but she is showing preflowers and starting to stretch. Gave them the weekly flush and fresh nutrients. This will be the last week of maxigro. I will cut it out and start liquid Koolbloom next week.
Processing
Likes
9
Share
End of week 3. Looking good. She is covered in bud sites. Some decent development so far. She hasn't stretched as much as I'd have liked but her colas look to start pretty low. Time well tell how much she will produce. Can't wait to watch her bulk up!
Likes
11
Share
@Chubbs
Follow
420Fastbuds FBT2309/Week 3 What up grow fam. Weekly update for these stunning girls. Up to this point they've been growing picture perfect . Not really doing anything special besides still feeding nutes every other watering 500ml. I'll double the feed this week taking it to 1000ml/1 liter per every other day. Not seeing any burn signs from introducing nutes so will keep that the same strength. All in all Happy Growing
Likes
15
Share
@YOZYY
Follow
Great week just loving to see them grow everyday.
Likes
26
Share
Hello Diary. Two new diaries. Hulkberry and Green Gelato, both Automatic. Many thanks to RQS for these strains, and I am very happy to be starting with the new storys. WHY HULKBERRY AUTOMATIC? HulkBerry Automatic is Royal Queen Seeds’ revved-up version of Bruce Banner #3 Auto. She’s one of the most potent autos you can get your hands on, easily outperforming many photoperiod strains in this area. Her compact and frosty flowers provide a THC content of up to 21%, enough to satisfy the most experienced of smokers. Expect a wave of euphoria to crash over you after a vape hit or bong bowl of HulkBerry Automatic. The strain is motivating, increases alertness, and gets the creative juices flowing. She makes a superb smoke when listening to music and watching films, or when indulging in your own creative endeavours. Overall, she’s an excellent strain for daytime use. LET'S START FIRST WITH THE FARM SET-UP: Box - Secret Jardin DS120W 120x60x178 Lights - MIGRO 200+ Ventilation - Blauberg Turbo - E 100 Fan - Oscillating Koala Fan Humidifier - Beurer LB 45 Soil - BIOBIZZ Light - Mix Pot - 11L Fabric Pot from RQS Seed - Royal Queen Seed Nutrition - BioBizz and RQS Organic nutrition I apologize in advance for the detailed documentation, or the large number of photos, but I enjoy it, and I think it will help others around tracking their plants. LET THE DIARY START OFFICIALLY: 10/06/2020. planting. I have prepared everything I need for planting. The 11lit fabric pot I got from RQS, also Organic Boost Nutrition and Mycorrhizza from RQS, Soil is Light-Mix from BioBizz and of course the seeds of the new strain Hulkberry Automatic. After adding 50g of pellets from Organic Nutrition and 5g of Mycorrhizze, I mixed everything well in the pot. After that I watered well and soaked the soil, I dug a hole with a wooden stick about 2-3 cm, I first put 1g of mycorrhize and then put the seeds inside. I lightly covered the hole with earth and put the pots in their new home. I planted two Hulkberries and one Green Gelato Automatic. The temperature was about 25 degrees and the humidity about 65%. 14/06/2020. She sprouted. After 4 days, Hulkberries came out. In the meantime, I sprayed the surface of the earth a little twice. The temperature is still around 26 degrees, thanks to the summer and the high temperature that enters the apartment anyway. I regulate the humidity with a humidifier, I maintain it around 60% -65%. 15/06/2020. Their first photo shoot, I also watered their with about 2 liters of water, which I only regulated p.H. at 6.3 with Plagron, Lemon Kick. 19/06/2020. Day 1. Hulkberries is officially one day old. On that occasion I took another photo shoot to celebrate this big day :). 24/06/2020. First Feeding First feeding. Their got a whole meal from BioBizz, Root-Juice, Bio-Heaven and Acti-Vera, p.H of water I regulated with Lemon Kick from Plagron. 25/06/2020. Day 7. End of the first week. For now, everything is great. It is developing nicely, its conditions are almost perfect. Hulkberry #1 - Day 7. - 9 cm Hulkberry #2 - Day 7. - 10 cm I think that’s all for this week, I’m happy that it’s starting all over again, following its development and looking forward to what’s to come. See you next week.
Likes
Comments
Share
Remove a lot of the lower branches this week . Everything looking pretty good at the moment