Likes
Comments
Share


@SonGoku848
Follow
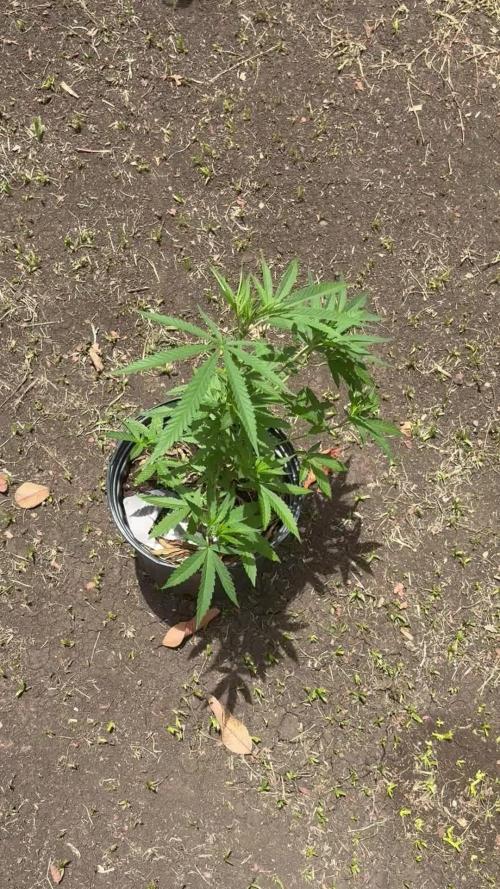
Germinati quasi tutti e 9 ne mancano 2 che sembra proprio stiano uscendo. Travasati nei vasi da 2 litri e dato 200 ml a vaso a ph 6,5

Likes
15
Share


@DudeGrowsWeed
Follow
October 28, 2021
Doing my weekly diary updates a couple days early this week. This weekend I'm doing some work on the basement to finally finish the last of the construction projects for the Dude Cave!!! Once finished, I have a new 2x3 tent and a Viparspectra XS2000 (240w LED) that will be set up next week. Then I'll run the 2x3 for veg/autos and the 2x4 for photos.
As for the plants... The Quick Critical is cranking! That girl is on a growing spree and I have no intention of doing anything to slow her down. The Critical Sour is a week behind, but looking much better than the sister seed that never really did anything after breaking the soil. I'd like to see the Critical Sour hit a growth spurt like the Quick Critical in the upcoming week 🙏 The CBD Medi Kush finally started pushing out a node and some serrated leaves. Its really funky looking right now, almost like its revegging. It will be interesting to see if she hits a growth spurt this week too. With the Dr Bruce Banner I think the seeds are just too old, neither of two seeds popped. I did decide to try to plant one more seed, but a different 1:1 strain. I planted a CBD Lemon Aid, also from Original Sensible Seeds. Hopefully this one will pop, but these seeds are the same age as the Dr B Banner seeds and have been stored the same way (dark space, room temperature, silica humidity pack in the box). If the CBD Lemon Aid doesn't pop, I'm just going to pull out that pot and see what the other 3 do.
Cya next week!


Likes
5
Share


@Ganja_Victoria_Aus
Follow
Flushing in progress.
Skittz Auto Breed by Ganja Farmer Seeds—incredible, highly sedative candy smoke. Keep you pain-free and running. Second, grow in coco with Bio Line Greenhouse Feeding under Vipar Spectra P600 95w at 50% of power due to the tight space 🤷 she is happy.
Be kind


Likes
11
Share


@Colonel420
Follow
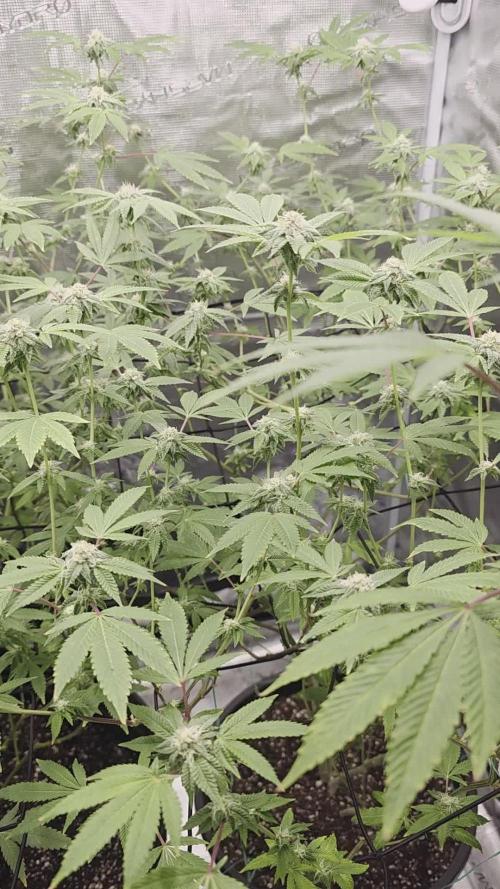
Week 4 - This week, more plants are fertilized to 650 ppm.A survey found that one tree had abnormal leaves.

Likes
2
Share

@Ninjabuds
Follow
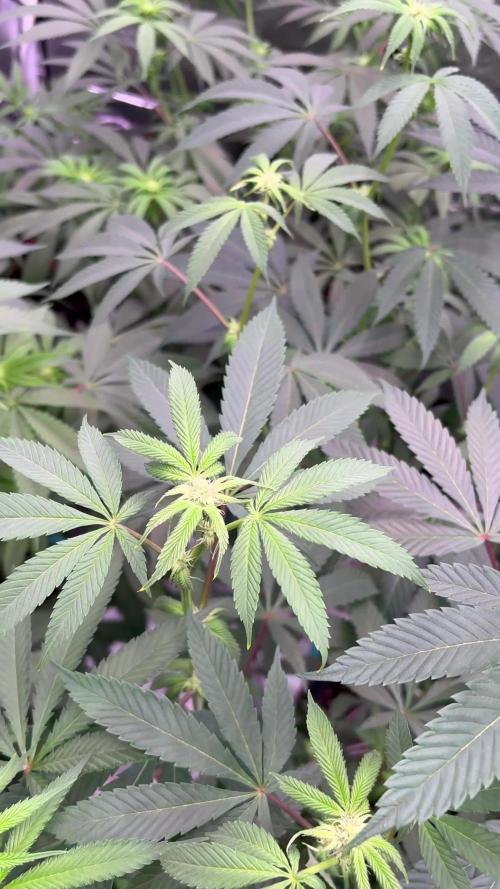
The plants are looking really healthy. I’m still getting used to my new lights. I think I didn’t push enough light in week 2 of flower I’m ramping up the light intensity now. I had to whip out my par meter I was keeping the light to far off the plants. This light has to be closer to the plants than my mini sun. I’m lurking this light a lot I just need to get used to it
Likes
80
Share


@OrganicNature420
Follow
• New release Cali Crasher by Doctor's Choice
• Kali Mist x Ak47 x Colombian Gold
• Satvia (mostly)
• THC high
• Yield 400 - 600gs indoors
Nutrients • GreenBuzzNutrients
(DISCOUNT CODE • GD42025) %25
I use the whole product range and this stuff is a game changer. I've not had one bad grow with this company and it hasn't let me down once. Terps and taste are through the roof. No need for run off in coco only during flush week. Hands down the best nutrients on the market
YOU GORGEOUS GROWERS CAN NOW GET A WHOPPING %25 OFF ALL PRODUCTS USING THE NEW CODE ABOVE
LIGHT/TENT • Mars Hydro FC-E6500 5x5 tent
Left them in the dark for 2days in their pots and now it's been about 5days hanging. At least another week and temps and humidity are perfect. Great Strain and now I'm looking forward to a smoke. Smoke review in a month 💚🌱🏆

Likes
10
Share


@yaron
Follow
Hi guys!its getting kind of boring but again a rainy day.They need sunlight bad,the coming days the sun will shine so we will see what happens.
Cheers!
Finally we have sunshine!The smallest one,a gg,just will not grow i dont know whats wrong with her and she is already in flower.
The rest is doing fine i think.
Cheers!
Likes
26
Share


@Highgrade_Harvests
Follow
Thank you everyone for following this grow. Thanks again to Seedsman for allowing me to be a part of the #Seedsman420GrowOff! Always amazing genetics and their customer service is top notch! If you want to grow some killer weed, hit seedsman up! Follow my channel for my highgrade Harvests! @

Likes
14
Share


@TPBzh
Follow
I still had some spots on leaves, but look like the calmag is doing the job. New leaves look better for now. It smell stronger, and plants are drinking a bit more now. Not sure, but i think no more than 3 weeks b4 harvesting HulkBerry 1 and the cookies gelato familly. Royal Bluematic 1 seems to take more time, but is growing well.
HulkBerry 2 and mostly Royal Bluematic 2 are really late and weak compared to the others.

Likes
64
Share


@Prof_Weed
Follow
Gestern wurde ein letztes Mal entlaubt, ich denke so in 10 Tagen fange ich dann mit Terra Aquatica Flash Clean und Final Part an (dauert dann auch nochmal insgesamt 12 Tage die Prozedur).
Die Buds duften sehr gut und die Pflanze ist mehr als gesund.
Sie wird jeden Tag fetter und fetter.
Also 3 Wochen dann wandert sie in den Cannatrol Cool Cure.
Ich denke so 100 g dürften es trocken sein, wir werden sehen.
Likes
10
Share

@Fyno_TH
Follow
✂️ Harvest — From Chop to Bubble Hash (Final Review) 🌿❄️
Harvest completed with dense, resin-heavy buds and fully swollen calyxes. Trichomes were mostly cloudy with a touch of amber, and the aroma at chop was loud — sweet, citrusy, and greasy, filling the room instantly 🍊🔥
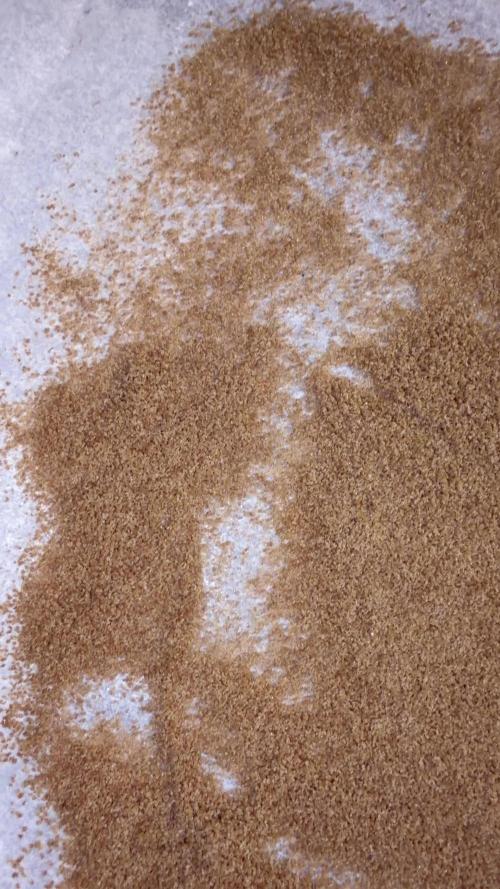
After harvest, the plant was air-dried for ~5 days at 16–19 °C, keeping conditions cool to preserve terpenes and trichome heads. Instead of a full flower cure, I chose to process the harvest into Bubble Hash, focusing on resin quality and terpene retention ❄️🌿
The wash went very clean — trichome heads separated well, showing strong resin production despite earlier challenges during the run. Smell stayed fresh and powerful throughout the process, confirming the effectiveness of the environment control and flush.
This grow was a big learning experience. From training in veg, managing powdery mildew in early flower, switching to RO water, and finishing with Flawless Finish, everything contributed to a clean and satisfying result. Ending with one plant proved that quality and consistency matter more than numbers 👑
Overall, very happy with the outcome — solid resin, loud terps, and valuable lessons gained for the next run. Looking forward to applying everything learned into the next diary 🌿🔥

Likes
88
Share


@NAS_Garden
Follow
🌼 Week 1: Flower Power Unleashed! 🙌
The excitement is palpable—it's the first week of Flower! 🌸 Our girls are ready to dazzle as it steps into this vibrant phase.
Remarkable Stretch:
Hold on tight, because the stretch is in full swing! 🚀 Our green companions are reaching for the skies, displaying a wild surge of growth. Brace yourself, as the promise of doubling in size during Flower unveils a spectacle in the making.
Strategic Scrogging:
To tame the exuberant growth, a well-timed second Scrog at day 7 is in play, orchestrating the dance of foliage. It's a symphony of green, ensuring that our Lemon Orange beauties grow with grace and control.
Nutrient Management:
The week kicks off with a refreshing flush, bidding farewell to the old nutrients and welcoming a new chapter. From the second day onward, a mindful approach unfolds, with 80% of the recommended nutrients by Terra Aquatica. It's a delicate balance, nurturing the plants with the perfect blend for optimal growth.


Likes
15
Share


@MrJones
Follow
MrJones Ztrawberriez Auto
🍓╰⊰🍓´🍓⊱╮🍓╰⊰🍓´🍓⊱╮🍓╰⊰🍓´🍓⊱╮🍓╰⊰🍓´🍓⊱╮🍓
💧 Feeding - Using Gaia Green Grow / Bloom and Compost Teas
🍃Training / LST-Defoliation-Topping TBA
🕷️ IPM - Will be using Green Cleaner" 1 OZ per Gallon, and CannControl from Mammoth alternating between products each month for Integrated Pest
🍓╰⊰🍓´🍓⊱╮🍓╰⊰🍓´🍓⊱╮🍓╰⊰🍓´🍓⊱╮🍓╰⊰🍓´🍓⊱╮🍓
▶️Saturday 11.18.23 - These girls are just blowing up, always like the flower stretch of FastBuds strains, the smells are nice and they are starting to drink more, the closet is filling up, did another PPM treatment with CanControl.
🍓´🍓⊱╮🍓╰⊰🍓´🍓⊱╮🍓╰⊰🍓´🍓⊱╮🍓╰⊰🍓´🍓⊱╮🍓
▶️Bud Description Ztrawberriez Auto produces long and fat buds with a beautiful light green shade with oftentimes purplish hues and a thick layer of resin that starts at the top of the flowers and continues all the way to the tip of the sugar leaves. It’s the typical bud structure you would expect from hybrid varieties topped with an explosion of fruity terps that’ll hit you in the face with a blend of creamy, fruity, and sweet aromas as soon as you break the buds open. Definitely a must for terp heads and extractors looking for exaggerated flavors and aromas
🍓╰⊰🍓´🍓⊱╮🍓╰⊰🍓´🍓⊱╮🍓╰⊰🍓´🍓⊱╮🍓╰⊰🍓´🍓⊱╮🍓
▶️SOIL MIX
40% ProMix HP
40% Coco Coir 70/30
15% Worm Castings
05% Malibu Compost
🍓╰⊰🍓´🍓⊱╮🍓╰⊰🍓´🍓⊱╮🍓╰⊰🍓´🍓⊱╮🍓╰⊰🍓´🍓⊱╮🍓
Likes
51
Share


@nonick123
Follow
Día 78 (06/01) CBD Auto 20:1 #1 - El amarilleo continua... esperando que haga efecto el SILICIUM FLASH 💥
OG Kush Auto - Empieza la ventana de cosecha: Reviso los tricomas y solo hay algunos nublados (el resto trasparentes), pero creo que acabará en una semana más como máximo!
Día 79 (07/01) CBD Auto 20:1 #1 - Parece que el amarilleo se frena un poco. ¿Será suficiente y formará unas buenas porras?
OG Kush Auto - Riego 750 ml. Está consumiendo mucha agua en este tramo final! 😍
Día 80 (08/01) CBD Auto 20:1 #1 - Está recuperando el verdor! El SILICIUM FLASH está haciendo efecto!
OG Kush Auto - La planta no para de beber y las ramas se doblan por el peso de los cogollos! 😍💥
Día 81 (09/01) CBD Auto 20:1 #1 - Los cogollos empiezan a coger mayor densidad. Según mis cálculos, le faltan 17 - 24 días
OG Kush Auto - La senescencia sigue avanzando pero los tricomas aun no están listos (50% nublados). Espero cosechar en el día 84 aproximadamente
Día 82 (10/01) Busy day
Día 83 (11/01) CBD Auto 20:1 #1 - El SILICIUM FLASH ha hecho efecto y empieza a retomarse el verdor en las hojas! Que maravilla!
OG Kush Auto - Los tricomas están mayoritariamente nublados y algo ámbar. Mañana la cosecha! 😁
Día 84 (12/01) CBD Auto 20:1 #1 - Los cogollos empiezan a apilarse y a engordar 😁
OG Kush Auto - Día de cosecha! 😍💥💨😁
FastBuds 15% DISCOUNT code "NONICK" 2fast4buds.com @fast_buds_official_ @fastbuds.official
💦 BioTabs 15% DISCOUNT code "GDBT420" biotabs.nl/en/shop/ @biotabs_official
🌱Substrate PRO-MIX HP BACILLUS + MYCORRHIZAE @promixmitch @promixgrowers_unfiltered
💡2 x Mars Hydro FC1500 EVO Led Grow Light (2024 NEW FC 1500-EVO Samsung LM301H 150W LED) - https://marshydro.eu/products/fc1500-evo-led-grow-lights/ - https://www.amazon.de/dp/B0CSSGN5D8?ref=myi_title_dp
Processing
Likes
43
Share


@GrowerGaz
Follow
Saturday 18th day 18 of 12/12
The jacks toe jam was looking a little hungry so, i gave it a pint of Bac PK booster and bloom stimulator. For the rest I will use biotabs pk compost tea and molasses, when the time is right. More tying down for the rest and some defoliation. I also added some nematodes on the 12th as I have a couple of little gnats buzzing about. Apart from that, I have just been carrying out daily checks for any buglife and any signs of male parts.

Likes
6
Share


@Mundito
Follow
Didn't post much I'm week 6 as not too much difference..
Was feeding by recommended dose as per nutrient bottle..
Switched to measuring by ppm mid week and has really made a difference.
Now starting week 7 and looking lovely with fattening buds and ripening trichomes..
Gonna maybe push her for week to 10 days n the flush..
The yield is looking quite promising..