


Likes
Comments
Share


@Sugahmama
Follow
Harvest week for Auto Mintz arrived around week 14-15, with the two plants hitting about 90 cm and sporting sticky buds. The air carried a sharp, minty scent, and the trichomes had turned mostly milky with a few amber flecks – time to cut. Watering stopped a couple of days before, and on harvest day, the buds were trimmed carefully, yielding a modest but satisfying 140 grams dry from both plants. They dried over a week in a dark, ventilated spot at 20-22°C and 45-50% humidity, keeping their fresh aroma. It was a straightforward process with a decent outcome for the effort.

Likes
22
Share


@NanoLeaf
Follow
End of Week 12 (Fifth week of flower)
The ladies are smelling reDANKulous and are so frosty and sticky I can't remove fan leaves without getting my hands sticky. Next level terpene profiles.
I did a final increase in CO2 to 1500ppm.
The main top-sites are taking shape.
I have been keeping a cooler average temperature - and also keeping the relative humidity lower.
Pest Report: None

Likes
10
Share


@Farmron
Follow
Weirdly enough her side branches have the fullest buds and most white pistils (gonna post better pictures soon)


Likes
27
Share


@RDWCGrowing
Follow
1/20/2023- So much to do pre grow and over the next 16 days, absolute first order of business is that I have to take down my current Grow---TIMBER-- Then I have a list of things I have to get done in order to be ready to start this grow 1 Feb.
With that said
T - 2 days until start 48 hour Flush
T - 2 days until Start 48 hours of Light
T - 4 days until TIMBER!!!
Items that need to be done before 1 Feb 2023
1. I need to clean the tent out
2. I need to clean the equipment- Proper Sanitization between grows in Hydro is a must!!!
3. I need to get the hole in the ceiling above my tent repaired- For my last grow I had a deep sink installed in my grow room, to make Hydroponics a little bit easier and have a water source in the same room. The seals on the pipes they were installing broke and leaked through the ceiling causing some damage all the way across my grow room, I was already weeks into my grow and couldn't risk them working above my tent and it would have been very awkward positon for them to be working in as well, so have to get this done quickly between chop and germination.
4. I have to install my new light- I was using a Vivosun 4000 and for this grow I am switching up to a Spider-farmer SF 7000.
1/20/23- For this upcoming grow I am working with M/F photo seeds so I ordered 4 Sex determination kits. I recieved my my 4 Sex determination testing kits from Rimrock Analytics today. I will be using these to test my plants at week 2 of Veg so that when/if I take clones I know I am taking them off females. As well as I don't want to accidently pollinate my tent during this grow I am looking for big beautiful buds not seeded buds. :-)
1/24/2023- Harvest of current grow- Started at 2:00pm and finshed wet trim and firt batch into the freeze dryer.
1/25/2023- Next batch into the freeze dryer and cleaning all my equipment for this Grow.
T-1 Day until the workers are supposed to be here to fix the hole in the Grow Room.
T-3 days until I instll my new Gorilla Grow Tent and my New Light Spider Farmer SE-7000 for this grow.
T-7 Days until Start of Germination
1/26/2023- Harvest is done ran through the Freeze dryer and dry tim completed.
1/27/2023- Grow Room repairs completed. Hole is gone Letting the paint dry before I install the new tent.
T-2 days until Install the New Gorilla Grow tent and the new Light
T-3 days until I put the hydro equipment in the new tent
T-5 days until Germination
1/29/2023- Day 0- Final Pre Germination activities
Germination Start T-3 days
The paint on the ceiling was dry and it was time to finish prepping for Germination. I got the following items knocked off my list.
New 4X4 Gorilla Grow Tent is up and ready
New Spider Farmer SE-7000 Light is installed- Thanks Moony Grows for the suggestion and for the Code that got me some money off and free shipping (Moonygrows)!! I turned the lights all the way up to max and set the timer to 18/6 0600-0000. I will keep an eye on the temperature and humidity without my plants and see how hot it gets with the new light.
I put my Hydro system back together and put in 40 gallons of water into it, time to monitor for leaks the next few days.
I Setup my cloning machine for Germination Days 3-11
1/30/2023
let me break down the situation, ROOM in the TENT.. Enough said.. No really I tried putting my exhaust system up in the new tent with my new light, The light is so big corner to corner that it really didn't give me enough room for the lights be be raised, with the exahust hanging the buckets my plants are Starting in are 2 and 1/2 feet off the ground, great for plenty of room for roots but not so great for upwards space for the plant to grow. In a 6' 11 tent with the exauhst in side and hanging that only gave me a little over 4 feet of grow room to play with. My last grow if you saw my diary, anyone could tell I was struggling to keep the buds off the lights. No good, Since space was such an issue I was running my carbon filter inside on the ground but It really needed to be up sucking the heat out not shooting the cool out. With that setup I was sucking air through the filter and pushing it out the tent at a bottom exhaust hole cold out. Wasn't doing me any good for my heat. I was hitting temps of up to 85 degrees. I bought a portable AC unit and have been running it in the grow room to try and keep temps below 85 and I have had to lower the power on my lights during grow also not ideal.. With that said a friend of mine MoonyGrows (Check out his diary) took the time to look at my issue send me a picture of my grow tent setup with detailed instructions on how to suck the air out from the top but putting my filter and fan on top of my tent so no room issue and I am sucking the air out from the top where the heat is instead of pushing the air out from the bottom where the cool is... THANK YOU MoonyGrows For taking the time to help me get this straightened out.. Now I have room and I have the exhausts working right and now my temps with everything at 100% are topping out at 80 this dropped the temp by 5 + degrees at 100% max.
T-2 days until Start of Germination
Prepped my seed tray with humidity dome
Prepped my Rapid Rooter plugs. I Used RO water, and I added a few drops of Hydrogen peroxide to Oxygenate the water. I then PH balanced between 5.7-6.0 the same that they will be getting in the Cloning Machine and when they get to thier final grow pod. I perfere the 5.8x range and I hit 5.84 for these rapid rooters. If you want to see a complete video on the process HowWeedGrow has an amzing video that shows step by step how to do it and explains it better than I ever could including how to plant the seeds. Which I will cover when I get to that step on Wed. https://www.howweedgrow.com/how-germinate-weed-seeds-cannabis-rapid-rooters/
1/31/2023
T-1 day until Germination Start
All set and ready have my Rapid Rooter plugs ready to go have my seeds out.. Have my seed tray warming up tonight. Tomorrow morning right into the Rapid Rooter then strait into the tray. I will spray the dome to start the humidity in there.
2/1/2023
Germination Day!!
Let the games begin!
0600am Put the seeds into the Root Riots. And then put the seeded Root Riots into their first home the Seed tray. I have them under the light 24/7. Sprayed the dome
7:30pm Sprayed the Dome to keep humidity going on the dome.
2/2/2023
Day 1 of Germination
Sprayed the Dome in the morning
Sprayed the Dome in the evening
2/3/2023
Day 2 of Germination
Roots are starting to come out the bottom of the root riot plugs and the heads are slowly popping out of Number 4 just below the surface.
Afternoon- Number 4 has popped up
Evening- Number 3 has popped up as well. Happy Dance!!
2/4/2023
Day 3 - Germination
Surprise Surprise Surprise- all 4 have now poked their heads up.. Happy day!! 100% Germination succeeded.
Now major milestone to track is how many are female and how many are male.
I will take look at the roots this afternoon/evening and see if they have enough root to go into the cloning machine for the next 7 days before they go into their Hydro Pods.
Day 3 - Germination - Evening..
Roots looked good and they were tall enough to make it into the cloning machine.
Now that they are all in the cloning machine I have switched the lighting to veg state 18 on 6 off.
2/5/2023
Day 4 - Germination - Morning
All the Ladies (fingers crossed) looking great stretching nicely and look nice and green, Photo synthesis underway....
UPDATE!! After a very interesting POD cast on FSTS by Dr. Bruce Bugsbee from Utah University, I have shifted my lighting to 24 hours on through seedling and then I am going to shift to 20 hours on the rest of Veg.
2/6/2023
Day 5 - Germination
While Checking on my conditions inside the new tent last night, I found that the Humidity was down to 39 Percent. I added an AquaOasis Cool Mist Humidifier, the reason I selected this humidifier is that I needed one that could be turned on and off utilizing my Inkbird Humidity Controller IHC200 that I have my Pro Breeze Dehumidifier currently running with.
Root structures are starting to get there about 1/4 of an inch.
2/7/2023
Day 6 - Germination
Everything seems on track more roots poking out of each today. They are each getting a little taller as well.
Checked in the evening and number 3 was drooping the Root riot plug on the bottome was dry and the roots were not in the water yet. I raised the water just enough that the longest root that was sticking out is now hitting the water.
2/8/2023
Day 7 - Germination
Everything looked good while checking in on them this morning number 3 is now full up and no droop again.
2/9/2023
Day 8 - Germination
T-2 days until Plant into Forever Pods and we start week 1 of Veg .. :-)
Surprising thing to me is that number 1 and 2 were later in popping then 3 and 4 but the roots are growing longer in 1 and 2.
2/10/2023
Day 9 - Germination
Number 1 and Number 2 are definitely ready for transplant today.. Based on how they were yesterday and where they are today I am hoping by tomorrow 3 and 4 are ready. Today they look to me where 1 and 2 did yesterday.. I really hope 3 and 4 catch up by tomorrow since..
T-1 day until transplant to new/ final home for grow.
Need the roots long enough to have some clay down in the basket to keep the root riot out of the water and only roots in the water..
2/11/2023
Day 10 - Germination
Today they got placed in thier forever Home, 7 days from Sprout and 7 days until Week 1 Start.
PPM- 180 this is water out of the Tap
Temp Water: 70.7
Temp Tent: 77
Humidity: 40% I have a humidifier going 24/7 to try and bring this up.. I also have Humidity Domes on each plant.
2/12/2023
Day 11 - Germination
Sprayed the domes, all are looking good.. Nothing much to do at this phase but Keep monitoring the PH level in the system and making sure they have a comfortable home.
T-6 days until Week 1 start
2/13/2023
Day 12 - Germination
Sprayed the domes, They were looking a little yellow today so I moved the light down to assist. Nothing much to do at this phase but Keep monitoring the PH level in the system and making sure they have a comfortable home.
T-5 days until Week 1 start
2/14/2023
Day 13 - Germination
Sprayed the domes, They were looking a little Florissant yellow today, with what looks like slight burn on the tips, I talked with a fellow grower and we agreed that It was probably that I was drowning them, Yes you can drown you plants even in Hydro, but only early on.. :-) It usually happens with the water being too high, which soaks not only the roots but the medium (root Riot plug in this case). I lowered the water from touching the bottom of the pot to about 1" away. This will probably take 3-4 days to resolve. I will continue my daily monitoring.
T-4 days until Week 1 start
2/15/2023
Day 14 - Germination
Sprayed the domes, continue my daily monitoring they look a little darker green instead of lime green now that I lowered the water levels in the system, so I think that I might have resolved the issue but it will take a few days for recovery to happen.
T-3 days until Week 1 start
2/16/2023
Day 15 - Germination
I looked in on them this morning, 3 and 4 look like they are doing well and recovering nicely. Number 1 not so much it has brown spots on the leaves, this very well can still be a side effect of the overwatering but I decide to go ahead and add Nutes earlier than I was planning just incase. I was going to wait until Saturday but I think intervention is necessary now especially after drowning them early on.
I added 1/2 what I am planning on adding for week 1 start. I also think I am going to adjust my chart to add 1/2 2 days after plant from now on. I don't think it would hurt it to have some Nutes to pull from.
.25ml/Gal Calmag = 12.5ml
1ml/gal GH FloraMicro= 50ml
1ml/gal GH FloraGro = 50ml
1ml/gal GH FloraBloom = 50ml
T-2 days until Week 1 start = I will drain the system and start it over on Saturday with Week 1 Nutes.
2/17/2023
Day 16- Germination
I didn't even want to post today after looking in on them this morning, 3 of the 4 are now showing signs of dronwing.. Brown spots on the leaves, the water levels were still too high.. I drained about another inch out of the tanks.. Will see how quick they recover.. I start week 1 tomorrow and will have to ensure my water levels are at least 1" away from the basket on this round.

Likes
6
Share


@I_Identify_As_A_Dan
Follow
Week 3 of flower for Space Panda
Pheno 2 in flower: Shes showing some purpling from the cold nights they are having unfortunately.
Pheno 1 in veg: Probably going to flip her to flower next week.

Likes
8
Share

@ThatsmyGrow
Follow
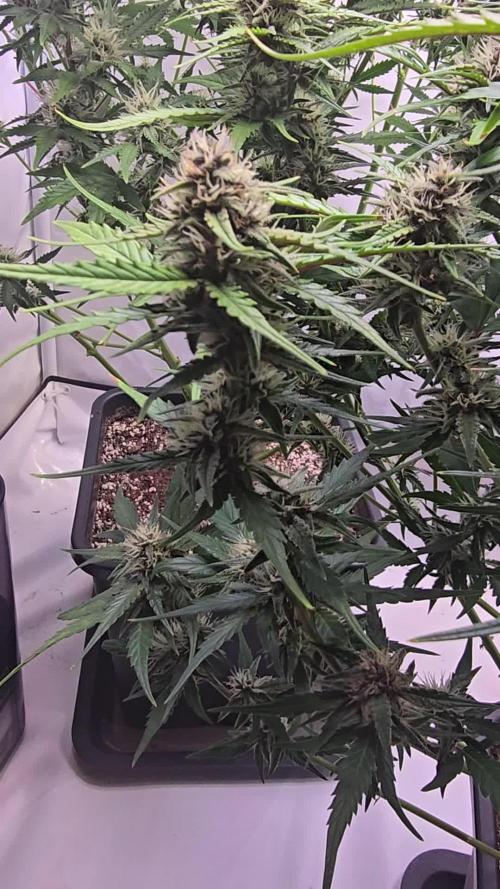
Another good week, i love how red some buds get. Never saw some buds purple like that, but i hope they Taste like they look.

Likes
10
Share

@Bncgrower
Follow
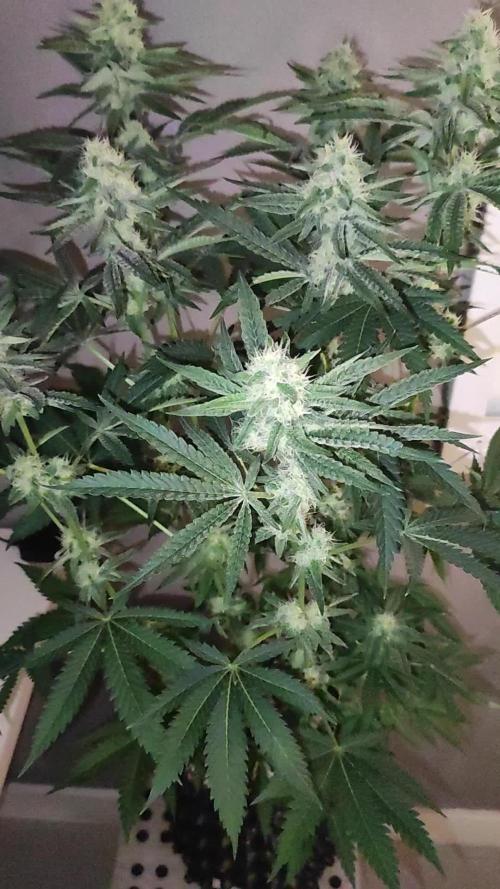
Another week successfully completed... All the plants are developing very well, the flowers are plumping up nicely, and all the plants smell great... Everything is as expected, and now we're closer to the end than before... Happy growing to all! 🌱🌿💪
Likes
18
Share


@DogDoctorOfficial
Follow
Seedsman Seeds Germination Report - Run 01: The White OG Journey
Kickoff to Germination: The Start of Something Great!
Welcome to the beginning of this adventure with The White OG feminized seeds from Seedsman Seeds. Excitement is in the air as we’re searching for strong, resilient plants, and this journey has all the best tools and tips. Starting with five seeds, we’re aiming for a solid beginning and maximum potential. Let’s explore every step in detail to make this grow as robust as it can be!
Germination Process: Tools of the Trade
TheCannaKan: The Ultimate Germination Gadget
I’m thrilled to share my love for TheCannaKan, a little germination wonder! This tool is essential for any grower who wants to start their seeds with precision and care. I noticed rapid results in just 24 hours, with the seeds showing signs of life. At about 32 hours, I transferred them to the Root Riots, which brings us to the next exciting stage.
Why I Love TheCannaKan:
• Quick Results: Seeds sprouted rapidly, minimizing wait time.
• Consistency: Keeps moisture levels optimal for uniform germination.
• User-Friendly: Simple yet effective for both new and experienced growers.
Root Riots and Their Role in Root Development
After sprouting, I placed the seedlings into Root Riot cubes under a dome. Root Riots are fantastic for stabilizing young plants, providing an airy and nutrient-friendly environment that promotes robust root growth from the start.
Benefits of Root Riots:
• Root Aeration: Soft yet structured, these cubes support root expansion.
• Moisture Retention: Holds just the right amount of water for growing seedlings.
• Enhanced Root Health: The cubes are ideal for preventing damping-off and ensuring healthy, white roots.
Nutrients to Kickstart Growth: Aptus Holland Regulator and Startbooster
To give the seedlings a perfect start, I added Aptus Holland’s Regulator and Startbooster (1ml/L each). This mix promotes early root and stem strength, giving seedlings the ability to absorb light and nutrients more efficiently.
• Aptus Regulator: Enhances plant resilience, aids in nutrient absorption, and promotes early vitality.
• Aptus Startbooster: Adds a balanced mix of growth hormones and nutrients that are ideal for the early stages, encouraging healthy roots and faster seedling growth.
Light and Environment: Future of Grow FOG LED with TrolMaster Tent X Controller
I’m using a Future of Grow (FOG) LED at 600W, but keeping it dimmed down to around 200 PPFD. This setting is controlled by the TrolMaster Tent X Controller to give the plants the perfect start without overwhelming them with intense light. Controlled lighting helps seedlings to develop without stress, encouraging healthy growth and internode spacing.
Shoutouts:
• Future of Grow LED: High-quality, efficient LED light that adapts well to seedling and veg stages.
• TrolMaster Tent X Controller: Reliable and intuitive control over light, humidity, and more. Perfect for a hands-off, efficient environment setup.
Observations: One Seedling Takes the Lead
At the end of this germination stage, it looks like one seedling has emerged as the strongest, while the others may need a few more days. Patience and observation are key; some seeds naturally take a bit more time to sprout. I’ll keep monitoring these with hope, allowing each seedling its own rhythm.
Grower’s Notes and Tips
• Consistency Matters: Germination is all about steady conditions—consistent moisture, gentle nutrients, and stable lighting make all the difference.
• Document Everything: Keeping a log of each step (like this one!) helps track growth patterns and provides valuable insights for future grows.
• Stay Positive and Patient: Not every seed will sprout at the same rate. Trust the process and remember each plant is unique.
Community Shoutouts
Thank you to everyone who makes this process smoother and inspiring—TrolMaster, Aptus Holland, Future of Grow, and Seedsman Seeds for amazing genetics and tools, as well as the growers’ community who share insights, tips, and encouragement along the way.
Next Steps
Now that we’re through germination, we’ll move into the early growth phase. I’ll keep documenting the lighting adjustments, nutrient changes, and growth patterns of each plant, especially that eager seedling leading the way!
Growers Love, and here’s to a strong start for the future of this grow! 🌱
DISCOUNT CODE - SeedsmanSeeds - DOGDOCTOR 10% off
As always thank you all for stopping by, for the love and for it all , this journey of mine wold just not be the same without you guys, the love and support is very much appreciated and i fell honored and so joyful with you all in my life 🙏
With true love comes happiness 💚🙏 Always believe in your self and always do things expecting nothing and with an open heart , be a giver and the universe will give back to you in ways you could not even imagine so 💚
Friendly reminder all you see here is pure research and for educational purposes only
💚Growers Love To you All and remember to keep that smile big and alive 💚

Likes
24
Share


@GreenthumbJacobs
Follow
Hier die restlichen beiden zkittles.😍
Was für riesige dicke schöne buds !
Die eine ist bald fertig 😁die dritte brauch noch paar Wochen.
Likes
142
Share


@MadeInGermany
Follow
Hi everyone 🤗.
The tent bursts at the seams 😍.
The buds are getting bigger and bigger :-).
The blue chesse pheno 1 is harvested this week 😎.
next week both Tangie Kosher Kush will be harvested :-) everyone else needs something 😊.
I wish you all a nice week, stay healthy 🙏🏻 and let it grow 🌱


Processing
Likes
10
Share




Likes
6
Share


@eldruida_lamota
Follow
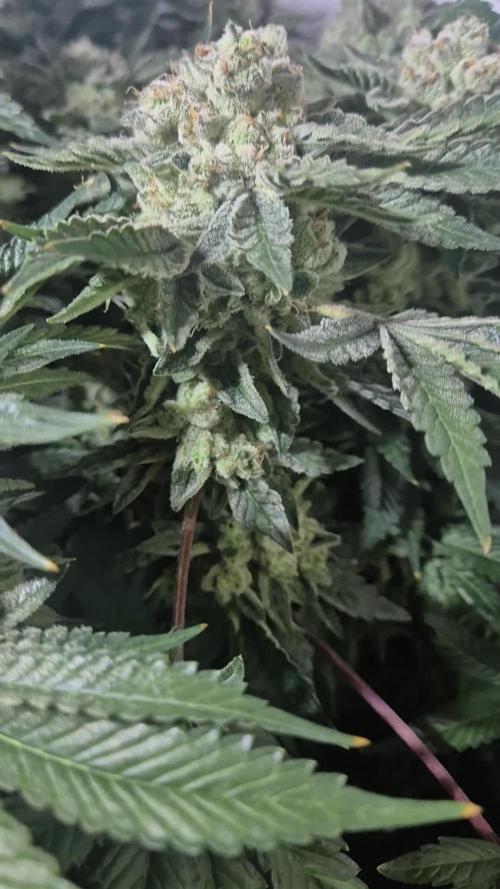
Que pasa familia, vamos con la quinta semana de vida de estas Papaya sherbet feminizadas de fastbuds.
Vamos al lío, de las 3 plantas, me quede con 2 por espacio, siempre pongo alguna semilla de más por si no abriese alguna por no perder ese hueco del indoor.
También se trasplantaron a su maceta definitiva, en este caso de 7 litros, que el mismo trasplante provocó un shock, que también fue solucionado inmediatamente.
El ph se controla en 6.2 , la temperatura la tenemos entre 20/22 grados y la humedad ronda el 50%.
Hasta aquí todo, Buenos humos 💨💨💨
Likes
17
Share


@Leonardo_DaGrower
Follow
Week 10 is probably my last nutrient feeding.
One of these plants looks like she is less than two weeks away.


Likes
11
Share


@Papastroumf
Follow
Day 66 : This lady continues fattening, faster now. Also crystal production increased. The breeder suggests 70-75 days. For now all crystals are almost milky with some cloudy. So she need 1 week for sure, maybe a bit more. That gum smell is so attractive, you want to eat it. Reduced bio grow and removed Calcium.
Edit 70 : I saw the first ambers, very little. So i watered for last time with juices Next watering will be flush to reduce the juices in the soil. So if initially has 1200-1300ppm i want to reduce it to 350-500ppm. After flush continue pure water until chop chop. This is my approach for all ladies always.


Likes
57
Share


@nonick123
Follow
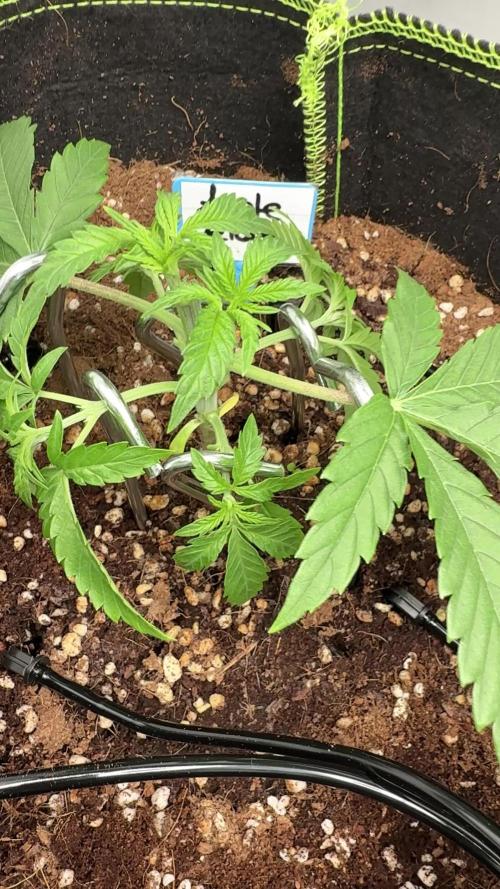
Día 34 (27/05) Riego con 750 ml H2O + Regulator 0,15 ml/l + P-Boost 0,5 ml/l + CaMg-Boost 0,25 ml/l + TopBooster 0,2 ml/l - pH 6.2
Día 35 (28/05) Riego 750 ml sólo H2O pH 6.2
Día 36 (29/05) Riego con 750 ml H2O + Regulator 0,15 ml/l + P-Boost 0,5 ml/l + TopBooster 0,2 ml/l - pH 6.2
ANDF es superdemandante de Magnesio. Como aún está en preflower, hago una aplicación foliar de sales de Epson a 4 g/L
Día 37 (30/05) Riego 750 ml sólo H2O pH 6.2
ANDF está creciendo muchísimo! Una genética muy potente!
Día 38 (31/05) Riego con 750 ml H2O + Regulator 0,15 ml/l + P-Boost 0,5 ml/l + CaMg-Boost 0,25 ml/I +TopBooster 0,2 ml/l - pH 6.2
Día 39 (01/06) Riego 750 ml sólo H2O pH 6.2
Día 40 (02/06) Riego con 750 ml de Té de Compost de Floración
ANDF no para de crecer y demandar Magnesio! Le aplico 4 gr de Sales de Epsom como Top dress
💦Nutrients by Aptus Holland - www.aptus-holland.com
🌱Substrate PRO-MIX HP BACILLUS + MYCORRHIZAE - www.pthorticulture.com/en/products/pro-mix-hp-biostimulant-plus-mycorrhizae


Likes
15
Share


@SamDo
Follow
Hello, semaine 10, floraison 6.
Nous approchons de la fin!! Le flushing viens de commencer en cette fin de semaine 6. Il reste une semaine avant la récolte. Le plantes semblent en bonnes santé. Les buds sont correctes. J’ai stoppé les engrais, et je vais flusher jusqu’à la fin, une fois par jour. Hâte de voir l’effet du flushing. C’est tout pour cette semaine,,,
Happy grow...😎
