


Likes
Comments
Share


Likes
24
Share


@CanarianGrow92
Follow
Quite good result considering that she only got around 6h of sunlight, the buds didn't grew too big but they have a lot of THC, this is perfect for people who live in the city and just want to grow some small plants on the balcony without getting too much attention, the smell was really sweet and she offers a good resistance against bugs, and i didn't even applied any insecticide.
We are going to use this plant to do a fresh frozen extraction 😁
Likes
33
Share


@burnerac
Follow
Day 121: no water added
Day 122: added one gallon pH6.5 water with two tablespoons Herculean Harvest. Will this ever be ready to harvest?!
Day 123: nothing added. No trimming. Trichomes seem clear to me. Should probably go another week or two. Eager to harvest now. Is this plant foxtailing and is that bad?
Day 124: added 1 gallon pH6.5 water with 2 tablespoons Herculean Harvest.
Day 125: no water added.
Day 126: I feel like she is looking healthy. Added one gallon pH6.5 water with 2 tablespoons Herculean


Likes
36
Share


@OGTrauma
Follow
As the grow is overcoming the loss of Eleven Roses, the space on the net is being distributed with the other strains. the other advantage, is that the text pot can be used by the other plants of the ground to colonize( i checked that the mass root is connected between pouchs. ANOTHER IMPORTANT ADDITION as now i have the space , is a 100w flat Panel in a vertical like distribution to reinforce low & mid branchs as i suppose this was the reason some plants died.
There is a bit of nute burn from the last foliar sprays before its too risky as it can summon mold , but not acute enough to slow down plant bud formation. I will keep using barrier but rather wathering than spray in order to contain plagues, but it can also help a bit on flowering pecause it's high potassium level.
The Flowering Food is based on Hesi Boost, Top Candy and Top Bloom, a pretty basic sugar based scheme, but i preffer to not use much products and stick with the neccesary ones ( according to my criteria)
Kind Regards

Likes
3
Share


@123Grow
Follow
1. LABS - I suggest using distilled water for the entire process ( no chlorine or chloramine). I also suggest the type of rice product shown ( 1/2 cup), it has red, brown, white, and black rice blended together. You get the benefits of each type.
2. Take the rice that was used in making the rice rinse for labs and boil it in 3 cups of water for 30 mins. Strain the rice out. Add 1 TBSP molasses per 300 mls.
Use 300 mls of the above mixture during your watering cycles. It contains starches, b vitamins, aminos, trace minerals, calcium, magnesium, iron, phosphorus, potassium, and some nitrogen. The ppm’s are not higher than 200 ( if using distilled water). This is ONLY used if your plants are healthy. If your plants are sick…this will NOT help them. It will make stuff worse!!!
The Hulk-Berry got a new home. 1 tsp 7-3-1, 1/2 tsp 0-12-0, 1/2 tsp Langbeinite, 1 TBSP 2-2-2, 3 TBSP 4-3-3, worm castings, recharge (1/32 tsp) into the soil ( Mother Earth).
The 3 RuntZ are coming back from slow growth at the outset. I added LABS, Lentil SST, Photosynthesis Plus to the media. I did a foliar spray with recharge. 24-36 hours later the leaves exploded with growth and height. I added ZERO nutrients!!! I only used natural inputs and bacteria to get the root zone back in order.
11-3. Things are all in check! The LABS, SST’s and Rice wash have gotten the 3 RuntZ back on track. The Hulkberry is in full swing. I think I can get to 3 feet by flower time with the Hulkberry
11-5 All is well today!!! Everyone is very happy after the cal-mag, Photosynthesis Plus, kelp bath

Likes
7
Share


@CalGonJim
Follow
4/29🐼👍 I gave her about 2 L of water yesterday with a little bit of bud factor X I think about 2 mL into that and I don’t think it needed it but I’m trying it with some other plants and I had good results but that also could have been a result of the way I mixed up my regular general hydroponics nutrients which are my favorite.
5/5 🐼👍🔥💫

Likes
24
Share


@MadeInGermany
Follow
Hey everyone 😀.
A lot has happened this week 👍.
Flowering day 28
Today 1.2 liters were poured.
(See nutrient table for nutrient addition).
The humidifier was refilled with an Ec of 0.4. The tent has been cleaned.
Flowering day 29
Today the plants and buds were checked for health and cleaned.
Flowering day 30
Today was poured again.
This mam she got 1 liter of water.
(See nutrient table for nutrient addition). Of course, the plant was checked for its vitality 🧐😅.
Flowering day 31
The humidifier was refilled a little and the tent cleaned 👍.
Days of flowering 32
Today 1.2 liters of water were poured. (See nutrient table for nutrient addition).
Fans, fans, electrics have been checked for functionality 😊.
Flowering day 33
The plant has been carefully checked for pests, etc.
Flowering day 34
Today 1.6 liters were poured, so that it had about 10% drain 👍
For nutrient addition, see the nutrient table.
The tent was plastered and rubbed with disinfectant.
The buds look beautiful, and already smell extremely tasty again 😍.
I wish you a lot of fun with the update, let it grow 🍀 and all stay healthy 🙏🏻
You can buy this Strain at
https://www.amsterdamgenetics.com/product/kosher-tangie-kush/
You can buy this Nutrients at
https://greenbuzzliquids.com/
Type:
Kosher Tangie Kush
☝️🏼
Genetics:
Kosher Kush
X
Tangie
👍
Vega lamp:
2 x Todogrow Led
Quantum Board 100 W
💡
Bloom Lamp :
2 x Todogrow Led
Cxb 3590 COB 3500 K 205W
💡💡☝️🏼
Soil :
Canna Coco Professional +
☝️🏼
Fertilizer:
Green Buzz Liquids :
Organic Grow Liquid
Organic Bloom Liquid
Organic more PK
More Roots
Fast Buds
Humic Acid Plus
Growzyme Big Fruits
Clean Fruits
Cal / Mag
Organic Ph - Pulver
☝️🏼🌱
Water:
Osmosis water mixed with normal water (24 hours stale that the chlorine evaporates) to 0.2 - 0.4 EC. Add Cal / Mag 2 ml per l water every 2 waterings . Ph with Organic Ph - Pulver to 5.8 .

Likes
47
Share


@Northern_Ent
Follow
Aug 10: Blueberry Pie F1 Fast is doing great. Three weeks now moving her into the garage which is enough, and now I can just leave her in the yard which is easier and scores another couple hours of sunlight per day.
Nice solid start to flowering, and I like the schedule used this year for the force flowering. This strain is delivering on the promise of being big and fast.
Bright sunny day and I’ve got the UV lights on. About five hours today with the UV lights at mid-day. Buds are looking really good.
The bud development after 3 weeks is amazing. The buds got visibly much fatter just today. Compared to some fast plants in previous years, this one is about 2-3 weeks ahead. Very well suited to short season outdoor growing, but partially due to full darkness in the garage rather than just phyto-forcing with the far red light as I did last year. I’m still using the far red light, but putting them in the garage provides more darkness and helps get strong flowering started.
Aug 12: nice fat buds forming quickly, gotta like that.
Aug 14: fast, fast, fast. Flowers are progressing quickly.
Added three tablespoons of a 50:50 mix of Power Bloom and malted barley. Added as top dressing and then watered in.
Aug 16: cool, overcast all day, a bit of rain and smoky so not a nice mid-August day. Rain should help but out some fires in northeast BC, Yukon, and northwest Alberta. maybe. BC needs rain to break their record drought.
#seedsman420growoff
#seedsmanseeds


Likes
29
Share


@eldruida_lamota
Follow
Buenas noches fumetillas, abro ya mismo el diario de las green poison de sweetseeds, una variedad con una floración rápida que crecerá bajo unos Leds de la marca mars hydro.
.
Quitando el equipo el control básico es ph 5.8 temperatura 22/24 grados y humedad 70/80%.
.
La alimentación de la gama agrobeta.
0,5 ml x L Piramid , vía radicular.
0,5 ml x L Growth black line , vía radicular.
0,1 gr x L Cancerbero , vía radicular.
0,1 ml x L Tucán , vía radicular.
0.1 ml x L Flash Root , vía radicular.
0,4 ml x L Great Green , vía foliar.
.
Para ser la primera semana esto es todo en verdad, un saludo y buenos humos 💨💨💨

Likes
48
Share

@Northern_Ent
Follow
July 20: 31 inches with a 16 cola manifold 👍😎.
Definitely growing fast and has now pulled ahead of the 16 cola Bruce Banner Fast which is at 30 inches. Hot again today so a bit more water and a couple of mistings with hose water to cool off a bit and provide some humidity.
One tomato plant that I realized had a potassium deficiency responded well to a potassium silicate foliar spray. You can learn some cool stuff growing dope.
July 24: still growing fast and maybe starting to pre-flower which is fine cuz I’m starting the force flowering in a few days. This is just 12 h of darkness to get this photoperiod to start flowering. Yes, it’s a photoperiod plant from Fast Buds. And it’s awesome.
Did another lazy compost tea which is just 5 gallon pail of water that’s sat out overnight to degas, two handfuls of mature compost, some molasses, kelp and Humic Blend, and finally a couple handfuls of shredded coco coir to give the bacteria some where to attach and grow. Leave overnight, maybe stir a couple times, but that’s all. 24-48 h maximum as you don’t want it going anaerobic (and stinky).
After tea, she and the other girls got a nice top dressing of barley and Power Bloom with minor amounts of oyster shells (for calcium) and Azomite for trace metals. These are bloom nutrients in anticipation of the start of flowering this weekend.
This has been the hottest 90 day period ever here in Edmonton, and lots of other places too.
Processing
Likes
19
Share


@Fire_Farmer
Follow
Not much to report really, everything is in order and on track✅
The tallest plant has grown 16cm end of week 2 so 1 last week of potential stretch at that rate or hopefully less and it should all remain manageable 🤞
Facing some heat issues but it doesn't seem to be stressing my ladies they are loving life right now 🌞
Its been 25celcius here last few days and that translated to 28celcius in the tent🌡️
Gonna steal a few leaves here and there this week but nothing major, I'm happy enough with the canopy and its bud-sites 👌
Buds are developing nicely, hopefully I'll still get some dense nugs even though they are only wearing 6L shoes 👠
In the end though my main goal is clean and tasty smoke and ive been getting some nice fruity smells from the stem rub, especially the Zorro x Zkittlez #1 I'm getting a lot of lemon and lime from her 🍋🍇⛽
As for clean that's on me, in the great debate of flushing I'm all for it. I get that true organics is a different story but in coco which is what I'm using I notice the difference 🥥
I use bottled nutes which aim to be as close to organic as you can get in a bottle, Cellmax Bio always give me nice flavour and I'm just testing Buddha's Tree Organicus now alongside Cellmax Additives but I still always flush 🌊
Well that's all folks 🐰
Thanks for tuning in🙏
One Love💚
Fire Farmer🔥👨🌾
Likes
18
Share

@Colonel
Follow
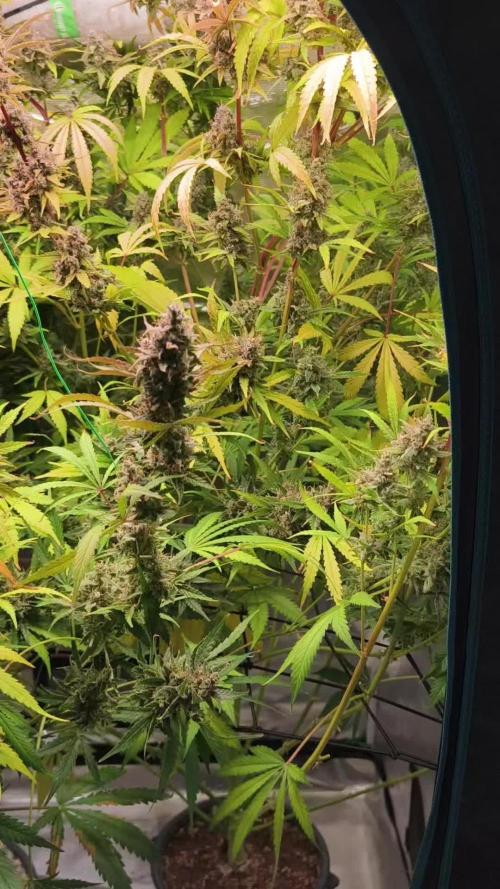
Well, looks like autumn is here, so I’m starting the flush. The next waterings will be plain water at 260 ppm — pretty much the lowest I can get without extra cost.
Upd: I was trying to understand the plant through the readings, but due to my lack of experience, I still kept bouncing back and forth with the ppm. That’s definitely not ideal. Next time I’ll try to rely on both experience and the meters.
Likes
120
Share


@DogDoctorOfficial
Follow
The Harvest Prelude:
After a patient wait and 48 hours of darkness, the moment arrived. The Tropical Tangie Lego Ninja, standing proudly like a silent guardian, was ready for the grand harvest. The sound of each cut echoed through the grow space, reminiscent of felling a mighty tree. The compact structure of the buds was awe-inspiring, a testament to the ninja's disciplined growth.
The Lego Ninja, like a stoic warrior, was then hung upside down, beginning a two-week drying ritual. Maintaining an ambient temperature of around 21°C and a relative humidity of 60%, this slow-drying process allowed the buds to retain their essence, preserving the symphony of terpenes and cannabinoids.
The trimming phase unfolded like a fragrant masterpiece. Each bud, adorned with a glistening layer of resin, transformed the trimming process into a sensory delight. The zesty aroma of oranges enveloped the room, a tangible expression of the tropical lineage. The compact buds made every snip a careful dance, revealing an abundance of frosty trichomes.
The moment of reckoning arrived with the scale's unveiling. The Tropical Tangie Lego Ninja, from a single plant, bestowed upon me 309 grams of dried medicine. Each gram was a treasure trove of cannabinoids, a promise of euphoria and relief. The sheer compactness of the buds translated into a concentrated potency that left me in awe.
In parallel, the clones, nurtured with equal care, showcased a fascinating divergence. A twist in the tale unfolded as the intense oranges of the mother transitioned into vibrant tangerines. This unique expression, I believe, was a testament to the clones weathering a summer heatwave differently, bringing forth a distinct personality.
The clones, resilient and generous, gifted me a bountiful 549 grams of pure joy. This now my keeper of the garden, an embodiment of the Lego Ninja's legacy. The harvest dance, though familiar, carried the nuances of tangerine zest, a refreshing twist that left me eager to explore its intricacies.
Both harvests shared a common thread—their resinous abundance. The trim bin, akin to a treasure chest, gleamed with golden trichomes and fragrant joy. Sticky fingers became a badge of honor, a tangible connection to the resinous richness that filled the room.
Shout Outs:
No harvest report is complete without expressions of gratitude. A special nod to @DutchPassion_Official for crafting the genetic marvel that is the Tropical Tangie Lego Ninja. Their expertise paved the way for this epic journey, and I tip my hat in acknowledgment.
In conclusion:
As the dust settles on this epic harvest saga, my heart brims with happiness and excitement. The Tropical Tangie Lego Ninja has proven itself not just as a plant but as a living masterpiece. Stay tuned for the smoke report, where we delve into the true essence of this botanical ninja's legacy. Until then, fellow cultivators, may your gardens flourish, and your harvests be as bountiful as the joy they bring.
As always thank you all for stopping by, for the love and for it all , this journey of mine wold just not be the same without you guys, the love and support is very much appreciated and i fell honored and blessed with you all in my life<3 <3 <3
#aptus #aptusplanttech #aptusgang #aptusfamily #aptustrueplantscience #inbalancewithnature #trueplantscience
With true love comes happiness <3 <3 <3 Always believe in your self and always do things expecting nothing and with an open heart , be a giver and the universe will give back to you in ways you could not even imagine so <3 <3 <3
Friendly reminder all you see here is pure research and for educational purposes only
<3 <3 <3 Growers Love To you All <3 <3 <3
P.S- I must extend my sincerest apologies for the missing video reports. Regrettably, Grow Diaries is still facing some technical issues that are preventing me from uploading them. Rest assured, as soon as the situation is resolved, I'll share those videos to give you an even closer look at this fascinating journey. or in my case apparently GD dont let me do uploads over 100mb with is super small file if you working and editing videos , doing my best here to upload them all but GD is not making my life easy on this <3 <3 <3

Likes
46
Share

@eldruida_lamota
Follow
Que hay familia, vamos con la novena semana de floración de estas Candy Rain de Zamnesia, para el concurso POWER BUDS Plagron x Zamnesia CONTEST.
Las flores van madurando progresivamente y desprenden unos aromas bastante dulces, también empiezan a tricomar bien y a madurar.
Segunda semana solo con agua controlando siempre el Ph, que ahora mismo lo dejamos en 6.
Tragan alrededor de 0.8 litro por planta cada 48 horas.(3 riegos semanales).
La temperatura máxima está en 22 grados y la humedad está entorno al 40%.
Hasta aquí es todo, vamos viendo estas semanas como terminan de madurar nuestras flores.
Os comento que tengo un descuento y para que compréis en la web de Zamnesia de un 20%, el código es ZAMMIGD2023
The discount 20% and the code is ZAMMIGD2023
https://www.zamnesia.com/
Hasta aquí todo, buenos humos 💨💨💨

Likes
152
Share


@EBxAH
Follow
Well week 15 and 5th week of flower started yesterday, 9/12. I did a little more defoliation over the weekend, maybe cut 20 leaves altogether. Everything is still looking good. Temps are good, rh is good, airflow is definitely good. And judging by the frosty trichs that are showing I'd say everything is right on schedule. Starting to get more smell. That's about it for now.
Happy growing everyone ✌️🍀✌️


Likes
5
Share


@Lazuli
Follow
She got defoliated and feeding goes up now
1ml/l calmag
2ml/l floranova bloom
Ph between 6 and 6.5

Likes
35
Share


@Master_weeda
Follow
Bonjour à tous les padawans et les maîtres jedis
Pour cette semaine je prévoit de pratiquer comme technique spéciale le LST et juste un arrosage.
Pour cela comme à mon habitude j'attend le cinquième noeud ou que je juge la plante robuste.
Je profite que cette semaine qui va être relativement calme pour faire un LST appliqué et vous faire un rappel de ce qui est pour moi la meilleure technique pour arroser une autofloraison et la façon dont je pratique le LST.
En suivant ces quelques simples conseils vous obtiendrez un résultat optimal tout au long de votre culture :
Le cannabis est une plante qui n’aime pas recevoir un léger arrosage en continu. Il est impératif de l’arroser en grosse quantité, puis d’attendre que la terre soit bien sèche avant d’arroser à nouveau!
Pour calculer la quantité d’eau nécessaire à chaque plante, suivez cette règle :
Le volume d’eau à donner lors de chaque arrosage doit représenter au moins environ un quart du volume du pot !!
Exemples :
pour un pot d’1L, donnez 0,25L d’eau à chaque arrosage pour un pot de 4L, donnez 1L d’eau à chaque arrosage pour un pot de 12L, donnez 3L d’eau à chaque arrosage pour un pot de 30L, donnez 7,5L d’eau à chaque arrosage !etc…
Pour donner un tel volume d’eau, il est souvent nécessaire d’arroser en deux (voir trois) fois, lentement et uniformément sur toute la surface. Disposez de bonnes coupelles sous les pots, celles ci se rempliront d’eau qui remontera dans le pot par capillarité en moins d’une journée. Il est également très important d’utiliser un bon terreau de qualité, avec une bonne capacité de rétention d’eau mais qui assure également un bon drainage (celui ci doit contenir de la perlite, et/ou de la coco, etc..)
Il vous faut alors maintenant attendre quelques jours en sous-pesant régulièrement les pot avec vos bras. Quand ils seront redevenus très légers, vous pourrez arroser à nouveau !!
En effet, comme l’eau pèse beaucoup plus lourd que la terre, un pot gorgé d’eau pèse plusieurs fois le poids d’un pot d’une plante prête à être arrosée. Avec un peu d’entraînement, vous apprendrez donc très rapidement à sous-peser vos pots pour savoir quand une plante a soif.
C’est une technique à la fois très facile et très efficace, et qui peut être appliquée à toutes les plantes en pots !
En arrosant de cette façon, en général vous devrez arroser vos plantes tous les 3 à 6 jours.
Pour cette semaine 3 au jour 17 ma plante fais 12 centimètres et son cinquième noeud apparaît je décide donc de pratiquer un LST sur ma plante.
Pour ce j'utilise du fil de fer galvanisé que je plante directement dans le substrat en faisant attention de ne pas endommagé les racines car n'oublions pas que ce qui pousse dessus pousse aussi dessous.
Jour 17 je pulvérise du une solution composé d'une cuillère à café de savon noir mou dilué dans un litre d'eau en prévention d'éventuels nuisibles.
Je corrige mon LST suivant la pousse de ma plante ...
Pour ma par c'est la manière dont je procède. Comme promis petit rapel de:
Quand commencer à appliquer la technique LST
De nombreux cultivateurs commencent la manipulation dés que les plantes possèdent entre 3 et 6 nœuds ou une paire de feuilles. Durant cette première étape de la croissance, le tronc encore flexible est pliable sans risque qu’il ne se casse, même si au fur et à mesure du développement de la plante il sera de plus en plus difficile de le plier. Nous pouvons continuer à guider la croissance des branches durant toute la culture, même durant la floraison, ce qui pour cette étape représente un grand avantage face à la taille, qui n’est pas du tout recommandé une fois que la formation des têtes commence, cela stressera en effet la plante, ce qui aura pour effet de retarder la récolte.
Comment appliquer la technique de guidage LST
Si nous sommes prudents, la flexibilité naturelle des fibres du cannabis permet de plier leur tronc et branches avec une relative facilitée, même durant la floraison des plantes.
En utilisant une corde fine, nous pouvons accrocher la pointe de la plante à la base du pot par exemple ou à un tuteur que nous aurons planté dans le substrat. Nous plierons le tronc avec précaution et nous le fixerons avec la corde, à partir de là, nous pouvons augmenter progressivement la tension de la corde, chaque jour un peu plus, jusqu’à obtenir la position souhaitée. Soyez attentif à la réaction de la plante, essayez de ne pas appliquer trop de pression sur la corde et rappelez-vous que la flexibilité des branches peut varier d’une plante à l’autre.
Pour obtenir de meilleurs résultats, il suffit de suivre quelques règles simples. Pour commencer, nous devons choisir une corde fine mais pas trop pour ne pas blesser les troncs au fur et à mesure qu’ils grandissent et qu’ils deviennent plus gros.
Nous pouvons utiliser des crochets en plastique souple ou de n’importe quelle autre matière flexible pour éviter d’endommager les plantes. Spécialement en intérieur, utiliser des cordons en plastique de couleur (voir les diaries de @Silky) est très pratique pour voir facilement les accroches et faciliter le travail au milieu du réseau formés par les cordes, les tuteurs, les mailles ou les supports que nous aurons dans la culture. Bien entendu, en culture extérieure et surtout en guerilla nous ferons juste le contraire et nous utiliserons des matériaux de couleur qui n’attirent pas l’attention pour que notre jardin reste discret.
Pour stresser les plantes au minimum, la mieux est de réaliser ces manipulations le soir ou juste après que les lampes en intérieur s’éteignent, ce qui leur permettra de se remettre durant la nuit. Normalement, le jour suivant nous pourrons observer comme les pointes des branches que nous avons pliées se dressent de nouveau vers le haut à la recherche d’une source de lumière.
Que la force soit avec vous