


Likes
Comments
Share


@Alejangrow
Follow
I've been overfeeding so I'm flushing them for a week & then going back to the feed schedule I should've been using. 😪 They didnt seem too bothered by the overfeeding tho. 🤷♂️🏽

Likes
8
Share


@Angelgrows
Follow
I upgraded her from her old 2.5gal plastic pot to a 7gal fabric pot and she’s doing a lot better. The roots were experiencing damage and I had to remove a chunk of em but it’s a lot healthier now :)
Likes
31
Share


@JeyGanesha
Follow
🦍 cookies ancora pochi giorni ed è cotta anche lei.. buonissima,!! Ha un profumo delizioso super.
I'attesa si fa lunga 🤣😉🤣😉


Processing
Likes
Comments
Share


@Nziaz4Twenty
Follow
Ultima semana de la etapa vegetativa, próxima semana empieza fotoperiodo 12/12
me impresiona la asimilación de nutrientes de la G13 que no muestra ninguna deficiencia y gran frondosidad, se hace destacar entre estas sativas
una planta sumamente vigorosa con un crecimiento increíble tiene bien puesto su nombre. High Level 😍


Likes
19
Share


@DrAnandamida
Follow
El proceso sigue "viento en popa y a toda vela" 🌬️🌿 Aunque me he encontrado un pequeño contratiempo, algunas hojitas están siendo mordisqueadas por pequeñas orugas. Si bien es cierto que sólo he encontrado algunos ejemplares en esta cepa, también hay hojas mordisqueadas en las otras cepas, compañeras de cultivo (Red Pure Auto - Sweet Seeds y OG Kush - Dinafem). El tallo sigue creciendo en tamaño y consistencia, por lo que no necesitamos los soportes/guías, pese a que ha alcanzado los 45cm de altura 🤩 Aumentamos la cantidad de agua, progresivamente, según van pidiendo/necesitando las plantas.
Sigo intentando no utilizar ningún tipo de "ayuda extra", salvo la tierra enriquecida de CANNA Terra Professional Plus donde están plantadas. Seguimos con el agua mineral, luz solar, mucha paciencia y mucho amor!🤞😍 Aunque para controlar la aparición de pequeñas orugas he añadido: 20g de tierra de diatomea (Diatical de TRABE), directamente sobre el sustrato (1-2 veces/mes y se puede aplicar en cualquier momento del cultivo). 50ml de Super Kukulus (fitofortificante ecológico)/1 litro de agua para riego foliar, tanto en el anverso como en el reverso de las hojas (2-3 veces/sem y se puede aplicar en cualquier momento del cultivo has 2 días antes de la cosecha). Además, añadiré unas pequeñas tiras (Yellow Sticky Traps) para mayor tranquilidad, veremos los resultados en las próximas semanas! 💪😅

Likes
6
Share


@Awt_genetics
Follow
Leaves starting to turn purple , will start flushing in two days to take it to 60 days flowering .

Processing
Likes
19
Share


@eldruida_lamota
Follow
Buenas noches familia, traemos la actualización de la semana, y es que esta genética si a crecido sin problemas, se ven con un verde sano, empezamos alimentándolas y pronto las tendremos en floración.
Alimentamos con la gama jungle se advanded nutrients y controlamos Ph 6.2
Temperatura ideal en el día, pero baja por la noche, mínimas 17, No supone problema alguno.
Likes
8
Share


@PortkeyCannabis
Follow
Got these two that I’m am very excited about I have never grown either of these or any fastbuds so yeah let’s go!! Stay tuned!!
Likes
16
Share


@Train
Follow
Transplanted from red solo cup to 2 gallon pot mid week. Trying to build solid roots that are slightly bound. Intention is to train the roots horizontally and vertically in their final 7 Gallon cloth pots.
I have reduced my plants from 3 to 2 plants. I feel 2 plants work better for a Scrog in a 2x4 tent.
I am watering (200ppm, 6.7ph) with a 2ml solution of Seaweed Extract roughly 2.5 times per week. I am also applying it as a foliage spray using a pesticide sprayer.(brand new, so clean)
Runoff water PPM 750(due to FF Ocean Soil) Ph 5.8.
Same day of transplant I put my plants under my Mars Hydro Tsl2000 on full power 40 inches from the plant.
Following day: 25 inches
Following day: 16 inches (best recommend distance by cocoforcannabis.com) helpful site for tested lights.
Currently both plants have 4 nodes. I intend to top above the 2nd node once 5 nodes appear. I intend to scrog in an X pattern with the 4 main colas that should develop.

Likes
57
Share


@BudBoutique
Follow
Welcome to Bud Boutique Grow Diary - really appreciate all your love and support :)
Dont forget to check out my other current grows!
🗓️ This Week:
- Day 52: the end is near
- Day 53: Trichomes check from #1 and #2 - looking super good almost all cloudy, a few amber and clear. perfect point to chop
- Day 54: this one is finished, let's chop them both #1 & #2 !! ✂️✂️✂️
- both phenos got still super purple beautiful leaves
- now its time to dry inside the tent at about 60%rh and less than 20°C/68°F trying to get it even lower for the next 10-14 days
Thank you for still staying with me 💚
___________________________________________
--- 🌱 Strain (Sponsor) 🌱 ---
🏷️ PEACH GIRL by Art Genetix
https://www.artgenetix.world/product-page/peach-girl
--- 🥗 Nutrients and Feeding (Sponsor) - (APTUS Ambassador) ---
🍸 APTUS: full nutrient schedule extreme
-- Regulator, N-Boost, P-Boost, CaMg-Boost, K-Boost, Allin1 Liquid, Startbooster, Topbooster, Enzym+ every feeding
-- Fulvic-Blast, NutriSpray as Foliar each once a week
🔗 https://aptus-holland.com/
--- ♻️ Grow Control (Sponsor) ---
TROLMASTER: TENT-X + LM14 Light Adapter to dim/sunrise/sunset lights + Temp & rH Sensor all remote on App
🔗 https://www.trolmaster.eu/
--- 🚿 PetraGrow (Sponsor) ---
CannaFogger Foliar Spray
🔗 https://www.petratools.com/product/petragrow-cannafogger-atomizer-new-mini-fogger
--- 🏭 Grow Setup ---
💡LUMATEK Zeus Pro 600
* 🏠🌿 Indoor: Homebox 120x120x200cm (4x4)
* 📐🌀 PrimaKlima exhausting Fan 1180m3/h (running on 60-80%)
* 🌀 Can Light Filter 800m3/h & 1x Fanbox 1x Dyson fan for Air circulation
🔗 https://lumatek-lighting.com/zeus-600w-pro-29/
🔗 https://primaklima.com/de/shop/ventilatoren-de/ec-ventilatoren/pk160ec-tc/
🔗 https://canfilters.com/products/filters/
All Likes and comments are highly appreciated!!!
👨🌾 don't forget to check out my Instagram for daily educational content: budboutiquee
- Bud Boutique


Likes
37
Share


@Budz_Bunny
Follow
Grow Journal Week 3: Bloom Phase Progress 🌼
Hello dear growers and growerettes,
I’m thrilled to share the third week of the bloom phase in our grow journal! Here are all the details for Week 3:
Weekly Progress
We are at the end of Bloom Week 3, and the plants are thriving! Even our previously problematic plant has made a full recovery. My favorite plant, the one on the left, has claimed an entire half of the tent for itself. The stretch phase has now concluded, and I am very pleased with the results.
Watering and Control Systems
The watering system is operating smoothly, even with the increased water consumption of the ladies. The Blumat and TrolMaster systems are working without any issues.
Challenges
In Week 2, I performed a heavy defoliation since I had some time that day. Although it was a bit early, the ladies have recovered well. Due to limited time over the past two weeks, and this likely continuing until the end of December, I've been doing my best to keep the journal as current as possible.
Goals and Expectations
In the next two weeks, I expect my buds to start swelling, and I am very excited about this development.
Thank you for following along, and stay tuned for more updates! 🌿✨

Likes
4
Share

@carlitoshaze44
Follow
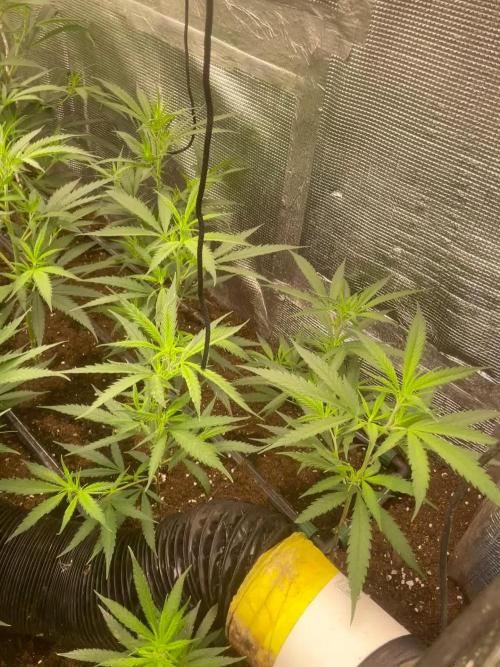
Seguimos con más avances!
23/3/26
Seguimos con 45 amnesias muy sanas! Y libres de plagas al menos por el momento!
En esta semana daremos otro fumigado para prevenir cualquier ataque que venga en las próximas semanas.
Tengo que decir que en estos últimos tres días los avances de las niñas fueron increíbles de las 45 solo se quedó atrás 1.
Tenemos entonces 44 plantas que se han desarrollado bien y entran en la floración al 100x100.
En esta semana iré reduciendo el nitrógeno hasta que vea la formación de las primeras flores y comenzaré a trabajar con las concentraciones de productos de floración.
Esta vez quiero ver qué tal con el 4en1 de plagron greensensation+sugar royal.
Que ya e visto y catado los resultados varias veces muy buenos! Por cierto.
Atami bloombastic +atamiflavor.
Que no e tenido la oportunidad de probar con ellos hasta ahora.
Tengo ganas de ver qué tal los resultados con estas haze.
Que esta vez llevaremos hasta el final de la maduración ya que este cultivo será exclusivamente para fumar en flores .
Quiero la máxima expresión de sabor.
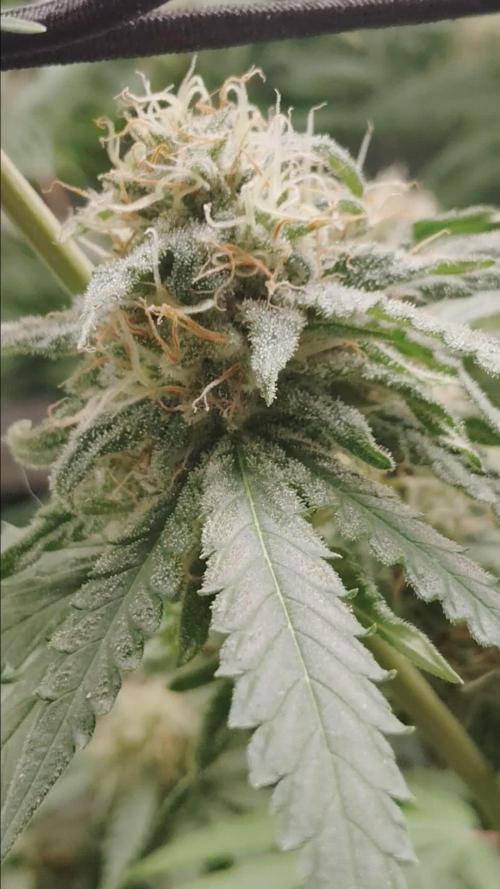
26/3/26
Espectacular!! Nítido! Solo deciros que en 24horas la evolución es impresionante las bacterias más el clima! Más las ? lombrices! Todo va como tiene que ir! Muy contento espero que todo acabe de una manera espectacular.


Likes
15
Share


@Bluemels
Follow
Tag 91: Nur noch 3 Wochen bis zur Ernte! Die Triple G entwickelt sich prächtig, ein richtiger Urwald ist sie geworden 😁
Bin gespannt wieviel es am Ende wird, so wirklich erahnen lässt sich das nämlich noch nicht 😶


Likes
2
Share


@Patillac31
Follow
●Well unfortunately the ballast blew on my light so I'm harvesting 6 days or so sooner than I had wanted. Will be giving a 6 or 7 day hang dry. I will post weights and flavors once dried and cured. As of now Big Bud has a strong bubblegum aroma. I'm very excited to give her a taste!


Likes
3
Share


@danielsegovia
Follow
28.05.20 Crecimiento normal.
Riego en suelo con agua y riego foliar con fertilizantes bien suave.
DÍA 11: Las transplanté a macetas de 15 litros pero con sólo 9 litros de tierra.
También agrandé el espacio de cultivo y puse un les de 1000w
