


Likes
Comments
Share


@Bread_n_Buds
Follow
At Breadandbuds we have never underestimated F1s and here we have a great example of why: Do Si Dos F1 Hybrid Automatic.
We have two plants that you can find compared at the end of the photo gallery of this diary, one left to grow straight that will be harvested tonight and you can find described in this diary and the other worked with a mainiling that made it bonsai style that will be harvested in about 10 days.
THIS IS THE HARVEST DAY FOR PLANT 1 the one not worked with techniques.
The characteristic of F1 plants small and fast flowering (on average) is found in this strain grown in winter ()
I'm sure that in autumn I can do something bigger) They are both very beautiful, resinous and fast, the one worked with the techniques has the natural delay due precisely to this type of work.
This plant collected in particular has a height anot very great but it really has all the little things in their place we really want to taste it as soon as possible.
It was all in an intensive flush, we both arrived a little too full and so we planted with the basic fi fertilizers girls.
Fertilizers x Soil x Additives 100& Organic Plagron
--- www.plagron.com
Try a seed of this strain that drives us crazy..
---- https://www.zamnesia.io/en/10664-zamnesia-seeds-do-si-dos-f1-automatic.html
Zamnesia Description // From the team at Zamnesia Seeds comes Do-Si-Dos F1 Automatic. Using consistent and reliable F1 genetics, this strain is not only incredibly easy to grow, but also offers potent and delicious buds. The plants remain small and offer a reliable growing experience that everyone will appreciate.
All the best that mother nature has to offer is at ---- www.zamnesia.com

Likes
52
Share


@Hashy
Follow
Grow diary 11 stage 8
Day 71 to 80
She doing her thing. Have managed to get a bit more light to her. Probably 2 weeks before she is moved out to finish on her own. Wish all the others in this grow had grown like this one.

Likes
14
Share

@MrGrowDiarie
Follow
Day 63
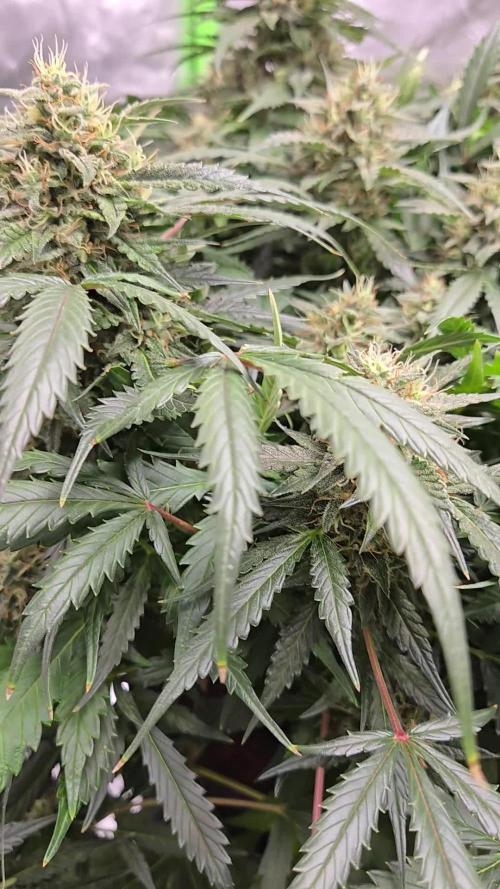
Today marks day 63 of flowering and the plants are really showing their final form. The buds have packed on a lot of weight over the past week, and the colas are looking dense, swollen and sticky to the touch. The pistils have mostly changed color now, with a good portion curling in and turning orange and amber, which gives the flowers that mature, finished look. When I check the trichomes under the loupe I can see that the majority are cloudy, with just a few still clear and the first signs of amber starting to show. This is a good sign that the harvest window is opening soon, though I’ll probably let them go a few more days to really finish and develop that extra potency and flavor.
The smell is very intense at this point. Every time I open the tent I’m hit with a strong wave of aroma that’s a mix of sweet, earthy and slightly fruity notes, depending on which plant I’m leaning into. It’s sticky enough now that just brushing against a bud leaves resin on my fingers. The leaves are starting to fade naturally as the plant finishes up, showing yellows and some purples, which also makes the buds stand out even more.
I’ve stopped feeding nutrients and have been giving only plain, pH-balanced water to let the medium flush out. Runoff is looking clean and the plants seem to be using up the last of their stored energy. Temperatures and humidity are steady, and the airflow in the tent is keeping everything fresh with no signs of mold or rot, which is always something I watch carefully this late in flower.
Overall the garden looks amazing and I feel like I’m right on track for harvest. The next week will be about patience and daily trichome checks until I see the balance of cloudy and amber that I’m aiming for. It feels like the long wait is finally paying off, and the excitement is building to finally chop, dry, and cure these beautiful buds
Likes
12
Share


@Grass_slinger
Follow
This bud stinks! The different geno type of the payote cookies is really starting to separate itself from the others with pistrols being longer and thinner but with less tricomb coverage. I’m hoping to see some colour changing on the leaves within the next couple of weeks.

Likes
38
Share


@Green_Mountains
Follow
Another good week! I fed them once on Monday. A final shot to boost them for finishing up. I am pretty certain they will finish within 2 weeks.I also watered them on Thursday and today (Sunday).
I defoliated both plants earlier this week as well. For one, I needed to open the canopy up to help keep the humidity down but, there were a lot of leaves yellowing and turning brown. I was not feeding them correctly... in the sense that I wasn't watering enough in between feeds. There were excess nutrients built up in the soil and I believe that led to the nutrient burn. Also, this was my first and only feed without the Grow Big due to flushing for week 9. I followed the Fox Farm feed schedule... but, I think I needed to understand my plants better!
I also believe I stunted these girls! One is about 24" tall and the other is 21" tall. Both on the very low end of the growth chart.
Overall, I am very happy!! So much to experience and learn in such a short window of time! I've thoroughly enjoyed this grow!
I look forward to the harvest and experiencing all that is to come!
One last thing... Anyone use GrowBuddy and any word on what is going on with the current download? I've followed the drama around taking so long and all that (the new hardware soon to be for sale for 2.0)... but, the website now says the software is available for free and working on Macs and Windows.... So, I downloaded it last night and I cannot activate an account. Everything has a greyed over kind of look... So, I assume they took some part of their servers offline... Anyone know if this is accurate and has anyone else activated a new account recently? Thanks for any insight!!
Peace!
Likes
6
Share


@Gromie
Follow
Last Sunday I increased the nutes so that the ppm was on the higher level (600-625) as the feeding schedule showed. Dec 9th I started to see some lime green (video) leaves on new growth. The ppm would go up mostly & down slightly, but the lime green spread & eventually turned yellow (last pic from today). I did a water change the other day & lowered the ppm/nutes to around 575-580 range. I've been reading around that this might be a sulfur deficiency? Some suggested adding Cal-mag. Today I added 2 ml more of Cal-mag & snipped some of the darker fan leaves that had some damage. I ordered epsom salt, waiting for it to arrive (tomorrow). Any other suggestions/diagnoses are welcomed! 😊


Likes
84
Share


Likes
9
Share

@Salokin
Follow
Week 5 | Jealousy Marker | Vegetation
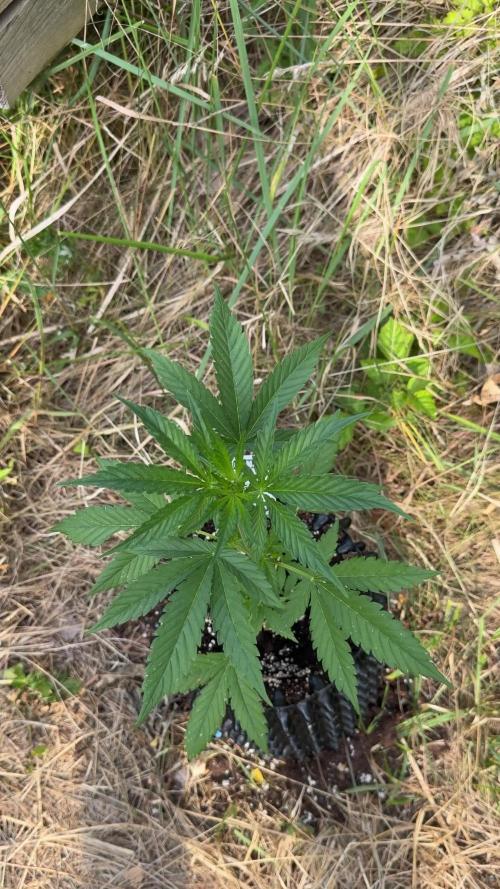
First full week outdoors and she’s already responding well to the sun. At 35cm she’s put on real structure since the move — internode spacing looks good and the canopy is opening up nicely. Natural light at 17 hours, no lamp distance to track anymore.
Temperatures this week were on the high end — 35°C during the day dropping to 18°C at night. Wide swing, but she’s handling it without complaint. Humidity sitting at 60%, watering stepped up to 1L per plant per 24h to keep pace with the outdoor conditions.
Nutrient stack has been dialled up to match the increased demand: CANNA Aqua Vega at 3 ml/l, CalMag Agent at 0.9 ml/l, Aptus Regulator at 0.1 ml/l. pH 6.2, EC 1.2 mS/cm. Still in the 5L bottomless airpot — roots are free to push down into the native soil below.
Updates every Sunday. Stay tuned.

Processing
Likes
6
Share


@Barcelona_Farmers710
Follow
Aplicamos recientemente jabón potásico por problemas con trips... estamos controlando todo a tiempo, en 3 semanas ya pasaremos al armario grande para continuar dándole crescimiento para las nenas farmers!🍁

Likes
36
Share


@Grey_Wolf
Follow
Eva Seeds High level
27th December 2021
Another very bloody Hot week here with temps nudging 46.1 on Christmas day 😬
But with plenty of shade cloth and water this plant is doing well 👊
Gave her some Bio Enhancer this week as well as some more mycorrhizae .
Cheers for stopping by 👍


Likes
7
Share


@saintetiennegrows
Follow
This strain was a pleasure to grow. No problems presented at all. She is very stress resistant and has some unique structural formations. She smells like a variety of citrus flavors when grown but after being harvested she smells exactly like an orange grove.

Likes
6
Share


@Rinna
Follow
This was a wild ride. Gave way to many nutrients and I realised this way too late, when lock-ups already started to happen. The buds still look very potent, I just think they had way more in em size/potency wise if the nutrients would've been on point. Not growing auto flowers indoor anymore, but I'll deffo be growing this one outdoors this year! The smell is out of this world, #1 smells like tropical fruit juice, #2 more of a candy-sweetness but definitely tropical. Can't wait for ya'll to grow this one!
Likes
1023
Share


@Grow3rPT
Follow
Cultivo Led The Jungle ( The Smith 150w 4000k ) - Não tem esta opção para colocar no diário.
Total Dias 36 - 16/05/2021
Total Dias 37 - 17/05/2021
Total Dias 38 - 18/05/2021 / Rega 1L x 4 Plantas / 4ml BLOOM
Total Dias 39 - 19/05/2021
Total Dias 40 - 20/05/2021 / Tive que fazer um FLUSH na planta 3, esta a ter alguns problemas uma deficiência de cobre.
Total Dias 41 - 21/05/2021 / Rega 1L x 3 Plantas (Uma planta levou FLUSH)
Total Dias 42 - 22/05/2021 / Desfolhamento das folhas que não apanham luz em baixo
Likes
7
Share


@Jays_Not_Here_Man
Follow
The girls are hungry! Despite seeing some nitrogen excess they are still wanting more phosphorus. The Bonnie and Clyde have been a bit of a learning curve, but overall, I’m very happy with these Autoflowers so far! Some of the biggest I’ve grown to date.
Humidity has been a struggle this week, trying to keep my VPD on point. Otherwise it’s been a good week of growth. Happy Gardening 🇨🇦🌱❤️😎💨


Processing
Likes
1
Share


@ladyjane
Follow
8/22 - There has been some explosive growth among my 4 purple Microdots. They are growing by leaps and bounds each day,
8/23 - So far everything is going smoothly. Just watering each day w/ RO water and organic black strap molasses.
8/24 - Brewing up some compost tea. This will be there first! As they start to get a little bigger I've made a prediction for sex. I think A238 & A239 are male and A240 & A241 are female. We'll see!
8/25- Fed the ladies with the compost tea and used it as a foliar spray as well. They responded very well and continue to have crazy, rapid, growth.
8/27 - They have gotten so big and bushy. I'm going to start a little LST on them today!
8/30 - They are starting to show sex! Still can't tell whether it's male or female...but it should be any day now!
Likes
27
Share


@adam_pawloski87
Follow
Let’s go Day 36 !!! This week went real great, girls built up a lot of structure, and stayed super healthy ! Today they got fed just water phd at 6.5 ! They been really loving that balance! I also removed a lot of under trim since we are going into preflower , so had to shave up those legs lol ! It’s really great for them , the love that airflow , but don’t take off too much or you could shock your plants so be careful ! Can’t wait to see what these girls do this week ! Hope you all enjoy an are ready for another amazing productive week ! Peace , Love , an positive vibes to y’all Cheers LetsGrowwww!!! 😶🌫️💨💨💨💨
Likes
1
Share

@hassehujasse
Follow
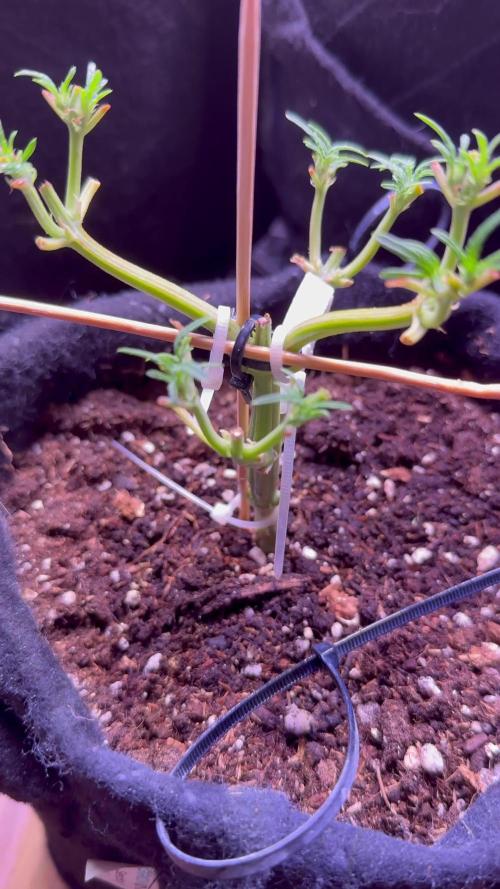
3 topping done, transplantation done 27 days behind
She have this week to recover and prepare plant to pre flowering