


Likes
Comments
Share


@Brocolis_Grow_Br
Follow
Chegando ao final desta colheita como comentei na última semana, por conta das pragas. Elas já estão em um nível quase incontrolável e eu já sabia que perderia alguma parte para mofo, já que tomou muita chuva e os buds estão densos.
Colhi 71g, descartei talvez uns 2g logo de cara. Ficou secando em condições um pouco ruins, pois os dias muito quentes e úmidos continuaram. No final, a planta ficou bonita e densa, mesmo que pequena. Acabei ficando com 13g secos, sendo que 4g foram para o lixo com mofo. A quantidade foi super baixa, mas fiz um teste no vape e gostei muito. Mesmo com todas as desgraças que ela passou, o produto final ainda ficou bem legal, o que já me motiva para fazer novamente mas agora com um cuidado diferente e no indoor.

Likes
207
Share


@SwissKush
Follow
Day 78 - Ripening
a. the buds are gaining more and more weight, humidity 45%
b. the resin is dripping from the buds, the amount of resin on this plant is next level
c. smelling this plant when I open the tent I smell floral fruity tones
Day 79 - more resin
a. the glands on this plant keep growing upward and multiplying all over the buds
b. buds fattening
Day 80 - buds are rock hard
a. the colas are very dense, even the buds down the limbs are dense!
Day 81 - the smell is so strong!
a. glad I use carbon filter in this box, this plant smells crazy good like most citrus weed you've ever smelled.
b. I clipped a bud, dried it safely, smoked .25g in a bong and the effects are already super strong.
c. trichomes are about 60% milky, a few ambers here and there, still plenty of clears to let ripen.
Day 82 - her pistils are 70% brown/orange - buds are becoming blue! Video uploaded
a. the colas are very tight and dense with their leaves all being yellow now, many are able to remove by hand with no effort except the huge amount of resin holding them in. I will not remove any because I will be making hash later on.
b. the buds are turning a nice blue color. I will be going the distance with this plant!
c. Trichomes are 80% white, 20 % clear with a few ambers here and there, still needs more time! DWC and autos always take a little longer due to the abundance of readily available nutrients in the water pool.
Day 83 - ripening fast! Blue Gelato buds!
a. turned lights down to 50% intensity
b. will begin the flushing process tomorrow
Day 84 - We will begin the flush!
a. I will use Florakleen to flush the ladies for a few days, then I will harvest
b. the trichome production is next level with this plant

Likes
435
Share


@Ju_Bps
Follow
Hello my friends 👨🌾👩🌾🔥🔥,
I'm back in GD Jail, so can't reply you my friends, hope will be solved asap.
3rd week of blooming 🌲🌲, Buds continue to grow up, they start to be frosty and sticky.
I can't talk too much about smeel cause I've make a thrips treatment, and still smeel insecticide...
This week I've found again several thrips, and several dead leaves cause eaten by this 🤬..
I'll try an other treatment in few days🥊🥊🤞🤞
Except this issue with thrips, plants look happy and healthy, and lot of buds site 💜💜🌲🌲🌲😁😁
💦I've given 1.5 l/plants 3 times.
Start week, Mid week, today
1x water + tera vega + boost
1x water + cannazym
1x water only (1.8l /plant)
PH@6
I'll start blooming fertilizer next week, I couldn't used today, cause plants look a bit overfert, so I preferred give only water today
Thanks community for follow, likes, comments, always a pleasure 👩🌾👨🌾❤️🌲
Also to @marshydrococo2 , @News_SweetSeeds for sponsoring 💕💕.
Mars Hydro TS 1000
https://www.mars-hydro.com/ts-1000-led-grow-light
If you want a litle discount on your Mars Hydro order, you can use the coupon Ju_Bps
Gorilla Girl F1 fast version
https://sweetseeds.es/en/photoperiod-dependent-seeds/3065-gorilla-girl-f1-fast-version.html
See you next week my friends
Have a good week end 😁💕

Likes
12
Share


@BlaKX
Follow
Gorilla Punch Auto 🦍 🥊:
22.6 - 30.6 = 34,5 cm
Mimosa Cake Auto 🍹🍰:
22.6 - 30.6 = 52,5 cm
Nothern Light Auto 🌌🌠:
22.6 - 30.6 = 63cm
Sie sind förmlich explodiert was das Bud Wachstum und Harz Produktion angeht!!!
Ich habe leider die Mimosa Cake und NL tauchen müssen weil das Substrat zu trocken war und ich grade in der wichtigsten Phase ein anständiges feuchtes Substrat habe ohne Salz ansammelung am Topf Boden.
Die Hitze macht an sich keine Probleme mehr dafür aber mittlerweile die Luftfeuchtigkeit und zwar von draußen wenn das Licht für 6std. Ausgeht mittags um 12uhr-18uhr herrscht oft eine Luftfeuchtigkeit von 50-60% aber ansonsten so 45%-50% RLF.
Hab nur PK13/14 zusätzlich verwendet und den booster 1ml erhöht.
Ansonsten bin ich wirklich zufrieden und stolz auf meine 3 Autoflower:)💚💜🍀🏻


Likes
20
Share

@DogDoctorOfficial
Follow
Skywalker OG — Harvest / Trim / Cure
Part 3 — Trimming The First Giant
First of all, once again, apologies for dividing this Skywalker OG harvest series into multiple parts.
But honestly…
there was simply no way to properly document this run without giving each phase and each plant the attention they deserve.
These girls became something special.
And with:
* multiple giant plants
* hundreds of photos
* trimming timelapses
* resin collection
* curing experiments
* and smoke reviews still coming later
we wanted to slow down and properly catalogue everything instead of rushing through it.
So now…
we return:
10 days later.
And the first Skywalker OG giant was finally ready.
⸻
The Click
After hanging whole-plant drying for roughly:
* 7–10 days
* at around 18–20°C
* with humidity stabilized near 60%
* and the first days closer to 45% RH to safely remove excess surface moisture
the moment finally arrived.
That special branch click.
Not bending anymore.
Not soft anymore.
That sound and feeling growers slowly learn over time:
the perfect dry point before curing.
And honestly?
This girl dried beautifully.
The flowers tightened perfectly.
The aromas became deeper.
The resin stayed everywhere.
Exactly what we hoped for.
⸻
Trimming Begins
So…
gloves on.
Medicine nearby.
Scissors ready.
Cleaning alcohol beside us.
And branch by branch…
we started.
Slowly breaking down the plant.
Separating branches.
Taking individual flowers out carefully.
Hand trimming every nug one by one.
No machine trimming.
No shortcuts.
Just patience.
And immediately one thing became obvious again:
sticky.
Very sticky.
The dry trichomes instantly started gluing themselves onto the gloves.
Every few minutes:
* fingers sticking together
* scissors becoming greasy
* resin buildup everywhere
The kind of trimming session where your gloves slowly stop looking black and start looking glossy.
⸻
Finger Hash & Resin Balls
Naturally, as trimming continued…
finger hash started forming again.
But this time differently from the fresh charas we collected during harvest.
This resin came from:
dry trichomes
broken loose during trimming and handling.
Still incredibly aromatic.
Still greasy.
Still beautiful.
But drier, more compact, and more stable than fresh charas.
And honestly?
Watching the little resin balls slowly form from pure trimming sessions never stops being satisfying.
A grower’s reward during the work itself.
⸻
Moroccan Drums — Trim Bin Sessions
As the trim accumulated, we also continued one of our favorite little rituals.
Lightly working the trim material by hand almost like traditional Moroccan drum techniques.
Nothing aggressive.
Nothing industrial.
Just gently helping the loose trichome heads separate naturally from the material.
And honestly?
This Skywalker OG was loaded.
The Trim Bin kept collecting beautiful resin underneath the screen while we worked.
And eventually…
we pressed some of that loose resin together purely by hand pressure.
No heat.
No tools.
No pressing equipment.
Just hand pressure alone.
And it immediately transformed into:
a beautiful little temple ball.
Soft.
Greasy.
Dark golden-brown.
Beautiful texture.
The kind of resin that instantly tells you:
“This plant had serious trichome production.”
⸻
The Numbers
Then came the moment everybody waits for.
The final dry weight.
And honestly…
we’re still smiling looking at the scale.
369.9 grams
from a single plant
under 12/12 from seed.
Absolutely insane.
Especially considering:
* minimal training
* natural structure
* relatively compact height
* and mostly letting the plant guide herself naturally
This girl became a true production monster.
Dense flowers.
Heavy branches.
Massive yield.
Excellent resin production.
One of those harvests where you step back afterward and just stare at the pile for a few seconds.
Because it honestly feels surreal.
⸻
Rock-Solid Medicine
And the flower quality itself?
Beautiful.
These buds dried into:
* dense
* compact
* greasy
* heavy flowers
Exactly the kind of structure we expected after seeing how swollen the plant became during late flower.
The kind of buds that feel substantial immediately when picked up.
No fluff.
No air.
Just proper medicine.
And visually?
Still gorgeous after drying.
The calyx swelling remained.
The trichomes stayed visible everywhere.
And the flowers kept that heavy OG structure beautifully.
⸻
Storage & Cure
At this point, preserving the cure properly became extremely important.
So we divided the flower between multiple storage methods.
Traditional Glass Jars
The classic method.
Simple. Reliable. Proven.
Perfect for:
* manual burping
* visual inspection
* humidity monitoring
* and traditional curing control
⸻
Vacuum Glass Jar
We also started testing one of the vacuum-style glass jars from Zamnesia.
The idea here is reducing oxygen exposure during cure and long-term storage.
Now we’re extremely curious to later compare:
* terpene preservation
* moisture behavior
* aroma retention
* and overall cure evolution
between vacuum curing and traditional curing.
⸻
Grove Bags
And honestly…
there was simply too much flower not to use Grove Bags too.
So part of the harvest also went into Grove Bags for longer-term curing and storage testing.
Again, we’ll revisit all of this deeper later during the smoke review reports once the cure evolves further.
Because right now the mission is simple:
preserve the terpenes.
Preserve the resin.
Preserve the soul of the plant.
⸻
The Skeleton
One thing we always love after trimming massive plants is looking at the final skeleton left behind.
And honestly?
This one was beautiful.
Not an absurdly giant trunk…
yet somehow it carried an absurd amount of medicine.
Which honestly says a lot about how efficient these 12/12-from-seed plants can become.
Compact structure.
Extreme productivity.
Minimal wasted growth.
The Legends of the 12/12 Galaxy continue proving themselves.
⸻
Timelapses & Documentation
We also included trimming timelapses in this report so people can actually see:
* the workflow
* the process
* the resin buildup
* the trimming rhythm
* and what goes into preparing flowers like this properly
Because behind every beautiful jar photo…
there are hours of work.
Hours of patience.
And honestly?
We love documenting that part too.
⸻
What Comes Next
The next reports will continue with:
trimming the remaining two Skywalker OG giants
And honestly…
there is still so much left to show.
Which means yes:
this series may realistically reach:
Part 4
or even
Part 5.
And honestly?
These girls deserve every slide.
Every photo.
Every detail.
⸻
Gratitude
Huge thanks once again to everybody following this journey.
To the growers.
To the silent viewers.
To the curious minds.
To the supporters.
To the old followers.
To the new people arriving now.
To the skeptics.
To the lovers.
To the haters too.
To Zamnesia for these incredible genetics.
To Plagron for helping feed this jungle.
To Future Of Grow and Lumiflora for the LEDs powering this room every single day.
To the entire growing community constantly sharing knowledge, mistakes, ideas, techniques, and passion openly.
And honestly…
being able to witness plants like this grow from seed into this level of abundance still feels surreal sometimes.
These truly became:
Legends of the 12/12 Galaxy.
And their story still continues.
From grower to growers.

Likes
8
Share

@GERGrowDesigns
Follow
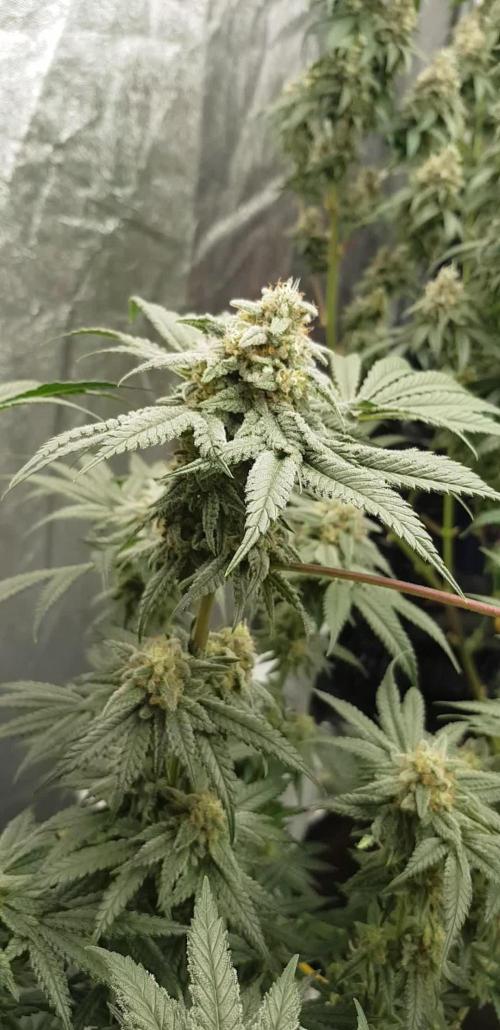
Welcome to Flower week 7 of Fast Buds LemonPaya
I'm excited to share my grow journey with you from my
FastBuds Project . It's going to be an incredible ride, full of learning, growing, and connecting with fellow growers from all around the world!
For this Project , I’ve chosen the Feminized Photo strain Lemonpaya :
Here’s what I’m working with:
• 🌱 Tent: 120x60x80
• 🧑🌾 Breeder Company: Fast buds
• 💧 Humidity Range: 35
• ⏳ Flowering Time: 58 Days
• Strain Info: 30%THC
• 🌡️ Temperature: 26
• 🍵 Pot Size: 16l
• Nutrient Brand: Narcos
• ⚡ Lights : 600W x 2
A huge thank you to Fast Buds for allowing me to try my Best with this amazing collection from Automatic and Photo Strains they managed to Sponsore . Big thanks for supporting the grower community worldwide! Your genetics and passion speak for themselves!
I would truly appreciate every bit of feedback, help, questions, or discussions – and of course, your likes and interactions mean the world to me as I try to stand out in this exciting competition!
Let’s grow together – and don’t forget to stop by again to see the latest updates!
Happy growing!
Stay lifted and stay curious!
Peace & Buds!
Likes
97
Share


@Master_weeda
Follow
Bonjour à tous les padawans et maîtres jedis
Merci à tous les growers qui m'ont aidé
À @laBOSSANOVA @Jésus @belzebut @vvince @Castafunk @bidou
JE ME SUIS RÉGALÉ !
Likes
42
Share

@TrickzCutz
Follow
Servus Moin!
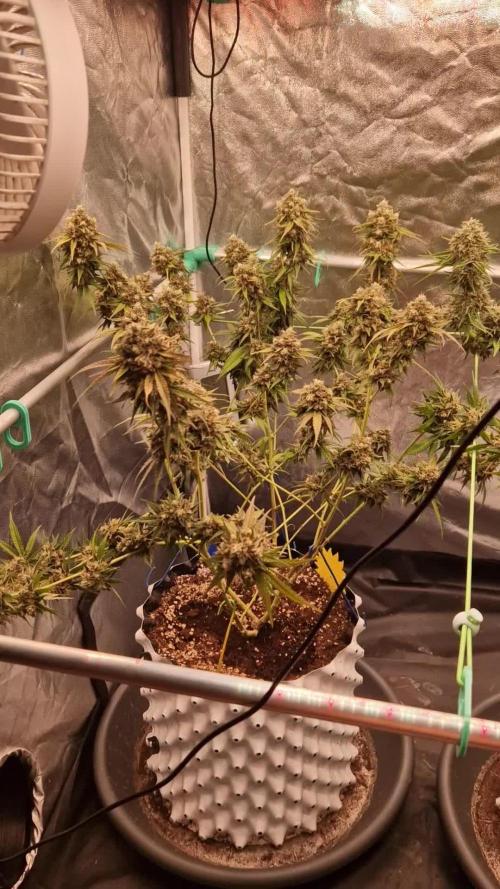
Die Permanent Melons wird heute geköpft. Ich bin wieder mega zufrieden mit ihr! Ich kann es kaum erwarten, das sie trocken ist, damit ich sie rauchen kann.

Likes
6
Share


@JackSkellington
Follow
19/05/2021
la mattina dopo aver lollipoppato ho trovato le teste delle apicali tutte a curvate verso giù credo sia dovuto allo stress.....
oggi andrò a visionare se si sono riprese dal stress dubito
proverò a risolvere l overfert alzando tutta la lampada in cima al box(poca luce=poco mangiare) per 4 giorni....
e cercherò di guardare un po le radici delle baby perchè ho il sospetto che l overfert si un conseguenza di troppa irrigazione d acqua....
se cosi non fosse credo che laverò il terreno tutte le mie bimbe sperando iniziano a schiarirsi un po dal quel verde scuro altrimenti niente fioritura....
restate connessi
21/05/2021
ho alzato la lampada a 90cm per farle riprendere dal forte stress lo tenuta cosi per 48 ore...
andrò il 24 a vedere cosa e successo...

Likes
214
Share


@Hologram
Follow
Finally the final chapter of the Big cheese twins chronicles!!
Those twins were not identical at all and they had diff. pots too
I will show you the diff:
5lPot: 151.98G wet harvest 28.42G cuttings and buds for oil.
She was not that big (50 cm) but her buds were fat as fu*k!
did not have big colas with flower but all the buds were fat, shiny and full with trich.😎
i can even use some of the big leaves for oil..👌
i love the smell, only in early stage of flower they were a bit skanky but later on the smell became more flowery
and herby 😋
had a lot of pests and bad weather and did not get a lot of daylight..
But still she couldnt get cheddar than this!😁
you fetta believe it! (😳yeah im feeling very cheesy 2day)
11L pot: 75,45G ~75,45G for oil
she was a freak with very strange leaves, i almost wanted to teminate her..but i gave her a chance..😎👊
she grew tall and was foxtailing all the way (very sexy 😁)
So the buds were not so big or fat but very white, filled with trichomes!
so maybe i will make oil with all of this (i made a diary about that if you are interested)
i will see how she dries 👍
Must also not forget they were in my fridge for almost 2 years, waiting...
So thats why im just happy they even wanted to grow! 🙌
Thankyou all for following the adventures of the BIG CHIEF-twins
they grew healthy thanks to all of you! 😇
Happy growing for all ✊

Likes
4
Share


@Maximilian1234
Follow
Blütewoche 6
Was soll ich sagen die Blüten werden immer fetter und fester. Ich bin eigentlich nur noch alle zwei Tage am gießen. Mehr ist nicht zu tun. Gut das die Gemüseanzucht wieder los geht sonst wäre es fast langweilig 😉
Die Pflanzen sehen nach wie vor sehr gesund aus, lediglich im unteren Bereich merkt man langsam das Nährstoffe verlagert werden. Trauermücken sind kaum noch zu sehen. Da haben die fressfeinde sich wohl gelohnt.
Die Skywalker ist eine sehr einfach anzubauende Sorte.
Bei mir haben sich meiner Meinung nach 4 unterschiedliche Phenos gezeigt.
Lasst mir dazu aber gerne eure Meinung da!
Liebe Grüße 🖖

Likes
4
Share


@THScollective
Follow
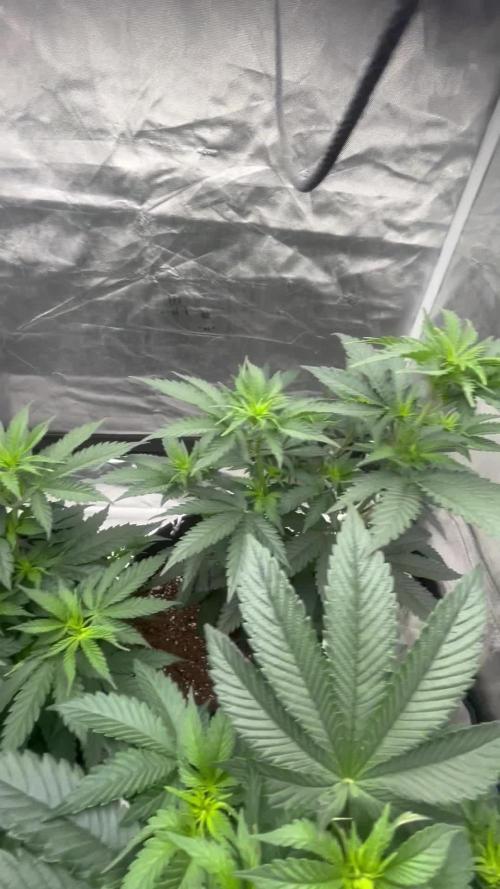
Germination day. Here is a lil introduction to planting autos video for you guys. Feels nice being back on the Fastbuds team.



Likes
12
Share


@Elk419
Follow
63 days of flower and chopped. Didn't want much amber on this indica. Weight will be determined after dry. Buds are basically dripping in resin and are frosty AH. Pics just don't do it justice.


Likes
7
Share

Likes
62
Share


@BodyByVio
Follow
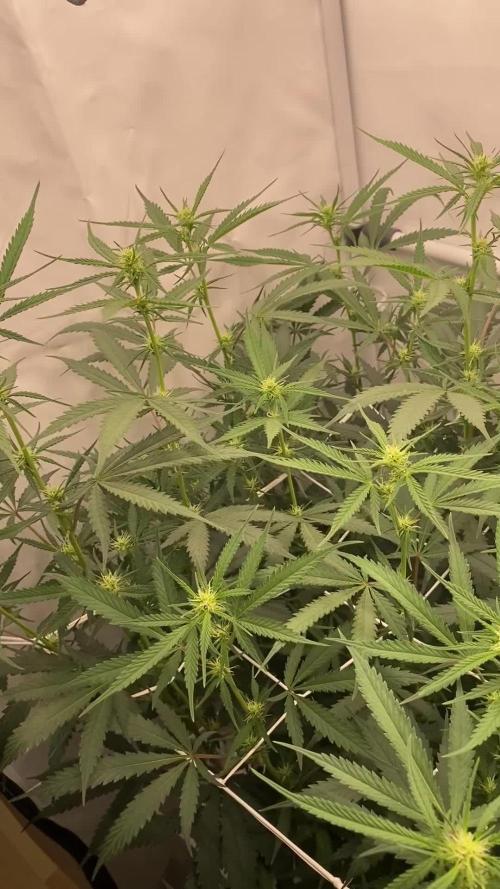
They were showing signs of Ca and Mg deficiencies and I increased my CalMg additive at 350ppm before I add my base nutrients. They seem to love it.


Likes
26
Share


@BudBoutique
Follow
! this is my current status, gonna upload my last veg weeks within the next week - got a bit busy around Spannabis - thank you for your understanding! 💚
Welcome to Bud Boutique Grow Diary - really appreciate all your love and support :)
Dont forget to check out my other current grows!
🗓️ This Week:
- Day 24: attaching once a week APTUS Foliar with Regulator & Nutrispray with the amazing CannaFogger by Petra Grow
- Day 28: bud development is super beautiful and praying up
Thank you for still staying with me 💚
___________________________________________
--- 🌱 Strain (Sponsor) ---
🏷️ Blue Cinderella 99 FF by MSNL
https://www.marijuana-seeds.nl/blue-cinderella-99-fast-flowering
--- 🥗 Nutrients and Feeding (sponsored by APTUS: APTUS Ambassador) ---
🍸 APTUS: full nutrient schedule extreme
-- Regulator, N-Boost, P-Boost, CaMg-Boost, K-Boost, Allin1 Liquid, Startbooster, Topbooster, Enzym+ every feeding
-- Fulvic-Blast, NutriSpray as Foliar each once a week
🔗 https://aptus-holland.com/
--- ♻️ Grow Control (Sponsor) ---
TROLMASTER: TENT-X + LM14 Light Adapter to dim/sunrise/sunset lights + Temp & rH Sensor all remote on App
🔗 https://www.trolmaster.eu/
--- 🚿 PetraGrow (Sponsor) ---
CannaFogger Foliar Spray
🔗 https://www.petratools.com/product/petragrow-cannafogger-atomizer-new-mini-fogger
--- 🏭 Grow Setup ---
💡LUMATEK Zeus Pro 600
* 🏠🌿 Indoor: Homebox 120x120x200cm (4x4)
* 📐🌀 PrimaKlima exhausting Fan 1180m3/h (running on 60-80%)
* 🌀 Can Light Filter 800m3/h & 1x Fanbox 1x Dyson fan for Air circulation
🔗 https://lumatek-lighting.com/zeus-600w-pro-29/
🔗 https://primaklima.com/de/shop/ventilatoren-de/ec-ventilatoren/pk160ec-tc/
🔗 https://canfilters.com/products/filters/
All Likes and comments are highly appreciated!!!
👨🌾 don't forget to check out my Instagram for daily educational content: budboutiquee
- Bud Boutique

Likes
12
Share


@Archieballs
Follow
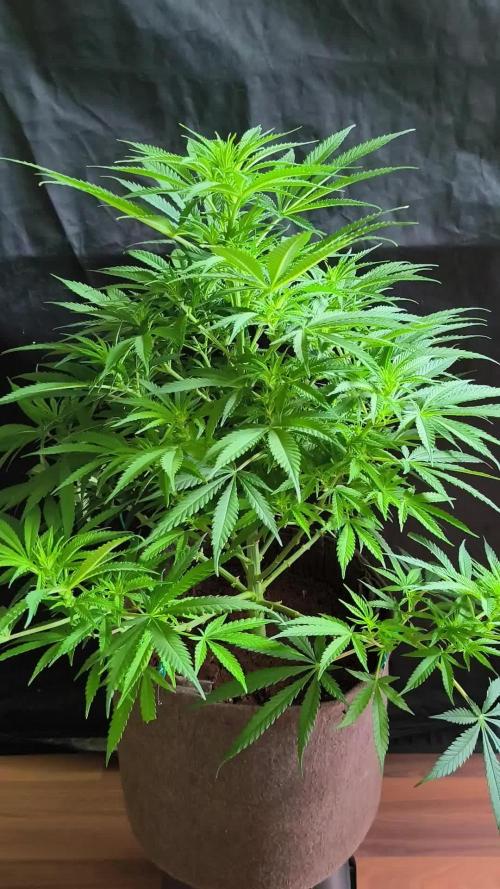
They are all showing sex and doing really well. Hoping with what we learned in our first grow that these three ladies end up with nice big firm buds. Based on their structure thus far I think these ladies have real promise.