




Likes
9
Share


@High_Grade_Dadli
Follow
Two low branch broke off due to wind and
stem wasnt stong enough for weight of the buds....other than that just a handful or two of defoliation every two day or so....makes trimming ez lol
Processing
Likes
6
Share


@PoshGrow
Follow
Welcome to Auto Alaskan Purple Grow by PoshGrow!
🍀 Week #6 2020 August 27th - September 3th.
General Info:
When planted: 2020 July 23th.
Week: 6
Days: 35 - 42
Last Update Day: 2020 September 3th.
Plants: 5 Alaskan Purple Auto.
Equipment:
Tent: MarsHydro 1mx1mx2m or 39"x39"x72".
Light: HLG 260w V2 Rspec QB Kit.
Exhaust: 4" 322 CFM fan + Viper Carbon Filter.
Intake: 4" 100 CFM Inline Fan.
Oscillating Fan:
Lower: 4" Ram Fan.
Upper: 9" Voxon Box Fan.
Humidifier: Taotronics TT-AH001.
Dehumidifier: Pavlit MD750.
Soil: NPK soil 40% Compost, 50% Peat Moss, 10% Agroperlite.
Pot: 7 gallon Fabric Pot x 5pcs.
Nutriens: Fox Farm Trio.
PH Correcton: Chemoform pH-Minus Granulat.
PH Pen: Cheap Chinese one, I callibrate it every time I use it.
Water pump:
Digital microscope: cheap Chinese USB X4, 1600X.
Comment

Likes
44
Share


@Cogollo_eu
Follow
With no doubt these plants have not produced much more quantity and density of buds due to the 2 serious mistakes I've made (those who have read the weeks will know what I mean). However, I can say that I am happy with the production obtained given the mistakes made.
Between the 2 plants, the one that has produced more and generated the most dense buds has been the Gorilla with the Man-lining technique applied, it has also loosed a bit less weight drying than the non man-lining one.
In comparison with the Money Makers with which they have grown the result is the same. Both Gorillas have each produced more than any of the Moneys comparing them 1 to 1. Also buds are a bit dense than the moneys, but none of them is really desde at all.
*****ESPAÑOL*****
Sin duda estas plantas no han producido mucha mas cantidad y densidad de cogollos debido a los 2 graves errores que he cometido (quien se haya leído las semanas sabrá a que me refiero). No obstante, puedo decir que estoy contento con la producción obtenida dados los errores cometidos.
Entre las 2 plantas, la que más a producido y ha generado cogollos más densos ha sido la Gorilla con la técnica de Man-lining aplicada, y también ha perdido un poquito menos de peso en el secado que la otra.
En comparación con las Money Maker junto a las que han crecido el resultado es el mismo. Las Gorillas han producido cada una más que cualquiera de las Moneys comparándolas 1 a 1. Así mismo, los cogollos de las Gorillas presentan un pelín más densidad que el de las Moneys, aunque realmente ninguna de las 4 plantas ha generado cogollos densos del todo.

Processing
Likes
34
Share


@LockDownGrow
Follow
My first time making alcohol tintcure
Using the c1 ,
Hold on tight gonna be a trip

Likes
62
Share


@SimpleGrow
Follow
Hello again guys and welcome to day 89!
The girls are taking their time but finally the trichomes are turning milky. As you can see from the videos, they still aren’t quite there yet. I really want them to reach their maximum potential instead of rushing it. I think in maybe a week or so they should be ready!
Thanks for stoping by

Likes
14
Share


@m0use
Follow
*=UPDATE=*
Smoke Report
*=UPDATE=*
Harvest Totals
**Smoke Report and effects** to follow after cure, May 10th ish.
This was my second ever indoor grow, and compared to my last grow I have learned a lot.
My goal this time was to get about 1.5-2oz a plant, up from my previous goal of 1oz a plant from last grow. Best part is I got to my goal!!😁 Next goal will be 2oz+ a plant.
This was the last time I will be using my homemade grow tent, it was compromised out of recycled Styrofoam, miss-tint paint and glue, it provided me what I needed to get the job done one a extreme budget but it is preventing me from doing more. The main problem I ran into this grow was humidity control/space. The fan broke half way through and I was too lazy to get a new one as I figured I'll wait till I get a real tent. This mind set enabled some mould to flourish and that is why I had to harvest early. I felt if I let the plants go 2 more weeks, I would have hit 2oz a plant, it was only a few grams away, however if I kept going with the mould I would have been down to 1oz after all the rot was cut out from both plants, that shit fucks up your grow fast if you don't manage your air circulation.
So the main things I learned:
1) I was underfeeding my plants in there 2nd half of life, thus the buds from the previous grows and this one suffered a bit. This grow does have the most dense buds I have ever grown, but it could have been better.
2) PH is key, I still did not have a PH meter but was blindly altering the PH of my water by adding in some citric acid, not only to neutralize the chlorine but also lower the PH a bit. When I did test the soils PH using a soil testing kit, it was lower then previous grows. This helped get more nutrients into the plants and grow bigger. previous grows the PH was 7-7,5 ish
3) You can get an "ok" harvest off of blue lights, my grow was under seven 18" 6500k 18w sunblaster LEDs, and I thought they would never get over 1oz a plant because they don't have the best spectrum for cannabis in flower, among the other dumb things I do as a novice grower. but they worked out just fine, still going to upgrade in time with proper lighting in the 3500k range.
4) Once the plants get bigger and buds start to becoming more dense, the air circulation is needed, its is not longer optional for a budget grow in a shity homemade tent.
5) Defoliation works. my plants have ruffly the same amount of buds, however the plant that I fiddled around with mainlining and defoliation had bigger fatter buds vs popcorn nugs like the opposite plant.
6) Fungas gnats are annoying, fuck them, use nematodes to kill them flat in there tracks.
7) Getting better at making edibles. :)
So other then that, the only real differences between this is last grow is lower PH in tap water, more lights, slightly bigger pots, bit more feed and different genetics from a different breeder. I followed everything else ruffly the same. My own hydro break down from lights alone is below.
I did not notice any big difference between the two plants and there phenotypes, I was meaning to take a clone and try and grow it outdoors again but forgot and that was my last of the seeds. I was surprised that one of them was a male. not even hermi, full blown male. I'm not into breeding or I would have kept him,
Yields:
Plant # 1 - male, killed
Plant # 2 - 42.1g bud, 13.15g trim (1 .49oz, 0.46oz) bigger fatter buds
Plant # 3 - 45.1g bud, 13.15g trim (1.59oz, 0.46oz) smaller nugs, almost all popcorn.
=Overall - 87.2g total bud, ave 43.6g a plant. 26.3g trim ave 13.15g a plant.
Smells:
plants 2-3 - both smelled the same, in the beginning they had a lovely sexy lemon sent, then in the end it just turned into something else, I think some of the moulds in the tent altered it a bit. Will wait till after cure to see what its like, I noticed some changes in just drying and having them in the jars for two days now.
Now that the cure is all done and finished the two strains smell a bit different in there respective jars but there smoke is almost identical.
plant #2 or pheno #1 is more of a classic OG Kush smell to me, its earthy, herbal and pungent. Hints of pine in there with lemon bit woody.
plant #3 or pheno #2 is more of a bright one, It's sweet smelling with berries in it, some hints of almost floral like in it, not quite rose or lavender something else, not what I was expecting at all. I like this smell better vs the other plant.
Smoke Report
It took its sweet time but I finally got it in. I myself do not smoke, so I relay on my roomie for this part of the report, they are a long time smoker 10+ years. They have reported that the smoke smooth and easy going, they would say it was a bit smoother then my previous grow of OK Kush CBD and Blackberry. the only noticeable differences between the different phenos is that pheno #1 is more pungent that phoneo #2 but over all the smokes flavours and quality are the same just brighter in phone #2, I feel these are a bit off from the original seeds I grew back in the day from my first ever grow but still high quality. this was rated as a equal balance of sativa and indica feels on smoking but the smells where leaning towards sativa a bit.
m0use
+++++++++++++++++++++++++++++++++++++++++++++++++++++++++++++
Cost + Time Analysis Of Growing Cannabis. m0use’s Breakdown
+++++++++++++++++++++++++++++++++++++++++++++++++++++++++++++
Light Schedule
===
growth: 18h on 6h off
flower: 12h on 12hr off
GROWTH: 35days
5am-11pm-on -- 11pm-5am-off
---
Cost of kwh with on-peak "20.8c", mid-peak "14.4c" and off-peak "10.1c".
5am - 7am -- 2hr @10.1c/kwh off-peak
7am - 11am -- 4hr @20.8c/kwh on-peak
11am - 5pm --6hr @14.4c/kwh mid-peak
5pm - 7pm -- 2hr @20.8c/kwh on-peak
7pm - 11pm -- 4hr @10.1c/Kwh off-peak
---
6h @10.1c/kwh
6h @20.8c/kwh
6h @14.4c/kwh
---
Using the previous c/kwh numbers above I can find out the daily cost of the lamps in the 3 peak periods. growth and flower
6h x 10.1c/kwh = 60.6c/kw * .126 kw = 7.64c off-peak
6h x 20.8c/kwh = 124.8c/kw * .126 kw = 15.72c on-peak
6h x 14.4c/kwh = 86.4c/kw * .126 kw = 10.89 c mid-peak
The "h" hours and "kw" kilowatts cancel out and we are left with a value of "c" cents per peak period
add all the peak periods up and you get your cost of running the lights in cents per day c/d
---
growth : 7.64c + 15.72c + 10.89c = 34.25c/d
FLOWER: 52days
===
8am-8pm-on -- 8pm-8am-off
---
Cost of kwh with on-peak "20.8c", mid-peak "14.4c" and off-peak "10.1c".
5am - 7am -- 0hr @10.1c/kwh off-peak
8am - 11am -- 3hr @20.8c/kwh on-peak
11am - 5pm --6hr @14.4c/kwh mid-peak
5pm - 7pm -- 2hr @20.8c/kwh on-peak
7pm - 8pm -- 1hr @10.1c/Kwh off-peak
---
1h @10.1c/kwh
5h @20.8c/kwh
6h @14.4c/kwh
---
Using the previous c/kwh numbers above I can find out the daily cost of the lamps in the 3 peak periods. growth and flower
1h x 10.1c/kwh = 10.1c/kw * .126 kw = 1.27c off-peak
5h x 20.8c/kwh = 104c/kw * .126 kw = 13.10c on-peak
6h x 14.4c/kwh = 86.4c/kw * .126 kw = 7.77c mid-peak
The "h" hours and "kw" kilowatts cancel out and we are left with a value of "c" cents per peak period
add all the peak periods up and you get your cost of running the lights in cents per day c/d
---
flower : 1.27c + 13.10c + 7.77c = 22.14c/d
Lights
===
LED’s I use are 18w each and I have 7 lamps on an aray.
18w*7 = 126w | 126w/1000 = 0.126Kw
growth: 18h/d lights on * .126kw lights hydro use = 2.27kw/d
flower: 12h/d lights on *.126kw lights hydro use = 1.51kw/d
G:79.45 + F:78.52 = 157.97kw for the entire grow.
Cost
growth : 7.64c + 15.72c + 10.89c = 34.25c/d
flower : 1.27c + 13.10c + 7.77c = 22.14c/d
The time my lights where on in the grow for 12 weeks and 1 day, or 85 days.
growth: 35d * 34.25c/d = 1,198.75c ÷ 100 "100c in a dollar" = .99
flower: 52d * 22.14c/d = 1,152.28c ÷ 100 "100c in a dollar" = .52
the "d" days cancel out and we are left with a total cost of the lights for my 85day grow.
11.99 + 11.52 = .51
Using the regular calculation of grams harvested divided by watts used is not accurate to me, it does not account for all the time the lamps are on, the length of grow to the over all cost. The calculation that makes sense to me is this, harvested dry weight of usable cannabis buds/trim/keif/whatever in grams divided by total kw used. Could also combine it with grams per total single use costs “anything you used only for this grow and wont reuse in the next, or fractions of multi use items like fertilizers if they ½ full” and see how much you’re investing per gram.
"kw" ÷ "g" = kw/g
"$" ÷ "g" = $/g
I have harvested 4oz or 113.5g on 157.97kw, this includes buds and trim in mycase.
157.97kw ÷ 113.5g = 1.39kw/g of usable cannabis. I’d still try and aim for under 1kw/g.
.51 ÷ 113.5g = :text.20g
The other ratio would have been, 113.5g to 126w = 0.9g/w just shy of the 1 mark.
So in total, it cost me 20c per 1g I grew in light electricity alone.
Not to bad.
legend,
kwh = kilowatt per hour
kw = kilowatt
w = watt
h = hour
c = cents
$ = dollars
d = day
LED= Light Emitting Diode
Likes
137
Share


@MrJones
Follow
mrjones - Slurricane #7 S1
🌱Slurricane #7 S1
@inhousegenetics_official
👨🌾🏽GD Grower: MrJones
🔹🔹🔹🔹🔹🔹GOALS🔹🔹🔹🔹🔹🔹
🌞Environment - 75/80℉ and 60% Humidity Good Old Mother Nature
💧 Feeding - The Green Sunshine Company - Earth Dust All-Natural Plant Nutrients
⚗️Soil - 35% ProMix MP / 25% Ocean Forest / 20% Tupur Royal Gold / 10% lobster Compost / 10% Additional Perlite
🍃Training / So this girl was 60 Inches and spread out under a 5x5 Trellis
🕷️ IPM - Will be using Green Cleaner" 1 OZ per Gallon, and CannControl from Mammoth alternating between products each month
🔹🔹🔹🔹🔹🔹🔹🔹🔹🔹🔹🔹🔹🔹🔹
📜 Rambling - So with the end of July on the Horizon, my time is running out to get the 3rd trellis up and do some major defoliation, but work has been so busy, the girl under the trellis has grown a foot above the second trellis! The other plant is almost 7 feet tall as well, just amazing, the Earth Dust is rocking it out!
🔹🔹🔹🔹🔹🔹🔹🔹🔹🔹🔹🔹🔹🔹🔹
▶️ Sunday - 07.25.21 / Just watering daily with Dechlirnated H20 using the BOOGIE BLUE PLUS+ (High-Capacity Filter) to remove the Chlorine and Chloramine out of the water.
▶️ Monday - 07.26.21 / Just watering daily with Dechlirnated H20
▶️ Tuesday - 07.27.21 / Just watering daily with Dechlirnated H20
▶️ Wednesday - 07.28.21/ Just watering daily with Dechlirnated H20
▶️ Thursday - 07.29.21 / Just watering daily with Dechlirnated H20
▶️ Friday - 07.30.21 / Just watering daily with Dechlirnated H20
▶️ Saturday - 07.31.21 / Today the girls got a hair cut, in the form of massive defoliation, adjusted the trellises, then top dressed with Earth Dust, watered it n with Dechlirnated H20.
🔹🔹🔹🔹🔹🔹🔹🔹🔹🔹🔹🔹🔹🔹🔹
Earth Dust - DESCRIPTION
🔹Earth Dust is our all-natural plant nutrient designed for indoor and outdoor flowering plant growers. You can grow easily by “just adding water” to your soil for the entire growth cycle. It creates a “living soil” so your plants thrive from seedling all the way through flower and harvest. Earth Dust represents an organic dry amendment method of gardening, it’s made of a natural powder of ingredients.
🔹Because you only need to water your soil with Earth Dust, you can concentrate on caring for your plants and getting a healthy crop “on autopilot”. Now you can grow without spending hours of your life mixing chemical nutrients, and you can do it naturally. What’s more, is you will enjoy the cleanest, most aromatic, and flavorful harvest you’ve ever experienced when a plant grows in a rich, organic web of living soil.
Product Highlights
🔹All-Natural Ingredients – Mostly plant-based – Safe around children and pets.
🔹Packaged in kraft paper bags that are recyclable and compostable.
🔹Easy to Use – Just mix the powder into the soil 3 separate times – then water only.
🔹Packed full of rich microbe food & contains billions of beneficial fungi and bacteria! Creates a resilient, living soil that defends against pests and diseases.
🔹Rich in trace minerals and nutrients for full plant expression. Sourced from rock dust, sea-farmed kelp, and land-grown crops.
🔹Soil Conditioners help balance pH and make nutrients more available in the soil. Achieved with ingredients like bat guano, worm castings, limestone, molasses, and humic acid.
🔹The correct balance of N-P-K nutrients for each stage of growth:
🔹Earth Dust Base (3-1-2) contains key nutrients for sustained vegetative growth. High nitrogen (N), Low Phosphorous (P), and Medium Potassium (K).
🔹Earth Dust Boost (2-3-6) contains accelerated-release nutrients for powerful flowering growth. Low nitrogen (N), Medium Phosphorous (P), and High
Potassium (K).
🔹Re-use soil harvest after harvest by simply adding more Earth Dust Base to begin again. Create your own living soil that gets better every time it’s used.
🔹Go organic, save time, and get predictable, healthy harvests.
🔹🔹🔹🔹🔹🔹🔹🔹🔹🔹🔹🔹🔹🔹🔹
Compost Tea for Vegetative Stage
Water 4 Gallons
3 Cups Composr (Your Favorite Worm)
4 TBL Molasses
4 TBL Seaweed Extract
4 TBL Fish Fertilizer
Use air Stone o the tea for 24/3 hours 70/75F, use at full strength for establishing plants and a half-strength for younger plants

Likes
10
Share


@SkunkyDog420
Follow
Hallo zusammen 🤙.
Sie wächst sehr schön und macht keine Probleme
Rabattcode für den BIOTABS-Webshop https://biotabs.nl/en/shop/ GDBT420, damit erhalten Sie 15 Prozent
Likes
4
Share


@matias_scrog
Follow
TODO VA GENIAL, MUCHISIMA RESINA Y OLOR EN ESTA ETAPA. HE NOTADO QUE ALGUNAS HOJITAS SE ESTAN QUEMANDO EN LAS PUNTAS Y DOBLANDOSE HACIA ARRIBA, SUPONGO QUE FUE DEMASIADA COMIDA. DE TODOS MODOS ES MINIMO, NADA DE QUE PREOCUPARSE POR EL MOMENTO, VOY A HACER DOS RIEGOS CON AGUA Y LUEGO VOLVEMOS A FERTILIZAR!

Likes
5
Share


@Godsgrace
Follow
💫The week went great. After the first stress, growth seemed to slow down, but it worked out, the plant began to expand.
I water it every 3 days.
I continue to bend the stem along the axis of the pot.
I bend the branch that will pass through the fastest.
💚I started giving supplements late. Only on the 33rd day I gave him fish and everything else.
🍀 Week showed good growth, but it could have been better, let's see what happens with the additives. I continue to twist the stem in a circle (I don't know where to twist it). And I also cut off the leaves a little bit, about once a week, as they block the light (a friend says not to overdo it with defoliation, let's see what happens).🍀


Likes
8
Share

@myterpygarden
Follow
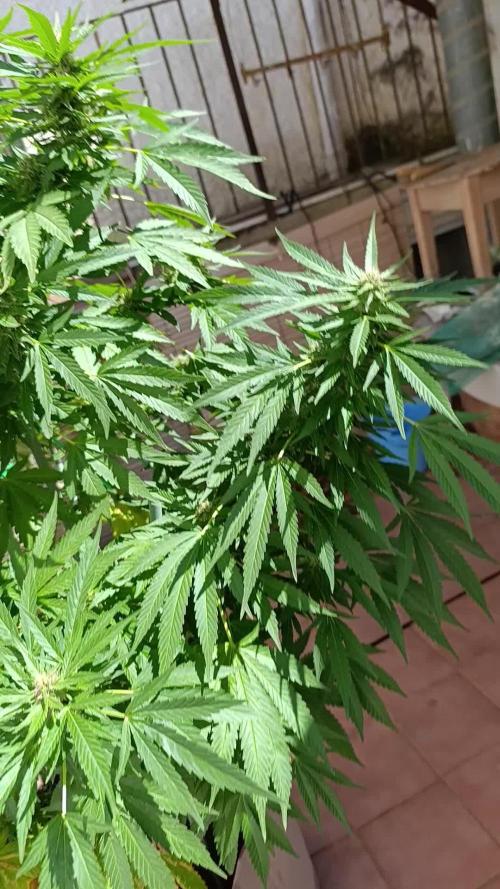
Esto marcha, empieza a engordar muy bien, en el próximo riego empezamos con melaza para la resina

Processing
Likes
8
Share


Likes
25
Share


@Master_weeda
Follow
Bonjour à tous les padawans et maîtres jedis
Jour105 arrosage avec 2 litres d'eau ph6.3
Jour107 arrosage avec 2 litres d'eau ph6.3
Jour110 arrosage avec 2 litres d'eau ph6.3

Likes
17
Share


@FirstTimer007
Follow
Had some isus with high humidity had no prob till day 33 of flower but sorted out back on track again dehumidifier rescue lol.o yee forgot to say added new light spider farmer sf4000 sick very happy with mars hydro and spider farmer sf4000 top noch lights .any one who is thinkimg to buy led light very very recomend happy growing

Likes
7
Share


@greensubrange
Follow
Day 39 - 26.06
Set new light, 200watt led
plus new swing fan
Day 44 - 01.07 - Defoliation 50 leafs cut

Likes
47
Share


@rhodes68
Follow
Tough going first few weeks going to look close on the postmortem for the roots and see if I can tell what was causing the issues with Phos, Ca, Mg lockouts. Foliar saved the day
Was very disappointed in the germination rate which caused delays in grow cycle and threw off my whole grow system. It forced me into 7 gallon pots to try and save the yield and THAT may be where the issues arose with the pots, I had to use another bin of soil for the extra soil. Still I should have known better and just stuck with the 5 gallon pots but was trying to get yield. Worked too on Layla and Maggie, nothing was going to help the stunting on Brandy which I dropped from the grow.
So 60% germination is not acceptable unless its tomatoes...
Dont get me wrong though, this strain has a LOT of good qualities, it not only survived my foul up but produced one excellent plant and one monster out of the three that germed.
May try it again next year, think it would be stellar in coco.
Beyond that a quality product, just had issues.
Easy-ish trim and harvest
For numbers on Layla (Week 12)
12/19 HARVEST DAY LAYLA
wet yield 578 grams
Dry weight 219 grams
Maggie wet weight 886 grams
Into dry DRY weight 255g
Layla 219g + Maggie 255g = 474g
Not letting me rate the Aurora Innovations Soul Peak PK and Finisher I give it 4 stars


Likes
3
Share

@MrWeeedWorld
Follow
Keimungsbericht – Lemon Cherry Sundae Automatic
Heute beginnt mein neues RDWC-Abenteuer mit der brandneuen Lemon Cherry Sundae Automatic von FastBuds.
Für die Keimung habe ich diesmal eine völlig neue Methode ausprobiert – mit einem Ergebnis, das mich absolut überzeugt hat.
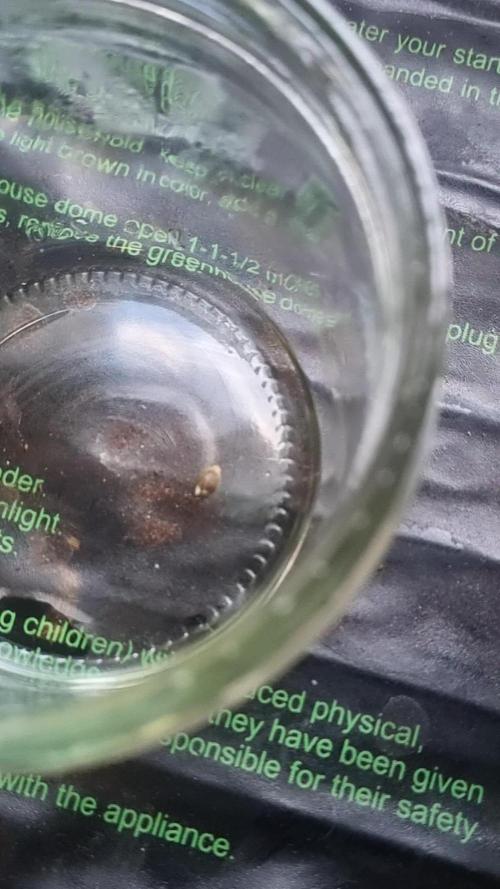
Zum Einsatz kam ein neues, sauberes Marmeladenglas mit Deckel. Das Glas wurde mit etwa 1 cm Osmosewasser befüllt. Anschließend habe ich mit einer Pipette zwei Tropfen 11,9 % Wasserstoffperoxid hinzugefügt und das Glas verschlossen.
Danach wurde das Glas auf einer Heizmatte bei konstanten 28 °C platziert.
Das Ergebnis war beeindruckend: Bereits nach nur 8 Stunden entwickelte die Lemon Cherry Sundae eine kräftige Keimwurzel von etwa 1 cm Länge.
Eine schnellere Keimung habe ich bisher nur selten erlebt. Die Kombination aus sauberem Osmosewasser, stabiler Temperatur und zusätzlicher Sauerstoffversorgung scheint ideale Bedingungen geschaffen zu haben.
Nach diesem perfekten Start zieht die Lemon Cherry Sundae nun in ihr neues RDWC-System ein, wo sie mit dem Plagron Hydro Düngeschema versorgt wird.
Ich freue mich darauf, die Entwicklung dieser neuen Genetik von Anfang an zu dokumentieren und bin gespannt, welches Potenzial sie unter optimalen Hydro-Bedingungen entfalten wird.
Vielen Dank fürs Vorbeischauen!
Jeden Sonntag gibt es neue Updates zu diesem Grow.
--------------------------------------------------------------------------------------------------------------------------------------------------------------------
Germination Report – Lemon Cherry Sundae Automatic
Today marks the beginning of my new RDWC adventure with the brand-new Lemon Cherry Sundae Automatic from FastBuds.
For this grow I decided to test a completely new germination method and the results were outstanding.
A brand-new clean glass jar with a lid was filled with approximately 1 cm of reverse osmosis water. Using a pipette, I added two drops of 11.9% hydrogen peroxide before sealing the jar.
The jar was then placed on a heating mat maintaining a constant temperature of 28°C (82°F).
The results were impressive. After only 8 hours, the Lemon Cherry Sundae had already developed a strong taproot measuring approximately 1 cm in length.
This was one of the fastest germination results I have experienced so far. The combination of clean RO water, stable warmth and additional oxygen appears to have created ideal conditions.
Following this excellent start, the Lemon Cherry Sundae is now moving into its new RDWC system where it will be grown using the Plagron Hydro nutrient line.
I am excited to document the complete journey of this new genetic and discover its full potential under optimized hydroponic conditions.
Thank you for following along!
New updates will be posted every Sunday.

