Likes
Comments
Share
Likes
16
Share
I've put them in a bigger tent this week, hope they can get comfortable fast 😀
Likes
8
Share
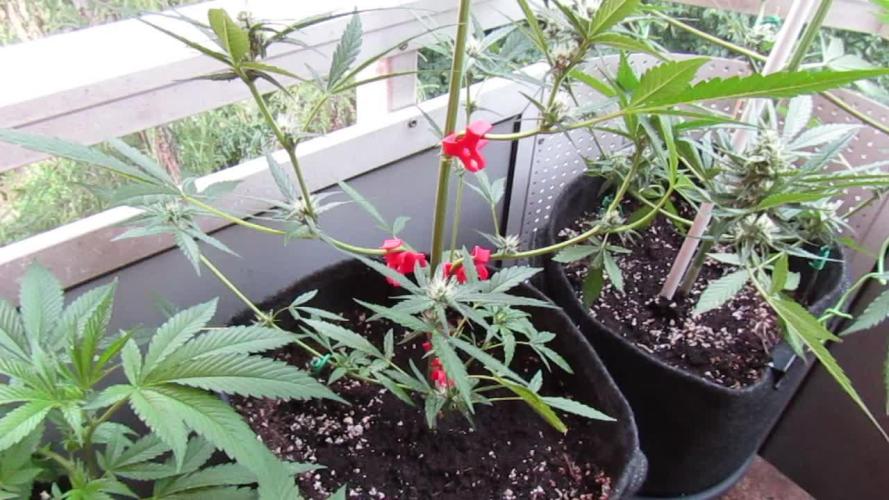
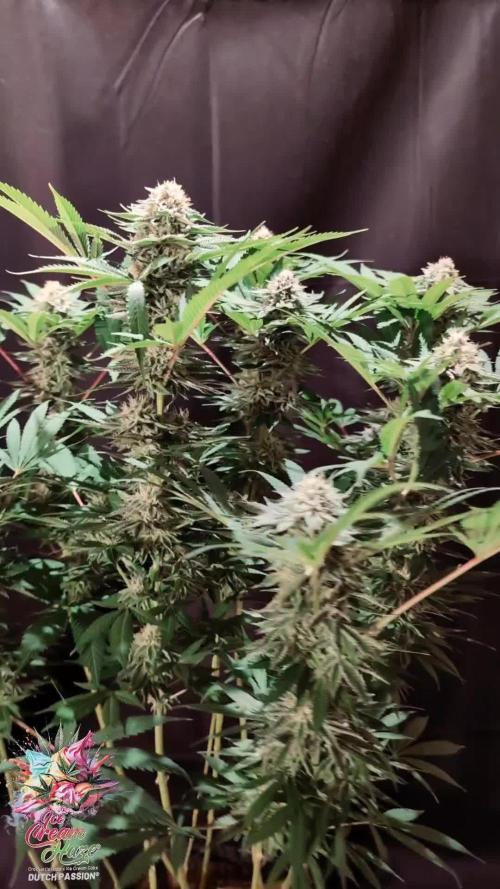
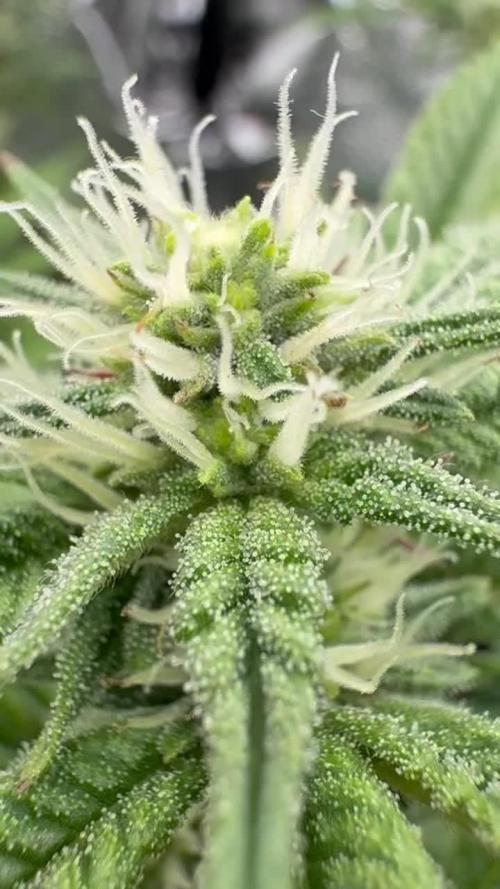
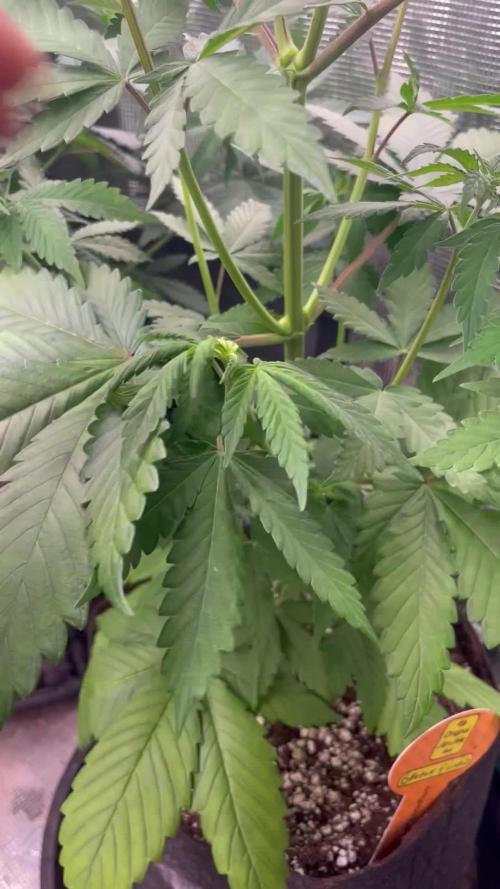
Second week of nutes given on Saturday nice bit of growth from the plants really stretching n reaching out now soaking up as much light as they can quite a few deficiencies showing been giving 1ml calmag ontop of the nutes on the bottle per litre of water , very cramped 1 plant taken out the tent to create abit of space currently 45 in there 2.4m x 2.4m would only recommend putting 36/38 plants it top capacity in 7/9 litre pots
Likes
6
Share
Enfim floração, chegaram bem e saudåveis agora e manter os cuidados aumentar a alimentação e torcer para nao esquentar muito nas próximas semanas .
Likes
13
Share
@MedicaL
Follow
Den 22.. Zvýšil sem EC na 1,4. Mazar si trochu líznul, ale nic závažného,jen lehce chycené špičky. Ostatní to docela snáší dobře. Kořínky dorazily dolu, tak už si nasávají z nadrzě.Je to pohoda týden nezalévat 💪Zatím žádné pre-Flowers. Ať to roste 🍀
Likes
39
Share
Everything looking good this week happy with the vegetative stage with the th Seeds original Bubblegum. Says they are an ibl strain so the genetics should be stable, which is less chance of 10 different phenos ( update me If I’m wrong here, still learning ) Day 54 - today I did the last defoliation and lst 2 days before swith to 12/12. Middle growth was insane so spread them out abit by screwing small screws in to the pot and using the as a tie down Day 55 - all plants seemed to have bounced back the day after and look exactly how I planned so far so good Day 56 - final day of vegetative growth all seems good, all females showing white hairs , have raised the lights and turned Intake to full to maintain humidity levels and switched lights to 12 / 12.
Likes
9
Share
@Wakesk8
Follow
6 week flowering stage for those babies!! Looks good but I found some thirps and I’m fighting with water/garlic and but of neem oil. Hope everything will be good till the end. Let’s bit how many grams I will make for my self with those 4 babies!!
Likes
4
Share
@gdogfunk
Follow
Day 57 This should be the last week in veg. It might be a partial week...I'll make the call in a few days. I'm excited to see these babes flower!!! Day 58: Last day of VEG! I set the timer to 12/12 and lower the lights to 18". These babes are ready to switch, based on my past experience. I hope they don't shoot too much in the next couple of weeks! Flower time is here at last! Day 59: Flower day 1! Fed transistion week 1 nutes today. Day 61: The plants are stretching nicely and I expect to run out of room on the screen at the outer edges. Day 63: I'm really surprised how fast Shiskaberry caught up to her tentmate. She's got many bud sites, even after losing one of the mains. It might actually be a good thing I'm down a few tops, since the canopy is getting VERY full!
Processing
Likes
14
Share
(Log date week 7, day 49) So this week was a mixed bag, Tuesday started off with me finding a spider web on one of the lower fan leaves on my Hulkberry plant and noticed some bite marks on some of Fat Banana. In my haste to give rid of the spider mites, i caused some minor wind damage to some of the fan leaves on Hulkberry which caused some copper spotting and a stunted Fat banana cola. After i correctly treated both plants for spider mites and wind damage, they both bounced back and started to recover quite nicely. I also noticed a difference between topping these plants at different times; i topped fat banana when it had 4 cola's but i waited until hulkberry's roots reached to the bottom of my 5gal bucket and she had 8 cola's. A BIG difference in their recovery and overall structure, where fat banana jump out the gate with explosive veg growth and hulkberry struggled for two weeks just to develop it's first set of fan leaves. To now whereas hulkberry is much bigger, greener and bushier than fat banana. Hulkberry has responded much better to the additional stress whereas fat banana has struggled or stalled due to the stressful conditions. All in all wasn't too bad of a week, except for the power going out for a couple of hours on Saturday which raised my grow-room temperature to 90f, i was able to put out a couple of fires this week without any adverse long term effects. I also topped hulkberry on the last day of the week and I'm going to continue to feed them Technfloa at the full recommended strength since they have both responded very well to last week's formula. as always my pic are in chronological order Mr. O.G.T
Likes
23
Share
@Chi_K24
Follow
Hello again! Into week 7+ ladies were very bushy so I decided to dive in and clear out the lower canopy and removed old leaves. As usual watering every 4-5 days and I have increased the amount of water to about 8L to each pot. They are drying out faster day by day. Still using 50mL of molassas to 5gal of water pH to 5.9 this time. No issues to report. See you on the next update!
Likes
29
Share
@DeaneR
Follow
VEG WEEK 10 My Base Nutrient Inputs: See VEG WEEK 6 for details of stock solutions A & B. My grow weeks run from Monday to Sunday. This week the goal was to let the girls grow, space the tops around the trellis, and attach each stem to the outside of this structure. Tuesday - Watering Day - 1 gallon each as described above. Friday - Watering Day - The pots are very light. Laverne is quite thirsty in pic # 10 - 2 gallons each as described above. Friday - Pruning Day - Pinched out all the new grow at each fan leaf. The goal is a single stalk with no side branching. Also removed some lower Fan leaves and a few select others. Unfortunately, Laverne lost a top. Not sure how, but I snapped it😡, and it dangled by a little of the outer stem tissue. I quickly reached for some tape to administer first-aid, which has worked for me in the past. Sadly, a few days later, it was evident (pic # 16), she wasn't going to make it. Sunday - Training and Trim Day - Laverne is now down to 11 tops and my plants symmetry is shattered. I pushed the broken limb aside, to make room to realign the neighboring branches. I'm leaving this broken branch on the plant for now (pic #17), in an attempt to keep the other branch, on the same main stalk from dominating the plant. The remaining branch (pic #18&19) is already growing much faster and needed some serious twisting to bring it to the level of the rest of the plant. I managed to get Laverne symmetrical again, and leveled out the tops with some wire work. Shirley was also wired down to a symmetrical, level canopy, without any drama. Laverne is now 10 inches tall, and Shirley is 12 inches. It seems I named them backwards, lol. Laverne received a 2 inch booster seat under her pot to bring her canopy level with her buddy. Their canopy tops are 30 inches from the Electric Sky ES 300 V1 light. Shirley has shown herself to be a female (pic #24), while Laverne has not shown sex (no concern, as these seeds I made should be feminized). I see some tip burn, and need to dial back my nutrients a tad. I also am working on eliminating the purple on the top side of the petioles (not too worried about it as the plant is growing and appears healthy otherwise). My base nutrients contain calcium and magnesium, plus I add Cal-Mag +, so not sure why. It is funny that the purple is only on the top side of the petioles, and makes me wonder if this is caused somehow by LED lighting. If anyone knows, please share😀. I plan on another week, maybe two, of vegetative growth. The mother(s), that I made these seeds from only stretched about 12-14 inches. I'll flip to 12/12 light schedule when the stems reach the height of the top of the trellis. With the stems supported, and some luck, these girls, will be set-up for smooth flowering. The video was taken Sunday morning, before training and trimming. Thanks for Viewing, Peace, DeaneR😎
Likes
50
Share
Week 8 Flower — The Frosted Finale Approaches As we enter Week 8 of flower, our Sundae Driver ladies have transformed into something truly spectacular. The tent feels alive with energy, coated in that glistening, diamond-like frost that every grower dreams of. These girls have come a long way—from seed to strength, from gentle sprouts to towering beauties—and this week’s photos capture that evolution in every sparkling detail. A Quick Recap for New Friends For anyone joining us now, welcome to the ride. This grow began with three seeds from Zamnesia Seeds, all of which germinated successfully. We selected two phenos—our Sundae Driver #2 and #3—and nurtured them through an exciting, experimental journey. They were fed a balanced blend of Aptus Holland and Plagron nutrients, grown in a rich super soil mix, and guided by the precise control of TrolMaster systems and the steady illumination of Future of Grow and ThinkGrow LEDs. Along the way, we explored advanced techniques—most notably, the Super Crop, which became a highlight of this grow. The Scene This Week Now in full bloom, both girls are thriving under the lights. Their colas are massive—one could easily compare the main stem to the size of my arm. Dense, weighty, and coated with trichomes from tip to base, they’re the very definition of healthy flower formation. The aromas are complex and sweet, a creamy mix that hints at their Sundae heritage. Even from a distance, the frost catches the light in a way that makes you pause and admire. Environmental conditions are holding steady despite the hot season outside. • Room temperature: around 28°C • Humidity: 62% • VPD: approximately 1.3 kPa With the AC doing its best and airflow dialed in through dual 6” carbon-filtered extractions, the girls are comfortable, breathing easily, and continuing to bulk without stress. Feeding & Formula This week, we continue with our refined nutrient mix: • Aptus Regulator: 0.15 ml/L • CalMag Boost: 0.25 ml/L • Plagron PowerBuds: 1 ml/L • Plagron Green Sensation: 1 ml/L • Plagron Sugar Royal: 1 ml/L EC hovers around 1.7, and pH remains close to 6.1. The soil, enriched and alive, holds an EC near 2.9, providing a self-sustaining foundation for these late-flower demands. Watering now follows the natural rhythm of the soil, ensuring each feed balances moisture and oxygen at the root zone—key for healthy ripening. The Art of Super Cropping Remember that bold super crop on Pheno #2 back in Week 4? She’s the living proof that resilience meets reward. The bend healed perfectly, redirecting energy and light into multiple bud sites. The result? An even canopy, incredible bud density, and a plant that carries herself like a true champion. For those hesitant to try this technique—let this be your sign. Super cropping, when done with care, can unlock your plant’s full potential. It’s a gentle stress that brings powerful returns. Don’t fear it—learn it, trust it, and apply it with love. Looking Ahead Week 9 will mark the start of the ripening stage. Expect pistils to darken, trichomes to shift from clear to milky, and the terpene profile to deepen even further. Patience becomes the grower’s greatest tool here—this is when the real magic happens. We’ll soon be talking about fade, flush, and preparation for harvest. Thank You, Family To everyone following along—thank you from the bottom of my heart. Whether you’ve been here from seed or you’re just joining now, your presence means everything. To the lovers, the haters, the curious, the passionate—thank you. Because together, we grow. And to the partners who make this possible—Zamnesia, Aptus Holland, Plagron, Future of Grow, ThinkGrow, Spider Farmer, and TrolMaster—your innovation fuels these gardens. This project is more than just growing plants; it’s about learning, sharing, and celebrating life itself. Love, patience, and curiosity—these are the lights we all grow under. Let’s keep shining. Dog Doctor Official P.S. For those of you still hesitant to try new techniques like super cropping—this grow stands as living proof that it works. When done gently, with care and understanding, it brings structure, strength, and new potential to your plants. Don’t be afraid to experiment. Each new method is a lesson, and growth—both for you and your plants—comes from curiosity and courage. 📲 Don’t forget to Subscribe and follow me on Instagram and YouTube @DogDoctorOfficial for exclusive content, real-time updates, and behind-the-scenes magic. We’ve got so much more coming, including transplanting and all the amazing techniques that go along with it. You won’t want to miss it. • GrowDiaries Journal: https://growdiaries.com/grower/dogdoctorofficial • Instagram: https://www.instagram.com/dogdoctorofficial/ • YouTube: https://www.youtube.com/@dogdoctorofficial ⸻ Explore the Gear that Powers My Grow If you’re curious about the tech I’m using, check out these links: • Genetics, gear, nutrients, and more – Zamnesia: https://www.zamnesia.com/ • Environmental control & automation – TrolMaster: https://www.trolmaster.eu/ • Advanced LED lighting – Future of Grow: https://www.futureofgrow.com/ • Root and growth nutrition – Aptus Holland: https://aptus-holland.com/ • Nutrient systems & boosters – Plagron: https://plagron.com/en/ • Soil & substrate excellence – PRO-MIX BX: https://www.pthorticulture.com/en-us/products/pro-mix-bx-mycorrhizae • Curing and storage – Grove Bags: https://grovebags.com/ ⸻ We’ve got much more coming as we move through the grow cycles. Trust me, you won’t want to miss the next steps, let’s push the boundaries of indoor horticulture together! As always, this is shared for educational purposes, aiming to spread understanding and appreciation for this plant. Let’s celebrate it responsibly and continue to learn and grow together. With true love comes happiness. Always believe in yourself, and always do things expecting nothing and with an open heart. Be a giver, and the universe will give back in ways you could never imagine. 💚 Growers love to all 💚 P.S.² As these girls start to pack serious weight, make sure every branch has proper support. Heavy buds are a blessing, but they can easily become a heartbreak if left unsupported. A single snap can cost you a beautiful cola. Use plant ties, yo-yos, bamboo stakes—whatever fits your setup—and keep a close eye daily. The last stretch is when your plants give their all, so it’s our job to help them carry that gift safely to harvest.
Processing
Likes
5
Share
I took these clones from my first grow. I took clones for my “lemon lemon lemon” grow from these mother plants.
Processing
Likes
5
Share
@Ensign420
Follow
Week 02 Introduction This week has been a bit of a struggle. Had my first experience dealing with slime and brown algae. But I think adding enzymes and increasing the beneficial bacteria helped to fix the issue. Also experienced nutrient burn for the first time. My nutrient solution strength got as high as 671 PPMs. So backed it down to about 430 PPMs during the end-of-week reservoir change. Also cut Hydroguard (expired?), CaliMagic, and Superthrive from this grow. Now she's still stunted, but is starting to recover. Hopefully... [START OF WEEK 02] Day 01 - Monday - 08/10/20 - Total Days: 008 ----------------------------------- - [0830]: Still looks a bit yellow. But getting larger! --- Solution strength was at 248 PPMs. --- Just topped off with a bit of distilled water --- PH went up to 6.1 so PH'd down to 5.8 --- Ran the top feed for a bit to wet the hydroton. - [2130]: She's looking even more yellow now. --- Even the new leaves are really yellow. --- Decided to add more base nutes. --- Added 4ml of Sensi A --- Added 4ml of Sensi B --- Now at about --- Solution Strength went up to 304 PPM. --- PH was at 6, --- Also raised the water level a bit more. --- I really hope it's a nutrient deficiency and not an over-watering issue. --- Please live! Day 02 - Tuesday - 08/11/20 - Total Days: 009 ----------------------------------- - [0830]: Looking less droopy. But still yellow. --- Decided to do a reservoir change. --- 4.5gal of distilled water --- 8ml of Sensi Grow A --- 8ml of Sensi Grow B --- 8ml of Voodoo Juice --- 4ml of B-52 --- 4ml of CaliMagic --- 4ml of Hydroguard --- 4 drops of Superthrive --- PH'd down to 5.8 --- Solution strength: 302 PPM --- Since I didn't want to risk over-watering the rockwool, I did not to do a top feed, may do one tonight after the sleep cycle (lights are still set to go off at 10am and back on at 4pm). --- As I was doing a reservoir change, I noticed that the tubes and bucket were a bit slimy. Didn't really stink or anything. Is this normal? Maybe due to the Hydroguard and Voodoo Juice? --- I hope she gets better soon! - [2215]: Getting larger! But still yellow. --- Also can see a root growing through the net pot! Tiny little thing but it's there! Will have to start dropping water once more appear. --- After looking over a few DWC diaries using AN nutes, seems like my solution strength is still too low. Most around this stage average around 500 PPMs with about 4ml per gallon. --- Top fed for a minute to wet the top of the hydroton. --- Solution strength went down to 263 PPM. --- Added 8ml more of Sensi A --- Added 8ml more of Sensi B --- Now base nutes are at 16ml for 4.5 gal of water. --- PPMs went up to 411. --- Still lower than 500 PPMs, but that's okay. --- PH was at 6. Not sure if I should adjust PH using AN nutes. So going to not ajdust unless PH goes above 6.1. Day 03 - Wednesday - 08/12/20 - Total Days: 010 ----------------------------------- - [0830]: Looks like more root growth! --- She still looks yellow. But leaves are perky. --- PH was at 6.2 so lowered down to 5.8. --- Solution strength was at 394 PPMs --- Since roots are still growing, I decide to lower the water level a bit. Now water level is a bit below the net pot. - [2200]: Root is getting longer! --- Slime is returning. Not sure why. --- Solution strength: 357 PPMs --- PH: 6.1 --- Decided to add an enzyme along with more beneficial bacteria to hopefully cure the slime. --- Added 16ml of Sensizym --- Added 5ml of Hydroguard --- Added 8ml of Voodoo Juice --- New solution strength: 430 PPMs --- New PH: 6.1 --- Top fed for a minute. --- This slimy residue is really freaking me out! I hope the added enzymes will help eliminate the slime. --- Going to do a full reservoir sterilization/nutrient change over the weekend. Please survive until then girl! Day 04 - Thursday - 08/13/20 - Total Days: 011 ----------------------------------- - [0930]: I think the enzymes worked! There is little to no slime now! --- Although I think the root was also dissolved in the process. It's now just a little stub sticking just below the net pot. The enzyme is also suppose to dissolved dead roots too but guess that root was too weak? Not sure what happened there. But I think the slime is cured! --- Solution strength went down to 395 PPMs. Decided to add more base nutrients. --- Added 8ml of Sensi A --- Added 8ml of Sensi B --- Added 4ml of B-52 --- Solution strength went up to 598 PPMs. --- PH was at 6.1 --- As long as the PH is between 5.5 and 6.3, I'm not going to use PH Up or Down. But still will monitor PH levels. - [1715]: Checked up on her after her nap and shes looking alive but stunted. But no slime! --- Decided to add some sugars to help maintain the enzymes and beneficial bacteria. --- Solution strength was at 587 PPMs. --- PH was at 6.2 --- Added 8ml of Bud Candy --- Solution strength went up to 671 PPMs. --- PH also went up to 6.3 --- Lowered water level a bit to hopefully promote more root growth. --- Top fed for a minute. --- She is getting bigger, but still looks yellow. Day 05 - Friday - 08/14/20 - Total Days: 012 ----------------------------------- - [0915]: Leaves look a little burnt on the tips. Still no slime. --- Going to back off on the PPMs to hopefully fix the nutrient toxicity. --- Solution strength was at 632 PPMs --- PH was at 6.3 --- Added/Removed water until PPMs were at 536. --- PH was still at 6.3 --- Raised water up a bit, then top fed for a minute. - [2200]: Looking better. Still yellow though. --- Solution strength: 514 PPMs --- PH: 6.5 --- Added PH down. --- New solution strength: 518 PPMs --- New PH: 5.2 --- PH was kind of high. So decided to PH down. Had to use quite a bit to bring it down. But eventually got it to drop down to 5.3. A little low, but so far, the PH has always gone up so wanted to start it really low. --- Ran the top feed for a minute to re-saturate the top of the hydroton. Day 06 - Saturday - 08/15/20 - Total Days: 013 ----------------------------------- - [0830]: She looks stunted. leaves are still yellow. --- Solution strength: 514 PPMs --- PH: 5.6 --- Top fed for a minute. --- Not sure what to do at this point. Going to do another reservoir change soon. Hoping she lives until then. - [2145]: Looking pretty much the same. --- A bit of slime has returned. Since I've been diluting the nutrient solution, the enzyme ratio has dropped. So I guess this is expected. --- Also noticed that slime build up was on the air-stones. Never really checked the stones so not sure how long that has been there. Looks brown too, which can't be good. --- Going to do an H202 sterilization of the system (minus the net pot) tomorrow so did not add anything. --- Lowered the water level to below the net pot. --- Then top fed for a minute. Day 07 - Sunday - 08/16/20 - Total Days: 014 ----------------------------------- - [0900]: STERILIZATION DAY! --- Decided to skip today's night cycle for a deep clean. --- I'm hoping that skipping a night cycle won't be too stressful. --- Temporarily moved her to a new bucket. --- Used about a half of gallon of straight distilled water to flush out the net pot. --- Drained the system and wiped up all the brown sludge. Also removed the air stones and cleaned up all the goo. --- Filled the system with 2 gallons of distilled water and at least 30ml of food grade hydrogen peroxide (35% strength). --- Yea its a lot, but since I'm not going to sterilize the system overnight, I went with a really high doseage. Basically I kept adding until I started to see little bubbles start to form. --- Then I ran the water pump. - [0915]: Boiled the air stones in tap water for about 10 min. Then reconnected them to the airlines. --- I let the air stones and hose soak in the sterilization solution for about 5 minutes so the peroxide can absorb into the stones. Then ran the air stone to help mix and agitate the solution. --- Occasionally, I'd repeat the process of turning the air pump off for a few minutes to let the stones soak. - [1000]: Covered the top two row of holes of the net pot with some aluminum tape. Hopefully this solves the light leaking in through the hydroton. - [1200]: Used an old toothbrush and scrubbed the pump clean. Then drained the system. --- Refilled with more distilled water and peroxide. Again added a lot. --- Ran system again to sterilize even more. - [1530]: Drained the system and refilled with distilled water to rinse. --- Ran the system for a few minutes, then drained and rinsed again. --- Did this a few more times over about an hour. - [1630]: Added 4 gallons of fresh distilled water. --- Added 15ml Sensi Grow A --- Added 15ml Sensi Grow B --- Added 12ml of B-52 --- Added 16ml of Voodoo Juice --- Added 16ml Sensizym --- Solution strength was at 430 PPMs --- PH was at 5.6 --- I was going to add Hydroguard, but I think the bottle is expired. Since 2017 or 2018!? I think Hydroguard is good for up to 2 years from the date on the bottle or 6 months after opening. So not going to use from now on. I wonder if this could have contributed to the slime build up. --- Also removed the CaliMagic and Superthrive too. Going to only use AN products to eliminate the chance of incompatible nutrients. --- Placed her back in the bucket and top fed for a minute. --- Here's hoping for the best. Going to let it ride until morning! Please feel better! [END OF WEEK 02]
Likes
13
Share
@Rob96
Follow
Decided to cut these now as trichs are all looking nice and milky with few ambers, buds are looking really nice, nice few tint of darker colours in there too really happy with result, hanging to dry now and will update the final week once all dry, been a great plant overall no issues and finished with some really nice looking weed hopefully smokes as nice as it looks
Likes
2
Share
Hola a todos!!! , la planta ha crecido esta semana algo de 20 cms , al día de hoy ( dia 42).... me refiero a hoy 24/09😅. Regue con top auto, top bloom, top candy 2ml x litro de agua, ayer (dia 41) El resto de los días solo con agua
Likes
53
Share
@Mastr
Follow
Just chop her down in 75 days from seed Veg 21 days Bloom 54 She produce very dense nugs alot better than before I think without bloombastic won't happen I let her dry in 23° for 32 hour then 24°for 3 days then ready this is quekest way you can dry your bud without test or smell like grass its take max 5 days
Likes
5
Share
I harvested 211,9gr wet on p2, I mostly wet trimmed her, I have around 30gr on popcorn nugs in the freezer for bubble hash, when I run out of flowers. I still have a bowl of leaves and stems, but it will be dismissed.
Likes
48
Share
@xbrico
Follow
Evening all...back on it AGAIN!!!! Worst is, in the middle of a heat wave (Hottest day every recorded in this part of the world a couple of days in a row!!!)...still need to finish trimming my last crop!!! 😰 Will get that done over the next couple of days as these girls need rehoused!!! So, got a cloner at the start of the year...was planning on clone a spare wedding cake I had but that sort of went to pot and life got in the way and that didn't happen. As I also got a hold of an Ultrasonic Mist Generator, I thought I'd give this "Fogponics" Germination thing a go!!! Seeing as @Sweet_Seeds donated a few Magical Beans to my cause, I thought I'd give their genetics a whirl. The Red Hot cookies looked too cool to pass up on!!! So, got the beans popped on the 12th of July and by the Thursday, they were showing their wee heads. These are strong wee plants!!! Vigorous as you like!!! Got them into the 'fogponics' machine and let them rip (Under 2x11W T5 Sunblaster 6400K's and a Amazon Special LED light for extra Spectrum) and they seem to be coming on grand. Noticed some yellow spots on the leaves and in 2 minds if it was: A. calcium (As starter plugs are Coir and I didn't put calmag in the plug hydration mix - Jiffy Original plugs are supposed to be buffered for this!!!); B. if I should have broken and washed them out of the Coir and put them into straight Hydroton (The fog could have been saturating the Coir and choking the internal roots a bit) or C. if its just the abusive heat we've been having here (In a country where A/C is basically unheard off as heat doesn't exist outside!!! 😋). Roots are ripping out of the net pots now so they're about as ready for transplant as can be...just wanna give a day or 2 more to see if the heat here settles as I can't adequately cool the area they're going too - but then again, under LED so heat may be good as it doesn't heat the leaf surface up as much! Plus I have a couple of plants to trim...still hanging in their humidor tent when is needed again for growing! Think this will also be the retirement party for the Wilma. Going to build an Undercurrent Fallponics system when this run is done (Wont have time to get it setup before these girls need forever homes!!!). Have the crates bought and a bit of research done on how to DIY a build so hopefully this turns out to be a decent run. Also have a few people with building experience on hand to give advice. Since last grow: Lights have been upgraded to a Geekbeast 630W Pro LED (3500K Spectrum - UV 385nm and Far Red 730nm built in [won't use the 730's as they can't be run independent of the Main Lights...be wary of this if you buy one off Alibaba for the 730's built in!!!] - Will run the 385UV's though throughout the grow for more blue...will run then 3 hours after lights on to until 3hours before lights off). Also procured an InvisibleSun LED 730nm Flower Initiator (Will use this for EOD Far Red treatment to try a 13/11 flower cycle) and a Migro UVB310 fixture - For the Trikes!!! 😝. Have a Haliea 300A winging its way to me as we speak. Have some Non-Stick Micro-tips flying in from the Grand old US of A a will to get a better, more consistent yield. Think that's about all I have for now...Happy Growing all!!! 💪
Likes
12
Share
@Lazuli
Follow
I defoliated her, cut away growth at the bottom and leaves on top of the main branches so all budsites will be as much on the same height as possible, shes a bit bright of color wich my other plants dont do with same nutes and setup, i guess its genetics and all normal because flower kicks in. The defoliation also happened to keep the stretch less agressive, i will defoliate again once the stretch stopped at around week 3 when we see the white hairy balls forming.