Likes
Comments
Share
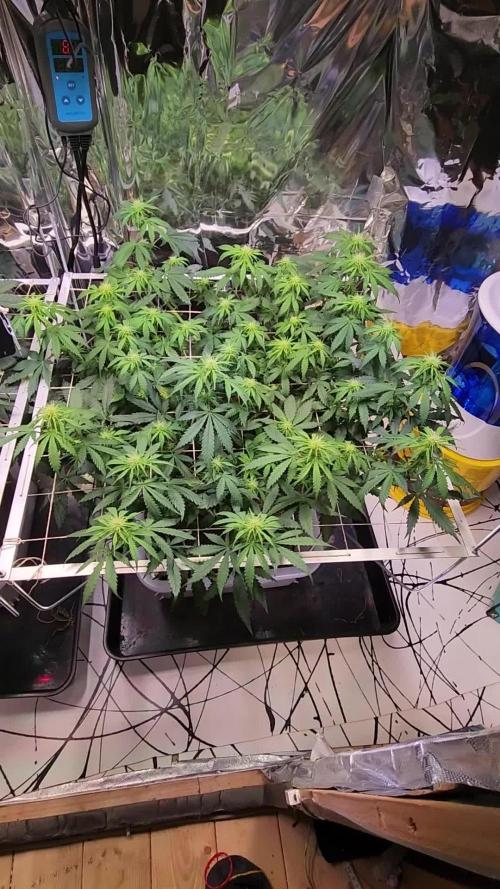
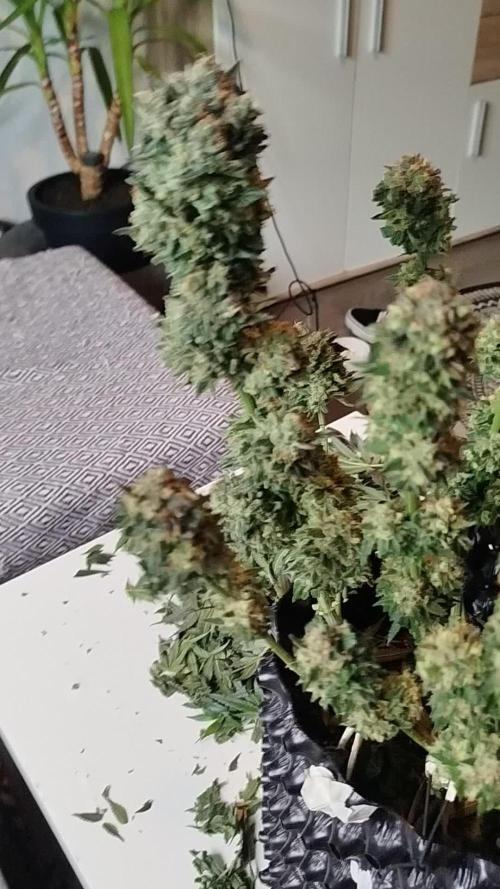
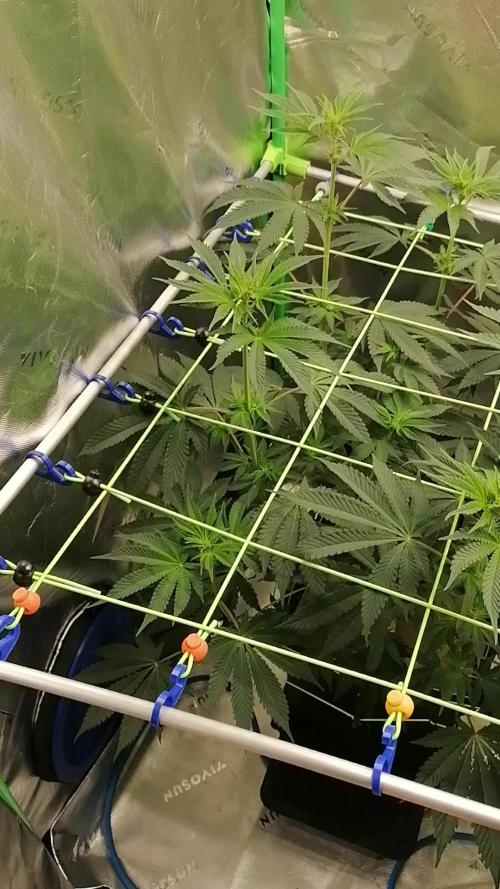
2.2 Plants have been moved into the tall RoyalRoom tent. Tent sits inside Ikea PAX wardrobe, I use RuuviTag meters for temperature and humidity monitoring and a couple UPS devices as a backup power for exhaust fan & led light. I have planted Alfalfa and red clover as a cover crop, also trying out Blumat digital soil humidity meters this round. PPDF at canopy level is at 400-450umol/m2/s, there is a possibility to swap out the solo led drivers for one big one if I want more power for flowering. 3.2 I tied down the tallest branches to the fabric pot to even the plant out, also gave the pots a little Raw nutrients B-vitamin foliar spray. 4.2 Worms added to pots and gave both plants 1L of B-Vit water. 7.2 Tied down the plants, also gave the right side plant 2 litres of water today, 1L for the left one.

Likes
20
Share
Not particularly growing for speed or any dedicated reason this time round, just adding water and a abundande of positivity, gotta admit I do like the autoseed logo. Off we go again into the magical forest. (Arthrospira platensis) cultivated in high-alkaline, mineral-rich water in Kailua-Kona, Hawaii. It is renowned for having a higher nutrient content, including more carotenoids and essential fats, compared to other spirulina brands. It is frequently cited as a "complete food" due to its dense concentration of proteins, vitamins, minerals, and pigments. The nutritional profile of standard dried Spirulina platensis biomass. 3kg of spirulina powder has an approximate NPK ratio of 10-2-1 (or 10% Nitrogen, 2% Phosphorus, and 1% Potassium). Here is the breakdown of the nutrient content for 3kg of powder: Nitrogen (N): ~300g (10% of total mass) Phosphorus (P): ~60g (roughly 2% of total mass) Potassium (K): ~30g (roughly 1% of total mass) 3kg of spirulina powder is more than enough nitrogen for 4 cannabis plants in a 100-gallon pot—in fact, it is likely excessive and could cause severe nutrient burn or toxicity if not properly managed. Spirulina has a very high protein content (46% to 63% dry weight), which translates to a significant nitrogen source. It is often described as a 5-1-1 NPK fertilizer. 3kg (3000g) of powder in 100 gallons means 30g per gallon. General organic recommendations for potent amendments (like frass) are often around 1–3 tablespoons per gallon. 30g of powder is roughly 2-3 tablespoons, making this a very high-strength application rate if added all at once. Balance this with calcium/magnesium, and organic nutrient delivery in soil growing can lead to deficiencies in these nutrients. Not all of that 100 gallon is used, so figuring out precise measurements was ballpark, but there is about 10kg of engineered biochar in that pot. Mostly in the top half. Ideally, I'd have 25kg in a full active 100-gallon, but......... don't mess with something that is not broken. Roots do not utilize the entire 100 gallons. This has been a couple of years of trial and error, mostly error. The amount of cations you can add in grams depends entirely on the specific cation exchange capacity (CEC) of your biochar and the type of cation being added. Biochar CEC values vary widely, typically ranging from 4 to over 300cmolc/kg. Multiple Biochars in use, ranging upwards of 100cmolc/km. Different cations have different atomic weights Potassium K+ 39.1g/mol. Calcium Ca2+ 40.1g/mol. Magnesium Mg2+ 24.3g/mol. Nitrogen NH4+ 18.04g/mol. You get more nitrogen bang for your buck. It all depends on the CEC of the biochar you use, but brrrrrrrrrr roughly I'm looking at 500-600 grams worth of elemental cation exchange capacity, give or take. That's just for the biochar alone. Elemental cation exchange capacity refers to the ability of materials—such as soil, minerals, and biochar to adsorb, hold, and release positively charged ions Ca2+, Mg2+, K+, Na+, Al3+, and Zn2+. This capacity is a critical measure of nutrient availability in soil and energy density in electrochemical systems. Added calmag 2:1 to complement spirulina. Calcium (Ca): Approximately 150g - 300g of elemental calcium. Magnesium (Mg): Approximately 75g - 150g of elemental magnesium. So long as pH stays in 6.3 to 6.7 ish, the plant will unlock hydrogen. Plants will be able to cycle CEC for their own needs. Hydrogen ion pumping (proton pumping) is a fundamental mechanism used by plant roots to facilitate the cycling of nutrients within a medium's Cation Exchange Capacity (CEC), directly increasing nutrient availability. A growing medium's Cation Exchange Capacity (CEC) does not contribute directly to Electrical Conductivity (EC). CEC represents potential nutrient storage, while EC represents active nutrients in the water/soil solution. A medium with a high CEC can hold many nutrients, but if there is no water present, the EC will be low. 98% of plant nutrient uptake comes directly from the soil solution. 2% of nutrient uptake is directly from soil particles. Nutrients held on exchange sites (CEC) are not directly measured by EC until they are released into the soil solution through exchange with other ions (e.g., hydrogen ions from roots or fertilizer). Plants source the H+ ions (protons) used in cation exchange primarily by exuding carbon sugars into the rhizosphere, then microorganisms perform root respiration, which reacts with soil water to form carbonic acid H2CO3 that dissociates into H+ and bicarbonate. Roots also actively pump out H+ ions directly to acidify the rhizosphere, plants trade hydrogen produced through metabolism for essential nutrients held by the soil. In plant cells, the H+ (protons) used in proton pumping across the plasma membrane come primarily from the cytoplasm (cytosol). The protons are derived from internal cellular sources, including metabolic processes that release H+, and the regulation of intracellular pH homeostasis. Distilled water is highly useful in managing the electrical conductivity (EC) of a growing medium by allowing for precise control over nutrient concentration and assisting in the mobilization of nutrients from the cation exchange capacity (CEC) into the active, plant-available nutrient solution. Just add water & positive energy. Potential hydrogen. pH. + - , potential charge balance for hydrogen. So long as there is adequate oxygen in the soil and air and water moves at a decent interval, its practically impossible for the pH to skew in a soil that is taking in oxygen and releasing CO2 and nitrogen, I say practically, but meh, even with plenty of oxygen, the process of converting ammonium NH4+ to nitrate NO3- by bacteria releases hydrogen ions H+, which directly causes acidification (lowering pH). While water movement is necessary, consistent water moving through the soil can leach away basic cations Ca2+, Mg2+, K+, Na+, leaving behind acidic hydrogen and aluminum ions, causing pH to drop, especially in humid regions. High levels of CO2 in the soil (from intense respiration) dissolve in soil water to create carbonic acid, H2CO3, which lowers the pH. (barometric pumping removes that possibility) The pH in a cannabis cultivation environment, particularly in hydroponic or soilless setups, will often naturally drift towards acidic (lower pH) over time. Understand how to know when to lime the pH back up. Complex but critical. Once I understood this it helped ease the pain of understanding pH. Base saturation directly reflects the percentage of CEC occupied by base cations. Generally, as base saturation increases, soil pH increases because fewer acidic cations, H+ and Al3,+ are present on the soil colloid surfaces. At a pH of 7 or higher, the soil colloids are saturated with base cations, resulting in a base saturation of 90+%. While many sources include Sodium Na+ as a base cation, some calculations focused specifically on plant nutrients (like in some nutrient management contexts) may focus solely on the "Big 3": Ca2+, Mg2+, and K+. However, in soil science and CEC (Cation Exchange Capacity) measurements, sodium is usually included in the definition of total base cations, making it the "Big 4" base cations. At a pH around 5.5, soils often have a 45–55% base saturation, while a soil with a pH between 6.5 and 6.8 generally has an 80–90% base saturation. Base saturation is considered a reliable, albeit complex, indicator of soil fertility and the degree of soil weathering, acting as a crucial metric in soil classification and management. Once you take full control of the pH, so long as there is oxygen, and one keeps tabs on base saturation levels. Its near impossible for anything to go wrong. All you are essentially doing is adding water and waiting for any sign of deficiency. Not so much growing as eliminating the possibilities of things going sideways. Can't over or under water, can't skew pH, can't go anaerobic. Everything runs in optimal cycles, watering every 2 to 3 days or as required, depending on the rate of combined ET. A little warmer, a little drier, but never short on water. All the nutrients are already there in the medium, we still focus on the water, just not adding salts, but to mobilize nutrients held in the Cation Exchange Capacity (CEC) and move them into the active soil solution for plant uptake, the best supplements to add to water are fulvic acid, humic acid, or seaweed/kelp extract. Liquid solutions with high concentrations of essential trace elements. Distilled water has no alkalinity or minerals to help buffer or release nutrients. Adding these supplements turns the "empty" water into an active agent that forces nutrients off the CEC colloids into the solution for plant uptake. When to water? When Electrical Conductivity of soil gets low. No water, no conductivity.
Likes
18
Share
Hello people, how are you doing? Week 9 is here and we are almost there to harvest those beauties. Everything is OK, no bugs, no troubles, just happy to see how the plants are growing... Thank you to follow this diary! Peace and love!
Likes
13
Share
it was so easy to grow, love this plant it's glorious and the taste... no comments, its earthy and maybe some diesel aroma... it was happy 1st grow of the ILGM's Gorilla Glue Auto!!! strongly recommended for beginners.
Likes
58
Share
@Rap_a_cap
Follow
Here is the ugly duckling. She does not work, has suffered more from life in a pot and continues to get naughty with irrigation. I'm basically keeping her a little underwatered. She's under close observation. After the storm I will evaluate whether to fertilize. She's the strain in which I place the most expectations.
Likes
43
Share
Week 6 flower. Not much to report with this one. Growing very slow, little buds, smell musky and not very nice but improving, very frosty and getting frostier. Watered in Gaia Green Soluble Seaweed Extract 0-0-17. Day 36 flower I turned off Blumat drip and will water with the watering wand from here on out. Just another potential runaway dripper so I eliminated the risk. I will just build another reliable system with a timer and use the Blumat outside. Thanks for the view! Have a great week!
Likes
4
Share
Hacemos domingo 4 mayo te aireado y echamos 22 gr de top dress
Processing
Likes
4
Share
Satisfied. However one of my plants is showing signs of either dying or it is dead. Hanging over and the leaves haven’t got as big as tho other plants.
Processing
Likes
83
Share
@Grey_Wolf
Follow
Chance of a Lifetime Greenhouse Seeds Wonder Pie Week five 5th June 2020 Welcome back to my Wonder pie Diary for the Greenhouse Seeds Win a trip to amsterdam Contest. It's been a busy week for the three plants. I waited until aprox mid week (Tuesday 2nd June) to begin some LST And each plant proved to be tricky in one way or another. Plant 1 has very flexible branches that I needed to use tent pegs on to hold down each branch I wanted to train. Plant 2 is very bushy and has quite a few side branches happening so I managed to tie down atleast 6 with some soft wire and left the others to grow a bit longer before I try more LST. Plant 3 was the trickiest because the branches are very stiff and not very willing to bend . I found this out by accidently snapping a branch off. I managed to tie a few down but have the two main branches still growing vertically for the time being. (Wed 3rd June ) Not touching them today and will water tomorrow (Thurs 4th June) Watered each plant with 2 Litres of Water (Friday 5th June) Today I am very happy with the way they responded to the LST all three plants have really bounced back well and look super happy. I have been playing around with a homemade CO2 producer which is very easy to make with household items. Basically I re-used a 1.5l empty water bottle as the container. Then I simply punched a small hole in the lid for the CO2 gas to escape. I then added aprox 7-10 teaspoons of Sugar & half filled it with nice warm water (not too hot) and let the sugar dissolve. Then I added 3 teaspoons of Bakers Yeast and gently shook it all up before placing the lid with the hole in it back on the bottle and placing it inside the Grow tent. The principle of this is that the yeast and sugar react with each other to start "Fermenting" which causes the release of gasses which are made up of CO2. Now whether or not this does anything to make the plants grow any faster is conjecture on my part but I have noticed that the plants look very healthy and growth has been more this week than previous weeks so who knows????? It's worth a try if you have the time and inclination to try it. Well that brings me to the end of this weeks Wonder Pie update. Thankyou very much for taking the time to Read it, I truly do appreciate the kind words and likes etc and I shall be back next week with another. 👍
Likes
4
Share
@QixxGrows
Follow
Day29: New sets of leaves. I'll repot and switch to proper Veg Lights on the weekend. Day30: I'll repot tomorrow. Day31: Repotting done. She had a crazy amount of roots in the seedling pot. MUCH more than I expected. I switched to Veg lights at 90% power. Day32: Settling in new pot Day33 & 34: I had to perform some maintenance on the tent. Lost some hours due to that. Day35: Growth really looking healthy. Although she's not really stretching high, she does look rather happy. I do like them thicc ;) General: I need to put the camera somewhere else so that the growth can be better seen. Right at the end I'll edit out the white flashes. They're caused by the humidifier running and will be really easy to cut out without losing the gist of the grow :)
Likes
4
Share
31.3 F50 2L of water for each plant. Last two weeks of flowering starting, happy happy :) 3.4 F53 1L of water for each plant, seems like the plants are starting to drink less and less. Which is totally okay by me, no need for water every 2 days. Other than that I lowered lights like 5cm since there isn't that much flowering time left, might as well "blast" em with the whole 70 watts lol. 5.4 F55 Lots of small creepy crawlers in the pots. Took a video of predator mite strolling around the fabric pot!
Likes
48
Share
@Kirsten
Follow
Well this week has gone a bit pear shaped. I think it is a combination of light stress and the new soil I'm using. Also the soil had fungus gnats. I won't use it again but it was an experiment and I've learnt that soil isn't my substrate of choice! Back to my super coco mix! 😁 I'm going to see if I can pull it through. I've got plants through worse! Wish me luck. I watered twice this week with 1ltr of dechlorinated water PH'd to 6-6.5, containing 1ml of Ecothrive Trace and 1/4 TSP Ecothrive Biosys. I will say that the soil is very difficult for me to judge the moisture level to water accordingly. Have I mentioned it don't like soil? 😒💚😂🍃✌️ Thanks for checking out my diary this week, I'm sorry its not a better update, but wish me luck! I'm going to need it here! 😂💚✌️
Likes
9
Share
Fue una exelente cosecha, esta planta en un principio se tuvo en imddor y posteriormente sacada al exterior. Es mi primera experiencia plantando en suelo. La planta llego a un gran tamaño de la cual se cosechó una gran cantidad superando la cantidad promedio.
Likes
16
Share
@DrLaggis
Follow
🌱 Start: 17.07. 🌱 Hello everyone! This is my very first grow and I'm thrilled to share every step with you! 🎉 I'd appreciate any tips you might have to help me achieve the best results! 😊 Equipment: I've geared up with an Indoor Grow Kit from MarsHydro along with some BioBizz supplements to ensure my plants get the best care. 🌿 🌼 Seeds: I opted for Fast Buds seeds after hearing great things about them. They were delivered super fast—just two days! I’m especially excited to test the C4 strain. 🚀 I've begun soaking the seeds and setting up my space. Eagerly awaiting the transition to the next stage in a day or two! 🌱 📅 Update: 19.07. All three of my C4 seeds sprouted 1-2 cm within just 1.5 days! 🌱 It’s often recommended that autoflowers be planted directly into their final home, so I'm following that advice. I'm working on improving the air circulation in my tent to ensure the best environment for growth. 🌬️ I'm currently using 0.2L cups with big holes over the sprouts to maintain higher humidity during their initial two weeks. 💧 🎉 UPDATE 22.07. - THEY ARE ALIVE 🎉 My C4 sprouted on 20.07., and I'm overjoyed to soon share photos and a video of my little green buddy! 📸🎥 PS: My plant enjoys 2 hours of chill jazz music every day! HAHA 🎷🎶
Processing
Likes
20
Share
@BudXs
Follow
"Chugging" along this week. Weather is hot, girls are loving the all time drip system. Forgot that my nutes and hot sun dont mix well and created a bad case of algae. Will monitor more often and maybe increase the drip flow
Likes
6
Share
@rvabudman
Follow
Performed another round of topping as the auto on the right is still doing its thing. Also did some more super cropping on the new growth. Canopy growth has made it through the screen.
Processing
Likes
22
Share
~~~~~~~~~~~~~~~~~~~~~~~~~~~~~~~~~~~~~~~~~~~~~~~~~~~~~~~~~~~ ==> Comments From Other "Living Soil/Super Soil" Growers Are Always Welcome <== ~~~~~~~~~~~~~~~~~~~~~~~~~~~~~~~~~~~~~~~~~~~~~~~~~~~~~~~~~~~ INTRODUCTION I am very excited about this grow as it is the first time with a new setup. I have added a new light and am going to try a super soil grow for the first time. I have a Mephisto Genetics Double Grape between paper towels and waiting to sprout. The space is about 18 inches by 24 inches. The ceiling slopes down, so I don't have much room at the rear of the space. For medium I am using Fox Farms Happy Frog augmented with perlite. The bottom third contains 0.5 pounds autoflower blend of a "super soil" additive from Nature's Living Soil. (https://amzn.to/2PUHc6k) I am using three-gallon cloth pots. The light is a Horticulture Lighting Group 135W QB V2 R-Spec LED kit. NUTRIENTS Tap water pH’d to 6.5. pH lowered using 1.5 TBS unsulfured blackstrap molasses and apple cider vinegar. One-half TBS of vinegar lowered pH about 0.5 points. The medium was very dry. Slowly watered to allow the moisture to be equal throughout the soil ISSUES My while I have yet to put the seed in the dirt, I am concerned about temperatures. They are currently running at about 86F. I would like to get it down to about 80F. DAILY LOG DAY -2: STARTED SEED * Started seed in my traditional manner. Between paper towels soaked in 5% bleach solution, 0.25 tsp/0.5 Cup water. Temp 82F. DAY -1: ACTION *The smallest of tip has appeared. Will put in soil in a few hours. Day 0: SEED PLANTED. * Refrigerator filtered water. pH 6.5. 1 cup (250ml) added very carefully. * Covered with humidity dome. * Light from Soil: 32.5” * Temperature: 82F DAY 1: SPROUT The sprouted seed has shown itself above the soil. A nice Christmas morning surprise. Now I can start counting the days. * Watered with about 200ml of water at pH 6.5. Used apple cider vinegar to lower the tap water pH. * I was pleased to find that my tap water does not contain chloramine. I was reading bad things about chloramine and "living soil." It can kill beneficial microorganisms. All I did was ask my water company and they replied saying "we found no mention of chloramine use in the system:" Just what I wanted to hear. * After looking at other diaries using 250W LEDs, I moved my light down to 25 inches. DAY 2: NO WATER FOR YOU * No watering today. There is plenty of water in the soil and I want the roots to stretch and work. * Working on increasing the humidity and getting more control over the temperature. DAY 3: WATER PLANT, NOT POT. ADDED MYCORRHIZAE. * Following the GrowWeedEasy watering suggestions for Kind Soil * 500ml water at 6.5 pH, around the plant and not across the full 3-gallon bag. * The fan gently moves the seedling to keep it strong. * Had minor unexpected run-off. I hope to avoid that in the future. * Added 1/8 tsp Great White Mycorrhizae dissolved in 100 ml of 50 ml water/50 ml molasses mix. Did not pH as it is such a small amount of solution compares to the watering earlier today. DAY 4: NO WATER, NO PICTURE * Nothing really new. So no reason for a picture. * The soil is dry on top, but the bottom of the pot is still damp. So I will watch it, but I don't expect to water today. * Adding a small intake fan has dropped the temps to about 82F, I think they can live with that. * A humidifier arrives tomorrow and I think that will be my last step to improve the environment. DAY 5: 500ml WATER, LOOKING GOOD * The plant is looking good. The second set of true leaves has a bend, but nothing to worry about. DAY 6: 500ml WATER. NEW HUMIDIFIER * It wasn't really necessary to water today, but I did simply to stay on the schedule I am using. * Given the lightness of the soil and the moving air, I don't anticipate any problems. * Added a humidifier yesterday evening. It's bringing the humidity up, but I need to keep the space closed and I'm a bit concerned about having to provide it with distilled water frequently. ~~~~~~~~~~~~~~~ WEEK ONE IN REVIEW ~~~~~~~~~~~~~~~ * Watered with 750 ml pH's tap water. Watered slowly to avoid any runoff. * The plant is looking very healthy. It looks as if the roots are really starting to work as the plant is darker green. * Balancing temperature and humidity is tricky, but I think I will be able to get it stabilized with a bit more work. * Target Relative Humidity: Seedlings - 65-70; Vegging - 40-70; Flowering - 40-50 ==> Beginning Next Week I Will Only Post Twice A Week, Mid-week And End Of The Week. <==
Likes
4
Share
Hello everyone, Been busy but I shoot a little video for yall to see, also if growing is something you guys intended to do, I suggest you guys get yourselves a Digital Microscope or a jewlers loop. I just got myself a Digital Microscope for under $20.00 on Walmart.com, I got me a cheap one to start with so I can learn how to use it properly. But for under $20.00 this one brings 8 led lights, a adjustable mount, comes with 3 different connection choices build in, magnifies from 50-1000x, can take pictures and also videos and my favorite part, it connects right to my mobile device, you download and install a Google app and your ready to go, ill work with it and add pictures next week... See you guys soon 👊👊👊
Likes
2
Share
@Iop420
Follow
Hi all and thanks again for watching my post🤗. From now it's all about waiting and patience😁. Next step is flushing, I think to start next week. I let the pictures and grow log to speak. Peace✌️