


Likes
Comments
Share


@Rangaku
Follow
I fucked up , the timer had gone back to 18-6 from the 12-12 I had it on 3 weeks ago and I just caught on .. fuck !!
Not sure what will happen now if they will stretch again or potentially hermie … man I’m fkn stressed out
Critical XL is just on auto pilot flying along , feed her up and watch her go . Keeping up the defol and spreading her out , same same next week .

Likes
3
Share


@MicroHidroGrow
Follow
Día 01.
Arranco con un nuevo sistema. Esta vez no puse madre ya que conseguí los esquejes sueltos. Pero la idea es que la punta donde queda una planta sola vaya la madre de los 6 esquejes que saque.
Puse 4 esquejes de Tropicana al frente y en el lugar de la madre. Y puse 3 esquejes de Polaris en el caño de atrás del sistema. Los tiempos de floración son de aproximadamente 55 a 63 días en ambas variedades, así que me van a coincidir los momentos para ir poniendo los productos y cosechar.
Los esquejes tuvieron algunos problemas durante el enraizado, por eso están medio destruídos, pero en una semana a más tardar deberían estar reaccionando y empezando el crecimiento. Voy a ver cuantas semanas las hago crecer.
El sistema tiene algunas pérdidas de agua, pero son goteos que voy a soldar.
Likes
6
Share


@valiotoro
Follow
Hello everyone 👨🌾🏻
she grew fast and with a beautiful green colour on the leaves!
Preflower has started and its a girl
Wish you all a good day and happy growing

Likes
43
Share


@Sabac
Follow
Plantitas en su semana 12.
Crecen y crecen espero dejarlas entre 13 y 14 semanas.


Likes
1023
Share


@Grow3rPT
Follow
Cultivo Led The Jungle ( The Smith 150w 4000k ) - Não tem esta opção para colocar no diário.
Semana 7
Total Dias 43 - 23/05/2021
Total Dias 44 - 24/05/2021 / Rega 1L x 3 Plantas
Total Dias 45 - 25/05/2021
Total Dias 46 - 26/05/2021
Total Dias 47 - 27/05/2021 / Rega 1L x 4 Plantas
Total Dias 48 - 28/05/2021
Total Dias 49 - 29/05/2021
Likes
Comments
Share

@DogDoctorOfficial
Follow
💜 Week 7 – Purple CousKush Auto (Pheno B)
Quiet Confidence
One of the things I love most about growing multiple phenotypes side by side is discovering that every plant has its own way of telling a story.
Some demand attention from the very beginning.
Others slowly earn it.
This Purple CousKush has always belonged to the second group.
Since germination she's chosen her own rhythm, never trying to become the tallest plant in the room or the fastest to flower. Instead, she's quietly built herself into an incredibly balanced, healthy and elegant little lady.
For anyone joining this 8×8 Adventure for the first time, this entire project is about growing multiple phenotypes side by side under exactly the same conditions. Every plant receives the same environment, nutrition and care, allowing their unique genetics and personalities to tell the story.
This Purple CousKush is proving that sometimes the quietest phenotype becomes one of the most rewarding to watch.
Week after week she's reminded me that confidence doesn't always need to be loud.
Sometimes it simply grows.
🌱 Plant Development
Week 7 finds this beautiful phenotype standing at approximately 88 cm, adding another impressive stretch since last week's update while maintaining the same wonderfully symmetrical structure she's displayed from the beginning.
Although she still isn't the tallest Purple CousKush in the tent, she's becoming one of those plants that immediately catches your eye for all the right reasons.
Every branch has continued developing evenly, creating a beautifully open canopy where light reaches almost every flowering site. The spacing between nodes has proven to be nearly ideal, giving each future cola plenty of room to develop without feeling crowded.
The flowers themselves have taken a noticeable step forward this week.
Fresh white pistils continue exploding from every bud site, while the individual flowers are beginning to connect into the first recognizable colas. They're still young, but the direction is becoming very clear.
One thing that really stands out is her colour.
The foliage has shifted into an incredibly rich emerald green that almost glows under the lights. Every leaf looks healthy, every stem feels strong, and the entire plant gives the impression of being perfectly comfortable in her environment.
She may not be shouting for attention.
But she's certainly earning it.
🌿 Environment & Growing Conditions
Another week of stable environmental conditions has allowed this phenotype to continue flowering without interruption.
• 12/12 light schedule from seed
• Future of Grow Black Series LED delivering approximately 850 PPFD
• Lumiflora under-canopy lighting now supporting lower flower development
• Mammoth Pro grow tent
• Day temperature around 29°C
• Night temperature around 25°C
• Relative humidity averaging 60%
• CO₂ approximately 639 ppm
• pH 5.8
• EC 1.95 mS/cm
One exciting addition this week has been introducing the Lumiflora under-canopy lighting.
While the main Future of Grow Black Series continues driving the canopy from above, the Lumiflora fixtures now provide additional light beneath the canopy, helping lower flowering sites receive energy that would normally be lost in the shadows.
As the flowers continue stacking over the coming weeks, this extra light should contribute to more uniform bud development throughout the entire plant instead of concentrating production only at the top.
It's another small detail that helps maximize every square centimetre of the grow space.
💧 Feeding Program
Growing in a 15 L Plagron Lightmix container and receiving approximately 1.1 litres of solution per irrigation, she continues responding beautifully to the current bloom programme.
This week's nutrient solution consisted of:
• Terra Bloom – 2 ml/L
• Pure Zym – 1 ml/L
• Sugar Royal – 1 ml/L
• Power Buds – 1 ml/L
• Green Sensation – 1 ml/L
The slightly increased EC has been welcomed without hesitation.
Leaf colour remains beautifully vibrant, new flower growth is accelerating and the plant continues showing absolutely no signs of nutrient excess or deficiency.
Sometimes the best feeding schedule isn't the most complicated one.
It's simply the one the plant happily accepts.
🌸 Phenotype Notes
This Purple CousKush continues reminding me that beauty isn't measured in height.
She's growing with incredible balance.
The main stem has become noticeably thicker, every branch is supporting itself confidently, and each flowering site appears to be developing at almost exactly the same pace.
There's something incredibly satisfying about watching a plant where nothing seems forced.
Everything feels natural.
The rich green foliage frames the developing flowers perfectly, while the bright white pistils almost sparkle against the darker leaves.
She isn't trying to steal the spotlight.
She simply shines in her own quiet way.
Sometimes those become the most memorable plants of the entire run.
🔍 Looking Ahead
The stretch now appears to be slowing, which means the next phase should become increasingly exciting.
Over the coming week I expect the flowers to begin stacking much more aggressively as the plant redirects more of her energy into building density rather than height.
The introduction of the Lumiflora under-canopy lighting should also begin showing its benefits as the lower bud sites receive additional usable light, helping create a more consistent canopy from top to bottom.
The framework has been built.
Now comes the part every grower loves watching.
The swelling.
The stacking.
And slowly, the first hints of the beautiful Purple CousKush she's been promising all along.
💭 Final Thoughts
This week made me smile.
Not because she's suddenly become the biggest plant in the room.
But because she's becoming exactly what she was meant to be.
Healthy.
Balanced.
Elegant.
Every photograph tells the same story.
Deep green leaves.
Strong stems.
Beautiful flower formation.
And a plant that looks completely at peace with herself.
She reminds me that growing isn't always about chasing the biggest harvest or the tallest canopy.
Sometimes it's simply about appreciating a plant that's doing everything right.
And this beautiful lady...
She's doing exactly that.
🙏 Thank You
A huge thank you to everyone following this 8×8 Adventure. Every comment, every question and every shared experience make this journey even more rewarding.
A special thank you to the amazing companies helping bring this grow to life:
💜 Zamnesia for the incredible Purple CousKush genetics.
💜 Plagron for providing the nutrition that keeps these ladies thriving.
💜 Future of Grow for delivering outstanding lighting from above with the Black Series LED.
💜 Lumiflora for helping illuminate the canopy from below, ensuring every flower has the opportunity to reach its full potential.
💜 TrolMaster for maintaining the stable environment that allows these plants to perform at their very best.
And finally, thank you to the entire GrowDiaries community. Whether you're here to learn, share your own journey or simply enjoy watching these phenotypes develop, I truly appreciate every visit, every comment and every conversation.
Until next week...
Growers Love and happy growing! 🌱💚
Likes
39
Share


@Hazecat_420
Follow
Fue una semana tranquila, viendo como poco a poco siguen creciendo y engordando esas flores, nevándose de a poco más y más gracias a Top Candy de Top Crop. Se cortaron las últimas hojas para despejar por completo su parte inferior y fuese aún más fácil el riego. Se sigue ... Va quedando menos ... 👽👽👽
Likes
44
Share


@RakonGrow
Follow
Note : Jegliches Equipment aufgelistet welches ich nutze findet Ihr in der Germinations Woche !!!
Day 15 :
ich weiss noch nicht ob der mineralische dünger wirklich sofort etwas gebracht hat . schauen wir was die zeitraffer so vermitteln. ist es seit gestern schneller am wachsen ?
Day 16 :
PPFD 275 * 20h = DLI 19.8
Day 17:
+ 0.5L Flaschenwasser (EC 0.26)
+ + Canna Rizothonic
+ + Canna Terrar Vega
+ = Total EC 0.68 (PH 7.2)
+ Final PH 6.15
Day 18:
es wächst
Day 19:
es wächst immer noch
ventilation übern blätterdach angemacht. ich glaub daher kommt das ruckeln im video
Day 20:
+ 0.5L Flaschenwasser (EC 0.26)
+ + Canna Rizothonic
+ + Canna Terrar Vega
+ = Total EC 0.68 (PH 7.2)
+ Final PH 6.15
+ 0.5L Leitungswasser (PH 8.0)
Der Stamm hat sich in den letzten 3 Tagen verdreifacht vom Volumen. Jetzt hat er so Bleistift dicke erreicht.
Day 21:
die temps und relative luftfeuchte sind hier zwischen 58%-68% und 23.5°-25.5°C . reguliert sich aber immer zu den höheren werten . ist hier halt so :))

Likes
26
Share


@Earthy_Greens
Follow
🌸✨ Week 14 Update! 🎉🌿
Our girls are in their prime, and the transformation is truly incredible! 💎🔥 The buds are filling out beautifully 🌱🌸, coated in a thick layer of sparkling trichomes ✨💎, and the aroma is getting stronger and more intense 🍊🌿.
Everything is going exactly as planned 📈✅, and we’re getting closer to the moment we’ve all been waiting for—a bountiful, top-quality harvest 🌾🌟. The colors, structure, and resin production are proof that the power of soil and premium nutrients 🏆🌱 make all the difference!
Stay tuned for more updates, friends! 🚀👀 The best is yet to come! 💚👊🔥✨

Likes
6
Share


Likes
13
Share


@AlpineGoat
Follow
She had some struggle but finally recovered from the bad start and show the first new leafs! Hoping a good nutrients will boost her up!
After 24hrs she started an explosive grow, hope to not feed her too much!
Tuesday 27 is transplant day! I’m using some light mix with rqs soil booster, so I can only water her without mix any nutrients.
Likes
62
Share


@Roberts
Follow
Do-Si-dos auto has started to get a spicy fruity smell. She is in the middle of bulking. Everything has been looking really good. Thank you Zamnesia seeds, Medic Grow, and Athena. 🤜🏻🤛🏻🌱🌱🌱
Thank you grow diaries community for the 👇likes👇, follows, comments, and subscriptions on my YouTube channel👇.
❄️🌱🍻 Happy Growing 🌱🌱🌱
https://youtube.com/channel/UCAhN7yRzWLpcaRHhMIQ7X4g

Likes
15
Share


@DoDhLo
Follow
Finally managed to get some money & bought some real lights (Added a 500W Hps lamp). Also bought aluminum and made a tent .
I Lost track of the plants names . The plants seems to be growing for the first time when i added the extra lamp.

Likes
17
Share


@STAYINGONMYMAINCBATORUNTWO
Follow
I’ll start by saying I’m NOT using both bud blood and bud ignitor in one solution, I am using bud blood on the rear wedding gelato plant and bud ignitor on the front one to test the outcome of them individually to see the best results! I tied down and defoliated twice in the week and have switched to 12-12 yesterday so they’re transitioning now and should be in bloom by week 7! I made some extract them made some gummies successfully I might add and added the photos in the diary!
Likes
2
Share

@deseed_uy
Follow
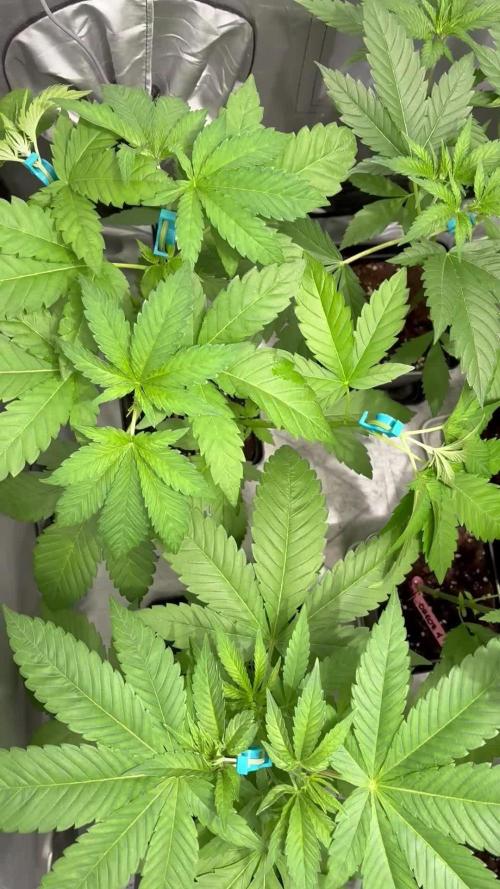
Ahi vienen las enormes, a puro clip lst😍
Las 3 del fondo son dos mandaruntz y una mango, y una de las q esta al lado del humi es la otra mango, las demas son las oreoz q tienen su propio diario pero estan con estas asiq las puse tambien aca jajjaja.
Borre algunas geneticas de este diario porq las saque al exterior, asiq les voy a hacer su propio diario. Ya estaban tan enormes todas y ramificadas q no entraban, unas ganas de pasar a flora! Pero bueno esperando para sacarles algunos esquejes, la nueva aventura

Likes
13
Share


@Prozak
Follow
the strain is really strong ,
low temperatures resist , 3 weeks around 12/16º graus and steell growing wel
nice new colos between week 4/6 in flowering.
really good strain to manipulate! 5 stars * * * * *
Likes
2
Share


@AestheticGenetix
Follow
7/8/25 Starting to look very very nice. Some nice purple flakes on the edges of the sugar leaves with bright hairy orange pistils on nice bulbous shaped buds
Likes
1
Share


@Bwright_315
Follow
Tale of two plant.
Plant 1 has been the perfect plant so far during flower no really issue and is growing frosty. She look like she will be ready in a week or so
Plant 2 is finally coming into shape and starting to get frosty, still lagging behind plant 1 in bud form and frostiness hopefully by harvest it will catch up about 2-4 weeks left


Likes
31
Share


@MrJoint
Follow
✌️🎃 Thank you for checking my cultivation.
🛁 Last week of roots washing.
😍 She’s small, fat and smelling a lot.

Likes
26
Share


@420DeepGrow
Follow
Gracias al equipo de Seedsman y XpertNutrients sin ellos esto no sería posible.
💐🍁 Bubba Cheescake:
Bubba Cheesecake es un cruce de Bubba Kush anterior al 98 con Cheese Cake (Wedding Cake x Exodus Cheese). Se trata de un híbrido 70% índica con muy buenos rendimientos, alto en THC y bajo en CBD. Bubba Cheesecake prospera en interiores y exteriores. En interior se aconseja un corto periodo de crecimiento vegetativo debido a la cantidad de estiramiento que presentan las plantas. Las plantas pueden crecer hasta una altura de 250 a 350 cm. cuando se deja crecer naturalmente al aire libre. En interior, la floración dura entre 60 y 65 días, con rendimientos entre buenos y altos, de 400 a 550 gr/m2. Las plantas de exterior son capaces de producir entre 700 - 800 gr. peso seco. En las latitudes norteñas, en exterior, los productores pueden esperar cosechar a principios de octubre. Los cogollos son grandes y duros como piedras. Las plantas maduras muestran atractivos colores púrpuras y azules y brillan con una resina pegajosa que cubrirá las manos del cultivador si no tiene cuidado. El componente Wedding Cake agrega dulzura al sabor del regaliz y el aroma es terroso y musgoso. La producción de THC es muy alta con un nivel bajo de CBD. El efecto es intensamente narcótico, fuerte y duradero.
🌻🚀 Consigue aqui tus semillas:
🍣🍦🌴 Xpert Nutrients es una empresa especializada en la producción y comercialización de fertilizantes líquidos y tierras, que garantizan excelentes cosechas y un crecimiento activo para sus plantas durante todas las fases de cultivo.
Consigue aqui tus Nutrientes:
https://xpertnutrients.com/es/shop/
📆 Semana 10:
Por fin comienza el buen tiempo y ella lo esta agradeciendo, incrementa su tamaño dia a dia considerablemente, se aprecian preflores sin erizos aparentes.
Sigo con las dosis de nutrientes recomendada por el fabricante.
Aplico tratamientos insecticidas y fungicidas para asi evitar plagas y hongos 🍄
