Likes
16
Share
@420keef
Follow
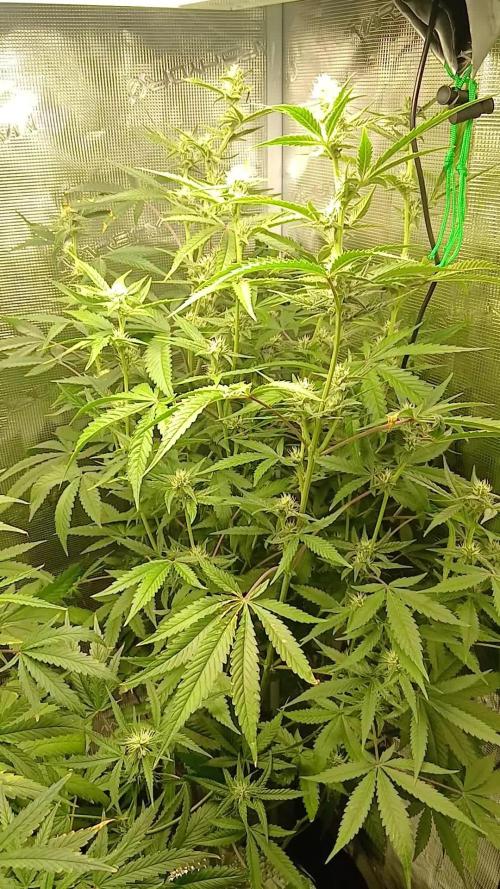
Looking healthy! Still wondering if the second one is a gorilla glue because i might have mixed them up, i gues time will tell!
Likes
17
Share
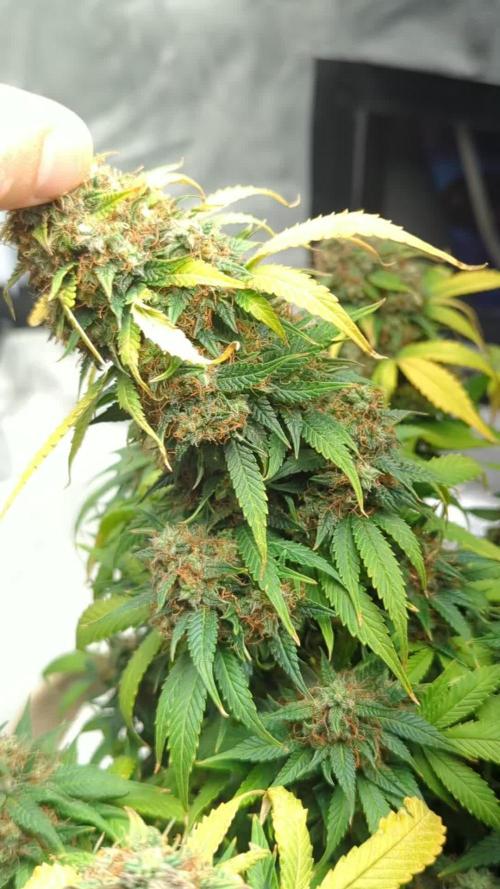
Some yellow leaves and some calcium def etc etc. All good, they are progressing well. Gave a feeding yesterday. Should have staked them probably we’ll see. Overall about 4 weeks left.
Likes
5
Share
@HK_OG
Follow
F1 ist gut durch die 2. Woche gekommen und startet gesund in die 3. Woche
Likes
13
Share
Impresionante colonia de tricomas en estas semanas y terpenos ricos ricos se viene muy rico esto.. En este cultivo use solo un. Par de riegos foliares con compost te brew.
Likes
6
Share
@nonick123
Follow
Día 44 (24/06) Riego con 250 ml H2O pH 6,5 La planta empieza a florecer de forma interesante Día 45 (25/06) N/A Día 46 (26/06) Riego con 500 ml H20 pH 6,5 Día 47 (27/06) N/A Día 48 (28/06) Riego con 500 ml H20 pH 6,5 Día 49 (29/06) Riego con 500 ml Té Floración de Lurpe Aplico Top Dress: 22 gramos de Tasty Flowers TD - Lurpe Solutions Día 50 (30/06) N/A 💦Nutrients by Lurpe Solutions - www.lurpenaturalsolutions.com 🌱Substrate PRO-MIX HP BACILLUS + MYCORRHIZAE - www.pthorticulture.com/en/products/pro-mix-hp-biostimulant-plus-mycorrhizae
Likes
6
Share
Acabamos la séptima semana de floración de las Original de GrowBarato familia, y no podéis imaginaros lo bien que huelen. Tienen un buen color, se ven sanas, y van progresando adecuadamente la flor va poco a poco engordando y tirando bien de tricomas. Creo que seguiré abonando una semana más , ya iremos viendo estos días que hago pero si creo que una semana más es necesario. Agrobeta: https://www.agrobeta.com/agrobetatiendaonline/36-abonos-canamo Mars hydro: Code discount: EL420 https://www.mars-hydro.com/ Las maximas de temperatura no superan los 26 grados y las mínimas no bajan 20, así que no me puedo quejar. Los niveles de humedad también son los correctos van entre 45%/55% de humedad relativa. Por supuesto el Ph lo estamos dejando alrededor de 6. Hasta aquí es todo, buenos humos 💨💨💨.
Likes
11
Share
@Harvi
Follow
I brought a microscope with me to check the trichomes. On the LSD plants, they have already turned cloudy, and surprisingly, some even have a significant amount of amber.
Likes
11
Share
@Kirsten
Follow
19.1.25: I have watered all plants with 300ml of dechlorinated water PH'd to 6.3, with 1/3 jar of black strap molasses with Ecothrive Biosys-1g. I am looking to increase the sugars for microbial life and plant processes. It'll also add some extra Calcium, Magnesium and trace elements. I also, watered all plants with Bloom nutrients. Using dechlorinated water PH'd to 6.3 with the following nutrients: (ml/l) ;- ♡ 2ml Cal-Mag ♡ 2ml Ecothrive Flourish ♡ 2ml Xpert Nutrients Bloom Booster ♡ 2ml Biobizz Bloom ♡ 2ml Biobizz Top Max ♡ 1g of Ecothrive Biosys I watered around 1-3 litres per plant. Depending on size and requirements. I'm still spilling water containing the nutrient solution. 🙄 I am using this to rub into the leaves. I think a nice foliar massage won't do any harm, make the most of the situation. The plants have become very hungry and thirsty. Increased the water by double. I ran out of my TNC cal-mag. I decided to order the Xpert Nutrients brand, as I like their products. It isn't organic as far as I can tell, but I don't think it matters too much to me, to be honest. I also want to top dress this week, so I bought some Green Leaf PK bud Booster dry amendment from Amazon, too. I'll mix it with canna coco, perlite, worm castings, and Ecothrive Life Cycle. 24.1.25: I went ahead and top dressed all the plants with 4.5 gallons of my supersoil custom mix. This consists of the following substrate and dry amendments: ♡ 60% Canna coco ♡ 20% Worm castings ♡ 15 % Perlite The remaining 5% consists of the following dry amendments;- ♡ 10g Ecothrive Biosys ♡ 1 Tsp RHS Mycorrhizal Fungi granules ♡ 3 Tsp Vitalink Bat guano ♡ 4 Tsp Diatomaceous earth ♡ 8 Tsp Ground Cinnamon ♡ 10g Green Leaf Bud Booster PK booster. ♡ 3 Tsp Ecothrive Life Cycle. •Worm castings for some all round nutrition. •Cinnamon for mildew and bug repellent. •Canna coco base substrate. •Perlite for adding oxygen to the root and soil system. •Green Leaf Bud Booster PK Booster for blooming. Building strong big buds. •Vitalink bat guano again for Bloom. •RHS Mycorrhizal Fungi granules, to boost beneficial microbes. •Ecothrive Life Cycle for lots of great benefits. •Diatomaceous earth for Silica. •Ecothrive Biosys, for an extra microbial boost. 24.1.25: Gorilla Cookies is absolutely healthy and strong! I'm very pleased with this plant. I was looking into topping autoflowers and had wanted to top her. Anyway I read some things, as a result of which I decided, last night, I wasn't going to do it. So today came around, and I topped it. Totally forgot I wasn't going to do it 😅 I was really excited to experiment with topping in addition to LST. Now I guess we're all in! 🤞 Thanks for checking out my diary 🍃 ✌️
Likes
17
Share
@Naujas
Follow
another activity in gloomy autumn evenings:) I think it will be interesting and difficult growth at the same time :) because the space is very minimal :) good luck to everyone:).
Likes
7
Share
@Thckaos
Follow
15-05-21 Se cambia la solución y se realiza un lavado de raíces. Para bajar la conductividad de las raíces de 1.43 a 0.2 ms para que la solución nueva sea más efectiva. La solución tiene 2.23 ms y 6 PH. Se añade una pastilla de CO2. 16-05-21 PH 6.2 Conductividad 1.85 ms 17-05-21 PH 6.1 Conductividad 1.84 ms 18-05-21 Se corrige el PH 5.2 a PH 5.9 Conductividad 1.97 ms. Se rellena con agua del grifo ya que el nivel es bajo. Conductividad 0.92 ms 19-05-21 Se corrige el PH 5.6 a PH 6.1 Conductividad 0.97 ms. 20-05-21 Se corrige el PH 5.3 a PH 6.30 Conductividad 1.21 ms. Se rellena con agua del grifo ya que el nivel es bajo. Conductividad 0.74 ms 21-05-21 PH 6.10 Conductividad 0.78 ms
Likes
19
Share
Very nice grow all at all,first time that i have a strain turned out so purple in volor,very interesting!
Likes
44
Share
**Encontrarás la traducción a español al final de la descripción** From/Desde: 10/05/19 || To/Hasta: 16/05/19 From day/Desde día: 78 || To day/Hasta día: 84 You can find the Money Maker Diary here: ** Podéis encontrar el diario de las Money Maker aquí:** https://growdiaries.com/diaries/25667-gorillamakingmoney-gorilla-vs-money-m -----IMAGES & VIDEOS----- 5 - HomeMade Organic & Cheap CO2 generator (more info in week summary) 9, 10, 11 & 12: The bud on the right is a Gorilla one, the buds in the left or/and in the middle are Money Maker ones. 15 - Same Gorilla plant buds, one affected by CO2 in the roots and the other not. -----WEEK SUMMARY----- The smell is more sweet and intense every day, friends that came home turned them eyes into crystals when they see this little babys. The size isn't awesome, but the high ammount of buds full of crystals plus the strong sweet aroma makes them awesome. Buds are growing and fattenning very very well. This week i added a boost of HomeMade CO2, i never measured the results of this invention so i can't give CO2 measurements. This method is widely used in home aquariums and there is where it comes from. For those interested i'm going to write here more detailed instructions. The 4 liters i've made will last for about 2 weeks. ---NEEDINGS--- - 250 ml Bottle - 6~10 l Bottle - 400 g Sugar / l water - 1 Envelope of organic baker's yeast / l water (CHEMICAL WILL NOT WORK) - 3 mid plastic tubes 40~50 cm - 1 short plastic tube 5~6 cm - 4 tube adapters - Hot glue to seal adapters The process of creating CO2 is simple, mix water, organic yeast and sugar in a bottle, and the sugar will free CO2 in the process of fermenting to alcohol due to the yeast. 1. Make a hole in the center of the big bottle cap, insert an adapter and secure it with hot glue 2. Make 3 holes in the small bottle cap and glue the other 3 adapters 3. Link both caps with one of the mid tubes and insert the other tubes on free adapters 4. Insert a short tube in the bottom of the small cap in the adapter that came from the big cap 5. Watch the Video!! -----WATERING CALENDAR----- Plants are beginning to drain the pots a bit faster so from now on i will raise the water ammount on each watering day 0.25 l. 11/05/19 - 1,5 l with All week nutrients -(Nirvana & Blombastic) also Big Bud half dosed @ PH6.4 & 2 E.C. 14/05/19 - 1,5 l with Bud Candy, Big Bud, Nirvana, B52, Bud Factor-X, Sensizym & Blombastic @ PH6.4 & 1.5 E.C. *****ESPAÑOL***** -----IMÁGENES Y VÍDEOS----- 5: Generador de CO2 casero, barato y orgánico (más info en el sumario semanal) 9, 10, 11 & 12: El cogollo que sale a la derecha es de una Gorila, el de la izquierda y/o el de en medio son de una Money Maker 15: Dos cogollos de la misma planta, uno afectado por CO2 en las raíces y el otro no -----SUMARIO SEMANAL----- El olor es más dulce e intenso día a día, los amigos que vienen a casa a verlas se quedan ojipláticos al verlas. El tamaño no es una maravilla, pero la gran cantidad de cogollos llenos de cristales añadido al aroma que entra por las fosas nasales las hacen increíbles. Los cogollos crecen y engordan de maravilla. Esta semana he añadido un boost de CO2 casero, nunca he hecho mediciones de los resultados por lo que no puedo darlas. Este método es ampliamente usado en peceras caseras y de ahí saqué la idea. Para aquellos interesados dejo aquí instrucciones más detalladas. Con los 4 litros de agua que he preparado yo da para unas 2 semanas. ---NECESITAMOS--- - Botella de 250 ml - Botella de 5 a 10 litros - 400 g de azúcar por litro de agua - 1 sobre de levadura de postre orgánica (LA QUÍMICA NO FUNCIONARÁ) - 3 tubos de plástico de tamaño medio 40~50 cm - 1 tubo de plástico de tamaño pequeño 5~6 cm - 4 adaptadores para los tubos - Cola caliente para pegar y sellar los adaptadores El proceso de generar CO2 es simple, mezcla agua, levadura orgánica y azúcar en una botella, y el azúcar liberará CO2 en el proceso de fermentación a alcohol. 1. Haz un agujero en la tapa de la botella grande, inserta un adaptador y séllalo con cola caliente 2. Haz 3 agujeros en el tapón pequeño y haz lo mismo con los otros 3 adaptadores 3. Conecta los 2 tapones con uno de los tubos y conecta los otros 2 tubos a los adaptadores restantes 4. Conecta el tubo pequeño en la parte libre del adaptador del tapón pequeño que viene del tapón grande 5. Mira el vídeo -----CALENDARIO DE RIEGO----- Las platas comienzan a secar los tiestos un poco más rápido, asi que de ahora en adelante incrementaré 250 ml de agua adicionales en cada riego. 11/05/19 - 1,5 l con todos los nutrientes semanales -(Nirvana & Blombastic) BigBud mitad de dosis @ PH6,4 & 2 E.C. 14/05/19 - 1,5 l con Bud Candy, Big Bud, Nirvana, B52, Bud Factor-X, Sensizym y Blombastic @ PH6,4 & 1,5 E.C.
Likes
14
Share
I CHOPPED ABOUT 15 AUTOFLOWERS AND MOVED SOME OF THE PHOTOPERIODS FROM THE 5X5 TENT INTO THE 8X8 TENT. ONCE ALL THE AUTOFLOWERS ARE CHOPPED I WILL MOVE ALL THE PHOTOPERIODS INTO THE 8X8 AND THEN I WILL SWITCH THE LIGHTS TO 12/12👍🤘🤘🤘 FOR EVERYTHING MARS HYDRO VISIT: www.mars-hydro.com www.marshydroled.ca PROMO CODE: rocknroll VISIT THE ALIEXPRESS STORE: @marshydro_aliexpress Instagram: @marshydropenny https://youtube.com/channel/UChU5ZWwNi-DvnO3oWVU3ceA (NEW) STRIVE NUTRIENTS 💪 Thanks for taking the time to read and check out my diary🤜🤛 FC-E6500 LED GROW LIGHT: FC-E6500 grow light with 3978pcs OSRAM BridgeLux Diodes & Moso Driver, market-leading PPF 2.7 µmol/J, Max 2.5g yield/watt with 30% higher Average PPE, more cost-effective when compared to same style type lights. Only consumes 650W, perfectly cover 5x5ft (personal), 4x4ft (commercial) grow space. Innovative Precise Uniform Lighting-Built-in removable bars interval & dimmability enable the exact & dynamic PPFD control over each of the plant growing stages, FC-E6500 detachable bars deliverSuperior Heat Dissipation: Real Aluminum heatsink together with 6 slim profile passive cooled bars (THINNER & LARGER surface) and detachable Meanwell Driver, create less heat. save 50% hydro than other old grow lights! Driver can be mounted remotely on the side of a grow tent/rack or on an adjacent wall to remove heat from grow space. Full Spectrum UV IR LED: With Yield Max spectrum (660nm Osram enhanced Deep Red,2800k-5000k,730-740nm IR,380-410nm UV LEDs), Average PPFD the FC-E6500 LED grow lamp enables cultivators to produce BIG FAT Dense Buds, perfect for full-cycle hydroponic, soil, grow tent/grow room. Dimmable Commercial Grow Light: Cost-efficient, easy dimming & daisy chain With a max up to 20 lights, IP65 Waterproof, master light easily controls the rest. Perfect for commercial & home horticulture. FC4800 LED GROW LIGHT: GET THE MAX FROM MARS👍: Welcome one of  the newest members of the Mars Hydro family🤜🤛🤘. The Mars Hydro FC 4800 480W LED Grow Light can accommodate up to a 4' x 4' area for flowering. It has OVER 2000 LED chips consisting of the best selling Samsung LM301B diodes which has a Luminous Efficacy of: 220 lm/W 0.2 W, 3 V mid power, Osram 660nm Diodes, Infrared light and UV LIGHT👍. It boasts the incredible efficiency of 2.8 µmol/J, maximum 2.5gram yield per watt with 30% higher Average PPFD. This High-intensity spectrum is beneficial for plants at all stages - from veg to bloom, and creates Big dense Buds👍. achieve 50% higher yields & quality compared with the old lights! Only consumes 480W for 4x4ft personal grows, and 3x3ft for commerical grow. It comes with a dimmer and daisy chain function with a  maximum of up to 15 lights, the master light controls the rest👍. Wide 6-bar design offers even & wide canopy coverage and can maximizes your grow space. slim 180° FOLDABLE DESIGN... YES I SAID FOLDABLE🤘🤣 , making it compact and easy to install, it's IP65 WATERPROOF and will give you no worries while growing in a humid environment and makes it a flexible high performance commercial grow light for enormous  SUPER FROSTY yields.😛😛😛. MARS GETS EM FROSTY BOYS👍 AWESOME HEAT DISSIPATION: The Low energy consumption FC4800 growing light has 6 passive-cooled bars and an aluminum heat-sink a removable driver  you can upgrade later or have it outside your tent. with zero noise  you can save up to 50% in your electricity bill compared to HID's or HPS lights! It also has a removable driver so you can upgrade it in the future or have it outside your grow space for better heat control in your growroom👍 UPGRADED FULL SPECTRUM: Yield Max Spectrum with enhanced red (Top-Bin Samsung 3000k-5000knm, Osram 660nm Deep Red), speed up blooming & fruiting, perfectly suited for full-cycle growing. The FC4800 LED grow lamp was born for Big Buds, perfect for commercial, grow tent, grow room, hydroponics, and all soil grows.👍 THE BEST SAMSUNG DIODES: THE FC4800 has Top Bin genuine Samsung Osram Diodes, combined with remarkable 2.8 µmol/J Efficacy, 30% higher Average PPFD, 50% less energy consumption, to maximize your yields. They give you a TRUSTED 3 years warranty 100% Satisfactory guaranteed!!! TSW2000 LED GROW LIGHT: INCREASE YIELD AND CROP QUALITY WITH MARS HYDRO LED GROW LIGHTS: NEWEST SMD LED technology provides the highest PAR/LUMEN output (1122umol@18") and can make you get 30% higher yield compared to OLD blurple led lights.  Max 2.5g yield per wattage and achieve maximum quality and quantity, much better than traditional HPS grow systems LOW ENERGY CONSUMPTION LED GROW LIGHT: Consuming only 300W true output with 684 LEDS! It saves up to 50% energy than other led grow lights. Perfect for 3.5x3.5ft bloom stage, 4x4ft veg stage. Over 90% light energy can be absorbed by plants, it will have higher intensity in a MARS HYDRO grow tent with diamond design mylar, or by crossing over using multiple TSW2000 HIGH EFFICIENCY FULL SPECTRUM INDOOR GROW: 3000K 5000K and IR 660nm 760nm RED, makes it close to natural light, highly engineered to provide improved growing performance for plants at all stages of growing, rapid plant response from seed to flower; Uniform and wide-beam light distribution for your plant's optimal growth 8x8 1680D GROW TENT The MARS HYDRO 8x8 Grow Tent interior is made of a unique diamond design mylar which is highly reflective. (Other companies mylar and reflective rate is as low as 50%, and it won't provide efficient light. They use thick 1680D oxford canvas, and being double stitched, it is tear proof and perfect for locking in the light. Their grow tent keeps 100% of the light inside the tent and helps your plants absorb more light. EXTRA-THICK material means No light leaks or rips at all.👍 Strong Stable metal corner adapters and poles are the trustful supporters of the tent. It's very sturdy, neither rusting or paint flaking off. quick and easy tool-free setup. They use heavy-duty metal zippers, with double layer black lining, by far the best on the market which creates a light-proof seal. The Easy observation windows are made by double layers of cloth. Observe the growing conditions of your plants without opening the tent and avoid disturbing your plants. The observation windows also serves to dissipate heat and ventilate the air. The tent includes 2 removable waterproof floor trays to hold soil and water. The removable tray can be taken out to wash easily. They guarantee the grow tents are easy to install even if you've never done something like this before. Clear Instructions and no tools needed! They also offer 30-day unconditional refunds for quality problems. Just contact their friendly 24 hours customer service 👍
Likes
22
Share
@skeby
Follow
Maybe next time i will do better, but what a beautiful plant 😻😘
Likes
9
Share
@GrowerGaz
Follow
Striped feeding completely day 60 , stacking hard in the dwc and I'm excited to see the yield. Smell is lemon sweets , cough sweets lots of hazey aroma. Mars ts1000 is so big a great job and I think will hit over a gram a watt.
Likes
43
Share
Flowering day 68 since clock change to 12/12 Hey guys :-) . It's so far, the lady is ripe and will be cut at the bottom end in the coming days and hung upside down in the drying tent :-) . Next week there will be an extra update on how they are hanging. Watering would be done twice this week with 1 l each (nutrients see table above) Otherwise it was checked and everything was cleaned. Have fun and stay healthy 💚🙏🏻 👇🏼👇🏼👇🏼👇🏼👇🏼👇🏼👇🏼👇🏼👇🏼👇🏼👇🏼👇🏼 You can buy this Nutrients at : https://greenbuzzliquids.com/en/shop/ With the discount code: Made_in_Germany you get a discount of 15% on all products from an order value of 100 euros. 👇🏼👇🏼👇🏼👇🏼👇🏼👇🏼👇🏼👇🏼👇🏼👇🏼👇🏼👇🏼 You can buy this strain at : https://www.exoticseed.eu/ Water 💧 💧💧 Osmosis water mixed with normal water (24 hours stale that the chlorine evaporates) to 0.2 EC. Add Cal / Mag to 0.4 Ec Ph with Organic Ph - to 5.8 - 6.5 MadeInGermany
Likes
16
Share
@Kush1988
Follow
Crescita veloce, interbodi molto corti, alcune presentano caratteri tipici indica, un paio invece sembrano sviluppare geni sativa. In entrambi i casi sembrano promettere bene poiché cominciano già a fare ramificazioni interne
Likes
3
Share
N'hésitez pas à me contacter si vous avez des questions! Pour préparer votre solution, dans votre réservoir ou arrosoir : Mettre en premier la base (Iguana) Ensuite Ancient Earth Et enfin les bactéries ASSUREZ-VOUS D'UTILISER UNE EAU DE BONNE QUALITE (EC < 0,2) POUR DE MEILLEURS RESULTATS. J'utilise un substrat non enrichi pour permettre le meilleur départ à mes plantes. Il s'agit du Promix de Plagron, il a une EC proche de 0, c'est pour cette raison que je commence les engrais assez fort dès le début. Les plantes sont très gourmande sous LED haute intensité et l'enracinement est rapide. J'arrose tous les 3 jours environ avec 2 arrosages à l'engrais et 1 à l'eau par semaine. Je n'attend pas que le substrat sèche complétement sinon ça réduit l'efficacité de l'arrosage, ça détruit la faune et éventuellement facilite la cristallisation des minéraux. Au niveau du volume d'arrosage, il faut prendre en compte 1/3 de la taille du pot. Pour un pot de 1L je vais donc arroser environ 300ml. Pour un Pot de 10L je vais arroser environ 3L. Il est important d'arroser doucement pour éviter que l'eau ne coule tout de suite au fond. Il est important d'avoir au moins 15% de drain pour s'assurer d'évacuer tous les nutriments non consommé et faire la place aux nouveaux. IL EST PRIMORDIALE D'EVACUER L'EAU AU FOND DES COUPELLES, c'est une eau qui est chargée en nutriments non consommé et on ne veut pas qu'elle remonte dans les pots car cela risquerait de créer des blocages. Au niveau de la technique de taille de formation, je réalise tout de suite une FIM que je reproduirai dès que l'apex aura repoussé. La première FIM est la plus longue mais les suivantes sont très rapide car la plante s'habitue à la technique et cela la stress beaucoup moins. En général il faut reproduire la FIM tous les 3 à 4 jours en fonction de la vigueur. C'est une technique très facile à mettre en œuvre et ne demande aucun matériel. C'est aussi la plus rapide pour obtenir des buissons. N'hésitez pas à me contacter si vous avez des questions concernant la FIM! Je retire également les feuilles supérieur (pas toute pour éviter de ralentir la plante) qui cache les secondaires pour augmenter l'efficacité de la FIM sur la croissance des secondaires.
Processing
Likes
7
Share
@Kushizlez
Follow
Day 10F-17F (Day 10F) Everything is looking on point. I’m going to soak in a gallon of lite compost tea diluted to 400ppms on each plant except for #5. I’m still a little worried I won’t make it through the stretch but at the same time I fear N toxicity just as much. I will give one more lite tea before the end of stretch, most likely at the end of this week. (Day 12F) Ladies responded nicely to the tea except for BBB#1. It just isn’t looking as vigorous as it was last week. It’s the only one without an air hose so I guess it couldn’t hurt to grab one. The air hose does without a doubt prevent overwatering in soil and I’m surprised I don’t see more people using it. It’s cheap, effective and gives me similar results to growing in pure coco. I’m going to give one more light foliar spray of 3ml of calmag, 3ml of kelp and 2.5ml of insect frass. (Day 14) Got the air hose hooked up to all 5 plants now. I hate that I’ve been forced to defoliate so much in early flower and it is definitely reducing bud size. Last round my bbb’s had pistil clumps twice the size at this time and they were dealing with severe deficiencies. I’m hoping it’s just genetics or the fact they are larger plants. (Day 15) I’m starting to see signs of N toxicity on the some of the new growth and overall growth on all plants except #1 has slowed. It was most likely caused by the foliar spray/tea combo. No more feeding anything for the next 12 days at least. Luckily it’s still pretty early in flower but I know that N tox can hit really hard after the stretch stops. I would be pretty upset if I vegged for 80 days only to get severe N tox in mid flower. Since it’s not breaking down in the soil, I should be fine. I’m going to defoliate some more of the large bottom fan leaves as they hold large reserves of extra nutes I don’t need. Hopefully these small defoliations aren’t stressing them at all. Next round I plan to do a big strip one week before flower, at transplant and a second big strip on day 21. (Day 17) I think I was over-worrying about the seriousness of the N tox. I’ve seen it hit very hard in mid flower and can’t be too careful. It’s almost always caused by water soluble nitrogen so I’ll try to stay away from that unless I absolutely need it. My case does not look to alarming just yet. I noticed the stunting on #3 right after that last tea so I am going to stop giving the last liter of compost tea because of how unbalanced and separated at the bottom it is. It sure helped out the other 4 plants that didn’t get the granulars from the bottom of the bucket. I‘m planning to give a bloom tea around day 26 and a final top dress a few days later. #1 has now out stretched everything else in the tent. I honestly was not expecting that. If #3 didn’t get stunted this whole week I think it would be the taller/heavier plant.