


Likes
Comments
Share


@Leonardo_DaGrower
Follow
I have never seen a plant so vigorous. Two weeks in and I was able to top and LST. I can hear the experts screaming, “too early”. Maybe, we will see. I continue to use RO water and no nutrients.
Check out the video. I think I have a pretty unique idea. Comment below with advice, praise, or insult.

Likes
13
Share


@einamio
Follow
Day 36 I guess I can call it bloom. Nice strong pistils shooting all over. She is the tallest so far making me raise my lights a little more.
Day 38 Now Californian Snow is the tallest :) Ztrawberry stopped at a perfect height, it looks like she's gonna develop into a beautiful lady. Fat white pistils all over 😻
Day 39 Happy girl got 2500ml cm bg bb bh 6.3ph ~1EC She is perfect, symmetrical, stopped stretching at about 50cm, flowers are mostly leveled, branches are strong, leaves point up unless I water. I think she's also turning purple. Beaut 😻
Day 42 I think I saw some burnt tips but she still looks super happy and healthy. The most vigorous plant I've had.

Likes
12
Share


@StoneyMelony
Follow
The Lemonberry Haze is a strong open plant, with big side stalks,big leaves but not that many. She has medium internodes. A little bit of LST did help to get the cannopy more even. EC levels never raised EC 1.4 and i had never a problem with feeding her. She matured very fast and i was amazed by her speed. You could have harvest her at day 63 but i did flush her a bit longer. This plant had a wonderfull smell of turpentine with lime and had very dark looks, very dark green with some purple nicely covered with white crystals very nice.
Overview of my grow:
Tent: Secret Jardin DS120 4 x 4 (120 cm by 120 cm)
Lights: 2 x 120 Watt CTlite c4 clusterled
Climat: Trotec Dehumidifyer 240 watt- 10L/24h
Filter: Prima Klima carbon filter PK2600
fan: 2 x Secret Jardin 20watt osc. fan
Pots: Gronest 4 x 11 liter airpots
Water : automated water system
PH: bluelab
Nutrients: Plagron cocos A/B
Plagron PK 13/14
ATA cal/mag
Epsom salt
no rights to music in the videos

Likes
1
Share

@HappyFarmer2
Follow
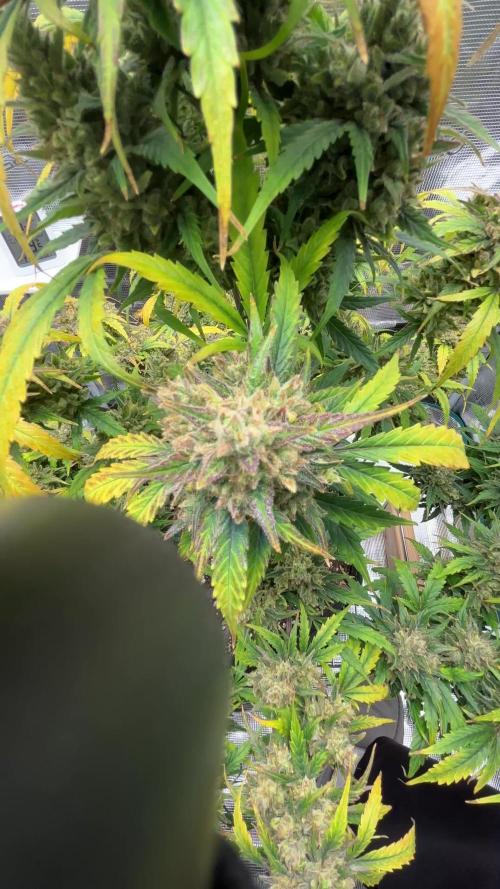
Both Plants looking good. Bud growth doing really well, they are fattening up good. Trichomes, monitoring daily, seen a few Amber on both plants. Mimosa: strong citrus smell. Pipe Light Kent: strong smell, buds are fatter than Mimosa. Both plants close to harvest, leaves are turning yellow.
Stopped a couple of nutrients, following FoxFarm feeding schedule for soils.


Likes
Comments
Share

@Dubl_Jointed
Follow
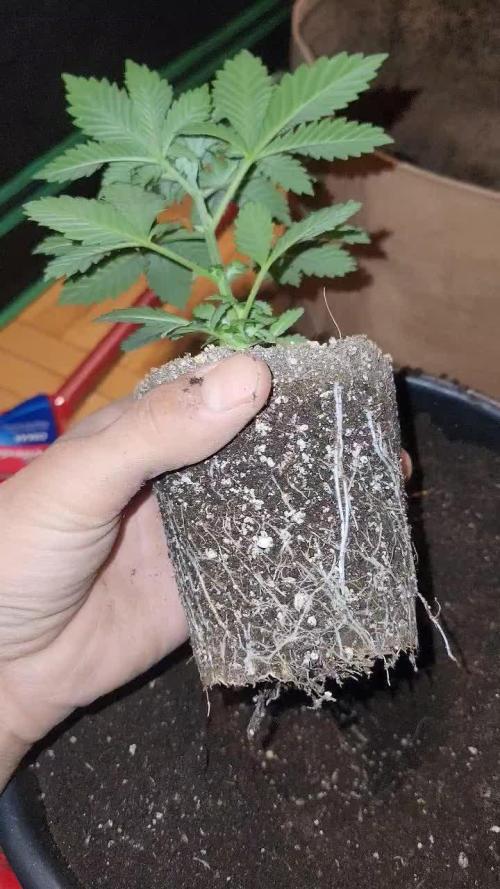
transplanted and ready to go, since shes fully recovered i threw her in a bigger pot now playing more of the waiting game.

Likes
35
Share


@GODSGIFT_2005_JM
Follow
🍼Greenhouse Feeding BioGrow & Bio Bloom
⛺️MARSHYDRO
The ⛺️ has a small door 🚪 on the sides which is useful for mid section groom room work. 🤩
☀️ by VIPARSPECTRA (models: P2000 & XS 2000)

Likes
75
Share


@Dedon
Follow
Happy New Year everyone !
Flo + 58
i'll start flushing this week end and cut them around 12/13 january, there is a strong smell inside the box ^^ it's so pleasant, i'm so impatient to chop them 😁
See you next week !

Processing
Likes
15
Share


@Cultivators_Dream
Follow
Day 9: installed this Pro Co2 bucket in my grow tent 2 days ago. Really looking forward to see what this addition brings and if Co2 can really improve a run. Only time will tell
Day 12: Everything is going good.. Added Foxfarm Acid Lovers dry fertilizer, scratched it into the top inch of soil about a tbsp and a half and watered good. I checked ph the other day and somehow soil ph was all the way up to 7.0 hopefully this FFAL will drop that a little. Also got some trifold poster boards and stapled sheets of mylar to them to reflect more light.
12/2 Ending week 2 gotta say everything is going as good as I could hope this lady is in full affect first time ever growing this strain and I can tell its a good one. Great genetics can't wait to see end result
Likes
25
Share


@pifflestikkz
Follow
Day 45
17/08/24 Saturday
Another watering today using de-chlorinated tap water pH 6 only.
Lemon skittles and XXL ammo are tall, bud nice and smelly plants!
The Kabul is more of a dense compact build, I'm excited to see what they grow into 😍
Picture and video update ✌️ 💚
Day 48
20/08/24 Tuesday
Feed today using de-chlorinated tap water pH 6. With Plagron PK13-14 and power buds.
Noticing the stretch stop, and now packing out there bud sites 💪💚
Vid + pic update ✌️💚


Likes
1
Share

@GrowOpsAnonymous
Follow
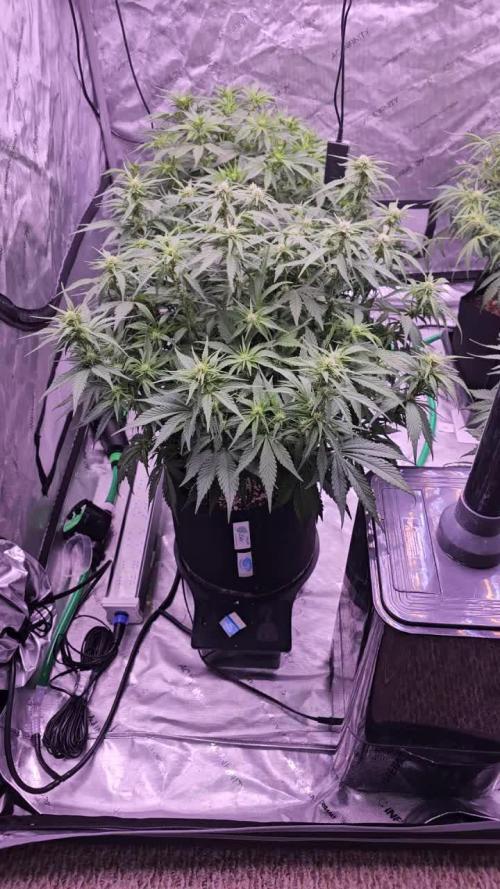
Still struggling to get the EZ Feed dialed in.
The APs are looking great. Number 1 is going to be a monster.
The two EZ Feed plants have skinnier leaves and the stems aren't as stout.
Also, swapped plants in back to the front from last week.
Likes
3
Share


@Bohmen
Follow
Nothing new, i will add commentary later in the week.
Edit: Everything seems nice and cool, 2 of the plants are just growing 4th node, 2 of the plants are growing 5th. Tommorow i will top for the first time. I will add video of that.
Day 16 - I increased the light intensity from 40% to 50%.
Day 17 - I watered with increased dosage, 750 ml per plant. I kept voodoo juice in becouse i wanted to make sure of establishing good rhizobial colonies (root bacterias that are prosperous for your plant - don't be afraid to ask any informations in the comments), the bacterias need food to stay alive and i started in 20 liter pots with small amount of water volumes per feed, so to make sure there will be some in the future i kept it there in the first bigger feed batch of this run.
Day 18 - topping(kinda fimming) above 4th node. Bending plants to the ground using rubber covered wire by AC Infinity. Adding video of topping. Also, when topping, i clean scissors in denatured alcohol (technical ethanol) after every plant - every detail matters, don't risk spreading any disease, these can be brought even in the seeds!
Likes
15
Share


@MadeInGermany
Follow
Hey guys :-)
This week she has developed very well.
For reasons of time, I topped them again on all the drives that were already high :-)
Unfortunately, there is still some time until there is room in the blossom tent.
That's why I'll have to train them a little more 😂.
Was poured 3 times this week with 1 l each. (nutrients see table above)
Since there are still trips in the vegetarian tent, the next few weeks will be treated again with nematodes and neem oil :-( .
Otherwise everything was cleaned.
Have fun with the update and stay healthy 💚🙏🏻
👇🏼👇🏼👇🏼👇🏼👇🏼👇🏼👇🏼👇🏼👇🏼👇🏼👇🏼👇🏼
You can buy this Nutrients at :
https://greenbuzzliquids.com/en/shop/
With the discount code: Made_in_Germany you get a discount of 15% on all products from an order value of 100 euros.
👇🏼👇🏼👇🏼👇🏼👇🏼👇🏼👇🏼👇🏼👇🏼👇🏼👇🏼👇🏼
You can buy this strain at :
https://www.amsterdamgenetics.com/product/kosher-tangie-kush/
Water 💧 💧💧
Osmosis water mixed with normal water (24 hours stale that the chlorine evaporates) to 0.2 EC. Add Cal / Mag to 0.4 Ec Ph with Organic Ph - to 5.8 - 6.4
MadeInGermany


Processing
Likes
3
Share


@Frankvalen
Follow
Hey guy ive started a grow with a new time of way of growing stat tune and let me know if you like what I’m building
Processing
Likes
20
Share


@Mr_nugs_lover_David
Follow
This lady is a beast, such a big bush full of flowers, very sweet aroma, I can't find the cherry notes yet but it's very very sweet, I love this strain, all of them have the same smell, and this pheno is just amazing, very strong and for what I can see very productive too 😍🌱❄️🍪

Likes
29
Share



Processing
Likes
14
Share


@Skunk_Life85
Follow
She is in full bloom mode😁😁😁. Nice tight nodal spacing. Compact plant. Hasn't started to smell yet. I bumped up her nutes to 700ppm. I started some Aurora Innovations nutes. She is a happy plant. I'm excited to see how she fills out.

Likes
2
Share


@I_Identify_As_A_Dan
Follow
Day 63
Shes getting a bit of cannoning at her top leafs, probably from the light intensity.
Her bud size isnt great either but shes putting on the trichome coverage now.

Likes
8
Share


@Kirsten
Follow
9.1.25:
I have done a large defoliation and readjusted all the LST pegs and removed the wire.
The wire was getting tangled in the plants, so it was easier to just take it off. I may get some thicker, stronger wire when they're too big for the pegs.
PPP1 and PPP2 are by far the best plants in this run so far.
PPP3, however, is the worst of all. She flipped into flower, still having only 3 finger leaves, and there are no five finger leaves at all. I am disappointed, of course! However, for me, the triploid PPP2 absolutely made up for it! 😍
Thanks for checking out my diary 🍃 ✌️
Likes
41
Share


@FrostyGardens
Follow
12/01/18
Start of week 6 of flower. Buds are continuing to develop. The structures on the ladies vary widely. 1 has long sativa like colas. Another has 9 dominate colas and many many golf ball size side branches. 1 is a runt. amd the other is just ok. There are several phenos in these beans.
