


Likes
Comments
Share


@eldruida_lamota
Follow
Vamos familia novena semana floración de estás Pink Runtz de RoyalQueenSeeds.
La cantidad de agua cada 48h entre riegos.
Esta semana ya añadimos nutrientes de también acabaré cortando esta semana las plantas, aunque una no esté acabada se cortará igualmente temprana.
Las flores son bien densas y repletas de teicomas, ya veis que tonalidades más rojizas que esta sacando.
Estás semanas veremos como acaban.
Agrobeta:
https://www.agrobeta.com/agrobetatiendaonline/36-abonos-canamo
Hasta aquí todo, Buenos humos 💨💨💨

Likes
6
Share

@Growfather1
Follow
Hello everyone,
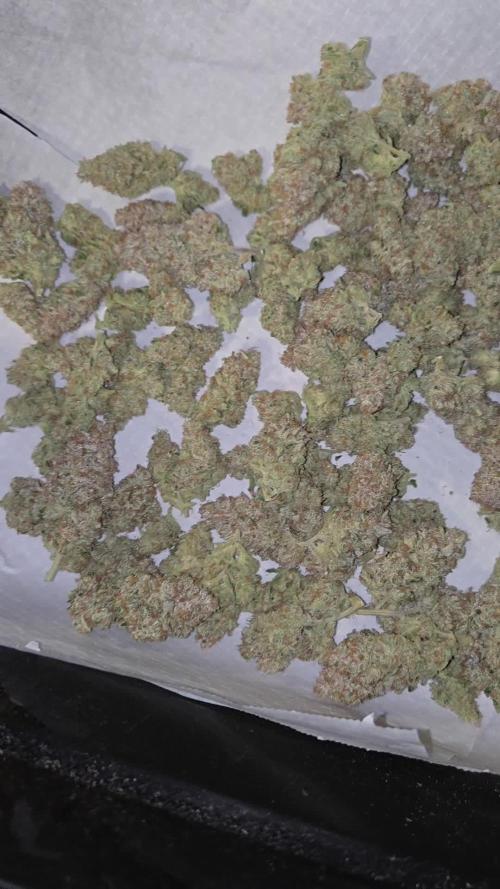
It's finally over the plant is harvested trimmed and is at the moment curing.
I harvested 175 grams of dense buds and gave some fluffy ones away the buds were small and not what i expected.
I will grow the bubblegum F1 hybrid auto from barney's farm next and will stop with expert seeds.
Thanks for taking the time to read my diary and have a nice day.
Best regards,
Growfather

Likes
41
Share


@Compassionate_Gardener
Follow
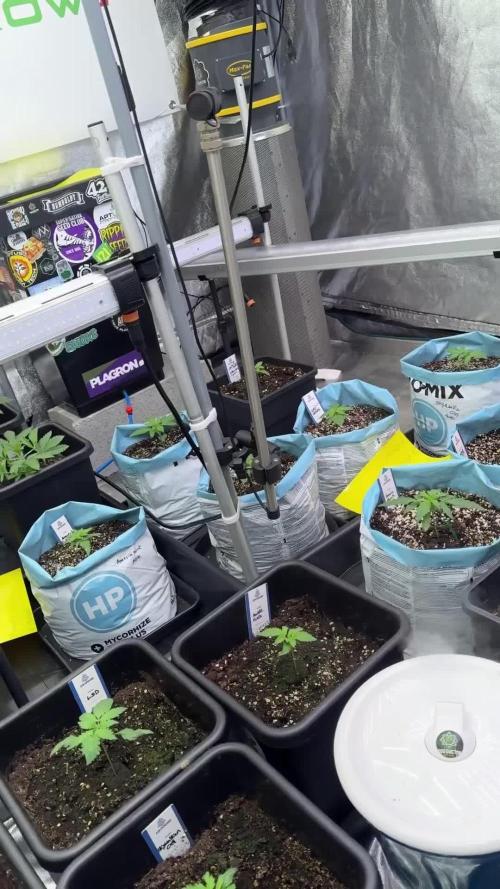
My grow of 8 plants in 4 cups (-->2 girls in a cup) of BANANA KRUMBLE (=Banana Punch x OG-Kush) from GREENHOUSE SEEDS is now in week 14 (counted from germination). This means they have been growing for 6 weeks and then flowering for 8 weeks. They have a VERY NICE reddish to almost purple coloration as you can see in the pics. The buds are COVERED in TRICHOMES with a thick white layer of crystals...its AWESOME to see. The plants are STICKY AS HELL, if I accidentally touch a bud my fingers stick together like they are SUPERGLUED! 😜 All side- and mainbranches have grown into BIG COLAS and are filled with hard and compact buds...simply DANK! 😎 The AROMA of the Banana Krumble plants is now even SWEETer and FRUITier than before! It reminds me of ripe bananas with a hint of cinnamon...simply DELICIOUS! The sweet smell has a 'gassy' or 'fuelly' undertone, which comes from the OG-Kush parent...very ENTICING! The strength of the smell is overwhelming strong and it surprises me each week that it can get even stronger!
The 8 plants fill out the whole area of my HOMEBOX AMBIENT R120 grow-tent and have grown to 80 cm of size. The fan-leaves are starting to wilt now and turn red and yellow already, which means the plants are getting ripe now. My two layers of trellies hold up the plants well, I am glad I put them in earlier. The BIOTABS nutrients are still working well, the only thing I have to do, is give the plants PURE TAB-WATER (no need for measuring EC- or ph-value or do a ph-correction!). Its SO SIMPLE AND CONVENIENT...I LOVE IT! The nutrients are precisely measured to last the FULL CYCLE, but also not too much, so they are gone at the end. At harvest time you do NOT want any nutrients left in the plants, since that makes the smoke harsh and scratchy in the throat. A good tell-tale is the yellowing of the fan-leaves, once that starts you know the plant uses its own sugars now and all nutrients in the soil are gone. Ay havest time you WANT YELLOW leaves, a green plant mostly has NOT BEEN FLUSHED properly and then it will hurt when you smoke the dried bud! My three SANlight LED-lamps are still hanging at 40 cm distance to the top of the plants. The two outer Q4W-Gen.2 lamps are dimmed to 100% (=three green lights on dimmer ON) and the Q3WL-Gen.2 in the center is dimmed to 80% (=two green lights on dimmer ON). The plants LOVE the spectrum and light-intensity of the SANlights, its amazing to see them flourish! Until now this round is developing FANTASTICALLY and I am totally happy with the genetics from GREENHOUSE SEEDS...👍😎

Likes
Comments
Share

@DogDoctorOfficial
Follow
📁 Folder 11 – LSD
Week 3 · VEG (12/12 from Seed)
Week 3 closes with beautiful, confident growth across all plants. Uniformity is strong, vigor is consistent, and it’s becoming very clear that we are working with solid, stable genetics.
Despite different timelines, all plants are responding exceptionally well to the environment, the feeding program, and the hands-on approach.
⸻
🌱 Plant Development & Structure
• 15-day VEG sister
• Clearly larger and more established, as expected
• Already pushing into approximately the 7th node
• Strong vertical structure and well-spaced internodes
• Acts as a reference point for genetic potential
• 12/12-from-seed sisters
• Currently working through the 3rd to 4th node
• New true leaves actively emerging
• If counting early single leaves, development aligns perfectly for Week 3
• All plants are remarkably similar in structure and expression
Across the board, plants are showing:
• Lush, healthy green coloration
• Strong leaf posture
• Excellent response to the soil and feeding regimen
No signs of stress. No confusion. Just steady progression.
⸻
🌿 Leaf Expression & Genetics
Leaf shape, color, and texture are extremely consistent across all individuals. This level of similarity reinforces the idea that these genetics are well-selected and stable.
So far:
• No erratic behavior
• No weak individuals
• No outliers
Everything feels balanced and intentional.
⸻
💧 Watering Philosophy (Hands-On Approach)
At this stage, everything is hand-watered, one plant at a time.
• No automated irrigation
• No connected systems
• No shared reservoirs
Each pot is lifted, weighed, and observed individually.
Watering decisions are based on:
• Pot weight
• Visual cues
• Leaf posture
• Overall plant behavior
This approach allows for:
• Individual attention
• Better understanding of each plant’s needs
• Stronger grower–plant connection
While this method will later be explained in more depth through video content, it’s important to document it here so readers understand how decisions are being made during these early stages.
⸻
💡 Light & Environment (Baseline)
Plants continue to grow into the light under a controlled PPFD range. No pushing, no forcing — just gradual adaptation.
Everything else remains aligned with the locked baseline:
• Stable temperatures
• Balanced humidity
• Consistent feeding
• Clean, predictable conditions
⸻
🔮 What to Expect
• Continued node stacking and leaf expansion
• Increased growth speed as root systems mature
• Clearer differentiation between the 15-day VEG plant and the 12/12-from-seed plants
• Preparation for more visible vertical movement in the coming weeks
🚫 What Not to Expect (Yet)
• No explosive stretch just yet
• No need for stronger feeding
• No aggressive training
• No automation at this stage
Observation remains the priority.
⸻
📝 Final Notes
Week 3 confirms that LSD is thriving under this approach. The combination of strong genetics, consistent environment, and hands-on care is producing predictable, healthy results.
This is one of those weeks where nothing dramatic happens — and that’s a very good sign.
Everything is right where it should be.
FOR DISCOUNT CODES AND MORE JUST FOLLOW THE LINK https://website.beacons.ai/dogdoctorofficial
📲 Don’t forget to Subscribe and follow me on Instagram and YouTube @DogDoctorOfficial for exclusive content, real-time updates, and behind-the-scenes magic. We’ve got so much more coming, including transplanting and all the amazing techniques that go along with it. You won’t want to miss it.
GrowDiaries Journal: https://growdiaries.com/grower/dogdoctorofficial
Instagram: https://www.instagram.com/dogdoctorofficial/
YouTube: https://www.youtube.com/@dogdoctorofficial
⸻
Explore the Gear that Powers My Grow
If you’re curious about the tech I’m using, check out these links:
🔆 Lighting & Environmental Control
• Future of Grow — Advanced LED lighting technology
https://www.futureofgrow.com/
DISCOUNT CODE: DOG20
• Lumiflora — Under-canopy LED lighting
https://lumiflorade.com/
• TrollMaster — Environmental controllers and automation gear (past collaboration)
⸻
Genetics
• Zamnesia Seeds — Genetics used in this project
https://www.zamnesia.com/
⸻
🌱 Soil, Substrates, Boosters & Root Support
• Plagron — Substrates, bio mixes, and supportive products
https://plagron.com/en/
⸻
🎒 Storage, Curing & Preservation
• Grove Bags — Curing and storage solutions
https://grovebags.com/
⸻
📸 Photography Equipment & Tools
(Not sponsors, but part of my creative toolkit)
• Sony A6700
• Sony full-frame macro lens + few more
• Stacking photography workflow - learning
• iPhone (for behind-the-scenes shots)
We’ve got much more coming as we move through the grow cycles. Trust me, you won’t want to miss the next steps, let’s push the boundaries of indoor horticulture together!
As always, this is shared for educational purposes, aiming to spread understanding and appreciation for this plant. Let’s celebrate it responsibly and continue to learn and grow together.
With true love comes happiness. Always believe in yourself, and always do things expecting nothing and with an open heart. Be a giver, and the universe will give back in ways you could never imagine.
💚 Growers love to all 💚
📸 P.S. – The Eye Behind the Lens
All photos in this diary (for now — except for the ones showing the camera, which I took with an iPhone) are taken with a Sony A6700 paired with a Sony full-frame macro lens and a few more.
Photography is part of the story — it’s how we share the fine textures, the glow, and the quiet details that words can’t always capture.
I’ve also started experimenting with photo stacking — a technique where multiple images, each taken at a slightly different focus point, are layered together to create one perfectly sharp image from front to back.
It’s not digital enhancement or AI; it’s pure photography — a way to reveal the plant’s beauty in microscopic depth, from trichome to petal.
You’ll even see a few shots of "ghost me" capturing the shots — camera, lens, setup — because every grow deserves not just to be cultivated, but documented like art.
FOR DISCOUNT CODES AND MORE JUST FOLLOW THE LINK https://website.beacons.ai/dogdoctorofficial
NEW DISCORD - Official Server Invite Link : https://discord.gg/ksjAkA5T74


Likes
52
Share


@ElPresidente
Follow
Starting these Sweet cheese F1, inside a home made SpaceBucket.
It has a Chinese UFO LED (150W - 70 W real) and a strip of white LEDs.
I plan on scrog and topping + LST.
Im aiming to get 75 g dried from one plant.
I will use TopCrop ferts along the proccess.
Lets see whats up!
I've been feeding it since day 5.
Water PH: 6.0
Top Crop Deep Underground & Top Veg.
One feed is water only, and another one is with those nutrients.
I feed her 50 ml of water every 2-3 days.

Likes
2
Share

@Phileed
Follow
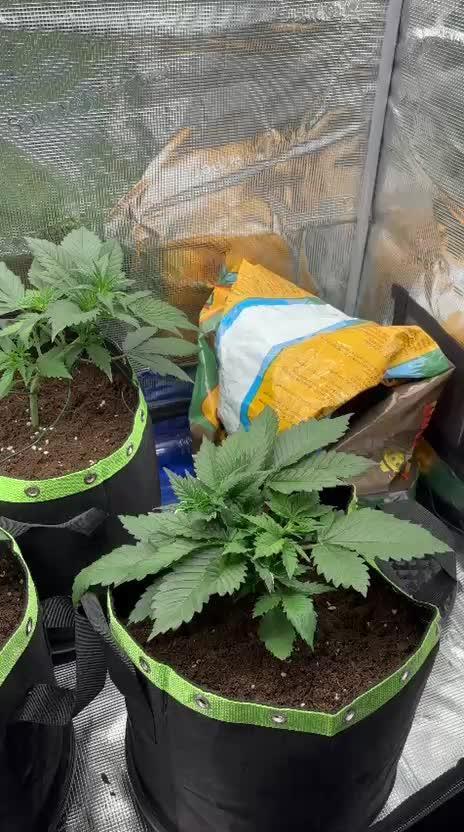
End of week 3 at the beginning of this week I did some lst… on some it turned out better than others but have to do some defoliation in next days.
Pls send some suggestions ( I really appreciate) since it’s my 2nd time growing
Week 2 for papaya cookies… lst very soon

Likes
17
Share


@Drtomb
Follow
Over all i am extremely impressed with the Alibaba lights i ordered. These 800w draw from the wall have beat a previous record of mine that i had with 1000w HPS ran at a boost setting of 1100w draw from the wall. The outcome dry was actually 1.87p

Likes
12
Share


@NONSENSE
Follow
Good afternoon everyone!
One more week is gone of the flowering.
the plant looks beautiful, the buds become heavier every day.
I still only use Hesi sponsored nutrients with every watering.
I don't overdose on nutrients and follow the weekchart I got from Hesi.
genetics is good old school from Neville's seed bank.
It is also a normal seed, not femenized.
The light schedule is 12/12 ,
feeding every day( I try to handle the cocos always wet)
next week is the last flowering, after that I will clean the plant and will harvest it.
Good luck, everyone

Likes
4
Share


@Filiaes
Follow
26.05
Cleaned the Tank and changed the water. Beside that nothing special to say about that grow - everything is just beautiful and developing suiper well.


Likes
10
Share

@Yamamoto420
Follow
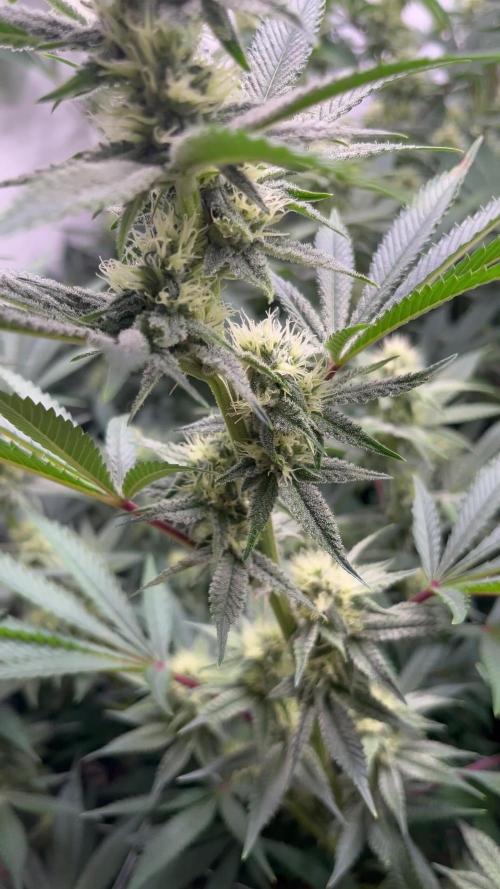
Week 4 day 22 the ladies stop stretching I had to do important deflation for the under canopy and stems where the light is not reaching, I don’t want popcorn buds. So far so good.


Likes
5
Share


@GermGrowFox
Follow
18. November
Die sechste Woche ist angebrochen. Heute keine Einsicht unternommen.
19. November
Die Begleiter kommt so langsam aus der Erde. Sind noch wenige. Spätestens in einer Woche neu nachlegen, falls nicht ausreichend wachsen.
Die drei Damen entwickeln sich prächtig. Stresssymptome durch das schneiden sind kaum noch bemerkbar.
Cookies gelato kommt mit den neuen Hauptrieben sehr gut zurecht. Wachstumstempo hat deutlich zugenommen.
Tropimango sieht deutlich gesünder aus. Auch bei ihr ist endlich mal etwas Tempo im Wachstum spürbar.
Die Runtz fühlt sich aktuell so an als würde sie den Rahmen des Zeltes sprengen wollen, sobald es in den blütestretch geht. Die Triebe haben sehr dicke Stämme, die Blätter sind verhältnismäßig zu den anderen Pflanzen sehr groß. Selbst neu entwickelte Triebe und Blätter starten deutlich größer als ich es bisher gewohnt bin. Aber schaun wa mal was wird… was wird.
Der Fimmingschnitt hat mir einen schrägen Trieb hervorgebracht. Ka was ich damit machen soll. Nächstes Mal halt gerade schneiden 🤝
20. November
Runtz hat ein unglaubliches Wachstumsbedürfnis. Ihre Blätter sind riesig und tiefgrün. Sie verdeckt innerhalb von Stunden erneut ihre anderen Triebe Sie trinkt auch deutlich mehr als die Cookie & Tropi. Hab ihr heute nochmal 3l Wasser mit dem vollem Düngerprogramm zugemutet.
Die anderen beiden kommen gut voran, haben allerdings noch kein Wasser bekommen. Die Töpfe sind noch zu schwer.
Tropimango wuchert in alle Richtungen
Cookies Gelato darf weiterhin an Höhe gewinnen. Ich spiele mit dem Gedanken sie kurz vor dem Wechsel in die Blüte erneut zu toppen. 😅
21. November
Die Cookies gelato wurde mit 3l Wasser versorgt. Zusätzlich gabs noch 1ml power buds von plagron. Kleine Vorbereitung auf die Blüte.
Tropimango hat 2l Wasser mit den normalen düngeschema erhalten.
Runtz wurde gestern mit 3l versorgt, ebenfalls normale düngeschema. Zusätzlich hab ich ihr die großen Blätter genommen, sowie die seitentriebe neu ausgerichtet
22. November
Habe bei der Runtz den schiefen Trieb abgeschnitten. Er ist leider viel zu verstümmelt. Die Idee war dass dieser Trieb dementsprechend der Pflanze Zuviel Energie zieht, die sie an einer anderen Stelle besser investieren könnte. Daher im heute der Schnitt
Cookies Gelato gewinnt an Höhe. Im Verhältnis zur Runtz ist sie unglaublich gut ausgeprägt, ist allerdings auch 14 Tage älter.
Die Tropimango sieht weiterhin merkwürdig aus. Ich kann leider nicht sagen ob ich beim Erde mischen irgendwas falsch gemacht habe. Weiß auch nicht wie ich drauf Einfluss nehmen könnte. Aber sie wächst. Von daher geht’s einfach weiter.
23. November
Die Woche neigt sich so langsam dem Ende zu. Nach ewigem umentwcheiden kam ich jetzt dennoch zu dem Entschluss, die Pflanzen zu Beginn der neuen Woche in die Blüte zu schicken.
Die Cookies gelato hat daher noch ihr letztes topping bekommen. Nachdem sie einen ordentlichen Wachstumsschub bekommen hat, gehe ich von aus dass sie es gut wegsteckt.
Die tropimango gefällt mir immer besser :)
Ich hoffe sie geht in der Blüte nicht unter, da sie eine babygenetik ist.
Runtz (irgendwie hört sich der Name eklig an. Muss da an einen alten Mann denken, der seine Nase hochzieht und dann auf den Boden spuckt) wird so wie sie wird. Der Stamm ist super stabil aber sie ist verhältnismäßig klein für ihr Alter. Dafür produziert sie immer noch riesige Blätter.
Cookies gelato ist nun 39 Tage alt.
Tropimango ist nun 36 Tage alt.
Runtz ist nun 25 Tage alt.

Likes
25
Share


@GODSGIFT_2005_JM
Follow
HEAVY 🌲
🍼Greenhouse Feeding BioGrow
⛺️MARSHYDRO
The ⛺️ has a small door 🚪 on the sides which is useful for mid section groom room work. 🤩
☀️ by VIPARSPECTRA (models: P2000 & XS 2000)

Likes
3
Share


@French__flair
Follow
N'hésitez pas à me contacter si vous avez des questions!
Pour préparer votre solution, dans votre réservoir ou arrosoir :
Mettre en premier la base (Iguana)
Ensuite Ancient Earth
Et enfin les bactéries
ASSUREZ-VOUS D'UTILISER UNE EAU DE BONNE QUALITE (EC < 0,2) POUR DE MEILLEURS RESULTATS.
J'utilise un substrat non enrichi pour permettre le meilleur départ à mes plantes.
Il s'agit du Promix de Plagron, il a une EC proche de 0, c'est pour cette raison que je commence les engrais assez fort dès le début. Les plantes sont très gourmande sous LED haute intensité et l'enracinement est rapide.
J'arrose tous les 3 jours environ avec 2 arrosages à l'engrais et 1 à l'eau par semaine. Je n'attend pas que le substrat sèche complétement sinon ça réduit l'efficacité de l'arrosage, ça détruit la faune et éventuellement facilite la cristallisation des minéraux.
Au niveau du volume d'arrosage, il faut prendre en compte 1/3 de la taille du pot. Pour un pot de 1L je vais donc arroser environ 300ml. Pour un Pot de 10L je vais arroser environ 3L.
Il est important d'arroser doucement pour éviter que l'eau ne coule tout de suite au fond.
Il est important d'avoir au moins 15% de drain pour s'assurer d'évacuer tous les nutriments non consommé et faire la place aux nouveaux.
IL EST PRIMORDIALE D'EVACUER L'EAU AU FOND DES COUPELLES, c'est une eau qui est chargée en nutriments non consommé et on ne veut pas qu'elle remonte dans les pots car cela risquerait de créer des blocages.
Au niveau de la technique de taille de formation, je réalise tout de suite une FIM que je reproduirai dès que l'apex aura repoussé. La première FIM est la plus longue mais les suivantes sont très rapide car la plante s'habitue à la technique et cela la stress beaucoup moins. En général il faut reproduire la FIM tous les 3 à 4 jours en fonction de la vigueur. C'est une technique très facile à mettre en œuvre et ne demande aucun matériel. C'est aussi la plus rapide pour obtenir des buissons.
N'hésitez pas à me contacter si vous avez des questions concernant la FIM!
Je retire également les feuilles supérieur (pas toute pour éviter de ralentir la plante) qui cache les secondaires pour augmenter l'efficacité de la FIM sur la croissance des secondaires.
Processing
Likes
11
Share


@LaughingDragon
Follow
This bugger neatly drank 3L of the solution I had prepared for three weeks!! there some serious growth happening. Defoliation was a good idea at this point to reduce the amount of wasted nutrients and increase the flowering priority.
Had to share the last "video" to show my appreciation in learning about LST here on growdiaries, those are pepper plants.

Likes
17
Share


@Leonard_Lunte
Follow
This is my first grow, felt like now is the perfect time to start. 😅
Picture 1 - The plants will have a 24h schedule with both sun and LED light. The solution with the cloth in front of the window is only temporary, I need something thats easy to pull up as soon as the sun comes out.
My light is about 16in/37cm away from the plants, please let me know if its too close or too far away from the seedlings.
Up until this point I germinated both the seedlings using one of those 'Easy Start' Kits with Microorganisms, I then just transplanted both plants with the soil still attached to them in the final pots.
I am using Bio Bizz Light Mix for the soil. In about 1 week I will start adding the fertilizers, I will go with about half of what it says on the nutrient schedule because these are autoflowers.
Picture 2 - Day 1 - Seedling number 1 is looking healthy. (I think?)
As you can see I put a hygrometer next to it so I can monitor the Humidity and Temperature levels. I currently have a humidifier running next to the plants and humidity levels seem to be good so far. I read online between 65-80% are good at this stage.
Picture 3 - Day 1 - Seedling number 1 again. At this stage I only water around the plant and dont soak the whole pot, I read that soaking the whole pot while the plant is this tiny can overwhelme the plants. I also noticed that the leaves look kinda yellow-ish? Please let me know if thats normal.
Picture 4 - Day 1 - Seedling number 2.
I need help with this one I dont know why but he doesnt look good, from the beginning he was much slower than plant 1 and when he finally popped out he looked like he was dying, he is kind of gaining a little bit of color now again but I dont know if he will make it. If you know whats wrong with him please let me know. I hope he opens his two little leafs soon.
I still have a third seed laying around so please let me know if it'd be smarter to just abandone number 2 and germinate a new seed. Thanks for reading this far and I'll update as frequent as possible.
Day 1 Issues Update - After taking a look at seedling number 2 again and seeing that after all this time it still didnt show any progress, I noticed that one of the two first leaves is actually cut. I mustve damaged it while inspecting earlier because I, (stupid newbie move), touched it too much or whatever. Now germinating my last seed in hopes that all goes well.
Since I dont have anymore 'Easy Start' kits im going to try a different germination method, I will put the seed in a cup of water with a piece of cardboard on top of it overnight (12-15h) and then plant it into the moist soil afterwards. 😄
Picture 5 - Day 2 - Seedling 1 is still doing fine. In the morning the temperatures went up a lot (29 Celsius), due to the sun shining a lot through the window, and the seedling was showing slight signs of heat stress (Leafs going up and small yellow-is tint), I then opened the window and the Temperatures quickly dropped back to normal (20-23 Celsius). Moisture levels seem lower than yesterday and Im not sure why (probably because of the heat and opening the window?), still at a solid 62% tho so Im not too bothered.
Picture 6 - Day 2 - Since my last Seedling 2 died I germinated another one, I put it in a glass of water over night (~15h) and then planted it into the soil. Hopefully it'll pop out in the next few days... 💪
Picture 7 - Day 3 - Everything looking good with Seedling 1, I kinda felt like it was sort of streching too much instead of growing its leaves, so I put the light closer to it. I will water again tomorrow, the last time I watered was when I put it in the soil 3 Days ago.
Picture 8 - Day 3 - The new Seedling 2 is still germinating and will hopefully pop out of the soil in the next few days.
Picture 9 - Day 4 - Seedling 1 still going strong, leaves are praying but I read that that is a good sign. I watered both pots again today with just Ph-water, will add fertilizer in about 3 days for seedling 1.
Seedling 2 is still germinating, will post a new picture as soon as it pops out of the soil. 😉
Picture 10 - Day 5 - Seedling 1 looks healthy, but is going kinda slow. Turns out I had the light far too high... 😐 Pulled it as much down as I could now and its already growing better! Main indicator for not enough light was the stretching and the thin leaves. I will probably have to invest into a bigger setup as soon as flowering hits. ✊
Picture 11 - Day 6 - Seedling 1 leaves are getting bigger and the next set is already on the way.
Picture 12 - Day 6 - After 4 days germination, seedling 2.1 finally popped out the soil! 👏
Picture 13 - Day 7 - Seedling 1 leaves seem a bit curled up, probably because of the hot sun this morning, Im not too worried tho. Will water with nutrients the first time tomorrow.
Picture 14 - Day 7 - Seedling 2.1 looking fine, soil was pretty dry so I watered it a bit with ph water.
Likes
74
Share


@420DeepGrow
Follow
Gracias a @James, Royal Queen Seeds y MarshHydro sin ellos no sería posible hacer este diario.
La Tropical Mirage es la última creación de los maestros de la cría de Royal Queen Seeds. Trabajando mano a mano con el DJ y productor Henry Saiz, nuestro equipo se propuso crear una variedad que sirviera como chispa de inspiración para las personas creativas de cualquier ámbito de la vida. Y ahora, por fin podemos presentar el resultado.
La Tropical Mirage desciende de la todopoderosa Zkittlez, uno de los híbridos más populares del mundo. Es el resultado de un cruce entre un esqueje seleccionado de la Forbidden Zkittlez y la Melonade, y es afrutada, edificante e inspiradora. Sus flores densas, alargadas y resinosas desprenden intensos aromas y ejercen un subidón energizante capaz de impulsar cualquier proyecto creativo, desde la música y las artes visuales hasta la escritura, el baile y mucho más.
En el cuarto de cultivo, la Tropical Mirage es rápida, fiable y muy productiva. Con una serie de cuidados básicos, esta variedad tan resistente te dará suficientes cogollos para mantener tu flujo creativo en acción durante todo el año.
🌻 🚀 Consigue aquí tus semillas:
https://www.royalqueenseeds.es/semillas-feminizadas-de-marihuana/647-tropical-mirage.html
💡 Mars Hydro TS 3000, como la lámpara de cultivo LED más grande de la serie TS, ofrece suficiente cobertura para un área de 4 × 4 pies con un precio asequible y rendimientos de calidad; a cambio, se puede aplicar tanto al cultivo doméstico como al cultivo comercial.
Potencia - 450w
Cobertura Vegetal – 5×5 pies
Cobertura de flores - 4 × 4 pies
La opción abrumadora para la mayoría de los productores que la aplican en tiendas de campaña.
Consigue aqui tu lámpara:
https://marshydro.eu/products/mars-hydro-ts-3000-led-grow-light/
📆 Semana 9:
Gran semana en la cual se ha incrementado la cantidad de resina, los cogollos se han hecho mas duros y los colores son para verlo en persona 😎😍.
Hubiera querido algo mas de masa vegetal en floracion pero por problemas personales no pudo ser. Estoy muy contento con los patrocinadores, gracias a todos
Últimos riegos con nutrientes 💣, dejo de aplicar Sticky Fingers y Bloom Booster y bajo la potencia del 100% al 80% con mi
Likes
4
Share


@SuperGluedGrow
Follow
Number 2 pheno might herm on me so I have to watch but I have limited plants and I really want to keep these genetics so I need atleast one female. Number 3 the mutant stopped growing before I topped, or maybe not stopped but it threw out pistils at the apical meristem and not producing leaves so I topped to see if I could promote side growth but it hasn't worked; I'm going to keep her around just for the fun of it. 4 is my hope of producing female and a good clone.
Likes
11
Share


@Thigh
Follow
Werde sie denke jetzt so lassen wie sie ist. Bin Mega zufrieden für mein erstes Outdoor Projekt. Die Farbe lila ist einfach Mega und der Geruch steigert einfach nur die Freude auf die Verkostung. 😄
Likes
14
Share


@Patillac31
Follow
Made it 67 days before the chop.
•••03/21/2020 After a 6 day hang I've trimmed and started to jar cure. Had a total flower weight of 85 grams. Over all I'm pleased. Will update with a smoke report in about 3 weeks.
