


Likes
Comments
Share


@ThatoneAKguy
Follow
Despite being absolutely crowded out by the behemoth Pineapple Express next door this earthy pungent beautiful plant isn’t taking any crap. Her colas from top to bottom are rock hard and text book. I can’t wait until we get a chance to actually see what is behind plant number one!

Likes
11
Share


@Professor_Daank
Follow
7/26: Last defoliation for about 4 weeks. Looking good and thick. LST is basically over and I'm going to let this plant do what it wants from here on out. I pulled some stems away a tad more so they grow out of any shadows. Bam!
7/27: Added my Google Home Mini so the girls can listen to classical all day long.
7/28: Pistils are tiny on plant 1, but the other 2 are growing rapidly.
7/29: Ordered a 600w ViparSpectra to add to the grow tent, can't wait. Also ordered some sticky traps. The gnats are not really affecting the plant, (never enough to cause major problems) but I just hate them. They seem to be coming from my shop-Vac (for run-off). I let it dry out, as it never stays full of water. I assume they are attracted to it regardless because of the moisture. I have now moved the shop vac further away from the grow tent and will have sticky traps installed 7/30.
7/30: Day 33. Going well. They love Mozart. Pistils FINALLY on every plant.
7/31: Got the new 600w ViparSpectra in, it's bright... this was a good idea. 600w @ 24inches, 450w @ 20inches
8/1: Pistils on all plants. Pre-flower stretch is real. The new light changed everything. Plant 1 taking half a gallon now.

Likes
30
Share


@TheCannaProphet
Follow
~ FASTBUDS TESTER #2203 ~
Well friends, here we go on another 'canna-venture' together!
The grow room has had a complete remodel and some upgrades done to it including brand spanking new 4x8 and 4x4 tents and a Trolmaster Hydro X controller along with a new Control Panel.
This tester strain is one of six tester strains that FastBuds has graciously provided me with and I'm looking forward to seeing what this girl has to offer when she's grown to her full potential!
One drawback of 'testers' is I have little to no information on it other than its number and that it's an autoflower... 🤪 But, it's ALWAYS a blast growing them for me because not knowing a lot allows me to just concentrate on the essentials: Light, Environment, Water, Nutrients and possibly a bit of LST... not complicated, just basics like keeping a constant temperature and RH in the tent at a level that gives a good VPD, watering when almost dry and maintaining proper light levels according to their stage of growth.
____________________________________________________________________________________________________________________________________________________________________________________________________________________________________________________________________________________________________________________________________________________________________________________________________________________________________________________
~THE SETUP~
~Initially seeds were lightly scuffed, then soaked for 3 hours in 78℉ distilled water after which they were transferred to moist paper towels laid out in a Jiffy Pellet plastic starter tray with lid. Underneath the tray was placed a Mars Hydro Heat Mat with Controller that was set to 78℉ where they stayed until their tap roots emerged.
~Planted into Jiffy Peat Pellets that were hydrated with distilled water warmed to 78℉ with a 7.0 ph.
~Once roots emerge from the Jiffy Pellet they're transferred to their fabric pots.
~Grown 100% organic in a 4g Gronest fabric pot and a 3g fabric pot by Wraxly filled with Mother Earth 70/30 Coco/Perlite medium and initially amended with Dr. Earth 4-4-4 / Earthworm Castings / Dr. Earth Flower Girl 3-9-4 and Coast of Maine Stonington Blend Organic Plant Food 5-2-4.
~19/5 light cycle for the entire run with supplemental UVA added during flower. Lights are controlled by a Trolmaster Hydro X controller set for a 15min Sunrise/Sunset simulation.
~Top dressing every 3-4 weeks with slow release dry amendments and Earthworm castings.
~Straight water ph'd @ 6.2-6.8 when needed and bi-weekly Compost Tea's.
____________________________________________________________________________________________________________________________________________________________________________________________________________________________________________________________________________________________________________________________________________________________________________________________________________________________________________________
Weekly Updates:
12/1- I soaked both seeds for 3 hours in 78℉ distilled water after which they were transferred to moist paper towels laid out in a Jiffy Pellet plastic starter tray with lid. Underneath the tray was placed a Vivosun Heat Mat with Controller that was set to 78℉ where they stayed until their tap roots emerged roughly 24 hours later.
12/3- Today their tap roots were about 1/4 to 3/8" so at 11 am I transferred them into Jiffy Peat Pellets that were hydrated with distilled water warmed to 78℉ with a 7.0 ph using a tine off of a plastic fork as a 'mini trowel' to make a hole in the pellet and to gently cover the tap root, leaving only the seed head slightly exposed. This method accomplishes most of the initial work the seed has to do by eliminating having to orientate itself, push it's root down and head up. By 10pm the #1 seed had her cotyledon leaves opened ...waiting on the #2. 🧐
12/5- Well this is Day ONE for the #1 FBT #2203 and I anticipate seeing her sister poking her head out real soon! I'll keep them in the covered/heated Jiffy tray until I see their roots beginning to emerge from the peat pellet, then I'll transfer them gently into their respective fabric pots. The #1 will be going into the 4g Gronest pot from FastBuds and the #2 will reside in a 3g pot by Wraxly, which I'm trying out for the first time.
12/7- Yesterday I checked the #1 tester and she had roots starting to emerge from her pellet so tomorrow I'll transfer her into her 4g Gronest pot.
The #2 tester has finally made an appearance and this will be Day One for her! She looks great and I'm confident that she should be ready to transfer into her fabric pot in the next couple of days!
😎💚 Thank you for checking out my passion in life! Please visit as often as you wish and I hope you enjoy this journey as much as I know I will! Grow Strong! 💪😎🤙

Likes
68
Share

@Ultraviolet
Follow
Removed autoflower and put her in her own pot outside the tent.
Foliars applied in strong blue 430nm with 4000Hz tone. 20-minute dose prior to application.
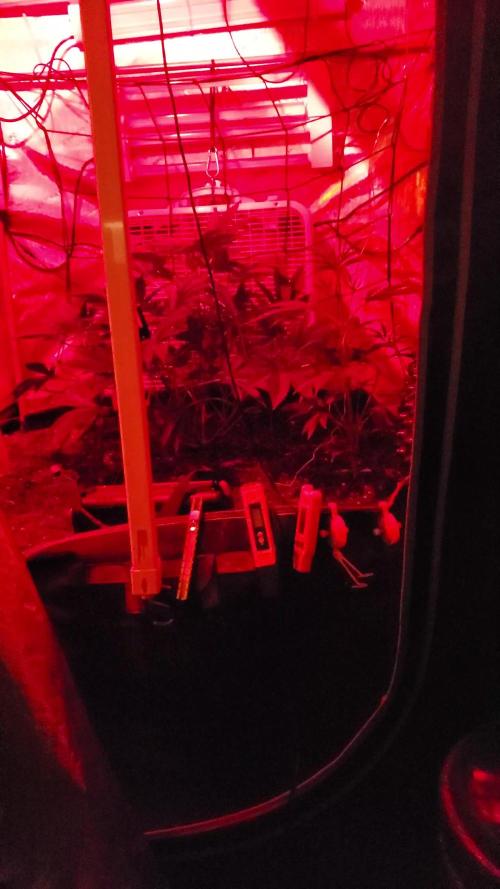
In essence, you're seeing a combination of the infrared light reflected by the plant, which the camera perceives as red, and any residual visible blue light the plant reflects, which results in a purple hue.
I was doing more stretching of the stems, adjusting weights, just a little too much, and it snapped almost clean. I got a little lucky in that it was still connected, wrapped her almost instantly while holding her in place with yoyo's. The core framework is now in place.
If your soil has a high pH, it's not ideal; you want a pH of 6.4, 6.5, or 6.6, which is ideal. If you are over a pH of 7, you have no hydrogen on the clay colloid. If you want your pH down, add Carbon. If you keep the pH below 7, you will unlock hydrogen, a whole host of new microbes become active and begin working, the plant will now be able to make more sugar because she has microbes giving off carbon dioxide, and the carbon you added hangs onto water. Everything has electricity in it. When you get the microbes eating carbon, breathing oxygen, giving off CO2, those aerobic soil microbes will carry about 0.5V of electricity that makes up the EC. The microorganisms will take a metal-based mineral and a non-metal-based mineral with about 1000 different combinations, and they will create an organic salt! That doesn't kill them, that the plant loves, that the plant enjoys. This creates an environment that is conducive to growing its own food.
Metal-based: Could include elements like iron, manganese, copper, or zinc, which are essential nutrients for plants but can exist in forms not readily accessible.
Non-metal-based: Examples like calcium carbonate, phosphate, or sulfur are also important for plant growth and potentially serve as building blocks for the organic salt.
Chelation in a plant medium is a chemical process where a chelating agent, a negatively charged organic compound, binds to positively charged metal ions, like iron, zinc, and manganese. This forms a stable, soluble complex that protects the micronutrient from becoming unavailable to the plant in the soil or solution. The chelate complex is then more easily absorbed by the plant's roots, preventing nutrient deficiency, improving nutrient uptake, and enhancing plant growth. Chelation is similar to how microorganisms create organic salts, as both involve using organic molecules to bind with metal ions, but chelation specifically forms ring-like structures, or chelates, while the "organic salts" of microorganisms primarily refer to metal-complexed low molecular weight organic acids like gluconic acid. Microorganisms use this process to solubilize soil phosphates by chelating cations such as iron (Fe) and calcium (Ca), increasing their availability.
Added sugars stimulate soil microbial activity, but directly applying sugar, especially in viscous form, can be tricky to dilute. Adding to the soil is generally not a beneficial practice for the plant itself and is not a substitute for fertilizer. While beneficial microbes can be encouraged by the sugar, harmful ones may also be stimulated, and the added sugar is a poor source of essential plant nutrients. Sugar in soil acts as a food source for microbes, but its effects on plants vary significantly with the sugar's form and concentration: simple sugars like glucose can quickly boost microbial activity and nutrient release. But scavenge A LOT of oxygen in the process, precious oxygen. Overly high concentrations of any sugar can attract pests, cause root rot by disrupting osmotic balance, and lead to detrimental fungal growth. If you are one who likes warm tropical high rh, dead already. Beneficial, absolutely, but only to those who don't run out of oxygen. Blackstrap is mostly glucose, iirc regular molasses is mostly sucrose. Sugars, especially sucrose, act as signaling molecules that interact with plant hormones and regulate gene expression, which are critical for triggering the floral transition. When sucrose is added to the growth medium significantly influences its effect on floral transition.
Probably wouldn't bother with blackstrap given its higher glucose content. Microbes in the soil consume the sugar and, in the process, draw nitrogen from the soil, which is the same nutrient the plant needs. Glucose is not an oxygen scavenger itself, but it acts as a substrate for the glucose oxidase (GOx) enzyme, effectively removing oxygen from a system. Regular molasses (powdered if you can), as soon as she flips to flower or a week before, the wrong form of sugar can delay flower, or worse. Wrong quantity, not great either. The timing of sucrose application is crucial. It was more complicated than I gave it credit for, that's for sure. When a medium's carbon-to-nitrogen (C:N) ratio reaches 24:1, it signifies an optimal balance for soil microbes to thrive, leading to efficient decomposition and nutrient cycling. At this ratio, soil microorganisms have enough nitrogen for their metabolic needs, allowing them to break down organic matter and release vital nutrients like phosphorus and zinc for plants. Exceeding this ratio results in slower decomposition and nitrogen immobilization, while a ratio below 24:1 leads to faster breakdown and excess nitrogen availability.
Carbon and nitrogen are two elements in soils and are required by most biology for energy. Carbon and nitrogen occur in the soil as both organic and inorganic forms. The inorganic carbon in the soil has minimal effect on soil biochemical activity, whereas the organic forms of carbon are essential for biological activity. Inorganic carbon in the soil is primarily present as carbonates, whereas organic carbon is present in many forms, including live and dead plant materials and microorganisms; some are more labile and therefore can be easily decomposed, such as sugars, amino acids, and root exudates, while others are more recalcitrant, such as lignin, humin, and humic acids. Soil nitrogen is mostly present in organic forms (usually more than 95 % of the total soil nitrogen), but also in inorganic forms, such as nitrate and ammonium. Soil biology prefers a certain ratio of carbon to nitrogen (C:N). Amino acids make up proteins and are one of the nitrogen-containing compounds in the soil that are essential for biological energy. The C:N ratio of soil microbes is about 10:1, whereas the preferred C:N ratio of their food is 24:1 (USDA Natural Resource Conservation Service 2011). Soil bacteria (3-10:1 C:N ratio) generally have a lower C:N ratio than soil fungi (4-18:1 C:N ratio) (Hoorman & Islam 2010; Zhang and Elser 2017). It is also important to mention that the ratio of carbon to other nutrients, such as sulfur (S) and phosphorous (P) also are relevant to determine net mineralization/immobilization. For example, plant material with C:S ratio smaller than 200:1 will promote mineralization of sulfate, while C:S ratio higher than 400:1 will promote immobilization (Scherer 2001).
In soil science and microbiology, the C:S ratio helps determine whether sulfur will be released (mineralized) or tied up (immobilized) by microorganisms.
A carbon-to-sulfur (C:S) ratio smaller than 200:1 promotes the mineralization of sulfate, when the C:S ratio is low, it indicates that the organic matter decomposing in the soil is rich in sulfur relative to carbon. Microorganisms require both carbon and sulfur for their metabolic processes. With an excess of sulfur, microbes take what they need and release the surplus sulfur into the soil as plant-available sulfate
A carbon-to-sulfur (C:S) ratio higher than 400:1 will promote the immobilization of sulfur from the soil. This occurs because when high-carbon, low-sulfur materials (like sawdust) are added to soil, microbes consume the carbon and pull sulfur from the soil to meet their nutritional needs, temporarily making it unavailable to plants.
200:1 C:S 400:1: In this range, both mineralization and immobilization can occur simultaneously, making the net availability of sulfur less predictable.
This dynamic is similar to how the carbon-to-nitrogen (C:N) ratio regulates the availability of nitrogen in soil. Just as microbes need a certain amount of nitrogen to process carbon, they also require a balanced amount of sulfur. Both mineralization and immobilization are driven by the metabolic needs of the soil's microbial population.
Sulfur is crucial for protein synthesis. A balanced ratio is particularly important in relation to nitrogen (N), as plants need adequate sulfur to efficiently use nitrogen. A severely imbalanced C:S ratio can hinder the efficient use of nitrogen, as seen in trials where adding nitrogen without balancing sulfur levels actually lowered crop yields.
Maintaining a balanced carbon-to-sulfur (C:S) ratio is highly beneficial for plant growth, but this happens indirectly by regulating soil microbial activity. Unlike the C:N ratio, which is widely discussed for its direct effect on nutrient availability, the C:S ratio determines whether sulfur in the soil's organic matter is released (mineralized) or temporarily locked up (immobilized).
Applied 3-day drought stress.
Glucose will hinder oxygenation more than sucrose in a solution because glucose is consumed faster and has a higher oxygen demand, leading to a more rapid decrease in oxygen levels. When cells respire, they use oxygen to break down glucose, and this process requires more oxygen for glucose than for sucrose because sucrose must first be broken down into glucose and fructose before it can be metabolized.
In a growth medium, glucose is a more immediate and universal signaling molecule for unicellular and multicellular organisms because it is directly used for energy and triggers a rapid gene expression response. In contrast, sucrose primarily acts as a signaling molecule in plants to regulate specific developmental processes by being transported or broken down, which can be a more complex and slower signaling process.
Critical stuff.
During wakefulness (DC electric current) life can not entangle electrons and protons. During the daytime, the light is sensed as multiple color frequencies in sunlight. Coherence requires monochromatic light. Therefore, at night, IR light dominates cell biology. This is another reason why the DC electric current disappears during the night. The coherence of water is maintained by using its density changes imparted by infrared light released from mitochondria in the absence of light. This density change can be examined by NMR analysis, and water is found to be in its icosahedral molecular form. This is the state that water should be in at night. This is when a light frequency is lowest and when the wave part of the photoelectric effect is in maximum use.
3600
Likes
35
Share


@bypado_farm
Follow
They look good, they are drinking good aswell, every 2 days 1 L each plant

Likes
Comments
Share


@DogDoctorOfficial
Follow
🌸 Pink Rosay Auto by Zamnesia | Pheno B | Week 10
💗 The Little Dwarf Keeps Growing — Slowly, Beautifully & Completely on Her Own Terms
Welcome back to another chapter of the 8×8 Adventure! 🌱💚
And our little Pink Rosay Pheno B...
😂
She's still little.
There's really no point pretending otherwise.
But you know what?
She's beautiful.
So maybe I should stop calling her the little dwarf like I'm making fun of her.
Because the funny thing is...
she's tiny, yes.
She's cute, absolutely.
But she's also becoming a genuinely beautiful little flowering plant.
And she's continuing to evolve.
Continuing to develop.
Continuing to build flowers.
Continuing to get closer to whatever her final form is going to be.
All while asking me for almost nothing.
No drama.
No headaches.
No constant intervention.
No complaints.
Just:
"I'll grow over here, thank you very much." 😂💗
And honestly?
I respect that.
🌱 The 8×8 Adventure — Let Every Phenotype Tell Its Story
For anyone discovering this diary now, welcome to the 8×8 Adventure.
This project is about putting different genetics and phenotypes into the same general environment and allowing them to show us what they naturally want to become.
The plants share:
The same room
The same 12/12 lighting strategy
The same environmental approach
The same irrigation system
The same general nutrition
The same lighting ecosystem
The same grower
And yet...
they couldn't be more different.
Some stretch.
Some stay compact.
Some become enormous.
Some become dense.
Some fill the tent.
And some...
decide that 63 cm is plenty, thank you very much. 😂
That's Pink Rosay Pheno B.
And that's exactly why she stayed.
💗 Still Tiny — Still Growing
She's continuing to grow...
just not in the way some of her sisters do.
She's not suddenly going to turn into a giant.
She's not going to wake up tomorrow and decide she wants to become two metres tall.
And I don't expect her to.
Her size is part of her phenotype.
It's part of her identity.
But what I really like is that she's still evolving within that size.
The plant isn't static.
The flowers continue developing.
The structure continues maturing.
The density continues increasing.
And the whole little plant is gradually becoming more and more complete.
She's growing...
in her own way.
At her own speed.
Inside her own little world.
And I'm perfectly happy to let her.
🌸 Small Doesn't Mean Uninteresting
This is something I think this girl has demonstrated particularly well.
When you first see her beside some of the other plants in the 8×8, the immediate reaction is obviously:
"Wow, she's tiny."
😂
But spend a little time looking at her...
and the conversation changes.
You start noticing the flowers.
The structure.
The compactness.
The little details.
The developing resin.
The way everything is packed into such a small framework.
And suddenly the height becomes almost irrelevant.
She's not impressive because she's large.
She's interesting because she's different.
And that's exactly what I wanted from this project.
❄️ The Little Lady Is Still Getting Frostier
One of the things I really enjoy watching on Pink Rosay Pheno B is the developing frost.
The flowers continue taking on that increasingly resinous appearance.
The closer you get with the camera, the more detail starts appearing.
Calyxes.
Pistils.
Sugar leaves.
Resin.
Tiny structures packed together inside an extremely compact plant.
And this is where the little dwarf becomes particularly fun to photograph.
From a distance:
"Aww... look at the tiny plant." 😂
Get closer:
"Holy shit, look at those flowers."
💗❄️
That's the trick with her.
She doesn't necessarily impress you with scale.
She gets you with detail.
🌿 She Really Doesn't Ask for Much
This might be one of my favourite things about her.
She isn't trouble.
At all.
She's not demanding.
She's not constantly requiring attention.
She's not stretching into places where I don't want her.
She's not making me fight with the canopy.
She's not taking over her neighbours.
She's just...
there.
Growing.
Flowering.
Doing her thing.
And when I come to check her, I can simply look at her and think:
"Yep. You're good."
Then move on.
😂💗
There is something incredibly relaxing about having a plant like this in a room full of much more demanding personalities.
✂️ No Need for More Intervention
We've already performed the selective cleanup that she needed earlier in flower.
Since then, she's been allowed to continue developing naturally.
And that's exactly where I want to keep things.
I'm not going to start taking healthy leaves simply because the calendar says Week 10.
I'm not going to reshape her.
I'm not going to try to make her something she's not.
She has a compact architecture.
The flowers are developing within it.
The plant is healthy-looking.
So...
hands off.
Let her finish.
Sometimes the best thing you can do for a plant is stop trying to improve it.
She's already telling us what she wants to be.
💡 Eating Photons — Just in Miniature
The lighting environment remains consistent with the rest of the room.
The Future of Grow Black Series LED continues providing the primary overhead lighting, with Lumiflora contributing to the under-canopy lighting strategy.
And Pink Rosay is doing her part.
She's taking the available light and turning it into plant.
Into leaves.
Into flowers.
Into resin.
Into density.
Just...
on a miniature scale. 😂
That's perfectly fine.
Not every phenotype has to maximize vertical growth.
Not every phenotype has to fill every available centimetre.
Some genetics simply choose another strategy.
Pink Rosay Pheno B appears to be saying:
"Why grow bigger when I can just make this little space count?"
Fair enough.
🌸 Dense Flowers on a Tiny Framework
This is where I think she really earns her place in the experiment.
Her flowers are developing within a very compact framework.
Everything is close together.
The plant doesn't have enormous distances between flowering sites.
Instead, the whole structure feels compressed.
And that's fascinating to watch.
It's almost like looking at a miniature version of a much larger flowering plant.
Same basic idea.
Different scale.
And the longer she develops, the more interesting that compactness becomes.
She's not going to win a height competition.
But she might win the "how much personality can you fit into one tiny plant?" competition.
😂💗
💧 Feeding & Environment
The current conditions remain stable and consistent with the room:
🌸 Flowering: Week 10
📏 Height: 63 cm
💡 Light schedule: 12/12
🌡️ Day temperature: 29.9°C
🌙 Night temperature: 25°C
💧 Relative humidity: 60%
⚗️ pH: 6.0
⚡ EC/TDS: ~2.0 mS/cm
🌡️ Solution temperature: 25°C
🌱 Substrate temperature: 26°C
🌬️ CO₂: 639 ppm
? Pot size: 15 L
💦 Watering: approximately 1 L per plant / 24h
The flowering nutrition strategy remains consistent with the overall room.
No unnecessary changes.
No chasing numbers.
No special treatment.
The beauty of this experiment is that she gets the same general opportunity as everyone else...
and then shows us what she wants to do with it.
🔬 The Dwarf Phenotype Is Becoming Its Own Story
I think this is the point where I have to stop thinking of Pink Rosay B as simply the small one.
She's certainly the small one.
😂
But that's no longer the whole story.
She's also:
Compact.
Dense.
Easy to manage.
Interesting.
Frosty.
Beautiful.
And increasingly...
distinctive.
That's what happens when you spend enough time with individual phenotypes.
Eventually you stop comparing them.
You stop asking:
"Why isn't she like that one?"
And instead you start asking:
"What is this one telling me?"
Pink Rosay B is telling me:
"I'm staying small. Deal with it."
😂💗
And I'm absolutely dealing with it.
📸 The Photographer's Tiny Friend
She's also incredibly easy to photograph.
And I mean that in the best possible way.
Because she's small enough that I can get around her.
I can move her if necessary.
I can find different angles.
I can get close to the flowers.
I can really examine the structure.
And when I put the macro lens close...
the size of the plant disappears.
Suddenly the photograph is all about the flowers.
The textures.
The resin.
The little details.
That's one of the things I love most about macro photography.
It completely changes your perception of scale.
A plant that's tiny in the tent can become enormous inside the frame.
And Pink Rosay Pheno B gives me plenty of little worlds to explore.
💗 Will She Be a Big Producer?
Honestly?
I don't think so.
And that's okay.
She's 63 cm.
She's compact.
She's got a limited overall framework compared with some of the monsters around her.
So I'm not expecting her to suddenly produce a huge harvest.
But that's not what I'm hoping for anymore.
Now I'm hoping for something much more interesting:
quality.
Give me beautiful flowers.
Give me density.
Give me resin.
Give me aroma.
Give me something tasty.
Give me something memorable.
If this little plant finishes with a modest amount of exceptionally enjoyable flower...
I'll be perfectly happy.
Because the value of a phenotype isn't always measured by kilograms.
Sometimes it's measured by how much you enjoy what it gives you.
And I'm very curious about what this little lady has to say when she finally gets to the finish line.
🌱 The One I Almost Didn't Keep
And this is still one of my favourite parts of her story.
She could easily have been dismissed early in the project.
She's so much smaller than many of the other plants.
If I were growing only a handful of plants and space were extremely limited, the temptation to remove a phenotype like this could have been very real.
But that's not what we're doing.
We're running an experiment.
We're giving these different phenotypes the opportunity to express themselves.
And I'm very glad we did.
Because now I get to look at this little plant and think:
"I'm really glad you stayed."
💗
She's given us another story.
Another phenotype.
Another extreme.
Another reminder that plants don't read the rulebook.
They simply grow.
🔭 Looking Ahead
And now...
I'm curious.
Very curious.
Because she's getting closer.
The flowers are developing.
The density is increasing.
The resin is becoming more visible.
And she's continuing to mature within that tiny frame.
I don't expect a dramatic transformation in size.
That's not coming.
But I do expect the flowers themselves to continue changing.
And that's what I'm watching now.
How dense will they become?
How much will the resin develop?
How will the aroma evolve?
And perhaps most importantly...
how tasty is this tiny little lady going to be?
😂💗
That's the question I really want answered.
Because if she turns out to be delicious...
well...
then the little dwarf might have another trick up her sleeve.
❤️ Final Thoughts — Let's Make Her Shine
Week 10.
And our little Pink Rosay Pheno B is still here.
Still tiny.
Still cute.
Still beautiful.
Still developing.
Still doing her own thing.
And honestly?
I wouldn't change that.
She's not going to be the biggest producer in the room.
I don't think she ever intended to be.
She's simply making the most of the space she has.
And she's doing it beautifully.
She doesn't demand much attention.
She doesn't cause trouble.
She doesn't need constant management.
She just quietly continues becoming more herself.
And I think that's pretty damn cool.
There are plants that shout:
"Look at me!"
Pink Rosay B doesn't need to.
You eventually notice her anyway.
Because once you stop comparing her size...
you start seeing everything else.
The flowers.
The density.
The frost.
The structure.
The personality.
The peculiar little architecture that makes her unmistakably herself.
And that's what I love about her.
She's different.
She's tiny.
She's peculiar.
She's beautiful.
And she's completely comfortable being exactly what she is.
So no...
I don't think she's going to be a massive producer.
But maybe...
just maybe...
she'll give us something far more interesting.
A small harvest with a big personality.
Something beautifully aromatic.
Something tasty.
Something that makes me take a little flower from the jar later and say:
"Damn, I'm glad I kept that little girl."
😂💗❄️
Until then...
we provide.
We watch.
We photograph.
We learn.
And we let her finish on her own terms.
Because Pink Rosay Pheno B doesn't need to become a giant.
She just needs to become the best little Pink Rosay she can be.
And she's doing exactly that.
So...
let's make her shine. 💗✨
🙏 Thank You
A huge thank you to GrowDiaries for giving us the space to document this 8×8 Adventure and follow these very different phenotypes week after week.
Thank you to Zamnesia for these Pink Rosay genetics and for giving us the opportunity to discover expressions like this little beauty.
Thank you to Plagron for supporting the nutritional side of the journey.
Thank you to Future of Grow LED for the Black Series lighting driving the garden.
Thank you to Lumiflora for bringing the under-canopy lighting dimension into the experiment.
Thank you to TrolMaster for helping maintain the environment behind the scenes.
And, of course, thank you to everyone following along.
Every comment.
Every question.
Every observation.
Every photograph.
Every week.
That's what turns a grow into a story.
And Pink Rosay Pheno B?
She's certainly given us a story worth following.
She's the little one.
The dwarf.
The tiny girl surrounded by giants.
The plant I might have overlooked in another situation.
And now?
I'm genuinely happy she's here.
She's not going to take over the room.
She doesn't need to.
She's found her own little corner...
and she's filling it with flowers.
She's peculiar.
She's beautiful.
She's easy.
She's interesting.
And she's still evolving.
So let's give this tiny little lady the attention she deserves.
Not because she's big.
Not because she's going to produce the most.
But because she's herself.
And sometimes...
that's the most interesting phenotype of all.
💗🌸❄️
Stay small, little lady.
Keep getting beautiful.
And let's see just how tasty you can become.
Growers Love & Happy Growing! 🌱💚💗

Likes
4
Share


@SamDo
Follow
This week marks Week 18 of veg for the Pineapple Upside Down, and things are getting interesting.
The plant is still pushing hard, stacking growth on all sides — more height, more volume, more density.
She’s clearly in that phase where she’s comfortable, full of energy, and ready to take every bit of space you give her.
But that’s exactly where the challenge begins.
Right now, I still can’t move her into the bloom tent.
There’s another plant finishing inside, so the space isn’t free yet.
And that delay changes the whole strategy, because this girl is getting tall — fast.
So the main question of the week is the same one I’ve been wrestling with for a while:
Should I let her stretch and plan a SCROG, or should I top her to keep things low and contained?
And to be honest, I’m still not ready to decide.
I want to see her in her final environment before making that call.
Transplanting into the bloom tent will change the lighting, the airflow, the VPD, the root-zone rhythm — and I don’t want to shape her structure blindly before she settles in.
On top of that, she’ll need a short acclimation period once she’s transferred, so there’s no point in rushing structural training now.
It could do more harm than good.
So for the moment, the rule is simple: don’t touch anything.
I’m keeping her on the same settings, same nutrition, same EC, same feeding schedule.
She’s clearly thriving, and when a plant is this comfortable, the smartest move is not to interrupt her momentum.
You can feel she’s building up internal energy — thicker stems, fuller leaves, faster node spacing.
All of that will pay off in bloom, as long as I manage the height correctly once she moves to her final tent.
This week is all about timing.
Letting her grow, monitoring the stretch, and holding the decision until the very last moment.
The more I watch her, the more I realize that patience here is probably the winning move.
For now, she’s healthy, beautiful, vigorous, and still accelerating.
No signs of stress, no burn, no deficiencies.
Just a plant in full confidence.
Next week should be decisive — hopefully the bloom tent will finally be free, and I’ll get a clearer picture of the strategy: SCROG or top.
Until then, she keeps growing… and I keep observing.

Likes
11
Share


@Inceptionist
Follow
Sooo... The King's Juice Auto wasn't placed back into the tent as you can see and she also wasn't really developing the pistols properly. Gave me a bit of worries but I think/hope she just needed some time to get used to the outdoor conditions.
The last few days she started to develope quite well again. So far I could see any male traits... I hope it stays that way and she actually stays a female and only a female.
Putting her back alone into the tent unfortunately just wasn't efficient at all. I switched the plants around and my tent is now a 3 plants flower tent with 12-12 cycle, so the King's Juice Auto probably wouldn't have had a lot of fun in the tent anymore.
Also if the KJA decided to hermaphrodite as well, I wouldn't know if she was pollinated already or if my tent is still holding on to some pollen from before and I just HAVE to know if my tent is safe now.
I just hope outdoor conditions stay like this. It's very sunny, hot and dry right now

Likes
4
Share


@knnabisgrower
Follow
En la 4ta semana aumentamos la dosis del fertilizante para crecimiento, regulamos su p.h en 6.0 e hicimos una poda apical en el 4to nodo de cada una de las plantas.

Likes
7
Share


@CrowMaster
Follow
Everything good normal looking good will start to flush in a week or so…smell is awesome as always I ran this cutting a few times it’s a real keeper checks all the boxes


Likes
Comments
Share


@MrStarOn3
Follow
At the end of week 3 I topped one of the strawberry cough they are all looking good and starting to veg I’m all caught up with the grow diary’s and will add at the end of every week. I’m in Australia and did start a little late into the season but hope to get a decent grow in they will be at my brothers once transplanted and he has a few aswel that I will add into the grow log nothing but sun and water only use a little thrive that’s from Bunnings that I get from my pops shed. They will be in a nicer cleaner soil when transplanted into veggie beds and will have chicken poo as a nutrient source first time ever using chicken poo so see how it goes. Will keep the grow log updated and hopefully everything goes all well for the travel and transplant for the plants in the next few days
Likes
36
Share


@Erpollic3verde
Follow
La fioritura procede a gonfie vele e entrambe le genetiche mi stanno rendendo orgoglioso della mia scelta!! Fiori densi e super appiccicosi dall' odore inebriante


Likes
131
Share


@Roberts
Follow
Just cut down the Miller high life bottle grow with QP. Was a really neat micro grow. It got much bigger then I expected. Was a pain to get started, and growing. Finally got it. The Unit Farm UF2000 worked great. Thank you Unit Farm 🌱
I will be back when dried to weigh out.
Happy growing 🌱🌱
Thank you grow diaries community for the likes, follows, comments, and subscriptions on my YouTube channel. 🍻🌱👍
https://youtube.com/channel/UCAhN7yRzWLpcaRHhMIQ7X4g

Likes
Comments
Share


@Backyardnewbie
Follow
Moved light to 3ft above plants. 400ppfd plants are reacting well.

Likes
7
Share


@BIYEI
Follow
Floracion (Tiempo estimado 64 dias)
Segunda Semana de Floracion
15/01/2024 - 5:00hrs y 22hrs: Se verifican parámetros básicos del agua, mantener cuidados específicos.
Agua de osmosis: Ph 6.0, PPm 1000-1250, Ec 2.0-2.5, Temperatura 20°C - 26°C, Humedad 75%
Ambiente: Temperatura 24 °C, Humedad 65%, Ventilación 15%, 12 hrs de luz , 12 hrs de obscuridad.
16/01/2024 - 5:00hrs y 22hrs: Se hace cambio de solucion nutritiva, con los mismos parametros de la semana, Se lavan recipientes, Se verifican parámetros básicos del agua, mantener cuidados específicos.
Agua de osmosis: Ph 6.0, PPm 1000-1250, Ec 2.0-2.5, Temperatura 20°C - 26°C, Humedad 75%
Ambiente: Temperatura 24 °C, Humedad 65%, Ventilación 15%, 12 hrs de luz , 12 hrs de obscuridad.
17/01/2024 - 5:00hrs y 22hrs: Se verifican parámetros básicos del agua, mantener cuidados específicos.
Agua de osmosis: Ph 6.0, PPm 1000-1250, Ec 2.0-2.5, Temperatura 20°C - 26°C, Humedad 75%
Ambiente: Temperatura 24 °C, Humedad 65%, Ventilación 15%, 12 hrs de luz , 12 hrs de obscuridad.
18/01/2024 - 5:00hrs y 22hrs: Se coloca una red extra para separar los tallos secundarios y entre mas la luz entre las ojas, Se verifican parámetros básicos del agua, mantener cuidados específicos.
Agua de osmosis: Ph 6.0, PPm 1000-1250, Ec 2.0-2.5, Temperatura 20°C - 26°C, Humedad 75%
Ambiente: Temperatura 24 °C, Humedad 65%, Ventilación 15%, 12 hrs de luz , 12 hrs de obscuridad.
19/01/2024 - 5:00hrs y 22hrs: Se verifican parámetros básicos del agua, al acomodar bien los tallos secundarios por la red por accidente troce una rama, coloque savila para ver si reconstruia la pared celular rota, queda en observacion, mantener cuidados específicos.
Agua de osmosis: Ph 6.0, PPm 1000-1250, Ec 2.0-2.5, Temperatura 20°C - 26°C, Humedad 75%
Ambiente: Temperatura 24 °C, Humedad 65%, Ventilación 15%, 12 hrs de luz , 12 hrs de obscuridad.
20/01/2024 - 5:00hrs y 22hrs: Se verifican parámetros básicos del agua, no se observa mejoria asi que se procede a cortar ese tallo segundario, mantener cuidados específicos.
Agua de osmosis: Ph 6.0, PPm 1000-1250, Ec 2.0-2.5, Temperatura 20°C - 26°C, Humedad 75%
Ambiente: Temperatura 24 °C, Humedad 65%, Ventilación 15%, 12 hrs de luz , 12 hrs de obscuridad.
21/01/2024 - 5:00hrs y 22hrs: Se verifican parámetros básicos del agua, mantener cuidados específicos.
Agua de osmosis: Ph 6.0, PPm 1000-1250, Ec 2.0-2.5, Temperatura 20°C - 26°C, Humedad 75%
Ambiente: Temperatura 24 °C, Humedad 65%, Ventilación 15%, 12 hrs de luz , 12 hrs de obscuridad.
Likes
Comments
Share

@eldruida_lamota
Follow
Que pasa familia, vamos con la primera semana de floración de estas Forbidden Mochi feminizadas de Seedstockers.
Vamos al lío, las plantas se trasplantaron a macetas de 7 litros.
El ph se controla en 6.5, la temperatura la tenemos entre 24/22 grados y la humedad ronda el 50%.
El ciclo de crecimiento puse 12h de luz, el foco está al 50% de potencia.
Me gustaría estar más encima este cultivo pero la salud me está impidiendo un poco este 100% con el proyecto. Con suerte la semana que viene andaré mejor.
- os dejo por aquí un CÓDIGO: Eldruida
Descuento para la tienda de MARS HYDRO.
https://www.mars-hydro.com
Hasta aquí todo, Buenos humos 💨💨💨
Likes
27
Share


@Herbinski
Follow
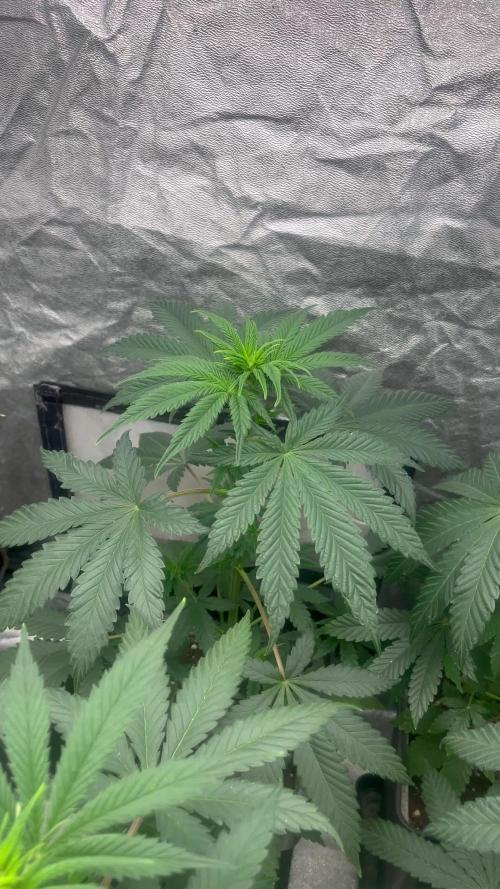
As you can see she is in full flowering mode right now.
She has slowed down the vertical growth and I can see “hairs” everywhere.
During this week I took off some fan leaves as advised by the breeder and I will probably do it again in week 5 of flowering.
Despite feeding her with solid dosages of BAC nutrients some of the lower leaves have turned a bit yellow so I will increase the amount of “food” she gets from now on.
I have ramped up the power on the Bilberry lamp to 80%. I must say this lamp is out of this world. I hope the end product will reflect it.
Hope she keeps going good.

Likes
3
Share

@Lontra
Follow
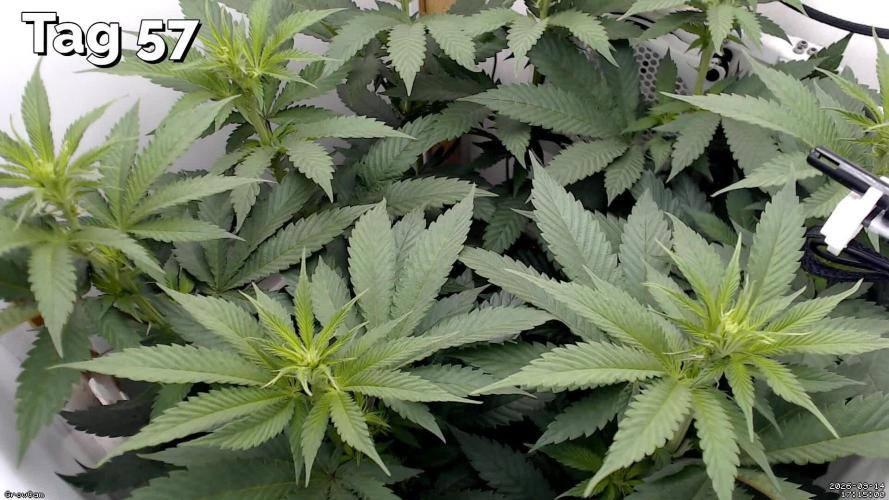
Diese Woche war wahrscheinlich die bisher stressigste. Direkt zu Beginn der Woche ist mir an Tag 57 beim Versuch, die unteren Hauptarme per LST noch einmal neu zu justieren, ein Malheur passiert: Ich habe aus Versehen den Stamm der Pflanze gespalten. Ich habe die betreffende Stelle im Anschluss direkt mit etwas elastischem Isolierband umwickelt und den Riss anschließend mit Kabelbindern fest fixiert, um den Spalt zusammenzuhalten. Das LST wurde daraufhin zunächst erst mal komplett entfernt.
Zum Glück zeigte sich relativ schnell, dass die Pflanze diesen Schaden erstaunlich gut verkraftet. An Tag 59 habe ich dann die unteren 4 Hauptarme mit Bodenankern von unten gestützt und das LST vorsichtig wieder aufgebaut, damit die Verteilung der Triebe wieder etwas besser und damit auch das Zentrum der Pflanze wieder etwas offener ist. Ansonsten habe ich das LST diese Woche nicht weiter verändert, um den eingerissenen Stamm möglichst nicht noch weiter zu belasten. Die Fixierung sieht weiterhin stabil aus. Bisher gibt es keine Anzeichen dafür, dass einzelne Triebe schlechter versorgt werden. Die Pflanze scheint den Schaden also überraschend gut wegzustecken.
Parallel zum Stammproblem ging der Stretch weiter. Die Pflanze legte in dieser Woche deutlich an Höhe zu und der Abstand zur Lampe wurde dabei zunehmend kritisch gering. An Tag 62 (BT16) blieben nur noch ~14cm Abstand zwischen den höchsten Trieben und der Lampe, weshalb ich mich dazu entschied, einen kleinen Umbau an der Box vorzunehmen und die Abluftanlage aus der Box herauszunehmen und auf das Dach zu montieren. Dafür habe ich eigene Halterungen für den Lüfter und den AKF konstruiert und in PETG gedruckt. Die Halter wurden mit Moosgummi etwas von der Growbox entkoppelt, um Vibrationen und Körperschall möglichst zu reduzieren. Dadurch habe ich noch mal ein paar Zentimeter gewonnen und konnte die Lampe noch etwas höher hängen, um so wieder auf einen Abstand von ~21,5cm zu kommen.
Am Ende der Woche (BT17) liegen die 5 höheren Haupttriebe bei ~55cm und die 3 kürzeren Haupttriebe bei ~47,5cm. Damit bleiben aktuell noch rund 19 cm Abstand zur Lampe. Ich hoffe daher, dass der Stretch in den nächsten Tagen so langsam endet, denn jetzt bleibt kein Spielraum mehr, um die Lampe noch höher zu hängen. Trotz des zeitweise sehr geringen Lampenabstands konnte ich bisher zum Glück keine deutlichen Anzeichen für Licht- oder Hitzestress erkennen, obwohl die Lampe weiterhin dauerhaft mit 100% Leistung lief.
Ansonsten gab es diese Woche wieder 2 Bewässerungen:
1. Gießvorgang: Tag 58, insgesamt ~4,5 Liter (0,5ml/l Fish-Mix, 2ml/l Bio-Grow, 2ml/l Bio-Bloom, 1ml/l Top-Max, 2ml/l Bio-Heaven, 1ml/l Alg-A-Mic, 0,81ml/l CalMag, ca. 0,24g/l Bittersalz, pH-Wert ~6,5, EC-Wert ~1,8mS/cm, Topfgewicht vorher ca. 4,4kg, nachher ca. 7,6kg)
2. Gießvorgang: Tag 61, insgesamt ~5 Liter (2ml/l Bio-Grow, 2ml/l Bio-Bloom, 1ml/l Top-Max, 3ml/l Bio-Heaven, 1ml/l Alg-A-Mic, 0,81ml/l CalMag, ca. 0,24g/l Bittersalz, pH-Wert ~6,4, EC-Wert ~1,9mS/cm, Topfgewicht vorher ca. 4,2kg, nachher ca. 7,7kg)
Die Blütenbildung wurde im Laufe der Woche deutlich sichtbarer, und alle Haupttriebe zeigen inzwischen gut erkennbare Blütenansätze. Für die nächste Woche steht dann, nach hoffentlich abflachendem Stretch, das Lollipopping auf dem Plan, um etwas mehr Luft und Licht in die Pflanze und vor allem das volle Zentrum zu bringen und vielleicht dem ein oder anderen Nebentrieb noch eine Chance zu geben. Außerdem werde ich im Laufe der Woche vermutlich die Kabelbinder und das Isolierband am Stamm entfernen, um die Stelle einmal besser inspizieren zu können. Wenn alles gut aussieht, wird die Stelle danach zur Sicherheit mit Veredelungsband und neuen Kabelbindern wieder fixiert.


Likes
54
Share


@Belverde
Follow
Hi guys
Welcome 🙂
After more than month postharvest , I have tested this Blue Gelato #41 🍦🌱
In the end was passed 78° days in flowering for the right maturation
I can only say..
Awesome 🤩
About taste , perfume and effect
Also the grow inself was fun and not to hard
In the beginnig my plan was to growing her in a natural way
But in the end I have decide to topping her and create a multiple primary colas
And she was react very well: 1:🌳
Flowers are very dense , also after the dry and cure process
The aroma of smoke after my first pitch from a joint, obviously weed-only, reminded me a lot of Amsterdam
The bluberry taste is the first thing you feel, and it's clear and clean
Afterwards there are notes of earth and something similar to citrus on a sweet base
The effect is enough for the day because it keeps you motivated and creative too
But if you sit on the sofa and close your eyes, you can clearly feel a tingling on the forehead halfway between one eye and the other 🧠👁️
And the imagination is facilitated, expanding the creative process
For this reason it could be vaguely psychedelic
I personally love it
I want to spend two words about post-harvest artistic process😉
Personally I have spent more time figuring out the best way to have the tastiest, smoothest, cleanest and most perfect burning weed.
First I just want to say one thing...
..WEED SHOULD NOT SMELL DURING THE DRY PROCESS..
If this happens, it means that the temperature and humidity are too high and probably the fans are aimed directly at the inflorescences
The scent that is felt are all terpenes that are dispersing in the air and which consequently will be less intense during final consumption
The less trichomes remain in contact with air, the better If too exposed to air and light, these oxidize, thus removing much of the final experience
Personally, what interests me most is the taste, because it already creates the effect in itself
A bit like when you sit down to eat
I prefer a well-cared for dish with quality ingredients that leave me a great memory after consuming it, rather than a dish that only fills my stomach
Mc Donald weed vs Five star restaurant .
Sorry Mc lovers 🍔🍟🙌
Said this..
My method is that the cannabis is dried whole plant for a maximum of five days at constant and balanced temperature and humidity, the important thing is to maintain a narrow range between te ur, 20 ° or 24 ° C little changes, even if humidity remains between 55 and 60% is fine
The increase in temperature must also correspond to an increase in humidity
And so also in case of a decrease
In any case In the first few days it must lose most of its water 💧
When the branches are about to break, but still not cracking, I cut the branches one by one and perform a professional manicure
Afterwards, always with the flowers still attached to the branches, I put everything inside a classic brown bread bag (not white because it is colored and not the best)
For about two days I leave the buds inside, opening the bag several times a day to circulate air and to move the branches with the flowers
After a couple of days, the inflorescences usually have reached a good level of drying and are dense to the touch, but by pressing, you still have to be able to crush between the fingers
Explaining in words how hard they can be pressed to find out if the ur level is optimal is difficult to say
It is must necessary to try and make mistakes many times
And never be satisfied
You can always do better 😎: 1:💪
So, now we are about ten days after the cut of the plant and, at this point, the flowers can be placed in an airtight container
BASIC
The flowers are put in the vase "a moment before" that the branches break cleanly, this is important
An optimal method to understand when the right time is is to see if the popcorn buds are easily detached from the branch, without dragging with them the "thread" of the bark
Once placed in the pot, normally I leave it closed for 24h in order to let the moisture come out from the central area of the flower and distribute it evenly
After this first day, I start to open and close the pot several times a day, but always for a few seconds
At each opening I always move the flowers to allow a correct exposure to the little air present in the vase
The jars would be better not to fill them completely, but just a 3/4 or a little more
The important thing is that the flowers can move easily enough
This process generally lasts about four weeks, and every seven days I decrease the number of daily openings
Usually, after the first week, the scents that will be created begin to be felt
And this makes us realize that we are on the right track 🛣️🚀
After four weeks, if everything has been done in a workmanlike manner, the perfume will be pungent and intoxicating and the flowers will be dense and oily to the touch When the humidity level appears optimal, I insert a bag from the Boveda series to keep the ur around 62%
In all cases, I personally start using my flowers constantly two months after cutting 📆
I noticed that in general, Haze-type Sativas are tasty even after only a month
For the Kush the optimal terpene profile I appreciate it in the neglect only after a couple of months
In this way the flowers will be extremely fragrant, crunchy and smooth in flavor once consumed and always create a clear oil all around the rolling papers
As you can appreciate in the videos what place, and that I hope to be able to post for much longer every time I conclude a new cycle
You need to savor a lot of cannabis in order to have a clear idea of how a high quality finished product should look 🔥👌
This is my thought about our true works for having the best , I hope it can be useful 😉
About the Living Soil with my High-Brix formula
Like I say week by week , for this lady I have use a 20l geotextile pot with around 1/3 of the Living Soil I have made ( in this case in november 2019 )
First thing to say is
Trought this metodology we're not feeding the plants , but the soil ☝️
Basycally the important things are principaly four
Soil energy
Cation exchange
Microbial activity
Mineral balance
Soil energy is kept high with humus
Cation exchange with rock powders
Microbial activity is achieved with innoculants and some teas or other
Mineral balance is achieved by adding the micronutes and having everything in the right ratio's
For doing this I have use a base mostly of
light-mix soil with already perlite inside ( classic cannabis soil )
coco nut
humus
zeolite
then I have add
Neem soil , Kelp , Krill , Azomite , Basalt , Gypsum , Calcium Carbonate , Phosforite , Alfalfa and Leonardite
Then I was have "cooking" it for a month an half
And this was the engine that allowed the plant to stay in constant health, keeping the Brix level high 🌳🔥
During the flowering time I have add mostly only water , one times a week with molasses for feeding the microbs
I have also make a humus/nutrient tea for she and her sisters , just one time
I'm feel good doing in this way , like it and I understand so many more things about the lives into the ground in general
But just for be precis..
For having the high brix in plants we must need obviously a good soil with a right nutrition way, but we have also to maintain the environment around her in the best condition
Temperature , ur , right water dosage in right time , good ventilation and fresh air
The balance it's the key
Like in our daylife 🙂
And obviously a fundamental it's
First , the right strain selection from serious breeder 🏆🔥
Second , passion&love 💚 (Don't look for them in a growshop)
So, I think I said it all
I apologize for this long review
But I wanted to explain the best of the things that personally took the quality of my cannabis to a higher level
Thanks for everybody stopping by here in this few months or just now for the first time🙏
Thanks Barney's farm for create this and more strain 🤝
And like as always thanks the people behind Grow diaries for maintaine this creativity space👏🙌👉💪🏅
Hope you was enjoy
Or at least , hope you are stoned like me right now 😁
See you somewhere
Always growing 🌲
Looking for a clouds ☁️
Ciao ✌️
🇮🇹
FC
