


Likes
Comments
Share


@pareto
Follow
Everything went well appart from the afids in the end. She looks very pretty and smells awesome!
Yield could be a litle higher... Still shooting for less than 1€/g. I think I will stop topping my plants.
Maybe next time.
--------------------------------------------------------------------------------------------------------------------------------------------------------------------------------
Set up cost (fixed costs)
-Lamp: 40€
-Timer: 3,5€
-Pot: 4€
-Total fixed costs: 47,5€
Given 5 years (or 15 grows) usage time translates to around 3,17€ per grow in materials.
Variable costs:
-Seed: 10€
-Soil: 6€
-Fertilizer: 3,50€
-Power (68 days 20h/day): 19,58€
-Total variable costs: 39,08€
-Total costs per grow: 42,25€
-Cost per Gram: 1,63€

Processing
Likes
10
Share


@VovaFarms
Follow
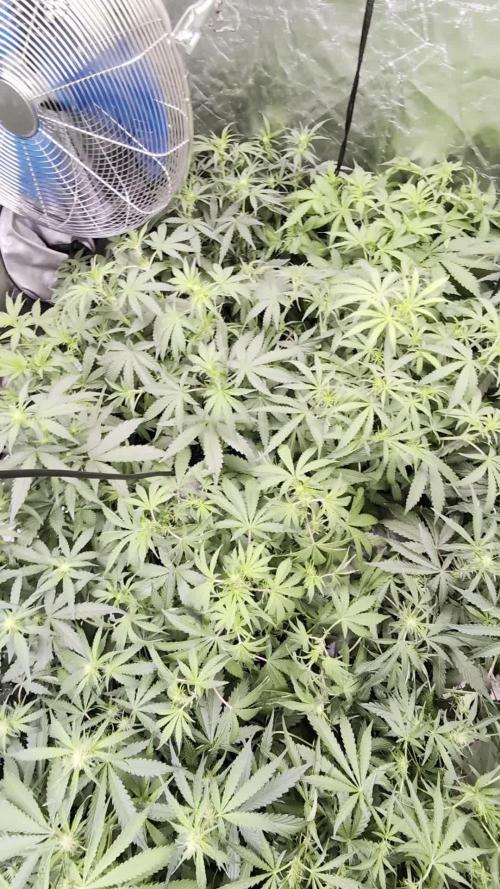
Report on week 3 of veg: I lower the RH to 50-55% while the RM stays relatively on the higher range: 27-29C daytime and 18-22 at night. I had nice visual on the 6th node of BB3, Larry Bird and Gelato plants and few cm. to avoid any eventual stem splitting, so i topped them. I guess the Gorilla will be ready for topping by tomorrow. Unfortunately i have to work with hard water so i have to keep constant eye on the water's EC. For this reason and from personal experience i wont increase the nutrients dosage any time before flowering. The high percentage of worm castings is doing wonders and help me a lot with the substrate's maintance. I did some runoff water measurements and end up with the following values: Gorilla had 2.75EC and 6.5pH, Gelato got 2.70/6.6, Larry 2.85/6.7 and BB 2.20/6.9. Substrate pH is 7.0. Once again, I have to say that Sunmaster's Dual Spectrum HPS are indeed super powerful lamps. I added another clip-fan to ensure a nice breeze around the plants. I will follow the general rule of thumb and give the plants 10-14 days to recover from the HST. Once i week i spray the plants with foliar iron-based nutrient solution👊 (Plagron Vita Race). It boosts the photosynthesis, plus it washes and cleans the leaves. P.s. only the Larry Bird is topped on the pictures. I topped other two today, but i didnt want to switch-off the lights in order to take pictures. Peace!



Likes
22
Share


@donovanliam
Follow
Good week. Everything seems to be going as planned. Ill have a microscope tomorrow to check trichomes. Getting to the end now. Letting it go the full 10 week flowering.

Likes
27
Share


Likes
4
Share

@Guerrilla_grower777
Follow
16/10/2025
18:25
15°C 64%RH
Here i am,man these plants smells a lot,super Fire🔥🔥
When every tree in the forest have yellow and brown falling leaves two hidden in plain sight marijuana plants stays green and keeps bumping juicy buds especially Coco fresh
Days are now shorter,colder and the wettest days of the year are now officially beginning
30 minutes after we went out of the forest an heavy rain started and didn't stop until 18/10 morning,i'm honestly worried about my plants,😭
#1 Coco Milk 89 days from seed
Buds are now putting on some weight ,i don't expect a big yield from her but the quality Is here better than any expectation
Keep smelling like milk and coconut simply stronger than 5 days ago
At 1:50 you could see a strange calix formation,that thing Is enormous and it's the only one in both plants
I'm not worried about this,i find It funny and i'm intersted if someone can explain It scientifically
#2 Coco fresh 77 days from seed
Bigger bigger and bigger!!!
This one doesn't give a fuck if nights are longer and colder,the buds have a totally different dimension in less than a week,smell is now coming through pretty similar to her sister Coco Milk with a funky candy twist not so potent right now
According to the moon phases theory i will harvest probably 4/5 november when the moon will be full again
Apricot and part of the gorilla z was harvested during the so called super moon and the difference on the smell and crystal coverage are pretty impressive being honest
That's why i will push until the next full moon even with impossible climate
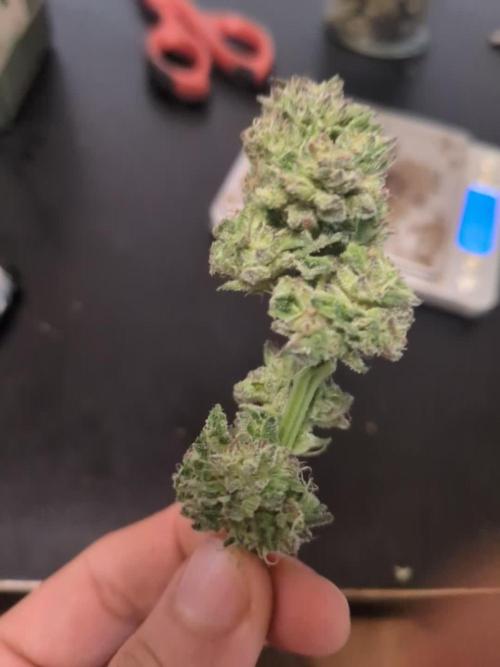
Pictures and #3 Coco milk sample wet trimmed,have to say hard to trim,but the final result looks and smells AMAZING
I know that Is better to wait but i have to try this ASAP,i have to know how It tastes
Tomorrow i will update smoke report of gorilla z and apricot auto,next guerrilla spot update 22/10 maybe



Processing
Likes
33
Share


@dutdut
Follow
Still having this weird potassium lockout. Some new growth is burned/spotted. Very confusing situation I don’t know wether to back off the feeding a little. Wouldn’t the plant just leach the potassium rich coco and burn it more? This isn’t a huge issue for me right now but I’d like to find out what is causing this. non buffered, coarse coco

Likes
Comments
Share

@cdxxbuds
Follow
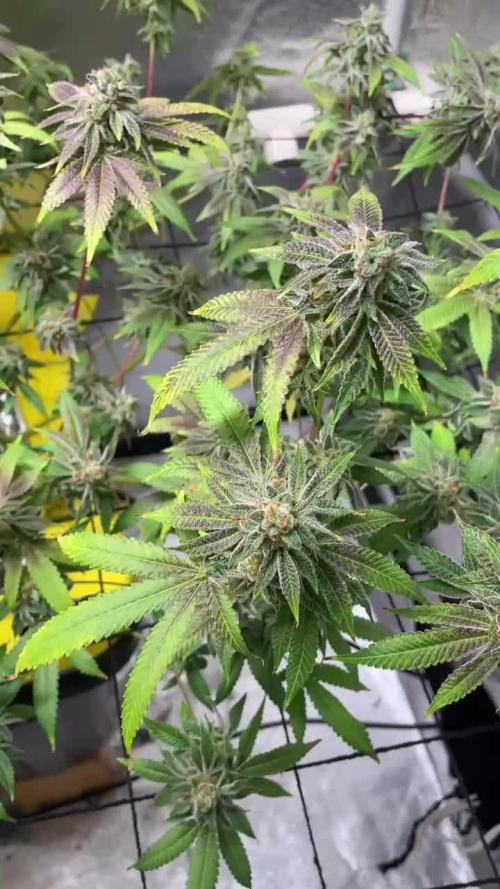
These ladies are crazy. Iced. Flushing underway. Colored up nicely.

Likes
4
Share


@AustinRon
Follow
OG 4Q24 Seedling Week 2
Orangegasm (Fem) [ IRIE Genetics ]
12/12 @ Bolt (Day 21)
Germination: 20 November 2024
#3A Earliest Harvest Date: 7 February 2025
#3B Latest Harvest Date: 17 February 2025
_________________________________________
Start of Week: [Mon Dec 2, 2024 CR2 4Q24 15:S:1:1]
End of Week: [Sun Dec 8, 2024 CR2 4Q24 21:S:1:7]
OrangeGasm Fertigation: Max EC: [ 2.4, mS]
_______________________________________
Week 2 Objectives
- Continue to root out Seedlings
- WHEN We’ve ROOTS AT THE BOTTOM - Up Plant to 1 GAL and Flip
- Restart EC Ramp (from 1.0 mS/cm2) WHEN ALL Seedlings are standing up STRAIGHT.
- Maintain Environment
Feed Schedule:
- RLA Hydro Chart, Max EC: 2.4
- RLA Foliar (Veg, No add’l PK)
- Weekly: Cytoplus or TM-7: [ 1.25, ml, gal] Through Bolt III
- Wetting Agents
- Dr Bronner’s Hemp Soap: [ 6, drops, gal]
- Quillaja 60: [ 1.25, ml, gal]
- Biology
- Photosynthesis Plus
- Mammoth-P
RLA Foliar through BOLT III
- Monday: Silica Skin, Solar Rain
- Wednesday: CalMag Fuel, Lush Green
- Friday: Solar Rain
Environment, Rooting Cuts, Week 0
- ECRange: [ 1.1, 1.7, mS]
- TempMax: [ 82, °F]
- RHMax: [ 69, %]
- VPD: [ 0.85, ±0.05, kPa]
- LightIntensityRange: [ 410, 530, µMol/m2/s]
- LightPeriod: [ 18/6] # Light Hours, Continuous Dark
Lighting Notes:
- @19.5” Canopy Distance, the dimmer shows 10% of the PPFD Delivered, i.e. 100% = 1000 µMol/m2/s, therefore we’ll maintain light distance (19.5”) and control Light Delivery from the Dimmer. Max will be 85% ( 850 µMol/m2/s)
__
Mon Dec 2, 2024
OG 4Q24 15:S:2:1
- Foliar: Silica Skin, Solar Rain
- TM-7: [ 1.25, ml, gal]


__
Tue Dec 3, 2024
OG 4Q24 16:S:2:2
- Let’s Resume EC Ramp: EC: [ 1.1, mS/cm]
- AM: Watered 50 ml/pot
- All seedlings have ‘Popped,’ Good turgidity, stems firming, big leaves . . .

Photosynthesis Plus: [ 3, ml]
Quillaja 60 Powder (Surfactant): [ 0.625, tsp]
TM-7 (BioAg, µNutrients): [ 0.625, tsp]
Starting with 9.4 EC, Diluted GH pHDown 50:1, and applied 4.2 ml. Reduced to 6.9pH. Took EC from 0.3 to 0.4. We DON’T need additional Phosphorous when phDown’g.
__
Wed Dec 4, 2024
OG 4Q24 17:S:2:3
- Foliar: CalMag Fuel, Lush Green
Ordered ph UP to address acidic Dehu Water.
Fertigation: 2024-12-04T09:32:20-0600: 50 ml/pot

Foliar:
- [X] CalMag Fuel: [ 2.5, ml, pt]
- [X] Lush Green: [ 0.625, ml, pt]
__
Thu Dec 5, 2024
OG 4Q24 18:S:2:4
EC: 1.3
After Foliar (CalMag Fuel/Lush Green), ‘mutant’ is filling in color.
We may have TWO ‘Jagged’ Girls - Serrated/Funky Leaves, TACO Leaves (Natural Fold)
Fertigation @ 1000, 50ml/pot


If so - This is Golden Goat Leaning, Frosty as Hell, Moderate Yielder

Per 0.5 gal feed water:
- [x] Primer A&B: [ 3.4, ml]
- [x] Silica Skin: [ 2.0, ml]
- [x] CalMag Fuel: [ 2.0, ml]
- [x] Lush Green: [ 1.4, ml]
- [x] Root Anchor [ 1.4, ml]
- EC: [ 1.3, mS]
__
Fri Dec 6, 2024
OG 4Q24 19:S:2:5
Foliar:
- CalMag Fuel: [ 2.5, ml]
- Lush Green: [ .0625, ml]
Fertigation:
- EC: [ 1.4, mS]
Per 0.5 gal feed water:
- [x] Silica Skin: [ 2.2, ml]
- [x] CalMag Fuel: [ 2.2, ml]
- [x] Lush Green: [ 1.5, ml]
- [x] Primer A&B: [ 3.7, ml]
- [x] Root Anchor [ 1.5, ml]
- [x] Photosynthesis Plus: [ 3, ml]

Wet Run Irrigation - 8 Emitters | Measure to assure relatively even delivery . . .
__
Sat Dec 7, 2024
OG 4Q24 20:S:2:6
- [ ] Assemble and Wet Run Irrigation
- [x] EC: 1.6

0.5 Gal Feed-water: EC: [1.5, mS]
- [x] Primer A&B: [ 4, ml]
- [x] Silica Skin: [ 2.5, ml]
- [x] CalMag Fuel: [ 2.5, ml]
- [x] Lush Green: [ 1.6, ml]
- [x] Root Anchor: [ 1.6, ml]
- [x] TM-7 (µNutrients): [ 1/8, tsp]
- [x] Photosynthesis Plus: [ 3, ml]
- [x] Quillaja 60 Powder: [ 0.125, tsp]
__
Sun Dec 8, 2024
OG 4Q24 21:S:2:7
440 x 4: 3520 ml/day (Less than 1 Gal)
EC: [ 1.6, mS/cm]


Likes
10
Share


@GrowerGaz
Follow
Great strain all three phenos are really greasy and high in resin. Two phenos are very kushy gassy , one has more citrus than the other. The third pheno is a the super frosty #1 more sweet and a little funkier than the other two
Likes
17
Share


@Bobo_Zion
Follow
Well we finally got around to putting a gate on the hemp garden and today we are transplanting one of the ladies in the 1 gallon smart pots to a 5 gallon smart pot.
For this process we placed about 3 inches of soil in the 5 gallon smart pot, then placed the 1 gallon smart pot with plant still inside on top of the soil. The next step was to start placing soil around the 1 gallon pot, so that it made sort of a mold. Once we got the soil where we wanted it, we removed the Queen Dream cultivar from the 1 gallon smart pot and placed it in the mold that was made in the soil. Finished up by adding some more soil and then watered the newly transplanted lady. No nutrients added this week.
Likes
3
Share

@Avengergreen
Follow
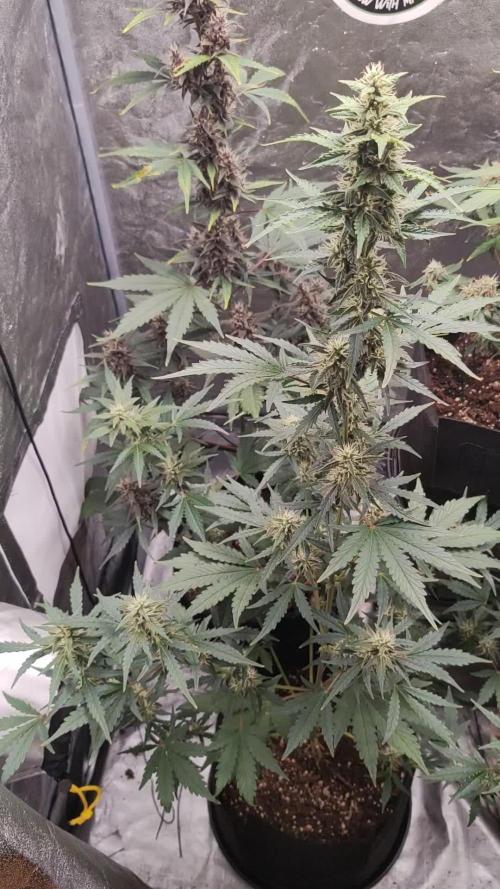
I am now at the beginning of the fifth week of flowering. The plants are handling the doses of fertilizer very well

Likes
39
Share


@flako
Follow
day 21 : irrigation
Plant still looking heathy, but only 11cm , i'm no idea if this is normal to outdoor because is my first time growing outside, but i have no problem with that :D .
ill buy neem oil to avoid pests 👆
Day 24 she grow up to 15 cm ( 4 cm in 4 days) and spray her with Anasac products (Chilean pesticides used in agriculture) she's growing stronger, 😤 im really happy.
she will preflowering soon

Likes
10
Share


@iLoveGoodWeed
Follow
Um suprise how fat does this buds getting. Some of the buds are start getting some frost. Will be done great CBD/THC oil.
Likes
5
Share


@ThatDudesDad
Follow
The wait is over. This part of it anyway. Plant grew healthy, strong and fragrant. Very happy to this point. Would already highly recommend this strain.
Likes
4
Share
@Organic710
Follow
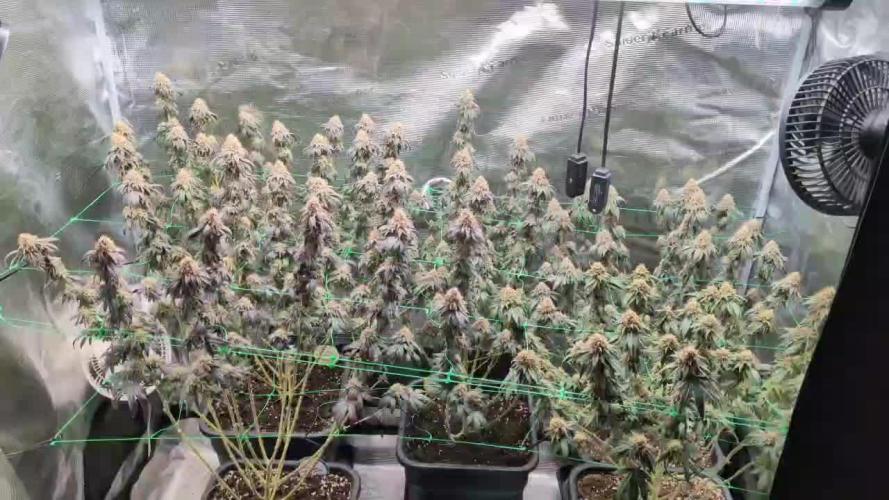
Slowly reducing temps to help preserve terpenes towards the end. Also just water now with 1-2more dose of microbes. Flourish/Trace/Microben and Organic growth regulator all stop 2-3weeks prior now. The mammoth setup is pretty crazy I have the 720w set at 30% and the canopy lights at 50% with corners of the tent still getting 1300ppfd and the middle 1500-1750. I can tell already just within a few weeks of the canopy light and 1week of the 2bar greenhouse light the quality of produce is incredible. I'd be destorying terpenes trying to get this ppfd from my old spiderfarmer lights so it by far was worth it already to me. Also the cost to run the lights is like 2c per hour extra a day for MASSIVE ppdf + spectrum boost and temps below 25c with ease. I cant wait to do a full run using these lights in the new bigger tent 😇

Likes
25
Share


@BudGardener420
Follow
Week 4
the right plant shows a deficiency... no idea what that is. the light from the lamp was too strong at first but it shouldn't be... I don't know - I'll keep an eye on it... I think the left plant looks good... growing splendidly - sativa genes are showing... the right plant is growing more bushy
👉Defoliation and exposing the shoots👈
I removed all the leaves that were or would soon be covered with scissors ✂️ - I started in the middle to give the plant more air flow

Likes
25
Share


@espaniabudz
Follow
all plants suffer over feeding but i’m chilling, let ‘em live and don’t feed em too much

