


Likes
Comments
Share


Likes
10
Share


@SnoopyShaggy
Follow
The plants were doing great, i feel that this strain can go for a better grow. Overwatering was an issue for me because of this strain packs buds and leaves are very little on it. Next grow for this strain i will need to improvise the watering schedule. This strain takes up very little water.
Likes
22
Share


@Stork
Follow
Day 36 Mon
PH 5.7
EC 0.9
DLI /12h/
PPFD/
Water 18c
Day 37 Tue
Add water
PH 5.4/5.9
EC 0.9/0.7
DLI /12h/
PPFD/
Water 20c
Day 38 Wed
PH 5.3/6.0
EC 0.7
DLI /12h/
PPFD/
Water 18c
Day 39 Thu
PH 5.5/5.8
EC 0.8
DLI /12h/
PPFD/
Water 18c
Day 40 Fri
Add soda for pH up
PH 5.0/5.9
EC 0.7/0.8
DLI /12h/
PPFD/
Water 20c
Day 41 Sat
PH 6.1
EC 0.8
DLI /12h/
PPFD/
Water 21c
Day 42 Sun
PH 6.1
EC 0.8
DLI /12h/
PPFD/
Water 21c

Likes
53
Share


@Mastr
Follow
Just chop her down in 75 days from seed
Veg 21 days
Bloom 54
She produce very dense nugs alot better than before I think without bloombastic won't happen I let her dry in 23° for 32 hour then 24°for 3 days then ready this is quekest way you can dry your bud without test or smell like grass its take max 5 days
Likes
7
Share


@SupportiveMango
Follow
Started to flush GG Auto 2 (Grown in 70% Coco & 30% perlite). Since she's getting heavy and falling over I bought a cheap net (the wrong size ofcourse lol), but it does the job. Just waiting for those amber trichomes now!
Hoping to harvest her on day 90.
It's very humid here where I am, so have had the dehumidifier going non stop which is making it much hotter in the tent. Trying my best to keep temperatures below 30c during the day.
First grow so any feedback would be really appreciated!
Likes
14
Share

@Miketama
Follow
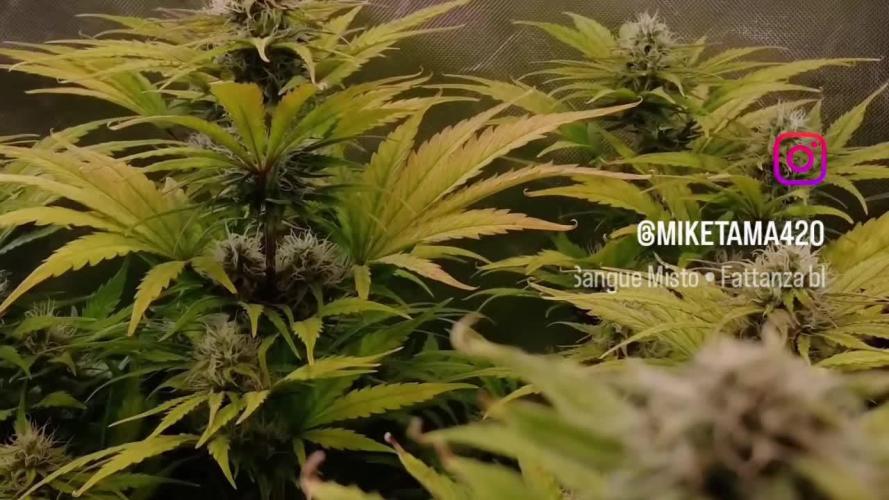
Despite the leaves 🍁 turning yellow, the buds are still fattening up nicely, so I’m not worried at all. I’ve read that this indoor strain tends to sacrifice the fan leaves pretty early and yellow out (a pattern I’ve seen in other grow diaries and even on the RQS website!). I removed the dead or almost-dead ones and I’ll keep doing it gradually throughout the flowering.
See you in the next episode! 🌱💨

Likes
13
Share


@kushman_4
Follow
The girls have entered week 3 and are growing slowly, but steadily. Raised the lights slightly since I felt the internodal space was kinda small. Fed them their first nutes. Will be just watering them for 3 days, and give them their seconds feed after that. Waiting to see how they respond to the feed.

Likes
12
Share


@SoulGrownBotanicals
Follow
Trying some new nutes now and compared to the mother plant I think I notice a difference lol. She's getting frosty and showing off some nice colors.

Likes
6
Share

@CalGonJim
Follow
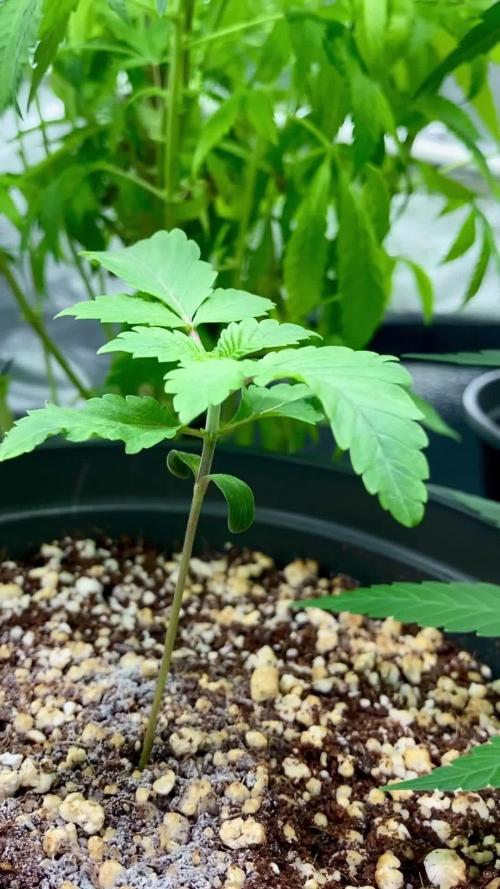
2/2 12am Hotel is looking great, got a great feeling about this.
2/3 1:31M BILLY MAY'S VERSION OF STRANGERS IN THE NIGHT....THE GREATEST SONG FOR STONER EARS...SO MOVING.
2/3 12:01 PM I have all three of the trailer Park boys going in one tent. I cut Ricky down way way down and I’ll cut bubbles back a little bit. I want them all to flower at the same time and the Ricky plant has been growing since September so I can cut quite a bit off. She’ll be just fine. It’s kind of funny looking so they’re kind of trailer trash looking. It’s all perfect what I lack in ability. I’m making up for in showmanship so if I screw up, it’s on purpose. It’s part of the show you wouldn’t understand.🎥
2/6 12:22AM CBG'S ARE ALL FAILS...BAD SEEDS? NOT ONE TURNED OUT GOOD. SO CBG SEEDS ARE ALL GARBAGE AND IN THE FUCKING TRASH NOW.
AND I GOT LOTS OF DEVISTATING FINANCIAL NEWS SO I WILL BE SUICIDING OUT THIS MOTH SO FUCK YOU YOU THOSE WHO CAUSED THIS

Likes
9
Share


@L8bloomr1008
Follow
Start of week 8 for DG. Buds are still filling out. Wondering when of if I should flush her before harvest? Only been using Cronk Nutrients for a couple of weeks so I don’t think there should be too much of salt build up. Haven’t tested and ppm from runoff. She still showing a little bit of bite or light burn so I fed her plain ph’d water for 2 feeds in a row so we’ll see.
The GWK is starting week 7. She’s taller but still has a lot of filling out to do. She also showed a few leaves of nute burn but I’m pushing her. She had one plain water feeding this past week. She’s looks great though.
Flush or no flush? I think I’m a couple weeks out from DG harvest.


Likes
28
Share


@Theia
Follow
This may be the last week for the widow. She is huge..The last week saw her swell and eat most of the leaf on the buds. This week I am feeding her water only. She was flushed through with 2L of water at 6.5 with around 600ml run of which came through at PH 6.53. I will check her trichomes over the weekend once she has drunk some of the water she had. Not much else to say. She is a tough old bastard and she has made me want to test some other white widow genetics. Any recommendations please say.
Happy grows🌿🌱.
Stay safe😷😷😷


Likes
7
Share

@GoodTimesOrganics
Follow
Hi liebe Community and Welcome Back! 💚
Slush Mint Cake von Dutch Passion
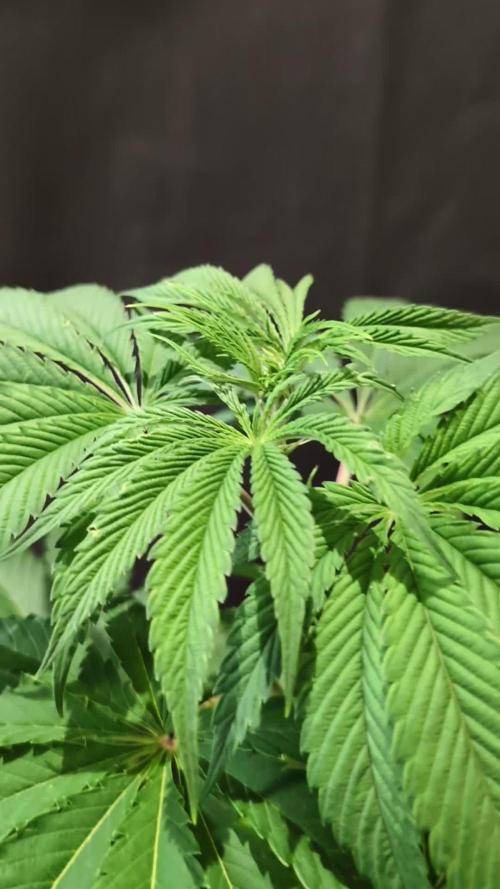
Die Pflanzen gedeihen prächtig und die Pflanze zeigt hoffentlich bald mal ihre Geschlechtsmerkmale.
Ich habe bereits die untersten Triebe entfernt und auch daß untere Blattwerk rausgenommen.
Sie wachsen etwas unterschiedlich hoch, was an dem Tag Unterschied der Keimung liegt.
Die Wuchsform ist kräftig und Energie geladen.
Die Seitentriebe spreizen sich schön ab, was nach der Geschlechtsbestimmung gut für das Topping ist
Die Bedingungen im Growschrank sind Top!
—————
🌞 Temp: 21
🌚 Temp: 18°C bis 19°C
💨 RH: 58%
VPD: 0,75 kPa
💡ppfd: 330 mpm
—————

Likes
6
Share


@Spazmagi
Follow
11/3 - Today was the first day of week 5 and also the first day I could see a visibly measurable decrease in her water level between check-ins (~12 hours apart). As a result of her drinking so much water in such a short time, the ppms shot up to almost 800. I used straight tap (7.5 pH, 170ppm) to adjust since her pH was also measuring 5.3. I adjusted her with this method until she registered 5.6pH and 670ppm (1.0ec + tap, 500ppm of nutrients). I would prefer for her pH to be a bit higher (5.8, ideally), but I will settle with this for now since the water is back to just touching the basket. Over the last couple days I've been adjusting her LST to help her bush up as much as possible. I can already see the heavy Sativa influence in her compared to her sister in the tent. I can't wait to see what she will throw at me.
11/4 - I wasn't even planning on doing an update today, but I want to note a few changes. Her root bundle is over a foot long and getting more wound up every day. I removed her LST ties in order to take advantage of the ScrOG screen apparatus (see notes below). After lights came back on, she measured 650ppm and had another notable drop in water level. Currently, I am preparing another nutrient solution that closely matches what she is feeding on now. I will be upgrading her to a 5 gallon bucket. I will be aiming for 1ec of nutrients/additives (500ppm + Tap on my meter, Hanna Primo .5 conversion). Tap measured 180ppm, so target ppm would be 680.
Later that same day... So I finished upgrading her to a 5 gallon bucket before I actually got done writing the update. Added one photo showing new 5 gallon setup.
Solo ScrOG test mk1 - In an attempt to do a ScrOG, but maintain control over each bucket, while still having relatively easy access to each reservoir, I decided to throw together this little contraption. I removed the lowest complete segment of a tomato cage, leaving a short "tail" beyond the lower ring to act as a peg to insert into corresponding holes in the lid. The lower ring is 10" in diameter and the upper is approximately 12" in diameter. Each ring is 11" apart. I would prefer to have a shorter segment, but I haven't worked out exactly how to do this yet. I would prefer to set the screen height at around 6" above the bucket instead of 11". This will have to suffice for the time being while I let my latent conscious work out a solution or one is provided by the community. Above each cage will sit a coated wire fence with grids measuring ~2"x3", as shown in the above picture.
11/5 - Uploaded short video showing Solo ScrOG Apparatus in place. Screen height currently set to 6".
Thanks for stopping by my garden, and, as always, Happy Growing!

Likes
25
Share


@eldruida_lamota
Follow
Ya estoy de nuevo familia, vuelvo actualizar, la primera semana de floración de estas Casey,s rollex O.G. Están gozando con un buen crecimiento y buena vegetación.
Ya marcó su sexo 3/3 hembras, las condiciones climáticas si están siendo óptimas en este espacio.
.
La humedad la tengo al 50% la temperatura está entre 21/25 grados , y el ph está en 5,8/6,0.
.
AgroBeta:
0,6 ml x L Flowering black line , vía radicular.
0,3 ml x L Tucán , vía radicular.
0,8 ml x L Génesis, vía radicular.
0,1 ml x L Betazyme, vía radicular.
0,05 ml x L Gold Joker, vía radicular.
0,2 ml x L Silver, vía radicular.
.
Hasta aquí es todo amigos, buenos humos fumetillas💨💨💨.

Processing
Likes
10
Share


@GrowerGaz
Follow
Just gave them some ffj fermented fruit juice , made with blackberry and raw brown sugar. As a bloom booster. Just water via autopots the rest of the week. Certainly very frosty and begining to stink.
Likes
23
Share


@SonomaSungrown
Follow
This week was a banner week for the Adult Garden.
Booming vegetative growth for all three girls.


Likes
12
Share


@UK420hydrogrow
Follow
Ok so had a lot to do this week harvested the large critcial mass to which I got 6 n half 0z from one plant so happy with that i also had a few issues with enviroment mainting right temp and humidty as been a lil issue but think all is well now so there all now on the 7 week of flower think I may push these as far as I can to maximise yield potential overall a real good plant to grow had very few issues from start to finish a top strain a deffo keeper for the garden of mothers in my opinion


