


Likes
Comments
Share


@84ruk
Follow
The strain is really good. I harvested it when the trichomes were milky and it had a very energizing and uplifting effect. I'll definitely grow it again now with better care and the knowledge I've gained. I harvested around 20 grams dry.

Likes
18
Share


@JeyGanesha
Follow
Anche questa strawberry gorilla è quasi arrivata al termine.... forza bella mia. Tira fuori il massimo della tua potenza 😂🤣🤤💪👍..gli ultimi 3 giorni lasciata fuori all'aperto con 2/3gradi °c un buono sbalzo termico gli ha fatto solo bene...

Likes
52
Share


@Jef79
Follow
Hello and welcome to u all.. Hope you are all well and having a great weekend.. 😁👍
Great week growing for my "Future #1" from Anesia Seeds.. Passed on the mother plant and been busy with my clones and - future - mother!.. Both original cuttings rooted up and wer transferred into 4inch rockwool cubes.. I noticed today that the later cutting is just starting to flash her roots at me so she will b placed into soil for future runs.. 🤣👍
Huge amount of thanks to you all for your support, comments, follows and likes.. Stay safe to u all and best wishes for all your grows.. 😁👍🍀

Likes
53
Share


@Skunk_Life85
Follow
Slowed her feed way down this week and next before my flush, I added molasses to my last couple feed. She smells like grape jelly when you touch her, cant wait to get her into a jar...

Likes
6
Share


@ToastFarmer
Follow
No deficiencies thus far adding some molasses each feeding 1 tbls per gal water

Processing
Likes
24
Share


@ElChicoDelaWeed
Follow
35 DÍAS DESDE EASY START.
Maceta RQS 10L.
-EASY BOST ORGANIC NUTRITION.(preparación del suelo con 50g en 10 litros de sustrato con perlita)
-EASY COMBO BOOSTER PACK.
En la 5ª semana estoy regando las 4 plantas con agua mezclada con la pastilla EASY GROW BOOSTER (dividida en 4 trozos para la semana 4,5,6 y 7). diluyendo en 1,5L. de agua la mezcla).
-Las 3 que están en vaso de plástico a principios de la semana pasada ya le añadí al vaso uno granos del EASY BOOST ORGANIC que no le mezclé cuando las planté).

Processing
Likes
229
Share


@DadasGrow
Follow
So this is the start of the fourth week with me. I find this very engulfing. I like spending an hour with them a day and move the little ones out of the bigger fan leaves shadow by tucking the larger ones away giving the little ones a chance to get more light and flourish. I’m noticing more the strain my one girl went through compared to the others, her leaves being smaller than the other girls. I’ve tried to give them the best environment I can and realize I still play a huge role in their life. This is my first grow and I love it. I hope they grow up well and flourish. They were fed last week and had a bit of nutrient burn so this week I gave them just water. I’m not sure how much longer I should veg but I hear in the scrog game the longer you veg the better. Hoping for the best for everyone on GrowDiaries and their grows!

Likes
3
Share


@Briangrowss
Follow
I think she start to look delicious
28/7 she really start to smell good
30/7 give her this morning the first time green sensation and build it up to 0,5 in the next week that starts tomorrow ☘️

Likes
37
Share


@DogDoctorOfficial
Follow
🌱 Germination Journey with Terpyz Mutant Mentha de Croco 🌱
Hey Grow Fam! Today kicks off an exciting adventure with Terpyz Mutant Mentha de Croco genetics. I’ve got 10 regular seeds ready to sprout, and I’m looking forward to discovering some beautiful female phenotypes—and maybe even a standout male for potential future breeding. It’s been a while since I’ve worked with regular seeds, so I’m thrilled to dive in!
Germination Process Overview:
Here’s a step-by-step rundown of the germination setup and process, with a special focus on the equipment and nutrients that are helping these seeds thrive right from the start.
Step 1: TheCannaKan Germination Pod 🌱
For germination, I rely on TheCannaKan—a device I’ve come to love and trust. It’s designed to create the perfect microclimate for seed germination, and within just 24 hours, the seeds started showing signs of life. By the 32-hour mark, they were all ready to be transferred to the next stage! I can’t recommend this gadget enough for anyone serious about getting strong, early growth from their seeds.
• Why TheCannaKan?
• Humidity Control: Ensures seeds stay hydrated without oversaturation.
• Stable Temperature: Maintains an even temperature around the seeds, so there’s no shock or stalling.
• Enhanced Oxygenation: Keeps fresh air circulating, helping prevent mold and ensuring seeds don’t suffocate.
Step 2: Transfer to Root Riots & Aptus Holland Supplements 💧
Once the seeds were sprouted, I transferred them into Root Riots, known for their excellent water retention and structure that encourages strong root growth. Root Riots also have a pH-balanced, spongy texture that makes it easy for roots to penetrate, promoting sturdy, healthy root systems.
At this stage, I started using Aptus Holland’s Regulator and Startbooster at 1ml/L each. Here’s why I chose these products for early growth:
• Aptus Regulator (1ml/L): Helps strengthen the plants against environmental stresses by supporting cell wall structure. It’s a fantastic choice for giving young seedlings an early boost in resilience.
• Aptus Startbooster (1ml/L): This product provides essential microbes and nutrients that stimulate root growth and early plant vigor. Especially for regular seeds, the early root development makes a noticeable difference in later growth stages.
Step 3: Lighting with Future of Grow (FOG) LED at 200 PPFD 💡
For lighting, I’m using a Future of Grow (FOG) 600W LED. For the germination stage, I’ve dimmed it to around 200 PPFD (photosynthetic photon flux density), which provides just enough light for healthy, strong seedling growth without overwhelming them.
• Why Low Intensity?
• 200 PPFD ensures that young plants aren’t exposed to too much light, which could cause stress or stunting. This level of intensity is perfect for encouraging healthy development without risking “stretching.”
• The FOG LED provides a balanced spectrum tailored to plant growth, setting up these young sprouts for success as they grow.
Step 4: Environmental Control with TrolMaster Tent X Controller 📲
For monitoring and control, I’m using the TrolMaster Tent X Controller, which lets me dial in every aspect of the environment to make sure these little ones have the perfect conditions for germination and early growth.
• TrolMaster Benefits:
• Precision Control: Adjust temperature, humidity, and lighting all in one place.
• Notifications: Sends updates in real-time to my device, so I can make adjustments as needed without being physically present.
• Consistency: Maintains stable conditions around the clock, reducing stress on seedlings and ensuring they’re thriving.
Grow Tips & Reflections:
Germination is one of the most crucial stages in a plant’s lifecycle. Starting with strong genetics like Terpyz Mutant Mentha de Croco, combined with a solid germination setup and the right nutrients, creates the foundation for a successful grow.
💡 Quick Tips for Fellow Growers:
• Hydration Balance: Don’t oversaturate! Moisture levels should be high enough for the seeds to sprout but not so wet that they drown.
• Light Management: A low PPFD for young seedlings prevents stretch and keeps nodes tight, preparing them for a healthy vegetative phase.
• Environment Consistency: Use a reliable controller like the TrolMaster Tent X to manage your settings, and consider monitoring tools for real-time adjustments.
Shout Outs to the Community:
Big thanks to Terpyz Genetics for these incredible seeds, Aptus Holland for their top-notch nutrients, Future of Grow for the stellar LED lights, and TrolMaster for the amazing controller. Also, shout out to all of you in the growing community—you make this journey exciting and filled with endless learning. Let’s keep growing and sharing together!
That’s it for the germination update! Next up, I’ll be monitoring growth closely to identify strong females (and maybe a standout male for breeding). Stay tuned for updates on our Mutant Mentha de Croco adventure—this is just the beginning!
Genetics - Mentha De Croco
https://terpyz.eu/products/menta-de-croco-fern-type?_pos=1&_sid=e9237cbcb&_ss=r
DogDoctorOfficial Discount Codes @ terpyz.eu - DOCTOR 15% off
Nutrition - @aptusholland
https://aptus-holland.com/
Led Power @ F.O.G. Future Of Grow
https://www.thefuturofgrow.com/en/online-store/BLACK-SERIES-600-p489093171
Controls @ TrolMaster
https://www.trolmaster.eu/tent-x
As always thank you all for stopping by, for the love and for it all , this journey of mine wold just not be the same without you guys, the love and support is very much appreciloved and i fell honored with you all in my life
With true love comes happiness Always believe in your self and always do things expecting nothing and with an open heart , be a giver and the universe will give back to you in ways you could not even imagine so
Growers Love To you All 💚

Likes
Comments
Share

@DogDoctorOfficial
Follow
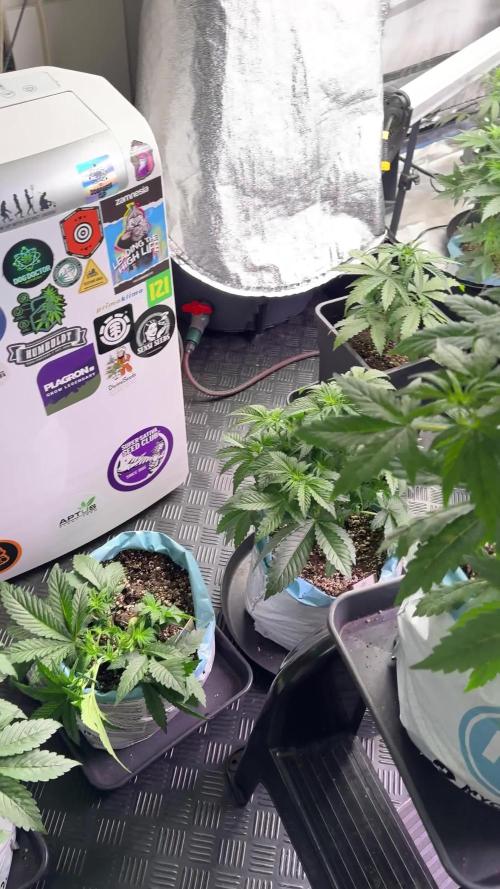
🌱 Grow Diary Update — Sour Diesel
Week 4 | First week of flower (12/12)
This week, the spotlight is on Sour Diesel, because she clearly stood out from the rest of the room — and when one plant speaks louder than the others, we listen.
⸻
📍 Quick recap (so everyone is on the same page)
• Sour Diesel just entered week 6 / first week of flower
• She was running on Autopots with mineral-only feed
• Organics and amendments were removed from the Autopot system
• The rest of the room handled this change fine
• She did not
She started showing:
• Droopy posture
• Loss of vigor
• Early deficiency-type signals
• A general “I’m not comfortable” look
Important detail:
👉 She was the only plant reacting like this.
⸻
🌿 Why this happened (the key lesson)
Sour Diesel is an old-school genetic, and not all strains respond the same way to abrupt system changes.
In her case:
• She was previously thriving with organics + minerals
• Removing organics reduced:
• Nutrient complexity
• Biological buffering
• Availability of secondary elements
• This happened right at the transition into flower, when demand increases sharply
On top of that, we had environmental pressure:
• Outside temps: ~4°C
• Outside humidity: ~98%
• Room stabilized at: 21°C / 58% RH
Those conditions are acceptable — but combined with:
• Feed change
• Flower transition
• Genetic sensitivity
…it was enough for her to react.
⸻
🚿 Why we took her off Autopots
Autopots are great — but they’re not universal.
We removed her from the Autopot regimen because:
• She needed immediate, tailored feeding
• She wasn’t responding well to mineral-only delivery
• Hand-feeding lets us:
• Adjust EC gently
• Reintroduce organics
• Observe response feed by feed
This wasn’t a system failure — it was a plant-specific decision.
⸻
Current feeding strategy (now)
• Medium: hand-fed (off Autopots)
• EC: 1.43
• pH: 5.9
• Full recipe: organics + minerals
• Added: CalMag Pro
Why CalMag Pro?
• We’re using rainwater + humidifier water, which is very soft
• Low calcium & magnesium availability can show fast in flower
• This is both:
• A corrective move for her
• A preventive move for the whole room
Meanwhile, the rest of the Autopot system is running:
• 2.29 EC
• pH 6.0
• Mineral-only
• Other plants are stable and happy
⸻
🌬️ Environment (current)
• Lights: stable
• Airflow: good
• Temp: ~21°C
• RH: ~58%
Nothing extreme — but this shows how context + timing + genetics matter more than numbers alone.
⸻
🔮 What we expect (and what we don’t)
What we expect:
• Gradual recovery, not overnight
• Leaf posture improving first
• New growth responding before old leaves
• Stability over speed
What we don’t expect:
• Instant “fix”
• Old damage to reverse
• Her to behave exactly like the rest of the room
From now on, she’ll simply need a bit more attention than her sisters — and that’s okay.
⸻
🧠 The bigger takeaway
This is a perfect example of why:
• There is no single “best way”
• Systems are tools, not rules
• Genetics always get a vote
• Listening beats forcing
We’re not chasing perfection — we’re responding with intention.
We’ll keep monitoring her closely over the coming week and adjust calmly, step by step.
As always, this is just our experience and observation — not a universal recipe.
Plants teach, we adapt 🌱💚
👽 New team member Meet Mr. Baggy
Our new fluffy alien/beaver/whatever-he-is friend, won through a Grow Diaries contest.
Expect to see him around — he’s officially part of the grow now.
Week 5 Veg/pre-flower | 8×8 Tent | Master Conditions
🌍 External Environment (Context) • Outside temperature: ~5 °C
• Outside RH: 92–96% (very high humidity)
• Strong seasonal pressure influencing internal stability
⸻
🌡️ Internal Tent Conditions
• Tent temperature: ~21.8 °C
(noted drop due to cold external temps)
• Tent RH: ~58%
→ Very good considering outside conditions
⸻
💨 Airflow & Circulation
• Primary airflow: Bottom → top → wall return
• Pattern: Full-room vortex circulation
• Additional fans: Central airflow to break blind spots and mix layers
• Goal: No stagnant pockets, uniform VPD across canopy
⸻
💧 Water Source & Rationale
• Water: Dehumidifier water + rainwater
• Base EC: force
• Systems designed to support plant intelligence, not override it
FOR DISCOUNT CODES AND MORE JUST FOLLOW THE LINK https://website.beacons.ai/dogdoctorofficial
📲 Don’t forget to Subscribe and follow me on Instagram and YouTube @DogDoctorOfficial for exclusive content, real-time updates, and behind-the-scenes magic. We’ve got so much more coming, including transplanting and all the amazing techniques that go along with it. You won’t want to miss it.GrowDiaries Journal: https://growdiaries.com/grower/dogdoctorofficial
Instagram: https://www.instagram.com/dogdoctorofficial/
YouTube: https://www.youtube.com/@dogdoctorofficial
⸻
Explore the Gear that Powers My Grow
If you’re curious about the tech I’m using, check out these links:
🔆 Lighting & Environmental Control
• Future of Grow — Advanced LED lighting technology
https://www.futureofgrow.com/
DISCOUNT CODE: DOG20
• Lumiflora — Under-canopy LED lighting
https://lumiflorade.com/
• TrollMaster — Environmental controllers and automation gear (past collaboration)
⸻
Genetics
• Zamnesia Seeds — Genetics used in this project
https://www.zamnesia.com/
⸻
🌱 Soil, Substrates, Boosters & Root Support
• Plagron — Substrates, bio mixes, and supportive products
https://plagron.com/en/
⸻
🎒 Storage, Curing & Preservation
• Grove Bags — Curing and storage solutions
https://grovebags.com/
⸻
📸 Photography Equipment & Tools
(Not sponsors, but part of my creative toolkit)
• Sony A6700
• Sony full-frame macro lens + few more
• Stacking photography workflow - learning
• iPhone (for behind-the-scenes shots)
We’ve got much more coming as we move through the grow cycles. Trust me, you won’t want to miss the next steps, let’s push the boundaries of indoor horticulture together!
As always, this is shared for educational purposes, aiming to spread understanding and appreciation for this plant. Let’s celebrate it responsibly and continue to learn and grow together.
With true love comes happiness. Always believe in yourself, and always do things expecting nothing and with an open heart. Be a giver, and the universe will give back in ways you could never imagine.
💚 Growers love to all 💚
📸 P.S. – The Eye Behind the Lens
All photos in this diary (for now — except for the ones showing the camera, which I took with an iPhone) are taken with a Sony A6700 paired with a Sony full-frame macro lens and a few more.
Photography is part of the story — it’s how we share the fine textures, the glow, and the quiet details that words can’t always capture.
I’ve also started experimenting with photo stacking — a technique where multiple images, each taken at a slightly different focus point, are layered together to create one perfectly sharp image from front to back.
It’s not digital enhancement or AI; it’s pure photography — a way to reveal the plant’s beauty in microscopic depth, from trichome to petal.
You’ll even see a few shots of "ghost me" capturing the shots — camera, lens, setup — because every grow deserves not just to be cultivated, but documented like art.
FOR DISCOUNT CODES AND MORE JUST FOLLOW THE LINK https://website.beacons.ai/dogdoctorofficial
NEW DISCORD - Official Server Invite Link : https://discord.gg/ksjAkA5T74

Likes
3
Share

@BudHunter420
Follow
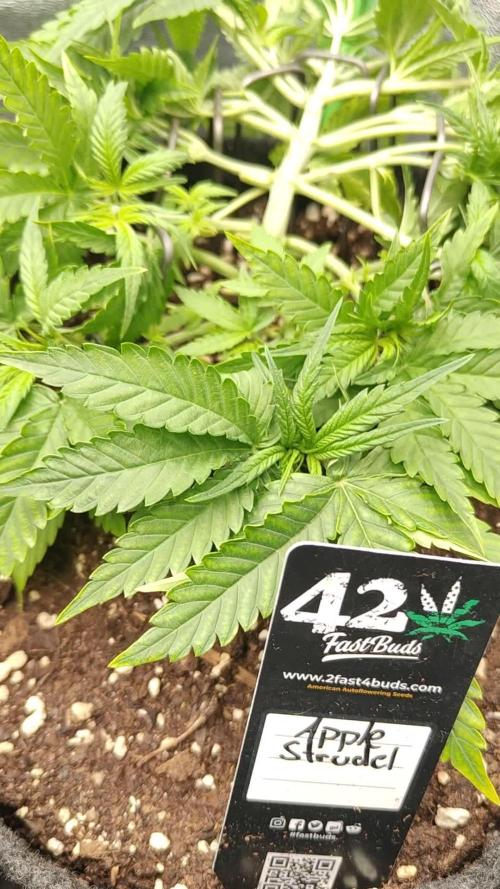
27.08. Die zwei wachsen echt kräftig. Ich habe die Orange leider etwas verletzt und mir geht der Platz am Topf aus um den Haupttrieb unten zu halten. Daher werde ich den Haupttrieb in Ruhe lassen und nur noch die Seitentriebe weiter nach außen bringen. Bei der Apfelstrudel muss ich das genau so tun. In 1-2 Tagen werden beide nochmal leicht entblättert.
28.08.
Alle Seitentriebe weiter nach außen gebogen. Orangensorbet hat 12 Blätter abbekommen und Apfelstrudel 14 Blätter. Orange hat keine Nachwirkungen durch ihre Verletzung gezeigt.
Am 30.08. Haben die zwei jeweils 2,5L mit insgesamt 15ml Bio Grow, 10ml Acti Vera, 10ml Bio Heaven und 6ml Calmag auf ph 6,46. Direkt nach dem Gießen beide etwas entblättert. Wie schnell die zwei an neuen Blätter zulegen ist krass. Und dann hab ich weiter versucht die Seitentriebe weiter nach außen zu bringen
Likes
33
Share


@Caukygrow
Follow
Wow, coming along. The girls are really getting smelly. I actually added a second carbon filter on the exhaust & have invested in a dehumidifier, keeping the humidity levels at 50% for the rest of the grow. It is running 24/7 draining into a bucket outside of the tent. I will use the water from the dehumidifier to feed my girls.
I also managed to get some cal mag to help my burnt edges. Other things I have changed for this week as we are preflowering is switching the schedule from 24 hours of light to 18/6. I think this has helped the plants get some much needed rest after vegging.
12th of August. I think I can see it starting to flower!!
* Minor defoliation to remove leaves that are damaged from watering at the bottom of the plant
16/08/22 Grow question
ADAM BASE A - NPK 3-0-1 (3 ml/l)
EVE BASE B - NPK 0-4-3 (3 ml/l)
LUSH - NPK 5-0-0.5 (1 ml/l)
RAPTURE - NPK 0.7-3-3 (1.5 ml/l)
Herbi Cal mag NPK: 4 – 0 – 0 (1.8ml/l)
1L ADAM & EVE: Your base Nutrient, used from start to finish.
1L LUSH: Veg stage focused nutrient additive.
1L Rapture: Applied in early Bloom/Flowering.
I water around 1.5 liters of mixed water PH'd to 5.8 to each plant, giving me about 20-30% run off. Am I overwatering my plants?
Update! 17/08/22
I flushed the plants with 4 liters of water each using half the nutrients I was using before
13ml to 9l Adam
13ml to 9l Eve
6ml to 9l Lush
8ml to 9l Cal mag
Left out the bloom - I'll add it again for the next feed.
The canoeing I had on the smaller plant already seems less intense - hopefully see some good changes as we head into the next week for flowering.
Today I will do a more invasive defoliation on the big plant, removing all of the fan leaves on the bottom - stay tuned for week 5 starting tomorrow. A few more weeks and hopefully we get some nice juicy buds!!!
Likes
38
Share


@DomanAtrik
Follow
I've caught various carnivorous critters and released them in my garden. They seem happy here. Just began using overdrive. Cant wait for next weeks pictures.


Likes
6
Share


@Barcelona_Farmers710
Follow
Aquí empezó los problemas por el regulador...no podíamos bajar la potencia de 320w y los pelos se quemaron un poco, apesar de todo los colores empezaron a florecer! Buenos humos compañeros 🍁

Likes
15
Share

@paetel
Follow
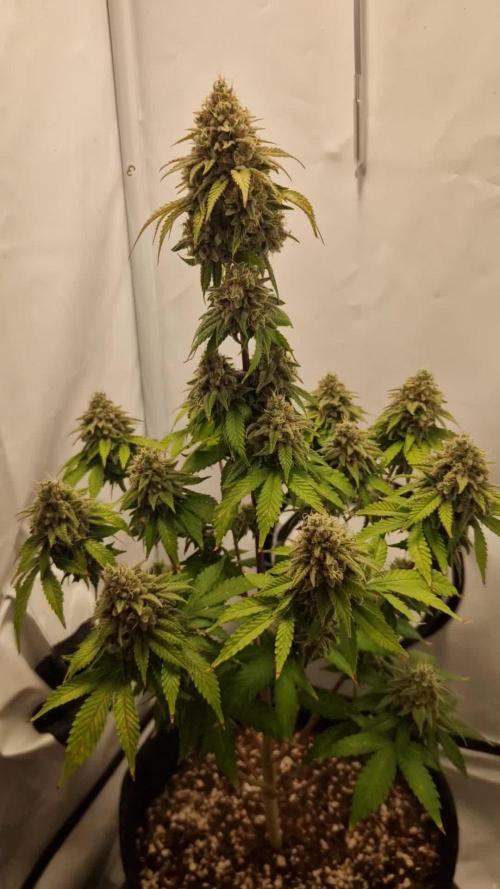
Life has taken some very unexpected turns, so I’m just posting a few pictures for now. I’ll probably only post another update once the harvest is done. In July, I’ll be moving to a new apartment with some extra space, and I’m planning to extend the growing area.

Likes
4
Share


Processing
Likes
28
Share


@TheFoxFarmer
Follow
Surf Purp Week 6 Flower
The last week before flush. All nutrients apart from PK and sugars have been stopped. This brought the ppm/EC down, plus Remo Bloom was reduced slightly now they're not so hungry. With that being said I'm still using a lot more with this line than I'm used to. Only because the remo nutrients feeding chart lists them so strong, which I'm already a lot lower than. In future I'll try reducing them and see how they cope and perform, but that's just part of dialing it in to your own specific set up.
Now that they're close to flush they're starting to get slightly more pale, with #2 and #4 showing some purpling too. This is because they are slowly coming to the end of their cycle, so they no longer need heavy feedings and are now eating less and beginning to cannibilise. They're all very frosty and giving off an insane amount of smell. At this point I'm more or less certain that #4 is a keeper, with the most unique terpene profile out of the 4 females. It smells like rotting candy/fruit with a lot of gas ⛽ it's also a close call between #1&2, as they're very similar to each other yet so different to #4. These two have the sweetest, most pungent smell of blueberries but with very slight differences between them that could change more throughout flush (and even after drying and curing). The keeper from these two will more than likely be decided after drying and curing.
One or two of the main cola's on #4 are way too close to the light, with one top bud showing clear signs of burning. When you look closely, parts of the burns are brown as you would expect, and others are bleached white. These are both from heat and light damage, and aren't ideal. But, it's only the one bud on one plant so I'm not going to stress over it. In fact, she's smelling that incredible that you wouldn't even know!
Thanks for following and happy growing!
🦊
Likes
23
Share


@Grey_Wolf
Follow
Fust Buds Originals Sour Diesel 5th week of flowering completed 18th Jan 2020
So that's another week gone by and the sour diesel auto looks pretty tasty to be honest. Not a lot of bulk and there is a tad too much internodal spacing for my liking
However the quality is definately there , with every bud glistening with trichomes and emitting a strong Diesel like smell.
The other plant (polyploid) isn't doing much really but will add to the final yield I get from this grow. Cheers for stopping by 👍
Likes
9
Share


@Scilef
Follow
Daily report:
Day 1.
Watering: NO
Notes: I am concerned that I've got a photoperiodic strain, not an autoflower.
Day 2.
Watering: Morning: 5.8 pH 1030 ppm (4.0 l 0.75% of Base + CalMag) => 6.0 pH 2120 ppm (0.65 l)
Notes: I set up a 12/12 light schedule. I want Heracles to blow.
Day 3.
Watering: Night: 5.8 pH 1210 ppm (4.5 l + CalMag) => 6.0 pH 2160 ppm (0.75 l)
Notes: Since today I'll feed Heracles according to the bloom feeding schedule. I forget to take a photo of Day 46, sorry.
Day 4.
Watering: NO
Notes: I hope that it is a beginning of blooming.
Day 5.
Watering: Morning: 5.9 pH 1160 ppm (4.0 l + CalMag) => 6.0 pH 2400 ppm (1.25 l)
Day 6.
Watering: Night: 5.8 pH 1030 ppm (4.5 l + CalMag) => 5.9 pH 2450 ppm (1.55 l)
Day 7.
Watering: NO
