
Likes
Comments
Share


@nonick123
Follow
Día 129 (07/10) Riego con 750 / 1.000 ml H2O de osmosis
Empiezan a moderarse las temperaturas con 28 ºC de máxima
Día 130 (08/10) Riego con 500 / 1.000 ml H2O de ósmosis
Las temperaturas están sobre 25 °C
Día 131 (09/10) Riego con 500 / 750 ml H2O de ósmosis
Día 132 (10/10) Riego con 750 / 1,250 ml H2O de ósmosis
Día 133 (11/10) Riego con 750 / 1,250 ml H2O de ósmosis
Día 134 (12/10) Riego con 500 / 1.000 ml H2O de ósmosis
Reviso los tricomas y estos indican que estamos más o menos a una semana de la cosecha! 50% trasparentes / 50% nublados
Día 135 (13/10) Riego con 1 litro H2O pH 6,5 + Kelp Hidrolizado 0,3 g/L
💦Nutrients by Lurpe Solutions - www.lurpenaturalsolutions.com
🌱Substrate PRO-MIX HP BACILLUS + MYCORRHIZAE - www.pthorticulture.com/en/products/pro-mix-hp-biostimulant-plus-mycorrhizae

Likes
5
Share


@AK1210
Follow
Another decent week in regards to growth, I'm sure that by mid way through next week flowering will begin. The leafs on this lady are hugh, she is competing with two other plants in the tent which may not be the best position for her but all is looking good and one of the other ladies will be harvested soon allowing More space to thrive.
The weather has been ok, nothing that will slow this lady down.

Likes
109
Share


@Prototype0181
Follow
Temps are finnaly under control, its been hot as hell out here. Plants are thriving again💪
Rock on Growmies


Likes
23
Share


@GreenthumbJacobs
Follow
Woche 12 beginnt. Sie ist fast fertig. Eine absolute tolle Genetik!
Lässt sich super trainieren ! Geruch ist sehr stark.
Hatte noch ein bisschen calmag Probleme was durch die 300w lumatek verursacht wurde.
Aber es geht ihr gut dank plagron.
Hab die gute gespült. Die spitzen sehen aus la ob sie leichten nutriens Brand bekommen. Aber das sollte die letzten paar Tage vor der Ernte kein Problem sein.

Likes
2
Share


@TreeFruitsDe
Follow
I took this pictures in the 2th week of flowering.
I only used the fertilizer once in the second week of flowering 3g/L.

Likes
14
Share


@Onlygrow99
Follow
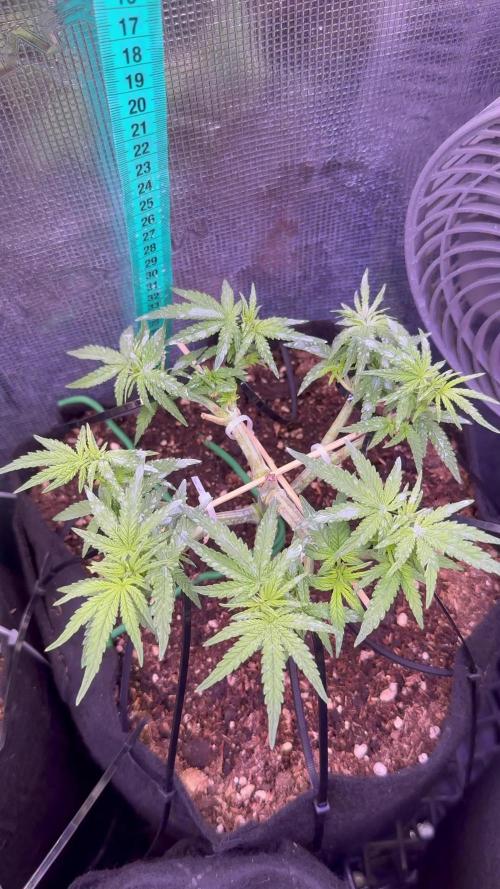
Empezamos 3ª semana de crecimiento, durante esta semana, podare los bajos y algún nudo. Tras unos días de recuperación pasaremos a floración.
Se empezaron a germinar el día 10/10/23 llevamos 27 días desde que se empezó a germinar.
Hoy día están siendo regadas con 1.5 de ec y 6.0 de ph, usando la gama de abonos orgánicos de boom nutrientes y CALMAG. Uso de sustrato el LIGHT MIX de GBNUTRIENTS.
Son frondosas con grandes hojas, nudos muy corto entre si y además están verdes. Se nota que la luminaria hace su trabajo sin calentarse y por eso la tengo cerca de las plantas evitando que se "espiguen"
**Actualización 08/11** he podado bajos de todas las plantas y alguna hoja grande que tapa las formaciones.
En pasar 2-3 días para que se recuperen, pasamos a floración.

Likes
2
Share

@hassehujasse
Follow
Have you ever been exceptional? 24/7/52/365/48??!!
With every new plant in my box bringing something new in my techniques
Likes
13
Share


@VickTurbo
Follow
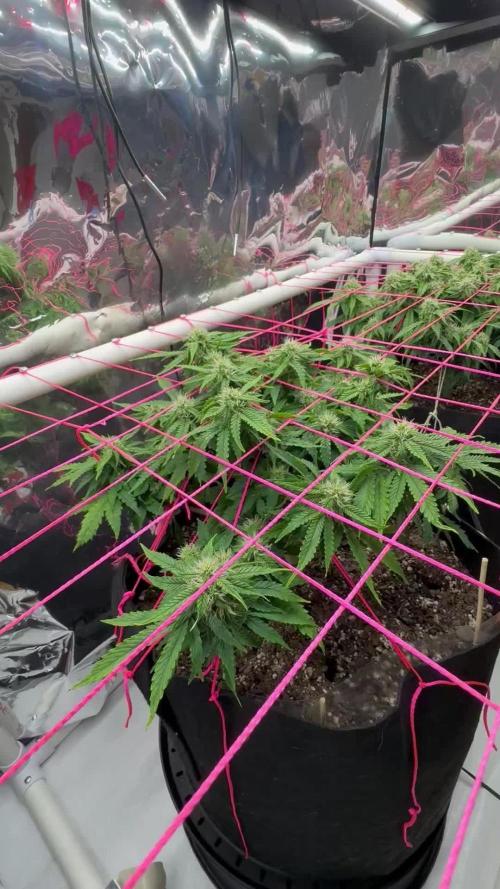
Sixth Week:
- Plants are doing amazing.
- Continuing to tuck under the Scrog
- Noticed some slow growth and debating adding some co2 due to hot weather incoming.
Likes
26
Share

@valiotoro
Follow
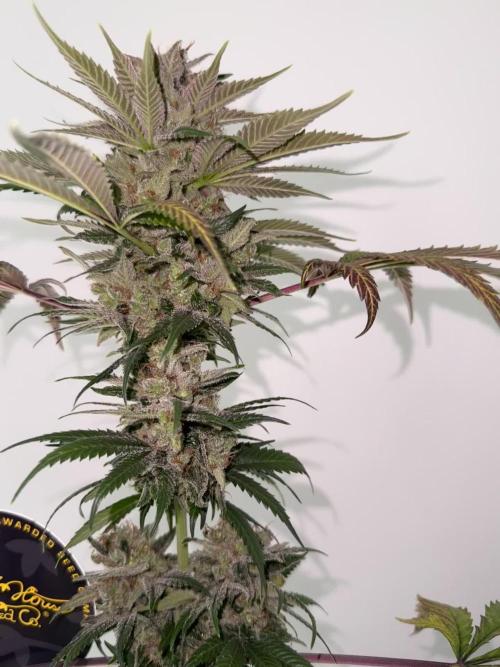
The buds are insanely sticky… even with gloves, the smell lingers on your skin for hours haha!
I trimmed a few “Dexter style” just to show the density, but normally I leave more leaf on.
Those sugar leaves are absolutely coated in trichomes.

Likes
15
Share


@mrbigbong
Follow
the flush started, 2-3 weeks of flush .... a plant is almost mature, but having had two phenotypes that are somewhat different at the genetic level, one or the other will mature slightly more (in view of sativa prevalence) it will be harvested when fully ripe. very sweet and fruity smells, really good and strong ...

Likes
15
Share


@Viccrazyweed
Follow
Intense week
Im trying OG Nutrients
Og bloom, bloom plantastic, bloom booster and PK 52/34
They are fattering buds, up steems are red, probably because of light burning, even being a 50w led light, I don’t know if that will be a bigger issue after or just purple colouring due to indicas strains and winter low temperatures, please share your thoughts
They look healthy as i see, people tell me that there is not enough light, there is too much light, not enough air flow, too much air flow… im just overwhelmed with suggestions, al most everyone says a different thing
As always thank you for reading and im open to every comment and suggestions!!
Likes
6
Share


@MissSolasolita
Follow
End of week 3 of flower
for some reason my phone wont take clear shots, so
decided to provide a video for this week
Everything seems fine, starting to smell them now
All plants looking healthy

Likes
18
Share


@Stonyways
Follow
happy growing!!!
its just been a shit week and I am just trying to make time to see the girls everyday before lights out.
last week of nutrients and then its flush. I didn't go heavy at all on the nutrients, tried to stay organic for the most part using FOX FARMS soli and nutrients.
2/6/2I I try to stay away from chems to beef up the buds and I am relying on the light, bit of CO2 and the organics. problem is, I love my SF2000 so how to get more light out of this LED? do i I add another SF1000 to the mix? should I look to another lighting group to help enhance with another light bar? I don't want to get rid of a perfectly good light, I just want to enhance the buds with more light...,MAYBE if I ask SPIDER FARMER to build a custom light ( and I DID) I could get something to run down the side of the SF2000......fingers crossed
Likes
12
Share


@BrMarijuana
Follow
Planta com ótimo desenvolvimento, não apresentou problemas em nenhuma etapa da sua vida, flores densas, bastante resina , ótimo rendimento, uma das melhores automaticas que tive o prazer de cultivar, sabor doce, lembrando amora.

Likes
74
Share


@Papablob
Follow
22/12 Youpi! demain c'est la récolte😍👍. (Elle est belle, elle est mignonne,🎵 c'est une bien jolie personne..🎵.) Je suis pas mécontent du résultat. 🖖🙏

Likes
16
Share


@Spiritual_Herb
Follow
This new week started better as with some flushes I brought the runoff back to 6.5/7, the plant seems to be growing well
Likes
24
Share


@Kountryboi90
Follow
Missed a couple weeks of progress from this beautiful girl. But, today is day 42 of veg, beginning of week 7. I quickly learned that she loves to be fed! Been feeding the Advanced Nutrients line(Sensi Grow A&B, B52, Nirvana, Bud Candy, and Fish Shit) at half strength. She loves it! She's been topped for a second time and the now 4 main colas are growing fantastically!


Likes
1
Share


@mauigrown
Follow
Week 9 is here and we are looking at harvesting! After checking the trichomes of just the top colas, I decided this week I was going to harvest. I am updating this post after I have dried and harvested the plant so do not have much more details. I flushed the plant this week with Flora Kleen along with terpinator and microbes.
I cut down the plants and hung them up in the tent to dry using a clothes hanger with clips I got off of Amazon. It took 10 days to dry the bud and my temps and humidity would fluctuate throughout the day and night. I stayed in the mid to low 70s for temperature and humidity was at 50% at first. Then I added a humidifier and had it dry in 60% humidity.
Will update the rest in the harvest update.
Likes
5
Share

@BossberryFarms
Follow
They are close to being ready to harvest! Smelling very nicely and looking frosty. I’ll start flushing them soon since they should need only a week or so more to ripen.

Likes
43
Share


@TheBulldozerSicily
Follow
Pensavo di raccogliere questa settimana , ma controllando i tricomi con la lente di ingrandimento possiamo notare che sono ancora trasparenti, quindi non pronti per il
raccolto, aspettiamo la prossima settimana e vediamo dinuovo.
HAPPY GROWING!!!!
Ec 1843 ph 6