
Likes
Comments
Share


@nonick123
Follow
Día 129 (07/10) Riego con 750 / 1.000 ml H2O de osmosis
Empiezan a moderarse las temperaturas con 28 ºC de máxima
Día 130 (08/10) Riego con 500 / 1.000 ml H2O de ósmosis
Las temperaturas están sobre 25 °C
Día 131 (09/10) Riego con 500 / 750 ml H2O de ósmosis
Día 132 (10/10) Riego con 750 / 1,250 ml H2O de ósmosis
Día 133 (11/10) Riego con 750 / 1,250 ml H2O de ósmosis
Día 134 (12/10) Riego con 500 / 1.000 ml H2O de ósmosis
Reviso los tricomas y estos indican que estamos más o menos a una semana de la cosecha! 50% trasparentes / 50% nublados
Día 135 (13/10) Riego con 1 litro H2O pH 6,5 + Kelp Hidrolizado 0,3 g/L
💦Nutrients by Lurpe Solutions - www.lurpenaturalsolutions.com
🌱Substrate PRO-MIX HP BACILLUS + MYCORRHIZAE - www.pthorticulture.com/en/products/pro-mix-hp-biostimulant-plus-mycorrhizae

Processing
Likes
13
Share


@Cheesefarmer420
Follow
Growing this popsicle cake definitely had its ups and downs. What started out looking like a dud of a seed turned out to be something pretty spectacular. Stacks the buds nicely to fill up the whole colas, super frosty, with an un godly stench of sweaty dirty socks. Still in the curing process but definitely has a heavy indica punch!
Processing
Likes
36
Share


@Stevodidge
Follow
Seen some good progress over the last week. Have been tinkering with water cycles. Got it up to 3 x 15min cycles in a 24 hour period, but i think I'm going to go back to two 15min cycles in 24hrs because she seems to wilt a bit in the morning. I'm wondering if the cycle an hour before lights out is too much. I've reset the cycles to 15min an hour after lights on and again 8 hours later for 15 min. I'll see if that improves things. I'm also going to change the reservoir for a fresh batch of water, nutrients and ph balance today or tomorrow. I've also got a sister plant on the go, but she's about a week behind in growth as she germinated later. She's also doing well, but obviously smaller than her big sister.

Likes
25
Share


@m0use
Follow
Noticed these little ones where hurting a bit and needed some more feed. The one week the runoff was quite high but the ec going in was not. guess that has been fixed, after feeding them they started to green up more and look a bit more healthy. went from a 0.6 to a 1.2 ec in feed ppm scale is 500.
the lightly purple tinted plant has the most height out of all three and is on the far right, the darkest purple is the shortest on the far left and the green one is only a bit taller located in the middle.
Other then underfeeding they seem to be doing quite well, will keep and eye on them and monitor for thrips and aphids. little fuckers where spotted on a Ganja farmer plant just a few feet down.
Also uploaded some of the little critters in the garden pollinating my things and eating pests.

Likes
4
Share


@Johncann
Follow
Not sure if these girls are ready for the chop yet?? Still sucking up water quickly 🤷♂️🏻
Likes
8
Share


@fitoplancton
Follow
1x Dutch Kush (main-line)
1x Critical Mass ( main-line)
1x Cream Felanitx (LST)
The other young ones are 4 White Widow seedlings which I might be growing along with just a short 2-3 week veg.
- Fed Cal-Mag for the first time: 1ml/l. along with BioGrow on 05/12/18 (day 38)
- Transplanted Cream Felanitx into 5 gal. pot on 05/12/18 (day 38)
- Defoliated and added support ring to Dutch Kush on 08/12/18 (day 41)
- Defoliated a few leaves from Cream Felanitx to get better light penetration on lower growth on 08/12/18 (day 41)
- White Widows sprout on 03/12/18
I had limited space and began growing my main-lined plants in 3 gallon (11L) pots. Now I upgraded to a 3.2x3.2x6.5' (1x1x2m) tent and I'm wondering if it's safe and worthy yield-wise to transplant these plants into 5 gallon pots without delaying my veg significantly. I'm planning to give them 2 more weeks of 18/6 light schedule before going 12/12. What do you guys think?
New grower here. 🙌

Likes
19
Share

@Kirsten
Follow
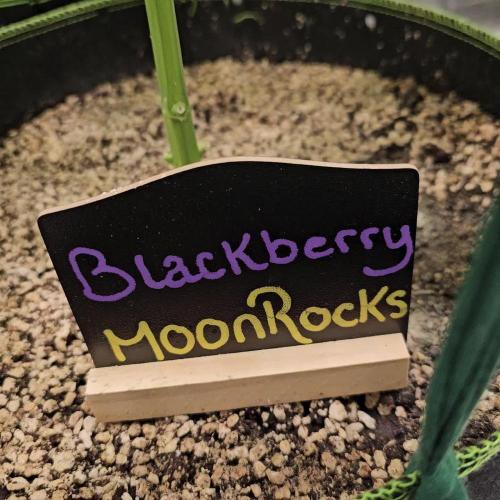
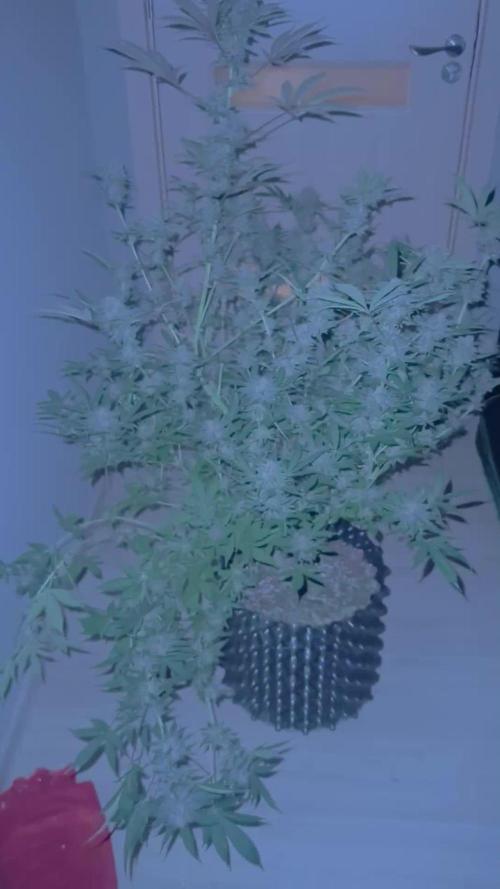
Blackberry Moon Rocks has become very tall and she is starting to flower now. And also stretching quite a lot.
I had previously topped the plant, and one top had grown larger than the other. So, with that one, I decided to use a fabric tie and tie it to the pot, to hopefully try and even things out a little.
There aren't really many branches on this plant.So hopefully that will mean that the colas grow bigger. Heres hoping, anyway!
I have gone through the tent this week, and I have removed a lot of the lower branches on the plants, as they're not going to grow into big colas or anything.
So it's better not to waste the plant's energy, developing those to hopefully redirect it into the larger flowers.
28.7.25:
I watered with 3ltrs of dechlorinated water PH'd to 6.3 with;
💜 2.5ml Ecothrive Trace
💜 1 TSP Ecothrive Biosys
PH: 6.3
PPM: 352
2.8.25:
I watered with 2ltrs of dechlorinated water PH'd to 6.6, containing the following nutrients;
💜 2ml Ecothrive Trace
PH: 6.6
PPM: 425
3.8.25:
Today I top dressed as follows:
🧡 1 Cup Worm Castings
💚 1.25 TBSP Ecothrive Bloom
💚 1.5 TSP Ecothrive Life Cycle
I watered the top dress in with with 2ltrs of dechlorinated water PH'd to 6.4, containing the following nutrients;
💜 1ml Ecothrive Trace
PH: 6.4
PPM: 363
That's all I did this week 😊 Thanks for stopping by and checking out my diary. Good to see you in the comments! 😊💚✌️🌱😁


Likes
6
Share


@EKWCR
Follow
I attempt to do an early SCROG but the plants are already too rigid for that, so i will train the branches and the trunk slowly to soften the tissues.
My objectif is to do a U SCROG.

Likes
26
Share


@pifflestikkz
Follow
Day 29
29/07/24 Monday
Nice feeding today with De-chlorinated tap water pH 6.
Gave her 300 ml and she had a small run off.
Getting chunky in the stem now 💪💚
Day 31
31/07/24 Wednesday
De-chlorinated water pH 6 today with Plagron pk13-14 5ml to 5L
Plagron power buds 5ml to 5L
Used 300ml of the 5L solution.
I will be using these on water days from now on as they are advised to be used every irrigation.
We'll see how they perform 💪💚
Day 32
01/08/24 Thursday
Another feed today using de-chlorinated tap water pH 6, there now taking 300ml every evening.
Day 35
04/08/24 Sunday
END OF WEEK 😁
De-chlorinated tap water pH 6 today with Plagron products. 300ml each.
Had a issue with leaf invaders this week, I have treated and am checking every 48 hrs so far seems ok and not progressive.
All plants look great, very healthy, one of the Overdose is way behind and due to space maybe culled at flower I'll see how she gets on.


Likes
5
Share


@KushAllDayLong
Follow
Alright Growmies!! So this Purple Ice Water is a bag seed I got from an amazing strain i had and was lucky enough to find hidden gem inside one if the beautiful nugs!! I think I have a photo in my Google photos I'll look for a picture of the flower the seed came from!!
Anyway, I was going to enter the 16oz solo cup challenge but I didn't realize time was running out and so i had already planted the seed by then and of course she popped and I grow attached to them when that happens so here we are!! Not to mention, this is my first indoor grow and so I'm not thinking or planning as I should be and so guess what problem I ran into next...well my tent was now in flower so lights were kn 12/12...so 3 days into the new seed I planted, i need more hours of light for her and so you'll see my solution in the photo or video..my lady thought it was hilarious when she walked into the bathroom to get ready in the morning and a baby cannabis plant was handing from the light fixture lmao!! 🤣🤣🤣🤣 this is only temporary fix and she is only hanging up there for a few hours then I place her back into the tent to give her that much needed light!! I could always do the window trick but hey this was too fun!!
1st week is going amazing, as it can go lmao!!
Between day 5 and 6 I added some rain water. It rained for almost 3 days straight here in Arizona so it was nice to be able to capture some rain water for my girls for once! Those days are few and far between unfortunately!!
Likes
3
Share


@Unculti_responsable
Follow
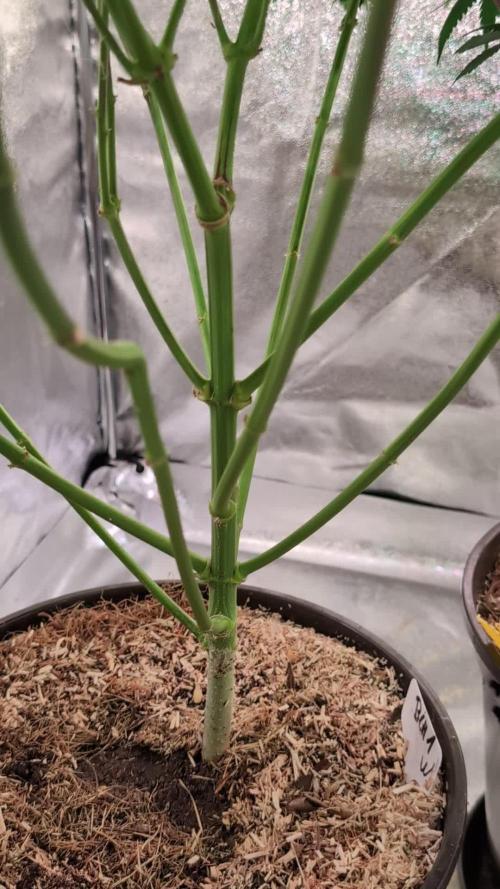
Esta semana hicimos la última poda de bajos y alicales , es una de las últimas podas q hacemos! Después de esto la vamos a pasas a 10 litros y ya la mandamos a florecer creo q esta más q lista para arrancar el proceso de floración

Likes
4
Share

@Ninjabuds
Follow
My new grow pros solutions under canopy lights are really making the colors pop


Likes
41
Share


@bypado_farm
Follow
Day 77:
All plants were cut.
Wet trim and some touches before the cure process.

Likes
Comments
Share

@GoodTimesOrganics
Follow
Allmählich entwickeln sich die Blütenstände aus und es ist schön zu erkennen, das die Interniodenabstände sich während des SCROG nicht groß weiter auseinander gestreckt haben.
Daraus vermute ich dass nun eine Dichte und Breite Budstruktur zum Vorschein kommen wird.
Jetzt geht es darum zu schauen wie sich daß Aroma und eben die Blütenbildung weiterentwickelt.
Heute befindet sich die Blue Cream Haze bei Blütetag 18.
Likes
7
Share


@TiRobotProds
Follow
Irrigation uniquement à l'eau. Souche hyper sensibles au température élevée c'est une hermaphrodite pour ma part. Pas de panique récolte tous les petits sacs a pollen pour croiser les variétés entre elles.

Likes
29
Share


@Prilyfe13
Follow
May 17, 2024 Day 92
We are at the end. Tropicana Cookies is in the dry tent having a nice 48 hours of dark. Tropicana C is now in the back of the tent with the 4 Sour Diesels up front. Yes I Tetrised the shit out of it to get them in. But everything is snug.
Tropicana Cookies is officially done with the main tent and is now in the dry tent for dark. I defoliated her up yesterday and only left the sugar leaves on. No sense in keeping the fan leaves on the plant if it's going to be pitch black for 2 days. Plus it's much easier to manage. And will be much easier at trimming time. She is also nearly dried out. Just perfect timing for this part. I just hope I'm not too early. Trichomes are almost all cloudy and there's a good 10% amber. A couple more days and in the dark should help them mature right along.
Tropicana C is still a hot floppy mess, but the tops have some potential. I think the majority of this plant will end up being pressed for concentrate. I wish I had a bubble washer. Oh well. Pressing flower is the option then.
Anyway, she isn't quite fading still, so I'm hoping for that over the next couple of days. If not, then I'll defoliate and put her in the dark for a couple days as well. Her buds are all purple and that's what matters.
She has about 5% amber trichomes and maybe 10% clear. Not enough cloudy for my taste. 4 more days? Maybe. 2 in the main tent and 2 more in the dark tent. I'm still trying to free up space for the Sour Diesels.
The light doesn't matter really anymore. She isn't growing at all and her buds are probably as big as they are getting. It's just a matter of ripening now. Don't really need a lot of light for that part. But still, I'm leaving the light as it is. Especially now that the Sour Diesels are in there.
The environment pisses me off. How the holy hell can I change the temp by 5 degrees and have no impact whatsoever on the humidity? Seriously. The temp is climbing a bit. I have to keep an eye on it as it's going above 78° and I don't want to melt my trichomes. Back down to 74° with the stupid humidity stuck at 62%. Annoying.
Grow System Environment:
Temp: 76.4°
RH: 61.4%
VPD: 1.17 kPa
Quick update: I had to increase the light power to accommodate the Sour Diesels now in the tent. They needed 200 to 25 mol/m²/d, so the light power as increased to 80%. The DLI only increased a couple points. No at 38 mol/m²/d. Everything looks fine.
May 18, 2024
Nothing going on today.
Tropicana Cookies is finishing up day 1 of dark. The humidity is a nightmare in the tent. It keeps climbing over 66%. I've tried everything at my disposal. Leave the tent door open, dehumidifier in the bedroom, dehumidifier in the tent? I don't think I tried that yet. I have 2 dehumidifiers in the main tent trying to keep the humidity down in there to no avail. I'm not bothering with trichomes today. I'll check trichomes tomorrow afternoon when she finishes up day 2 of dark. I may have to keep her in for a 3rd day. We shall see.
Tropicana C needs to get out of the tent ASAP. Her floppy tops are flopping right over the sour Diesels, which are growing vigorously. 2 of them grew 2" last night alone. They need the room now. Tropicana C just isn't ready for the dark tent yet. Maybe a few more days? She's just starting to show signs of fading now. I'll check trichomes tomorrow as well.
The lighting is of no concern. It's making the tent too hot, but it doesn't seem to be doing anything to Tropicana C. Tropicana Cookies doesn't have light. Lol.
The environment is a nightmare. Humidity is WAY too high. And now the temp is too high. No matter what I do, I can't control it at all. The temp is 77° and the humidity is still ridiculous at 66%.
Grow System Environment:
Temp: 75.4°
RH: 64.2%
1.05 kPa
Update: so I was researching other issues high humidity can cause. It slows down production and the plant won't drink because there is too much moisture in the air. It makes total sense. All of the flowering plants are taking forever to finish up. Now I think I know why.
Also, I added 1/2 gallon of plain water to Tropicana C reservoir. As she isn't quite done yet, I would rather her have a source of water if she needs or wants it.
I added one of the dehumidifiers to the dark tent with Tropicana Cookies. Now the humidity is around 51% with the temp hanging out around 76° to 77°. It spiked into 79° earlier, but I was messing with the heat in my room.
May 19, 2024
Busy day today. No watering or anything, but a very busy day.
Tropicana Cookies was wet trimmed and chopped down today. It took 94 days total from seed to harvest. After wet trimming, her total wet weight was 14 oz. A bit surprising to me. I was honestly thinking closer to like 9 oz, but I'll take it. Trimming took roughly 4 hours. I'm not sure why, but it did. I'm slow I guess.
There was no sense in trying to keep the trimmings for this round. There really wasn't much and I need a bigger table to catch it all. Messy. I've also discovered that the majority of the buds are a bit loose. Mostly the lowers and some of the middles, but the tops are mostly good.
I think based on my own mistakes, I'll be using the majority of this plant for concentrate. Maybe the whole plant. We will see. It all depends on how it dries and what the end result is. Both plants were not very happy with my nutrient regimen. Oh well. A lesson well learned.
Tropicana C is still floppy as ever, but now instead of a near black purple, she's almost like magenta or something. Dark pink? Lol. Something like that. She's starting to fade now and most of her tops are all colored. I'm just waiting for the fan leaves to catch up. I'll keep her in the tent for as long as I can. Maybe 3 more days? Maybe.
Her buds are definitely loose in the bottoms. The mids and tops are pretty nice. We'll see how they look after wet trimming.
The dry tent is hanging out at 70° and 61% humidity. I'd love it to go down to 65°, but for some reason it won't. I'll get it right in no time.
Grow System Environment:
Temp: 72.5°
RH: 68.3%
VPD: 0.84 kPa
May 20, 2024
We have fade! Tropicana C is finally starting to fade. Light green leaves coming in with purple hues. The buds are basically pink, it I expect them to get darker as she moves along.
Tropicana Cookies Day 1 Drying.
She looks good. Not much to report. She's drying. It could take between 5 and 7 days. Due to her smaller buds and the wet trim I did, I don't expect her to take very long to dry. And it seems that the environment is pretty nice. 61% humidity and 68°. The temperature could be lower though.
Tropicana C looks good. Still super floppy, but she has pretty buds. Not very tight buds. I'll do the same wet trim as well. She should end up drying after about 5 days. For now, she's drying her soil out and fading at the same time. I might give her another half gallon just to tie her over until harvest. I also plan on defoliation in the next few days after the fade is well underway.
The light is the same. No changes there.
The environment is still wonky. The temp is at 74° which I finally got control of again. The humidity on the other hand is still super high at 65%. I really don't understand. It was 40% humidity out yesterday and even with the outside door wide open, the humidity did nothing to drop. Nothing at all. It's weird.
It's back to being humid today, so no opening the door. Hopefully I can get it to clear up ASAP.
Oh, I did just learn that the central air isn't working either. And that is the main source of cool dry air. With none, I'm stuck using a portable AC that just blows wet air back into the room when the condenser is off. Stupid design. Very stupid. Even the dehumidifier function doesn't work right. It does the same thing except with heat. So my room gets too warm but the humidity stays the same.
Grow System Environment:
Temp: 72.6°
RH: 67.7%
VPD: 0.86 kPa
May 21, 2024
Day 2 of drying for Tropicana Cookies. The whole plant shrunk to half its size. Small tight buds. As I said before, the majority of this plant will most likely be pressed. We shall see.
Tropicana C is showing way more fade now. Like twice as much as yesterday. It's coming on fast and hopefully that means she's finishing up fast.
I checked her trichomes today. Looking good. She definitely needs way more amber though. But has much less clear. So it's mostly cloudy, but definitely nowhere near enough amber.
What's funny is how floppy she is. One would think those buds wouldn't develop properly, but they are swelling and getting more purple just like the rest of the plant. Interesting. I still don't know what happened here, but I'm guessing it has all to do with the nutrients this run. Bad timing.
This plant may also be mostly pressed. Her buds aren't as dense as Tropicana Cookies and they are definitely not tight. Unless by some miracle, they blow up and fill in over the next few days. We shall see.
The environment is finally leveling out now that the central air is on. Finally. It won't drop the humidity all the way to the low 40s%, but it will drop it below 55%. And that's keeps the tent below 60% and put of the danger zone for mold. However, I know it's still too high for the plant to perform at max potential, but it's the best I can do for now. Once it kicks on again, the humidity will hopefully drop to 50%, then maybe my dehumidifiers will start working as they are meant to.
Grow System Environment:
Temp: 72.7°
RH: 62.9%
VPD: 1.00 kPa
May 22, 2024
Tropicana Cookies day 3 of drying. I haven't weighed her up yet to see how far along she is. I'm really not expecting her to take very long at all. Her buds are small so she should be done in a couple more days.
Tropicana C is fading quite quickly. Looking really close to finishing up. However, the Sour Diesels in the tent are already in pre-flower and are starting to stretch. The need space ASAP. So I think I'll harvest her whole tomorrow she's not very leafy and I don't think she will get mold at all. She still has super loose buds so she will dry up within 5 to 7 days I think. Even at 60% RH, I think.
On the other hand, she was way too dry, so I added a half gallon to the reservoir. I was planning on harvesting in a couple days, but I don't think I have that much time anymore.
Originally I was going to wet trim Tropicana C just like Tropicana Cookies, but her branches are way too weak and floppy to trim without snapping branch after branch. So as I said earlier, I'll be dry trimming her instead.
The environment is back to being wonky. The central air hasn't turned on yet today and it's 85° out. So my room is suffering a bit with my crappy portable AC. It blows wet air when the compressor turns off. So the humidity is back up above 60%. The temp is fine at 75°, so I'm opening the tent periodically until the AC turns on.
I also added a new trichome video for Tropicana C. Getting really close. Let me know how close I am? Or does it not really matter at this point?
Update: I decided to completely defoliate Tropicana C. I don't know I will do. Full wet trim. The buds are small and so are the branches. So there shouldn't be any issues with the higher humidity. I'll be doing it in sessions as not to stink up the whole house. But basically anything with a stem I can access is getting cut off. Who knows, maybe I'll finish defoliating fst than I think and will wet trim anyway. She is definitely getting harvested tomorrow. I'm completely out of space for the Sour Diesels.
Grow System Environment:
Temp: 75.7°
RH: 59.4%
VPD: 1.20 kPa
May 23, 2024
Tropicana Cookies Day 4 Drying. I have a moisture meter for the stems and will be using that tomorrow to see how far along she is. Still a couple more days I think.
It might be Harvest Day for Tropicana C! Honestly, I would have liked a little more time, but I have other plants that need the space.
So I'm wet trimming her today and will harvest later tonight or maybe tomorrow. We shall see. Either way, she is done even if she's not.
I'll take one last Trichome Video after I'm done trimming. Then I can see if she's actually ready or not. Maybe she is. I don't think so though.
Not much else for today. Unless I harvest, then I'll update.
Grow System Environment:
Temp: 76.2°
RH: 60.6%
VPD: 1.18 kPa
Likes
2
Share


@Lifesgarden420
Follow
Did not have much success with the first run but hopefully this one will be great especially inside of the groot