Likes
Comments
Share
@Random80
Follow
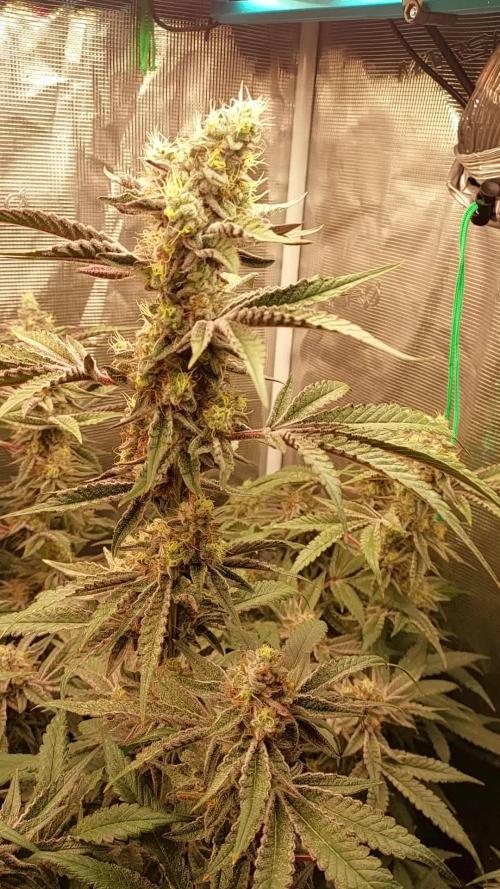
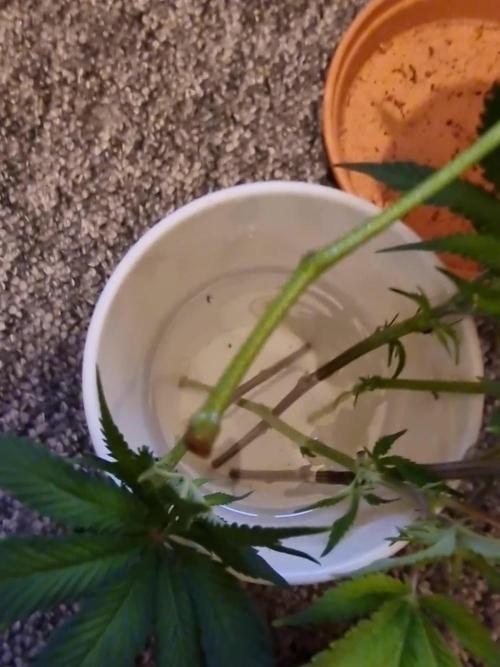
I applied too much pressure and main cola broke during final LST. I would call it super cropping if she wasn't in flowering faze already. She will recover but I doubt she will manage to reach full potential. Sprayed with boom boom spray. 20 ml orgatrex per plant and 10ml BIO P-K. Connected on auto-pot as I am gone for a week. Sun-Light EVO 80 grow light increased on 100% (Out of 4 levels I was increasing power every 2 weeks app). Light eight increased to 50 cm.
Processing
Likes
5
Share
@Ensign420
Follow
Week 02 Introduction This week has been a bit of a struggle. Had my first experience dealing with slime and brown algae. But I think adding enzymes and increasing the beneficial bacteria helped to fix the issue. Also experienced nutrient burn for the first time. My nutrient solution strength got as high as 671 PPMs. So backed it down to about 430 PPMs during the end-of-week reservoir change. Also cut Hydroguard (expired?), CaliMagic, and Superthrive from this grow. Now she's still stunted, but is starting to recover. Hopefully... [START OF WEEK 02] Day 01 - Monday - 08/10/20 - Total Days: 008 ----------------------------------- - [0830]: Still looks a bit yellow. But getting larger! --- Solution strength was at 248 PPMs. --- Just topped off with a bit of distilled water --- PH went up to 6.1 so PH'd down to 5.8 --- Ran the top feed for a bit to wet the hydroton. - [2130]: She's looking even more yellow now. --- Even the new leaves are really yellow. --- Decided to add more base nutes. --- Added 4ml of Sensi A --- Added 4ml of Sensi B --- Now at about --- Solution Strength went up to 304 PPM. --- PH was at 6, --- Also raised the water level a bit more. --- I really hope it's a nutrient deficiency and not an over-watering issue. --- Please live! Day 02 - Tuesday - 08/11/20 - Total Days: 009 ----------------------------------- - [0830]: Looking less droopy. But still yellow. --- Decided to do a reservoir change. --- 4.5gal of distilled water --- 8ml of Sensi Grow A --- 8ml of Sensi Grow B --- 8ml of Voodoo Juice --- 4ml of B-52 --- 4ml of CaliMagic --- 4ml of Hydroguard --- 4 drops of Superthrive --- PH'd down to 5.8 --- Solution strength: 302 PPM --- Since I didn't want to risk over-watering the rockwool, I did not to do a top feed, may do one tonight after the sleep cycle (lights are still set to go off at 10am and back on at 4pm). --- As I was doing a reservoir change, I noticed that the tubes and bucket were a bit slimy. Didn't really stink or anything. Is this normal? Maybe due to the Hydroguard and Voodoo Juice? --- I hope she gets better soon! - [2215]: Getting larger! But still yellow. --- Also can see a root growing through the net pot! Tiny little thing but it's there! Will have to start dropping water once more appear. --- After looking over a few DWC diaries using AN nutes, seems like my solution strength is still too low. Most around this stage average around 500 PPMs with about 4ml per gallon. --- Top fed for a minute to wet the top of the hydroton. --- Solution strength went down to 263 PPM. --- Added 8ml more of Sensi A --- Added 8ml more of Sensi B --- Now base nutes are at 16ml for 4.5 gal of water. --- PPMs went up to 411. --- Still lower than 500 PPMs, but that's okay. --- PH was at 6. Not sure if I should adjust PH using AN nutes. So going to not ajdust unless PH goes above 6.1. Day 03 - Wednesday - 08/12/20 - Total Days: 010 ----------------------------------- - [0830]: Looks like more root growth! --- She still looks yellow. But leaves are perky. --- PH was at 6.2 so lowered down to 5.8. --- Solution strength was at 394 PPMs --- Since roots are still growing, I decide to lower the water level a bit. Now water level is a bit below the net pot. - [2200]: Root is getting longer! --- Slime is returning. Not sure why. --- Solution strength: 357 PPMs --- PH: 6.1 --- Decided to add an enzyme along with more beneficial bacteria to hopefully cure the slime. --- Added 16ml of Sensizym --- Added 5ml of Hydroguard --- Added 8ml of Voodoo Juice --- New solution strength: 430 PPMs --- New PH: 6.1 --- Top fed for a minute. --- This slimy residue is really freaking me out! I hope the added enzymes will help eliminate the slime. --- Going to do a full reservoir sterilization/nutrient change over the weekend. Please survive until then girl! Day 04 - Thursday - 08/13/20 - Total Days: 011 ----------------------------------- - [0930]: I think the enzymes worked! There is little to no slime now! --- Although I think the root was also dissolved in the process. It's now just a little stub sticking just below the net pot. The enzyme is also suppose to dissolved dead roots too but guess that root was too weak? Not sure what happened there. But I think the slime is cured! --- Solution strength went down to 395 PPMs. Decided to add more base nutrients. --- Added 8ml of Sensi A --- Added 8ml of Sensi B --- Added 4ml of B-52 --- Solution strength went up to 598 PPMs. --- PH was at 6.1 --- As long as the PH is between 5.5 and 6.3, I'm not going to use PH Up or Down. But still will monitor PH levels. - [1715]: Checked up on her after her nap and shes looking alive but stunted. But no slime! --- Decided to add some sugars to help maintain the enzymes and beneficial bacteria. --- Solution strength was at 587 PPMs. --- PH was at 6.2 --- Added 8ml of Bud Candy --- Solution strength went up to 671 PPMs. --- PH also went up to 6.3 --- Lowered water level a bit to hopefully promote more root growth. --- Top fed for a minute. --- She is getting bigger, but still looks yellow. Day 05 - Friday - 08/14/20 - Total Days: 012 ----------------------------------- - [0915]: Leaves look a little burnt on the tips. Still no slime. --- Going to back off on the PPMs to hopefully fix the nutrient toxicity. --- Solution strength was at 632 PPMs --- PH was at 6.3 --- Added/Removed water until PPMs were at 536. --- PH was still at 6.3 --- Raised water up a bit, then top fed for a minute. - [2200]: Looking better. Still yellow though. --- Solution strength: 514 PPMs --- PH: 6.5 --- Added PH down. --- New solution strength: 518 PPMs --- New PH: 5.2 --- PH was kind of high. So decided to PH down. Had to use quite a bit to bring it down. But eventually got it to drop down to 5.3. A little low, but so far, the PH has always gone up so wanted to start it really low. --- Ran the top feed for a minute to re-saturate the top of the hydroton. Day 06 - Saturday - 08/15/20 - Total Days: 013 ----------------------------------- - [0830]: She looks stunted. leaves are still yellow. --- Solution strength: 514 PPMs --- PH: 5.6 --- Top fed for a minute. --- Not sure what to do at this point. Going to do another reservoir change soon. Hoping she lives until then. - [2145]: Looking pretty much the same. --- A bit of slime has returned. Since I've been diluting the nutrient solution, the enzyme ratio has dropped. So I guess this is expected. --- Also noticed that slime build up was on the air-stones. Never really checked the stones so not sure how long that has been there. Looks brown too, which can't be good. --- Going to do an H202 sterilization of the system (minus the net pot) tomorrow so did not add anything. --- Lowered the water level to below the net pot. --- Then top fed for a minute. Day 07 - Sunday - 08/16/20 - Total Days: 014 ----------------------------------- - [0900]: STERILIZATION DAY! --- Decided to skip today's night cycle for a deep clean. --- I'm hoping that skipping a night cycle won't be too stressful. --- Temporarily moved her to a new bucket. --- Used about a half of gallon of straight distilled water to flush out the net pot. --- Drained the system and wiped up all the brown sludge. Also removed the air stones and cleaned up all the goo. --- Filled the system with 2 gallons of distilled water and at least 30ml of food grade hydrogen peroxide (35% strength). --- Yea its a lot, but since I'm not going to sterilize the system overnight, I went with a really high doseage. Basically I kept adding until I started to see little bubbles start to form. --- Then I ran the water pump. - [0915]: Boiled the air stones in tap water for about 10 min. Then reconnected them to the airlines. --- I let the air stones and hose soak in the sterilization solution for about 5 minutes so the peroxide can absorb into the stones. Then ran the air stone to help mix and agitate the solution. --- Occasionally, I'd repeat the process of turning the air pump off for a few minutes to let the stones soak. - [1000]: Covered the top two row of holes of the net pot with some aluminum tape. Hopefully this solves the light leaking in through the hydroton. - [1200]: Used an old toothbrush and scrubbed the pump clean. Then drained the system. --- Refilled with more distilled water and peroxide. Again added a lot. --- Ran system again to sterilize even more. - [1530]: Drained the system and refilled with distilled water to rinse. --- Ran the system for a few minutes, then drained and rinsed again. --- Did this a few more times over about an hour. - [1630]: Added 4 gallons of fresh distilled water. --- Added 15ml Sensi Grow A --- Added 15ml Sensi Grow B --- Added 12ml of B-52 --- Added 16ml of Voodoo Juice --- Added 16ml Sensizym --- Solution strength was at 430 PPMs --- PH was at 5.6 --- I was going to add Hydroguard, but I think the bottle is expired. Since 2017 or 2018!? I think Hydroguard is good for up to 2 years from the date on the bottle or 6 months after opening. So not going to use from now on. I wonder if this could have contributed to the slime build up. --- Also removed the CaliMagic and Superthrive too. Going to only use AN products to eliminate the chance of incompatible nutrients. --- Placed her back in the bucket and top fed for a minute. --- Here's hoping for the best. Going to let it ride until morning! Please feel better! [END OF WEEK 02]
Likes
6
Share
i harvested the top part of my grapefruit plant as i checked the trychones and they were 20% amber the lower half had mostly cloudy but no amber ro im going to give it a last feed then flush in about 5 days for 7 days should bd ok then .. Ive raised thr grapefruit off the ground to stop fluids mixing between them as one gonna have a few more feeds where the other is on flush My other plant the bushy banana blaze is foing ok had a good 2-3 weeks i rekkon till i even think about harvest
Likes
18
Share
Week 10! First week of flower! I was eager and may have jumped the plan I had the other day of waiting another week but after some sound advice from a few people that inspired me to flip them to flower and watch them flourish!! Day 1..fed fox farm trio with some added aloe vera, very little..won't add anymore from here on out..I added some peroxide as well!! I opened the tent this evening and they were praying up to the mary Jane gods!! Just what their daddy wants to see!! Let's get this smoke to the heavens for the loved ones!! Aye!!! Thanks again to everyone who inspires me and has helped me along the way! Oh and I ordered a trellis net so it should be set up in the coming days!! I was going to enter the solo cup challenge with the mini Starbucks cup you see but I didn't realize time was ticking and i may end up throwing her away unfortunately as I dont have a tent to put her in with a light set at the right hours or whatever!! She wouldn't survive on 12 12 or would she? Day 2 of flower - I opened the tent this morning and the girls are reaching for the sky even more! I forgot to mention I made some fresh Aloe Vera tea/juice for the last feeding I did before flipping to flower..next run I'm going to try not using aloe vera on one of my plants to see the differences..I feel the aloe vera has helped my girls alot but I'm not too sure!! I made a video on youtube about how I made it!! If you have some time and are interested in making your own... Day 3..I opened the tent and BAM!! These girls know how to make you feel good!! https://youtu.be/ud9Yi-F5HSQ ( one of my high school friends band is called Katastro, Andy Chaves..lead singer, passed away in a tragic car accident this past year and it's been really tough on everyone!! R.I.P Brobro! The link above is a song I listen to, it's helps me through on tough days and sometimes it helps me shed a much needed tear!! I'm here for anyone that is struggling..have a good day!! Day 4 of flower..Half way through the day I made the video above titled day 4 of flower..they are all looking happy but the Watermelon Zkittelz is really taking off!! If you have any advice please send it my way!! Day 5 of flower in the books. Plants look healthy, few minor adjustments next watering for one of the girls..but for the watermelon Zkittelz she's taking off like crazy!! Also I'm doing a SPIDAR FARMER SF1000 NEW YEARS GIVEAWAY (PURCHASED BY ME ) ON MY NEW YOUTUBE CHANNEL. IF YOU ARE INTERESTED COME CHECK IT OUT AND GIVE ME A LIKE COMMENT AND SUBSCRIBE TO ENTER THE GIVEAWAY!! I FIGURED WHEN I UPGRADE MY LIGHT SET UP WHY NOT GIVE ONE AWAY TO ONE LUCKY WINNER!! FOLLOW THIS LINK BELOW TO ENTER: https://youtu.be/pqEeoWQjCAM End of Day 6 of flower - the girls are filling out and stretching high!!! Let's go!!! THANK YOU!! CHEERS!! One love!!
Likes
9
Share
Las dos primeras fotos son empezando la semana dos y la siguiente acabándola, una pasada el tirón que han pegado , va todo viento en popa y vamos a llenar esta carpa de 1,2 con 16 macetas de 5,5litros. hay dejo un videito :)
Likes
12
Share
@valiotoro
Follow
Hello everyone 😎 Day 30 she grew fast with a great structure and with a beautiful green colour on the leaves. She is responding superbly to topping and Ist aswell growing like nothing has been done to her! Have a great day 👨‍🌾🏻
Likes
10
Share
@Gokou4OG
Follow
These girls are on fire , super dense heavy nugs . Smells incredible and can’t wait . Harvest is expected before the end of the month . Btw this is actually my first grow … I’ve been studying a lot and have certs from thc university.
Likes
4
Share
I've been defoliating slowly trying to keep them small due to a house inspection coming up. Once that's out the way I'll put them in bigger pots then switch to flower. They all outgrew the mutated start and are looking good.
Likes
6
Share
Que pasa familia, vamos con la quinta semana de floración de estas Papaya sherbet feminizadas de fastbuds. Vamos al lío, de las 3 plantas, me quede con 2 por espacio, siempre pongo alguna semilla de más por si no abriese alguna por no perder ese hueco del indoor. También se trasplantaron a su maceta definitiva, en este caso de 7 litros, que el mismo trasplante provocó un shock, que también fue solucionado inmediatamente. El ph se controla en 6.2 , la temperatura la tenemos entre 20/22 grados y la humedad ronda el 50%. Las flores empezaron a formarse y progresan a buen ritmo. Hasta aquí todo, Buenos humos 💨💨💨
Likes
5
Share
@BombBuds
Follow
Die Milben haben wieder gute Arbeit geleistet. Alles schaut wieder gut aus! Werde sie jetzt so lang der Stretch noch geht mit Draht und Netz auf einer Höhe halten und ausbreiten. Anfang nächste Woche mache ich ne Defoliation und evt bissl lollipopping. Und lichtintensität geht nächste Woche auch auf 100%
Likes
Comments
Share
This week I tried out amino boost to see how it would affect the size and density of the buds. I am quite impressed by the turnaround time of efficiency...Just 2 days after the feed, the buds looking alot more frosty 😀..Getting thick too..
Likes
25
Share
Stretch 10 centimètres Jour52 légère defolliation et arrosage avec deux litres d'eau ph6.3 Petit rappel sur le meilleur cycle de lumière pour les autofloraisons QUEL EST LE PLANNING LUMINEUX OPTIMAL ? Le cannabis à autofloraison peut survivre avec à peine 5 heures de lumière du soleil par jour. Mais si vous voulez que vos plants s’épanouissent, atteignent le pic de leur puissance et produisent une lourde récolte, ils ont besoin d’au moins 18 heures de lumière par jour. Le planning optimal de lumière pour la culture en intérieur du cannabis à autofloraison est un 20-4 constant pendant tout le cycle de vie. Bien entendu, des plannings de 18-6, 20-2 et 24 heures non-stop ont tous leurs avantages, mais nous avons obtenu les meilleurs résultats avec le planning 20-4. Les cultivateurs en extérieur peuvent potentiellement lancer la culture dès le printemps. Cependant, nous recommandons toujours de faire germer les graines et de cultiver les jeunes pousses en intérieur sous des lampes artificielles pendant une semaine ou deux pour obtenir les meilleurs résultats. Nous parlerons des options en extérieur plus en détail un peu plus bas. LE CYCLE DE VIE DU CANNABIS À AUTOFLORAISON La plus grande différence entre le cannabis à photopériode et à autofloraison est que l’horloge tourne pour une auto dès le moment où la coque de la graine s’ouvre. Le cycle de vie post-germination de la grande majorité des variétés à autofloraison modernes est de 8-12 semaines au total. Au contraire des variétés à photopériode, les autos n’ont pas besoin du planning lumineux courant 12-12 pour faire la transition vers la floraison. Une variété à autofloraison progressera dans son cycle de vie indifféremment du cycle jour-nuit. CROISSANCE VÉGÉTATIVE ACCÉLÉRÉE Il est presque impossible de délimiter la phase de la jeune pousse de la croissance végétale avec les variétés à autofloraison de nos jours. De plus, en 30 jours, la plupart exploseront soudainement en phase de floraison. Donner aux autos un bon départ, solide et sain est un facteur critique pour une culture réussie. Beaucoup de choses peuvent se passer pendant une semaine avec un hybride à autofloraison vigoureux en culture. Il n’y a pas non plus beaucoup de temps pour la transplantation. Nous recommandons d’utiliser notre kit de germination ou de planter directement dans les premiers et derniers récipients dès le début. Des pots/récipients en plastique de 10-20 L avec de nombreux trous de drainage au fond sont parfaits. Les Air-Pots sont encore mieux. Beaucoup de cultivateur découvrent à leurs dépens que les petits pots ne sont pas durables pour les hybrides autos modernes plus grands. Préparez-vous à devoir ajuster quotidiennement votre lampe de culture pour éviter de brûler le feuillage. De plus, tout comme les variétés à photopériode, les conditions environnementales optimales pour les jeunes plants à autofloraison sont des températures entre 20 et 25 °C et une HR dans une fourchette de 50-70 %. En outre, les besoins en nutriments seront considérablement plus faibles que les variétés à photopériode. Il n’y a donc aucune bonne raison de ne pas cultiver bio. Généralement, les autos préfèrent avoir un milieu de culture légèrement fertilisé et bien aéré. Les terreaux légers et/ou le coco sont des substrats fortement recommandés. La plupart des cultivateurs préfèrent des lampes CFL blanc chaud, LED et MH pour la courte période végétative. Cependant, les lampes HPS à double spectre sont tout aussi efficaces et probablement plus pratiques à utiliser. FLORAISON RAPIDE ET FÉROCE Dès que vous pouvez voir les pistils pousser à partir des premières fleurs, vous pouvez vous dire qu’en 45-60 jours, les plants finiront le cycle de floraison et seront prêts à la récolte. Que vous soyez prêt ou non. Mais vous serez prêt, car vous aurez fait les ajustements nécessaires en temps et en heure. Les apports en engrais de croissance végétative à un dosage faible à moyen seront remplacés par des nutriments pour la floraison et des doses appropriés de compléments et boosters de floraison. Une fois de plus, un régime alimentaire spartiate est recommandé. Pas besoin de changer le planning des lampes, car vous allez suivre votre planning originel jusqu’à la récolte. Mais il faudra vous assurer que les températures ne dépassent pas les 28 °C et vous devez réduire votre HR vers une fourchette plus basse de 40-60 %. Les plants vont s’étirer à des degrés divers. Quoi qu’il en soit, vous devez faire attention et toujours maintenir une distance optimale entre la lampe et la canopée. Un ensemble de cordages ou de crochets réglables rendront la tâche bien plus aisée. Ne vous imaginez pas que toutes les autos développeront une structure courte de buisson, à moins que le sélectionneur ne donne des données qui le suggèrent. Naturellement, les deux dernières semaines de floraison devraient être réservées à un rinçage en profondeur du milieu. De l’eau pure, ou une solution de rinçage légère fonctionneront très bien. Quand la majorité des poils ou pistils sur les fleurs auront changé du blanc à l’orange/rouge, vous devriez passer au rinçage. Ne sautez pas cette étape finale critique. Vous méritez les fleurs les plus savoureuses, sans contamination. COMMENT LES AUTOS RÉPONDRONT AUX TECHNIQUES DE TAILLE ET DE PALISSAGE ? La réponse courte : très bien ! La plupart des variétés à autofloraison de nouvelle génération répondront très positivement au LST. Et tant que vous taillez tôt, l’étêtage et le fimming peuvent multiplier les tiges de têtes et en plus booster les rendements. De plus, la méthode ScrOG peut être combinée avec toutes ces techniques pour un rendement maximum. Cependant, la culture à grand volume utilisant la méthode SOG est probablement le style de culture le plus populaire à présent. Un nombre croissant de cultivateurs d’autos expérimentent avec les mêmes pratiques courantes de taille et de palissage à haut rendement que les cultivateurs de cannabis à photopériode utilisent. Les cultivateurs débutants ne devraient probablement pas se lancer dans une taille ou un palissage intensif ou excessif avant d’avoir de l’expérience. Cependant, plier un peu les pointes de croissance pour créer une canopée plus plate ne peut pas nuire aux rendements. De même, une défoliation minimale pour augmenter la pénétration lumineuse ne stressera probablement pas des plants en bonne santé, tant que vous vous limitez à l’élimination des grosses feuilles nourricières qui font de l’ombre aux sites de floraison. May the force be with you 💪
Likes
6
Share
@TheRexxx
Follow
Die Mädels haben offiziell die Ein-Meter-Marke geknackt. Die Papayton führt das Feld mit stolzen 104 cm an. Trotz des massiven Lollipoppings an Tag 14 ist der Vorwärtsdrang ungebrochen. Die Blütenansätze (Puschel) werden von Tag zu Tag dichter und definierter. Heute Morgen wurde die Intensität auf 319 Watt hochgefahren. Das Ziel ist es, die Photonen-Dichte passend zur Hauptblüte zu maximieren. Der Luftentfeuchter ist auf 55 % RLF scharfgeschaltet, um Feuchtigkeitsspitzen in der Nacht abzufangen. Aktuell sind die Lampen am Anschlag. Als taktischen „Joker“ habe ich noch die Bodenisolation im Zelt, die mir bei Bedarf weitere 3–4 cm Puffer liefert, sobald es oben zu eng wird. Die gestrige Mischung war das erste Mal „Full House“ inklusive dem Turbo-Booster: Green Sensation: Premiere an BT 17, um die Blütenmasse und den Stoffwechsel zu pushen Sugar Royal & Power Buds: Für maximale Harzproduktion und zur finalen Stretch-Kontrolle CalMag (10ml/5L): Als Schutzschild gegen die 319 Watt LED-Power Nematoden-Einsatz gestern Abend erfolgreich zur Prophylaxe gegen Trauermücken ausgebracht. Die Vitalität ist brutal die Blätter stehen steil zum Licht („Praying Plants“). Die Kombination aus hoher Wattzahl und dem Green Sensation scheint voll einzuschlagen. Die nächsten Tage wird der Fokus auf dem Lampenabstand zur Papayton liegen. Sobald der Abstand kritisch wird, fliegt die Bodenisolation raus.
Likes
214
Share
@Hologram
Follow
Finally the final chapter of the Big cheese twins chronicles!! Those twins were not identical at all and they had diff. pots too I will show you the diff: 5lPot: 151.98G wet harvest 28.42G cuttings and buds for oil. She was not that big (50 cm) but her buds were fat as fu*k! did not have big colas with flower but all the buds were fat, shiny and full with trich.😎 i can even use some of the big leaves for oil..👌 i love the smell, only in early stage of flower they were a bit skanky but later on the smell became more flowery and herby 😋 had a lot of pests and bad weather and did not get a lot of daylight.. But still she couldnt get cheddar than this!😁 you fetta believe it! (😳yeah im feeling very cheesy 2day) 11L pot: 75,45G ~75,45G for oil she was a freak with very strange leaves, i almost wanted to teminate her..but i gave her a chance..😎👊 she grew tall and was foxtailing all the way (very sexy 😁) So the buds were not so big or fat but very white, filled with trichomes! so maybe i will make oil with all of this (i made a diary about that if you are interested) i will see how she dries 👍 Must also not forget they were in my fridge for almost 2 years, waiting... So thats why im just happy they even wanted to grow! 🙌 Thankyou all for following the adventures of the BIG CHIEF-twins they grew healthy thanks to all of you! 😇 Happy growing for all ✊
Likes
25
Share
@Stick
Follow
OK guys I'm back after being away for 2 weeks. I've proceeded to a final transplantation into a 9L AirPot container, right before I left for vacations. Despite the transplantation, no special operation was done, I want to see how this clone is going to grow on its own and I don't have enough room for training / bending. A friend was in charge of the grow room while I was away, and she did a pretty good job. The clone is healthy, standing proud and praying the light. I started to build the manifold for 4 colas but some side branches have already reached the canopy, that clone wants to produce weight! She will remain under vegetative stage for 1~2 weeks before flipping into 12/12 light schedule. I can't wait to see her full of buds! Thanks for stopping by 👊
Likes
104
Share
_____ Week 14 | Day 99 - 105 | 7th week of flower ______ Day 93 🌞💧 - 3 liter each Plant, small drain. Day 94 🌞 - Since I'm a bit afraid of mold, I run the fans at a higher speed, which causes the leaves to rub against each other and causes physical damage to the leaves. A few tips are burnt but nothing to worry about. ------------------------------------------------------- Temp. avg. - 22,6° Hum. avg. - 53,6 %
Likes
10
Share
@Pechu420
Follow
Very beautiful and with a very pleasant, sweet smell, difficult to say about. Getting fatter and growing the buds more and more. Starting to increase the resin, getting whiter.
Likes
1
Share
Great gift from my friend! Let’s see how it work!!!
Likes
10
Share
Continue to defoliate as needed. Plants FINALLY stoped stretching. Longest colas are 28 inch with avg of 20. Smell is Wow! Need to get in there and thin it out... Again. So far everything I've learned from GrowWeedEasy is spot on. Last grow in this 28x55 with 2 plants was 10oz on the nose. Very excited about these 3 girls. Even the big fan leaves are getting frosty. Love it!