
Likes
Comments
Share


@TheBulldozerSicily
Follow
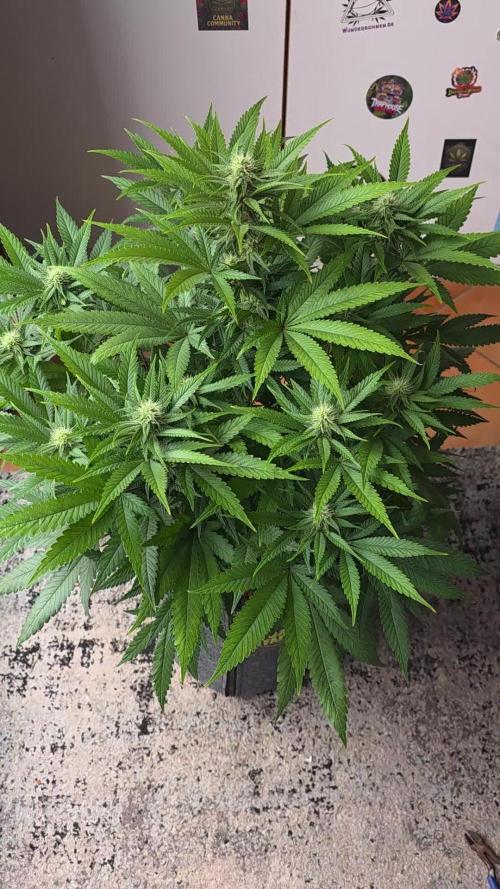
Ecco che spuntano i primi peletti, presto si inizieranno a formare i primi fiori! Già fanno un

Likes
8
Share

@GREENPHOENIX6262
Follow
02/07 - Prepped for cloning - applied heavy defoliation - isolated clone cuttings - prepping 15 clones for 4x4 - running mother in veg for about 3 maybe 4 more weeks then flipping into flower (02/25).

Likes
11
Share

@SecretHerb-Sanctuary
Follow
Es ist vollbracht.
Die 21 Tage seit Umstellung auf 12/12 sind vorbei
und die Babys sind untenrum ein wenig kahler und sind insgesamt etwas luftiger.
Ich habe beim Lollipopping nicht ganz so viel weg genommen,
da die Pflanzen ja so oder so schon nicht all zu groß geworden sind.
Außerdem soll ja auch noch ein bisschen was für die Weiterverwertung übrig bleiben :)
Die Blattmasse war sehr dicht, deshalb habe ich einiges weg genommen,
um die Luft besser zirkulieren zu lassen und so dem Schimmelrisiko vorzubeugen.
Jetzt können sie sich komplett auf die Entwicklung und den Boost der wichtigen Buds konzentrieren
und all ihre Kraft dort hineinstecken um schön dick und fett zu werden.
Das war dann vorest die letzte große (geplante) Stressaktion, die sie durchmachen mussten.
Bin gespannt wie die Ganja Farmer Ladies den Eingriff wegstecken und wie stabil die Genetik wirklich ist...

Likes
36
Share


@Mazgoth
Follow
Very good autoflower strain,this strain is the safe option if you don’t know how to grow.

Likes
48
Share


@MG2009
Follow
Still on water only. Captains Cake going to mom and clone tent. Alongside sour dream. For future diary's. Switching to Budswell 0-7-0 for flowering next week.😁

Likes
3
Share
@Olduffybastard88
Follow
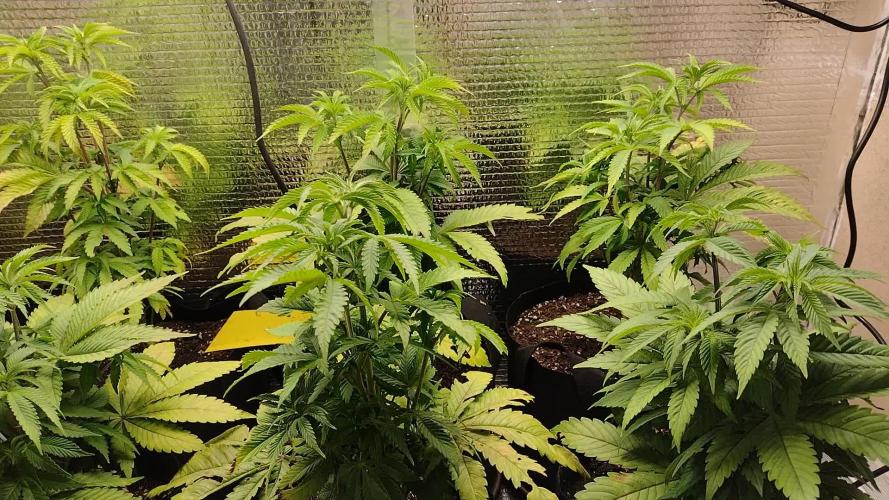
We are moving back inside so I can flower the plants on12/12 cleaned them up nicely with all lower shots removed haven't had 1 problem with these plants they pretty much taking care of themself and have big nice chunky stocks

Processing
Likes
2
Share


@TinyGrowingAdventures
Follow
This week i defoliated on day 18 because i have way too many top coming out and too many lowbuds that were getting no light from being covered by layers and layers of leaves. All strains but the og Martian have real tight internodal spacing.

Likes
16
Share


@Sadhus
Follow
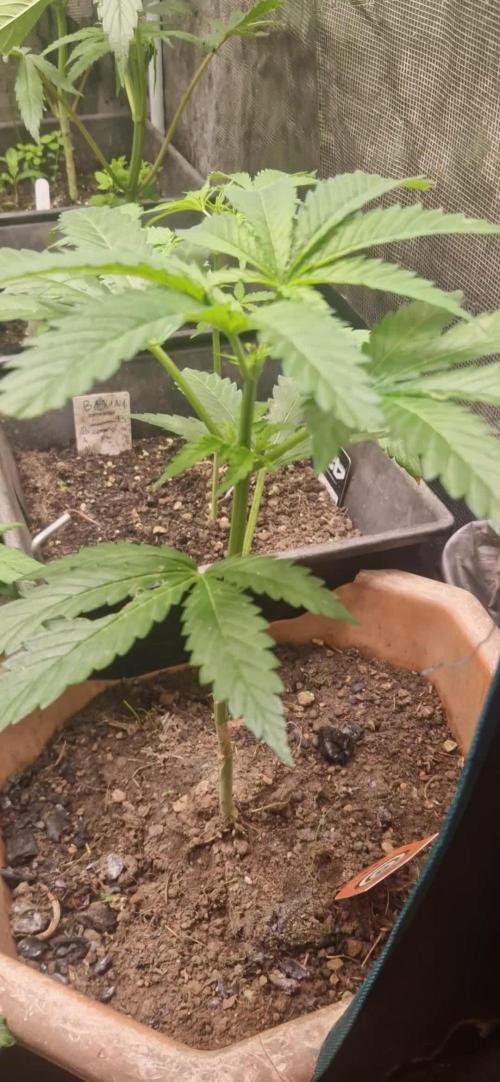
Rempotage en 13 litres, pleine santé rien a signaler, jolie feuille fine et pointues avec de belles dentelure bien prononcé , plantes très élancé, les sept sont très belles, encore une semaine ou deux et floraison et j'ai hâte de voir sa !
#kannabia
#madamegrow
#trolmaster

Likes
104
Share


@SmokingTiki
Follow
The 6 plants came out of the ground 😎 Even if the seeds were quite the same after germination, there is a significant difference between the plants growth. I will wait until the transplant in the final pot, but I already have a good idea about the 3 final candidates 😏 I've decided to increase the light power during the week because the plants bear the light intensity.
Plants heights at the end of the week :
-------------------------------------------
Blackberry Cake 1 : 1,5cm
Blackberry Cake 2 : 4,5cm
Jack Herer 1 : 9,5cm
Jack Herer 2 : 9cm
Cashew Kush 1 : 10cm
Cashew Kush 2 : 1,5cm

Likes
10
Share

@Gamfin
Follow
// Day 91
She is getting there. The buds ware not fattening up as much as I wanted to but her trichomes are almost all cloudy and a very low minority is amber. So I guess I give her 2-3 more days and cut her down on friday or saturday. This time I try out the bro science: Befor cutting, I'll let her stay in the dark for 48h. So maybe I turn off the lights tomorrow until friday and chop her down.
The bro science hypothesis is that the not ending darkness will give her a last stress which boosts trichome production.
|| Edit: I‘m not here for bro science, so I am not doing that shit
// Day 94
Those are the last videos and pictures from her.
I chopped her down today. Since I need to do a bud wash (spider mites, outdoor grow), I can't hang the plant whole. So I cut the stems into as big pieces as possible and washed them with deluted hydrogenperoxide. I hanged them into the tent and try to dry them as long as possible.

Processing
Likes
37
Share

@MG2009
Follow
06/20/2018
Did some supercropping on #1, Fimmed #4 she showing pre-flowers.
( #1,#2,#3) Not showing pre-flowers. #4 Fimmed because she gets stretchy 2-3 times veg height in my own experience.
06/21/2018
Longest day of the year today,applied potash last week, topdressed with Espoma tomato Tone tomato 🍅 3-4-6 with biotone
Likes
2
Share


@Stickybuds789
Follow
This is number 3 of 3 !!!
This one bolted from day 1! Ended up close to 1.5 metres. Took a lot of time defoliating watering but turned out amazing one of the best I’ve grew to date
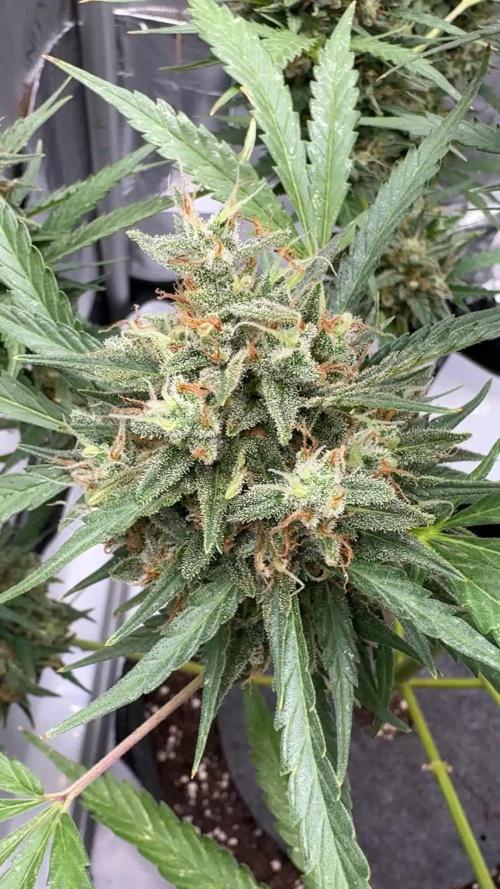
It’s been a few week since I last posted and now the buds are dry just under 6 oz!
The smoke is super smooth super strong
The buds are solid and so full of resin they just crumble with crystals sticking to fingers absolute top shelf green


Likes
26
Share


@Nebula420
Follow
Original Sensible Seeds this is the discovery of the year for me, just great genetics, I really liked Auto Destroyer, very tasty plant and easy to grow, suitable for beginners.
Refuse I liked fertilizers from Green Buzz Liquids, just amazing, great result.
Thanks to everyone who follow my grow report, love u all, Peace!

Likes
17
Share


@MrbeanTeddyVn
Follow
Veg 45 ngày, bloom 56 ngày. Phơi khô 2 tuần, thu hoạch khoảng hơn 200gram khô.

Likes
4
Share


@Growin_Ish
Follow
Both plants are really surprising me. Good genetics. They had a horrible veg, in wrong soil, and these girl are frosty, dank, and chunky (1of2). I'd like to grow this again properly.
Day 54
This girl is done! Took a few microscope peeps toward the middle and I see about 40% amber trichomes.
Chopping tonight!
Gotta check the other one (Christmas Tree). Hoping she has a few weeks left to bulk up, I don't know if she's worth trimming and I hope it's not a male!
A few hours later...
Checked trichomes on several spots of the bud and we have 50/50 clear to cloudy. Needs another few weeks.

Likes
3
Share


@FrostyB
Follow
Not sure exactly when she finished I believe around 3 weeks more than stated. Again this lady too everything I had to offer, always stood proud and tall and gave me no troubles at all! A pleasure to grow and one I will run again in the future.

Likes
100
Share


@ILoVeThiSpLaNt
Follow
Giorno 49
Ho girato in fioritura.
Le due Zombie come già detto nelle settimane scorse sono due fenotipi completamente diversi. Uno sicuramente haze e l'altro bubba Kush. Stanno bene entrambe ma la più grande l'ho dovuta defogliare per bene e sono certo che tra 15/20gg farò una seconda passata. Ultima bevuta prima di mandare in fioritura EC 1.28 ph 5,8.
Anche le due Rainbow Belts sono diverse perché sfregando il gambo una sa di Zkittlez l'altra di frutta quindi penso più a qualche fenotipo dosidos.
La Milk Monkey è quella che per struttura mi piace più di tutte.
Per la prima volta ho preso dei cloni anche se non so dove tenerli e sotto che luce. Per ora li ho messi in un vaso ricoperto da velina nel box delle autofiorenti


Processing
Likes
12
Share


@Rainy
Follow
Autoflower dwarf from natural seeds. Also a quick one. We will see what she will make im planning to grow them in 1l pots and keep them small since i dont have space but im really wondering how does it taste, so here is my try 😃

Likes
21
Share


@LittleBigTrees
Follow
Defoliated some leaves to let light in, chopped one down early as I run out of bud 🙄 it's good for less than 4 weeks flowering.
Have them rice water starch again this week in with there food.
A layer of frost is slowly forming 😎 hopefully they will fatten up nice and frost up really good to 🤞