




Likes
43
Share


@TheBulldozerSicily
Follow
Pronti per iniziare un nuovo ciclo aspettando che queste siano pronte per fumarle... questa sera mi sentirò un po più solo, dato che non andrò a visitare le mie cucciole e non controllero ec e ph... Inizio al più presto.. la pianta é vita!
Processing
Likes
29
Share


@Twizz
Follow
Weather has been rainy and windy so she has been living under a shelter at nights and most days. The climate is getting moisty here so i decides to remove some fanleafs again to keep a good airflow. Buds are getting bigger and they make me wanna sing
' I like big buds and i can not lie..'

Likes
28
Share


@gottagrowsometime
Follow
Very easy to harvest. Dried and was very fruity, no bush whack smell. Wasn't expecting it. As the dry time was long. And the buds super huge and in abundance.
Was a very early addition to my crop (50 odd plants) this was done in my 1st phase of 10-15 plants.
And I still have a good amount of it. And really looking forward to adding a smoke review next month with bud shots.
Update
3 months later. My mate back sent me back 22ml of D9 Distillate, about 95-100% THC 0-5% CBD, I fill carts and use 15-20% resin or natural flavours.
Flavours THC BOMB (ORANGE+LEMONS 10%-90% D9) 3 carts
Super lemon haze 15-20% SLH rosin 60-70 D9 resin 6 carts. + 5-10% of 1000mg 30% CBD SUPER LEMON HAZE cbd oil. As I couldn't get the burn right on the 1st attempt. D9 was too thick and a nightmare to mix. Bubbles did build up to fast while vaping and wouldnt settle. It's a really great way to make strong vape juice from strong but, not your favourite weed. There's no flavour to it until you add rosin or natural flavours or ratio of good CBD oil.
D9 is hard to make. It's much easier to source and then if you grow weed. You can press some to get rosin & add flavours that way or buy flavours. (Need to be potent and D9 mix friendly, works a lot easier) vaping is a huge part of my intake. And I was sick of buying shit carts & D vapes. So, I'm making my own. (With help on the D9 process)

Processing
Likes
35
Share


@Njaak
Follow
did all the topping I plan to do and she's responding just fine. found a touch of fuzz on the old seed pod forming on the rockwool and removed it, as well as snipping off the internodal leaves that had some brown spots... and now she's clean and symmetrical!
very definitely an improvement from a couple weeks ago :)
did not do a full nutrient swap this week, so no pics or videos of the root system just yet... maybe mid week.
tuned back the nutes just a tiny bit (mixed same nute in 1700 ml instead of 1500). not sure why, mostly instinct and to help keep it small (the whole point, really).
she's fun to grow! if you've never tried a desktop nano grow... i highly recommend it 😊👌😺

Likes
2
Share

@Black_Widow
Follow
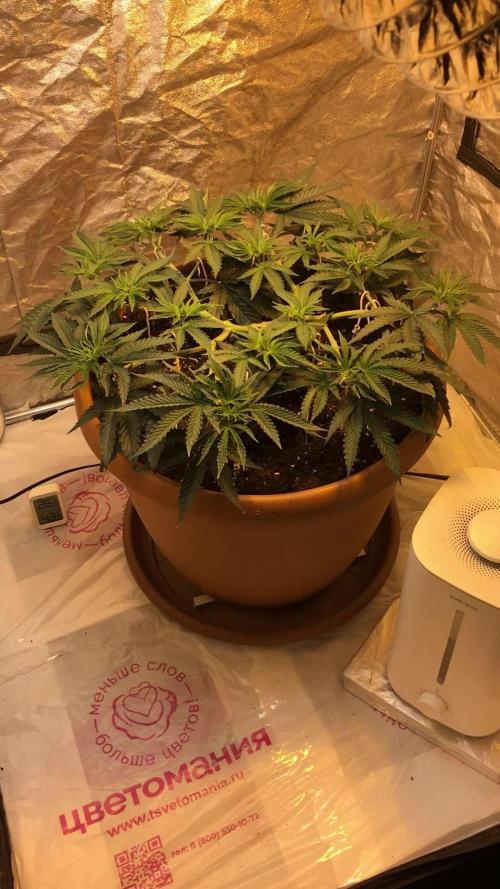
Привет садоводы и огородники !!!
Растение чувствует себя хорошо
теперь ему будет максимально комфортно расти в палатке без соседей
мне очень нрасится этот сорт
цветок имеет хороший рост в ногу со временем
надеюсь это будет сильная травка !


Processing
Likes
5
Share


@GoodBudz
Follow
This week you could see the bud sites starting to really show :)
Did some heavy defoliation but again you can't tell by the pictures
Pheno #1 and #2 were growing so tall and were stretching every day it was hard to get the lights any higher. Soon they won't be able to go any higher.
Feeding schedule stayed constant for most of the grow. See previous weeks
Likes
5
Share


@Meisterwulle
Follow
Jetzt wird’s langsam richtig interessant! 👀 Die Blüten haben im Vergleich zur letzten Woche nochmal ordentlich an Volumen zugelegt und der Unterschied ist inzwischen ziemlich deutlich. Auf den Bildern sieht man schön, wie sich die einzelnen Buds weiter aufbauen. Auch die Nahaufnahme zeigt eine Menge Trichome zwischen den noch überwiegend weißen Blütenfäden.
Viel verändert habe ich am Setup diese Woche eigentlich nicht, dafür ein bisschen an der Nährstoffversorgung geschraubt: Statt bei jeder Bewässerung Dünger zuzugeben, wechsle ich jetzt zwischen gedüngtem Wasser und reinem, pH-angepasstem Wasser ab. Mal schauen, wie die Pflanzen damit zurechtkommen.
Mein größtes Sorgenkind ist aktuell die Luftfeuchtigkeit. 😅 Ich hänge immer wieder bei über 60 % RH und bekomme den Wert trotz aller Bemühungen einfach nicht dauerhaft weiter runter. Gerade jetzt, wo die Blüten immer dichter werden, ist mir das etwas zu heikel. Deshalb entferne ich zwischendurch einzelne Blätter, damit die Luft besser durch die Pflanzen kommt und sich möglichst wenig Feuchtigkeit im dichten Blätterdach hält. Dabei natürlich immer ein Auge darauf, nicht unnötig viel gesundes Blattwerk zu entfernen.
Ansonsten gibt es momentan wenig Drama im Zelt – die Entwicklung läuft recht unauffällig, und genau das ist mir gerade ganz recht. Der Fokus liegt jetzt vor allem darauf, die Luftfeuchtigkeit in den Griff zu bekommen und die Blütenentwicklung weiter im Blick zu behalten.
Ausblick auf Woche 11: Weiter beobachten, wie sich die Buds verdichten, und vor allem das Klima verbessern. Denn bei aller Freude über das zunehmende Blütenvolumen wäre es ziemlich ärgerlich, wenn ausgerechnet Schimmel jetzt zum Problem wird. 🌿

Likes
10
Share


@Elguacho420
Follow
Buenas a tod@s... 3ra semana de floración de estás lemon cookie kush, de momento van bien, algunas hojas oxidadas a esta altura pero creo q es normal, eh podido regular bien la comida( a mí creer) y eh visto mejoras en las variedades, no las noto como antes q estaban como decaídas y se las veia agobiadas, las veo bien y en esta tercera semana se ve claramente la diferencia... Los nutrientes utilizados se ve q son la bomba... 🙌🏻👌🏻 La semana q viene más y mejor, se están poniendo hermosas...❤️ Muchas gracias y buenos humos para todos... 💨💨🇦🇷🤝🏻🇪🇦 🏻♂️

Likes
9
Share


@HashtagHerbs
Follow
Seeds were directly off the mother plant, soaked in water for 24 hours. They were pretty slow to popping and required me to use my fingertips to pop them gently. After that it was 100% successful.
Likes
2
Share


@fabialien
Follow
Semana sel 9 al 14 de septiembre 2024.
Vemos un desarollo bastante vigoroso en todas, esto también se puede adjudicar el hecho de la nutrición que han estádo llevando esta tanda se fem y regulares, la mandarine qué nació con apical va bastante bien.


Likes
18
Share


@Jays_Not_Here_Man
Follow
Transplanted 👍3 gallon pots, a healthy watering and nutrient feed, looking healthy 💪


Likes
25
Share

@420SYL
Follow
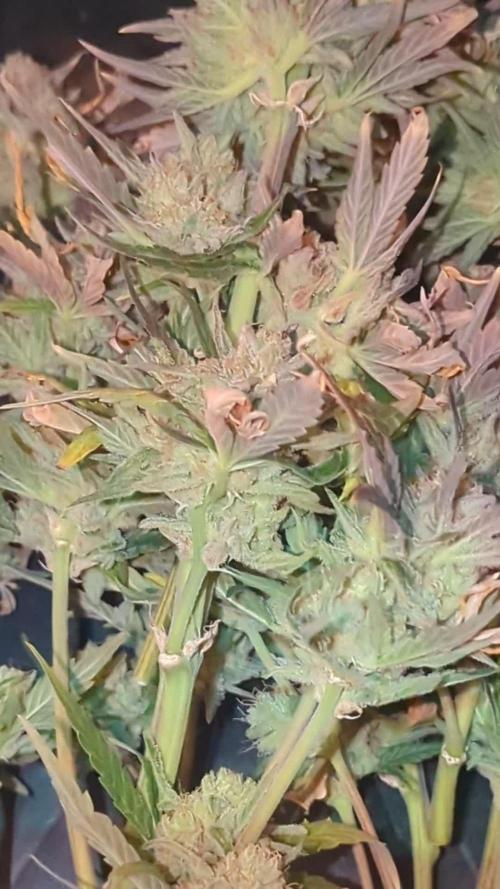
First time with Owl Night and I'm really happy ! The next run will be soon 🌳🌳🌳✨✨✨

Likes
7
Share


@Meksi2790
Follow
total end end dry weight was 2453g very nice strain to grow recommend to anyone dried them for 9 days 68fh and 50-53rh


Likes
3
Share

@JoExotic
Follow
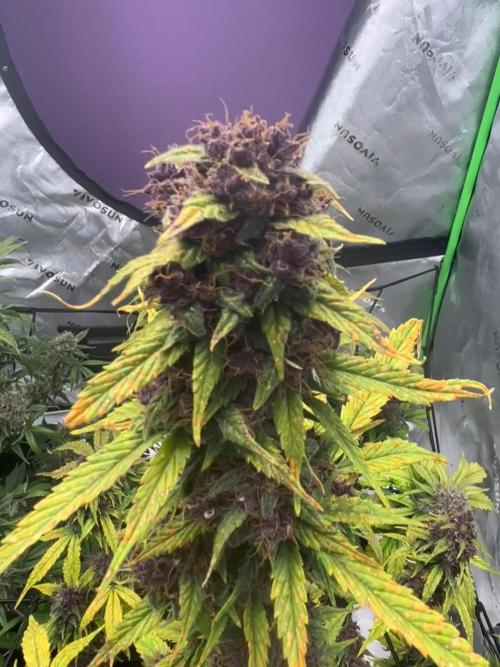
Week 10 - Lemon cherry cookies very close to harvest not quite sure when I wanna chop yet the smell on these knocked my socks off literally if you like lemons this is a very unique strain !
Likes
93
Share


@MrJones
Follow
Mr-Jones Shockwave F2
🔹🔹🔹🔹🔹🔹WEEKLY GOALS🔹🔹🔹🔹🔹🔹
🌞Environment - 75/80℉ and 45/50% Humidity
💧 Feeding - Using "Super Coco" amended soil. compost teas, Dechlorinated H20 PH/6.5 Fish Fertilizer, Started feeding the plants because they are only in 1-gallon pots.
🍃Training / towards the end of the week will be Schwazzing the plants, along with cleaning out the bottoms,.
🕷️ IPM - Will be using Green Cleaner" 1 OZ per Gallon, and CannControl from Mammoth alternating between product each month for Integrated Pest Management.
💡Mars Hydro FC 4800 / 480W Led Grow Light - "Instagram: MarsHydro_Aliexpress"💡
🔹🔹🔹🔹🔹🔹🔹🔹🔹🔹🔹🔹🔹🔹🔹🔹🔹🔹
📜- Rambling - Just feeding the plants Dechlorinated H20 PH@ 6.2/6,5 - that are still packing on bud weight, this could be the last week as the trichomes are starting to show cloudy, I like about 5/10%, Ambers - Have identified 3 maybe 4 of these girls to re-veg after I transplant into larger pots.
🔹🔹🔹🔹🔹🔹🔹🔹🔹🔹🔹🔹🔹🔹🔹🔹🔹🔹
▶️Sunday 01.03.21 / Watering with Dechlorinated H20 PH@ 6.2
▶️Monday 01.04.21 / Watering with Dechlorinated H20 PH@ 6.2
▶️Tuesday 01.05.21 / Just Watering with Dechlorinated H20 PH@ 6.2
▶️Thursday 01.07.21 / Just Watering with Dechlorinated H20 PH@ 6.2
▶️Friday 01.08.21 / Just Watering with Dechlorinated H20 PH@ 6.2, they are getting very close!
▶️Saturday 01.09.21 / They are looking great will be harvesting tomorrow!
🔹🔹🔹🔹🔹🔹🔹🔹🔹🔹🔹🔹🔹🔹🔹🔹🔹🔹

Processing
Likes
20
Share


@eldruida_lamota
Follow
Buenas noches familia, finalizamos el primer mes de esta farm cheese, esta variedad está colocada básicamente por gusto de mi paladar, me encanta el sabor de la cheese y a sido un capricho.
Volviendo a esta genética, vemos cómo la cheese a tirado unas preflores majas y unos brazos curiosos, es de las variedades que más huele de lo que e cultivado así que ojito gente que recuerdos tengo bastantes en cuanto a el tema olor-cheese.
Ph controlado en 6.0 humedad por debajo de 50% temperatura siempre por debajo de los 27 grados.
Poco más os dejo unas fotos y vídeos para que podáis comprobar que la farm cheese esta más que viva 💨💨💨 buenos humos.

Likes
52
Share


@00110001001001111O
Follow
Room setup rundown, examples of bud, et al in pictures... Some minor tweaks since these pictures were taken
Seedlings/Clones lights - Viparspectra XS1500 x1
Vege lights - DIY 630umol/s PAR x3
Flower Lights - 650w 3400K 1900umol/s PAR x2
Substrate - 50/50 sphagnum peat moss and vermiculite in 5-gallon pots
Climate Control - Luckily, the lights, winter and normal furnace use all equate to a decent temperature. A humidifier is needed early and later a dehumidifier is needed The last 4-5 weeks of flower phase.
Irrigation - I use 6 pressure compensating emitters per 5-gallon pot..
Basic process - 16/8 vege and 12/12 ligth schedule - Updated 2026
Sow up to 2x as many seeds as needed. These sit in a 1020 tray under the xs1500 until potting up to 1-gallons. After potting up, a couple 226-watt DIY lights are turned on to cover entire 4x4 area. Everything is hand-watered up to this point. Weak plants are removed as needed to get down to 8 plants that will go into final pots. This takes just over 3 weeks.
Once in the 5-gallon pots (slightly under-filled), they move to the 4x8 platform under two 650w lights running at 60% and a slightly closer hanging distance than normal for a minimum of 10 days before flip to flower - usually ~14. Some light training with scrog to get the canopy level and allow 10-12 future vertical branches per plant to space out a bit.
Cuttings for any feminized breeding cycles are taken after 30-35 days. Some light pruning of lower growth occurs. Flip to flower is generally 35-38 days after sprouting, but the second grow cycle can sometimes be delayed by the first.
After flip to flower, lights set to 100% with normal hanging distance, and fertilizer concentration is reduced. Now, the vertically growing 10-12 branches per plant are spaced out the last few inches with minimal training. The scrog provides the anchor. If necesary, some minimal pruning is employed to avoid future congestion. Some pruning is inevitable, but the goal is not to waste time and resources on growth that is not producing fruit.
Average and better plants will be 180-250+ grams. Weak plants will fall short of that. Even culling the weak early on in vege will result in 1-2 weak plants per crop, on average.
Drying / Curing - Into mesh racks for 10-14 days. I wet trim and cut down to similarly sized buds for even drying. Temps are controlled around 65F and RH is controlled at 57-60%. Then, into some 5-gallon buckets with gamma seal lids and (3) 2-way 67g boveda humidipaks (58% or 62%) in each bucket. These are burped until moisutre levels are confidently at equilibrium. Once i figure out what I prefer to smoke, large portions of both harvests will be vacuum sealed - still kept in the sealed, rh-controlled 5-gallon buckets. Only cut open a couple at a time to keep everything fresh throughout the year.
Cost - 0.33 cents (USD) per gram produced. This includes an accelerated depreciation expense for all equipment used, fertilizer, water, electricity for all equipment used, new filters and other yearly purchases - bti, ph strips, sticky traps, etc. I'm a finance guy, so these numbers are comprehensively accurate and purposely err slightly on high side of cost. The only facet not included is the cost of my labor.
Tip:
Reconstituting 2-way humidipaks -- tray, humidity dome and a heat mat are used. Set some wet paper towel on bottom of tray. change these out daily. I use upside down seedling pots so that the humidipaks don't directly touch the wet towels. Set heat mat to 80F or causes condensation to form on dome, and the 67-gram packs can gain abut 0.20 to 0.25 grams per hour. Weigh them as you go until they get back to 67 grams and remove from dome for use or storage.
Anything that has precipitated (hardness inside), will mostly go back into solution over a few days, but some small portion may not. Shaking or otherwise moving the pebbles around in the solution will help speed that process up. If those solids inside build up over time, that's when you'll need to replace them. A few pebbles inside of a 67g pack won't matter much.
The key is providing a closed 100% RH environment without directly wetting the packs. Rate of absorption is fairly slow, and will vary by pack size. You may not get 100% of it back into solution, but as long as those solids don't build up much, they'll work fine.
This process also reduces any bud smell that may be clinging to them... assuming they dried out significantly and not just topping them off with a few grams of moisture.
Don't try to max out their weight unless you are certain you only need 1-way RH control. Othwerwise, you don't want them fully saturated. So, do weight and keep track of their progress.