


Likes
Comments
Share


@GorkedOut
Follow
Had an issue, hence the yellow leaves. I believe I fixed it, so time will tell

Likes
11
Share


@spanish420pasiongrow
Follow
Muuy bonitos algunos ejemplares la verdad están casi toda la flora a unos 22/23c y a la noche 18 y va muuy bien

Likes
3
Share


@BudeCo
Follow
Starting a new cicle.
One of new money is 1 week younger.
The Mid cicle is ready to flip
The final cicle is near from harvest, maybe on 14th february.
some crosses of a male Girl Scout cookies with : White widow, Industrial plant, White diesel and (White fire og x bubbakush )all made in 2014.


Likes
16
Share


Likes
12
Share


@PEAKYPLANTERS
Follow
I need to change this tent urgently!
! I'm going to move this beast into the big tent 😅😅😅😅😅😅😅😅😅😅😅😅😅🤑🤑🤑🤑🤑🤑🤑🤑🤑
Likes
10
Share

@sunshinegroww
Follow
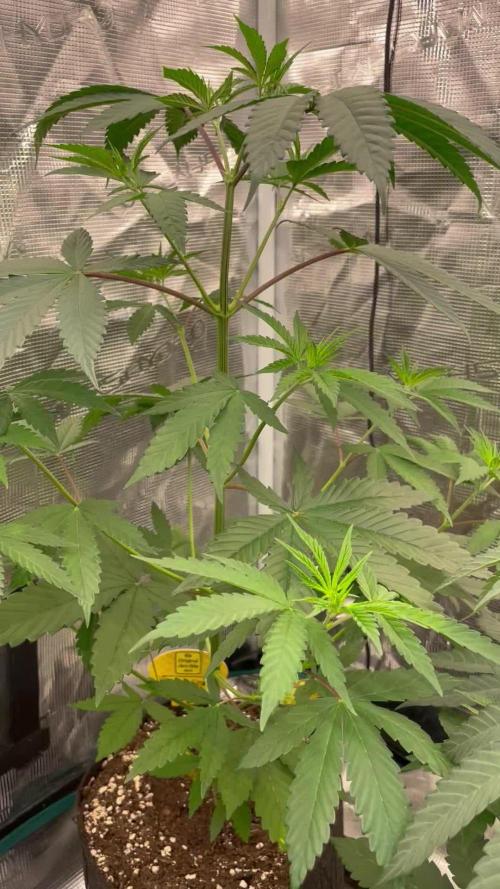
She is on fire 🔥 very healthy looking girl few more days and into 12/12 she goes


Likes
7
Share


@OwlGang_Uk
Follow
Gorilla Glue #1 - Harvest Comment - I Am Very Satisfied With What I Got, I got 3 ounce 7 grams - I Uses Advance Nutrients PH perfect In veg then I switch to the iguana juice organic juice for the flowering stage. I notice a much more slower growth when I switch to organic nutrients.00

Likes
5
Share


@CannaIGrow
Follow
This plant seems to have grown much denser and better than my first plant. I just got the ac infinity ventilation setup with controller 69 for my 2x2, still trying to learn, hopefully grow #3 goes even better. Stay tuned
Likes
179
Share


@Tropicannibis_Todd
Follow
Well growmies ive been looking forward to the Cherry Cola , the more she went into flower the more the frost would build up , and that's when the terps came out and they came out strong , there no stealth for this girl 👉 Stinky 👈 Buds are tight and full of frost 👈 Couldn't of asked for better Genetics 😉
The smell coming from this girl during the entire grow was just dreamy 👈.... Can't say I got the Cherry smells but the fuzzy cola oh ya 😍
Amazing
👉 Big thanks to all my Growmies out there in GD land 👈 Much appreciated 🙏
Thanks To MarsHydro for the TS1000
👉I used NutriNPK for nutrients for my grows and welcome anyone to give them a try .👈
👉 www.nutrinpk.com 👈
NutriNPK Cal MAG 14-0-14👉 All Weeks
NutriNPK Grow 28-14-14👉 Weeks 2 & 3
NutriNPK Bloom 8-20-30👉 Weeks 4 to 8
NutriNPK Bloom Booster 0-52-34👉 Weeks 4 & 9 & 10👌👌
Likes
17
Share


@gottagrowsometime
Follow
Unfortunately the phone I had documenting this grow has been lost for a few months. And, these pics are burning a hole.
Here's Lemon Paya/Mandarin 1 pheno each started in 2L hydro pots which were left for a long time. But, before they were flipped. I added them to 20L hydro of the same substrate. They took heavy abuse as I had to break roots for them to start growing out
(Hopefully I can backfil the both phenos progress soon) but, as I've a lot of projects. I need to start finishing ones just done.
Early on I topped as
Here's weeks 12-17 of a 9+ weeks or so flowering period here. Left ripening for a week and then harvest coming onto nearly 9-10 weeks of flowering,
(Note harvest has been done)
They were to grow in a hydro substrate. Their resistance was really strong and went a few days without feed. I made sure the substrate never dried up too much. But, could of tended more and gotten greater results. All nutrients above when mixed (base Nutrients lower the ph to 6) so rarely I adjusted the feeds (mainly water or calmag feeds). Silica feeds were the only feeds that needed strong PH-. no + ph buffer was used
As for feeds I kept the core npk feeds around 4-450 every 2-3 days and followed up the next day with water or Enzyme feeds, etc.
Thanks to fastbuds for sending me the prize. Amazing smells omg
Both are very different but also similar. One has a much more sweet aroma & one very gasey. Omg they're stinking the whole house.
Likes
9
Share


@masterofsmeagol
Follow
6/22 Some pictures didn't upload but that's probably a good thing. As long as the video went up its good. I need to take less pictures. I'm glad I watered the plants in the back with a premixed gallon last night as we didnt get nearly the rain I thought we would. It's small showers throughout the day. The plants are getting enormous. A couple have revegged. Mostly the 10th planet. The others aren't anywhere near as impacted. Boy are some of these stalks thick. I chose to keep a couple plants that could be grown naturally without topping or fimming. I like to see the structure of the tree bit with humidity like this 98%rh it's easy to get botrytis. That's why it's good sometimes to have multiple bid sites so your proverbial eggs aren't all in one basket. But you do end up with a massive cola. I think that mk ultra with the big fan leavescis just going to be one giant bud. That's what it's looking like. Oh and today is the summer solstice. Longest day of the year.
6/23 WATERED EVERYTHING. USED FIVE AND A HALF GALLONS. EVERYTHING GOT AT LEAST A HALF GALLON. Despite the rain we got and the bags still having some heft I decided to water. It's 80 at 9am. It's supposed to he in the upper 90's today and coukd break 100° tomorrow. I hate that the grow bags are black. That's way to hot for the plants. I should find some empty soil bags and wrap the black fabric for a couple days. A sunscreen might help but I doubt much. We'll see how it goes.
6/24 It's 90° at 9am. It's supposed to break 100° amd stay there a while. Up to 106°. Plants looked awesome this morning. I wasn't sure what I'd find. Today is the worst of the days. If it didn't break 100 yesterday it was damn close all day and the girls look GREAT. I WATERED AGAIN TODAY. I USED EITHER 5.5 OR 6.5 GALLONS TO WATER THE GARDEN. It was nice cool well water too so they should like that. Branches are getting longer and I'm training as the get bigger. I need to put up the trellis but I'm not doing it in this heat.
EDIT: 90° @ 6PM WENT OVER AND AS PREDICTED THE TWO TENS WERE DROOPING. IM WONDERING IF THEY WILL BE ABLE TO FINISH IM THOSE TENS. LAST YEAR I HAD ONE THAT WAS HUGE IN A TEN BUT IT JUST DEVELOPED INDIVIDUAL CALYXS WITHPUT CONNECTING. CHECK IT OUT ON LAST YEARS DIARY. IF THATS THE CASE I SHOULD KIGHT DEP THEM BECAUSE THEYRE GETTING BIG. I WATERED THE TWO TENS WITH ABOUT A HALF GALLON AND I USED WHAT WAS LEFT OF THAT COLD WELL WATER ON THE 10TH PLANET IN THE 30. SHITS LIGHTER THAN USUAL BUT LOOKING PRETTY GOOD. THE REST CAN WAIT UNTIL THE MORNING FOR THEIR WATERING. TOMORROW TOPS OUT AT 85° WHICH WILL BE MUCH BETTER. IM LOVING MY STRAIN CHOICES RIGHT NOW.


Likes
8
Share


@taylordarling
Follow
I don't have much to show or say for this week..
It was incredible to notice the radical differences in the plants appearance in just sever days but it was also quite nerve wracking!!! Once I got the plant transferred I decided to go ahead and feed her with Green Planet's Medi-One (an organic bottled nutrient that I still had lying around). The original plan was to attempt a dry amendment grow but as the dry amendments where no where to be found after placing my order, I opted to use what I had handy.
I went ahead with a water soluble nutrient that would immediately activate the roots and supply nutrients to the sterile medium and I am happy that I did. The very next day after the 1st feeding the plant already started to look different and just "perkier"

Likes
13
Share

@Suemchen
Follow
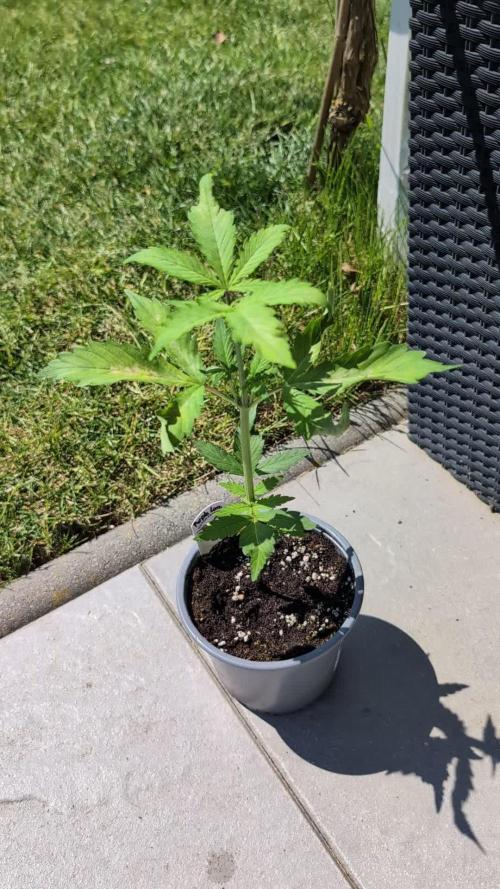
Outside during the day, INSIDE during the night
Day 22: Looks good 👍🏻 watered with supplements: rain water and 1ml/l Root Juice + 1 ml/l Powerzyme 👌🏻
Day 23: looking good 👍🏻 did nothing today 🤗
Day 24: also today, nothing was done👌🏻
Day 18: Looking really promising 👍🏻 watered with supplements: rain water and 1ml/l Root Juice + 1 ml/l Powerzyme 👌🏻Topped her today👌🏻
Day 27: looking good 👍🏻 letting her grow 🤗 leaves got a little burnt from the sun: sun hast been quite strong the Last couple of days...🌞
Day 28: looking good 🤗 watered with supplements: rain water and 1ml/l Root Juice + 1 ml/l Powerzyme 👌🏻did a little Lst
Likes
28
Share


Likes
8
Share


@Salokin
Follow
Overall plant wet weight was 2,6 kg after initial trim and removal of all stems, it came down to 2,1 kg, which will end up up somewhere in the high 300s maybe 400 gr dry. Harvested a bit in a hurry as the one mutated bud on the plant looked a bit funky and I feared but rot (all other buds look rot free so far). Tried to take some nice pictures with the plant out of the tent, however she was not able to support herself at all and I will there fore post some nicer pictures of the finished product .
I have to say for a, in the beginning, pretty small plant, she turned out very nice and I would definitely grow her again.

Likes
1
Share


@SzkolaZiola
Follow
Yet another beautiful creation from Humboldt Seed Company. Huge trichome heads, amazing, complex aroma.
Oh and did I mention magnificent leaf and bud colouration? They are purple AF 💪
I love them sooo much 😍😍😍



Likes
58
Share


@Gisbert
Follow
Ich bin sehr zufrieden, unsere Pflanzen sind mittlerweile alle so groß, dass sie im Gewächshaus eine Etage nach unten ziehen müssen. Der Geruch wird täglich intensiver. Das Wetter bleibt durchwachsen bis schlecht, ich bin mir nicht sicher ob das 50W Zusatzlämpchen bei 6 Pflanzen noch wirklich einen Unterschied macht... An Tag 40 gab es ein weiteres mal Dünger, diesmal einen ganzen Liter. An Tag 41 habe ich nochmal ihre Höhe gemessen, sie hat einen Stretch von über 20cm in fünf Tagen gemacht😊zwei große Fächerblätter habe ich entfernt, da sie (zukünftigen) Blüten das Licht nehmen.


Likes
44
Share


@SooSan
Follow
12/12 + 35 jours
Vu qu’il y a 16 plantes mais que sur growdiaries on ne peut mettre que 8 variétés j'ai divisé en 2 diaries pour le bas de la tente
1️⃣
🏠 90x60x90
☀️ FC-E 4800 => puissance a 20%
🍁
1x Black Bomb / Philosopher Seed
2x Amnesia Lemon / PEV Seeds
1x Blueberry / PEV Seeds
1x Blueberry / 00 Seeds
1x Wappa / Paradise Seed
1x Dark Phoenix / Green House Seed
1x Quick Sherbet / Exotic Seeds
1x Mango Cream / Exotic Seeds
1x Banana Frosting / Sensi Seed
1x Hindu Kush / Sensi Seed
3x Fast Mix / Sweet Seed
📎 https://growdiaries.com/diaries/122084-grow-journal-by-soosan
📎https://growdiaries.com/diaries/124052-grow-journal-by-soosan
2️⃣
🏠 30x60x50
☀️TS1000 => puissance a 50%
🍁 4x Quick Sherbet - Exotic Seed
📎 https://growdiaries.com/diaries/122080-grow-journal-by-soosan
