Processing
Likes
6
Share
@ProfDoty
Follow
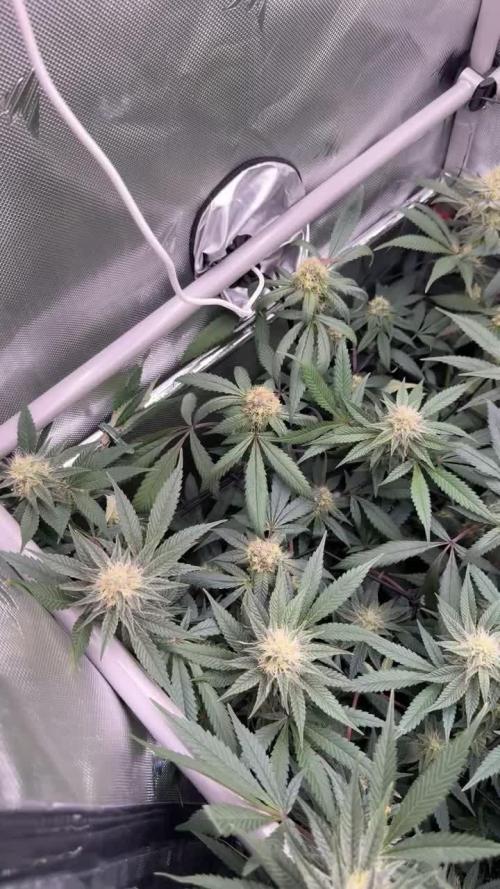
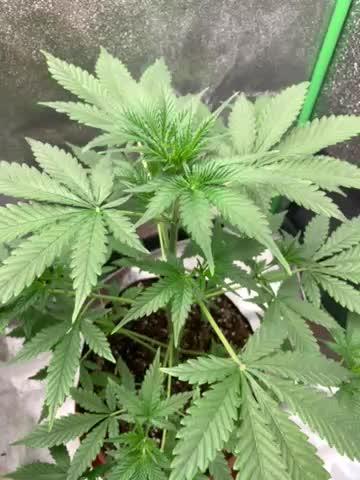
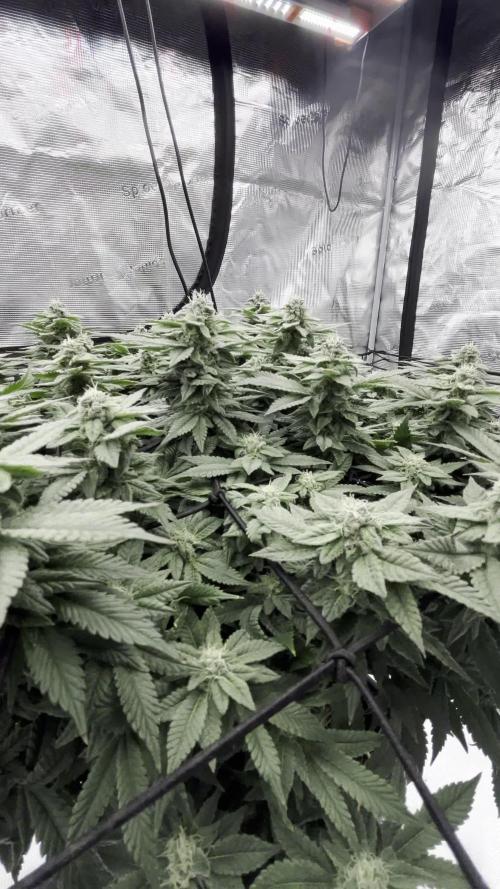
Went home for Mardi Gras for 3 and a half days and came back to ladies loving life. I kinda over watered these ladies because I knew I wasn’t gonna be able to water them while gone and it worked out perfect I guess clan ask for anything more. The Black Cream auto shod be on the path to just focusing on bud development. She grew a half an inch this week so hopefully that the most she gonna stretch. Buds smell sweet somewhat strong. The Green Poison is on her way to be a monster jus now entering her flower phase. She may be going for 12 weeks at this rate none the less I jus going with the flow making sure I’m paying attention to plant and how she reacting each day. I don’t really see anyone using the dry amendments ,let alone the medium I’m using, so I I’m jus doing what’s recommended on the bag and letting the plant tell me so far can’t complain
Likes
200
Share
@Ferenc
Follow
Day 96, 15th of December 2020: Wao and wao... this is what I can say. A bit late I was on holiday I usually start the week with the first day but now with the last one. So let's start with the "black sheep" of this group as she is alone here RQS Wedding Gelato. Easy growing issue free little bushy lady. Absolutely great choice of grow. Pretty much ready for Christmas but she can be cut even now lol.... And now let's speak about the Original Sensible Seeds' girls... Well Black Ghost OG similarly to RQS Wedding Gelato is calm little bushy and issue free lady.... no problem all good ready for Christmas.... Runtz Gum the thick chick with heavy big buds and excellent appearance is really amazing. I placed a stick there and fixed her to look better... It was not necessarily but i have done it. She needs more time pretty much done ny Christmas or a bit after.... Gelato from Original Sensible Seeds is similar in terms of acting such as streching and all that ... The same situation applies not much to really say we wait ;) I am really happy to have these ladies.... Well, Do-Si-Dos OG is the craziest one ever... lol.... not only due her crazy kind of streching style but the trichome developement that comes along to the fan leaf "holder" stem is pretty crazy.... Those buds are like a diamonds sticky and she would be ready to harvest but need to wait because I need to go.... I really had to fix her by placing a stick there I broke one stem but fixed as it did not come off... so crazy especially now because of the weight of the buds... now she looks even more beautiful... I think she is the most challenging grow ever. Original Sensible Seeds genetics is unique really high quality just look at them. Royal Queen Seeds as well but this is my second grow from them my first was a Green Gelato which is the same calm littlw bushy plant. Amazing very good for newbies ;) I am going on holiday again and back on 28th of December so after harvest starts. Girls will be cut after. The 7th weeks starts with tomorrow 16th of December.... Only flushing and no more nutritient will be used. Soon full report comes. Lamp is the same 11 hours on and 13 off.... The last 4 days they will get 4 days darkness and only ventilation will be working no even more water ;)
Likes
4
Share
@Ensign420
Follow
|»» LOG DISCLAIMER: Not intended as a grow guide. Grow log entries are usually posted 3 weeks later and are for my learning reference. ««| Introduction - Week 26 Summary - Ensign's log, stardate 17608.3, Wow what a week! Drying is always pretty simple and been checking daily. Buds are drying nicely and terps are smelling pretty dank!! Most of the week has been in the veg tent with tissue culture! Mixed another batch of establishment media and took proper explant cuttings. Also super-cropped the mothers to even out the canopy. Ahh yea! Getting hyped for trim day next week! Next week will also be the last week for this grow log, but am already planning out the next cycle. Anyways! Onwards to next week! [START OF WEEK 26] ========================================================== ---------- [ 4x4 MAIN TENT ] ---------- Heady OG BX1 #1 [Round4 ~Wk19] - WEEK 26 - Dry Wk1 ----------- [ 3x3 VEG TENT ] ------------ TKO - WEEK 09 - Full Veg Gorilla Goat #1 - WEEK 05 - Full Veg Heady OG BX1 - WEEK 09 - Full Veg Garlic Budder OG#1 - WEEK 05 - Full Veg 10/13/25 → 10/19/25 This Week's Estimated Goals ---------------------------------------------------------------------------------------------- DLI: ~0 mol/m²/d PPFD: ~0 μmol/m²/s VPD: ~1.5 kPa This Week's Meter Readings & Averages ---------------------------------------------------------------------------------------------- Light On/Off: 00:00 - 00:00 | Wattage: ~000.0W [LV00] Distance From Canopy: ~00” DLI: ~0.00 mol/m²/d PPFD: ~0 μmol/m²/s VPD: ~1.17 kPa Soil %: [47.4, 34.1, 35.0, 55.7, 43.7, 43.6, 44.0, 43.3] ========================================================== Day 01 - Monday - 10/13/25 - Total Days: 183 ----------------------------------- Daily Averages ~[+01:00] - Temps: 78.8°F [26.0°C] - Humidity: 64.4% - VPD: 1.19 kPa - Soil %: [49, 34, 35, 57, 44, 44, 44, 42] ----------------------------------- - [22:05]: Night check on the 4x4 tent. --- Ca-Caw!! Looking great! --- Heady OG BX1 #1 is drying along and no signs of mold. Also airflow and RH is stable and within the 60-70% range. --- Getting stoked! Trim day is 9 days away! - [22:09]: Checked the Ecowitt soil moisture sensor data: ------------------ [ 4x4 MAIN TENT ] --------------- ------ 48% - [CH01 FT » G30 - Heady OG BX1 #1] ------ 35% - [CH02 FB » G30 - Heady OG BX1 #1] ------ 35% - [CH03 BT » G20 - TKO] ------ 56% - [CH04 BB » G20 - TKO] ------------------ [ 3x3 VEG TENT ] ---------------- ------ 46% - [CH05 BL » GR7 - TKO] ------ 40% - [CH06 BR » GR7 - Gorilla Goat #1] ------ 40% - [CH07 FL » GR7 - Heady OG BX1 #1] ------ 40% - [CH08 FR » GR7 - Garlic Budder OG#1] --------- Veg: 38% - 45% | Flower: 45% - 55% --------- General: 30% [Dry] «| 45 - 60% [Moist] |» 70% [Wet] - [22:18]: Checked the 3x3 veg tent. --- Looking healthy in the veg garden! --- All of the vegging mothers are looking great and the canopy is starting to even out. --- Also clones look healthy and no need to water yet. --- The stems, err, I mean, explants, don’t show any signs of contamination. --- Staying positive, glad the growth media is sterile and the overall procedure was successful. --- Anyways! Plan to create more establishment media and cut proper explants soon! - [22:21]: Checked the humidifiers. --- Tanks are still full and no leaks found. Day 02 - Tuesday - 10/14/25 - Total Days: 184 ----------------------------------- Daily Averages ~[+01:00] - Temps: 76.9°F [24.9°C] - Humidity: 64.8% - VPD: 1.11 kPa - Soil %: [46, 34, 35, 56, 43, 43, 44, 43] ----------------------------------- - [21:44]: Night check on the 4x4 tent. --- Looking good in the dry tent! --- Heady OG is drying along and humidity levels look great! --- Nothing to do but maintain and wait to trim in 8 days! - [21:55]: Checked the Ecowitt soil moisture sensor data: ------------------ [ 4x4 MAIN TENT ] --------------- ------ 45% - [CH01 FT » G30 - Heady OG BX1 #1] ------ 34% - [CH02 FB » G30 - Heady OG BX1 #1] ------ 35% - [CH03 BT » G20 - TKO] ------ 56% - [CH04 BB » G20 - TKO] ------------------ [ 3x3 VEG TENT ] ---------------- ------ 41% - [CH05 BL » GR7 - TKO] ------ 40% - [CH06 BR » GR7 - Gorilla Goat #1] ------ 47% - [CH07 FL » GR7 - Heady OG BX1 #1] ------ 46% - [CH08 FR » GR7 - Garlic Budder OG#1] --------- Veg: 38% - 45% | Flower: 45% - 55% --------- General: 30% [Dry] «| 45 - 60% [Moist] |» 70% [Wet] - [21:59]: Checked the 3x3 veg tent. --- Looking healthy and growth is raging! --- All mothers are looking beautiful! --- Clones are getting taller and looking healthy! --- Gorilla Goat #2 needs watering. Let’s go Ensign! - [22:03]: Here is the starting initial watering range: ------ Gorilla Goat #2 » 255.4g → 300.3g and was last watered 4 days ago. --------- General Solo Range: [Dry] «| [Initial Cup Weight] + ~55-100g |» [Wet] --- Took the starting weight before watering, ------ Gorilla Goat #2 » 230.8g --- While on a scale, --- Gently misted her straw mulch with RO water. --- Tried to keep the top growth dry. --- Misted 5-10 sprays. Waited a few seconds, then misted again. --- Made sure to reference the watering weights. --- Repeated this process until the cup weighted at least 300g. --- There was no runoff. - [22:23]: Took the saturated weight after watering, ------ Gorilla Goat #2 » 345.7g --- Marked the watering date on the side of the cup. Also marked the saturated weight on the back. --- Placed her back into the tent. --- Decided to train and super-crop both clones. --- Bent the taller branches to lower the canopy. - [22:38]: Checked the humidifiers. --- Tanks are still full and no leaks found. --- Onwards Ensign! Day 03 - Wednesday - 10/15/25 - Total Days: 185 ----------------------------------- Daily Averages ~[+01:00] - Temps: 75.6°F [24.2°C] - Humidity: 63.8% - VPD: 1.09 kPa - Soil %: [48, 34, 35, 56, 44, 43, 44, 42] ----------------------------------- - [+01:33]: Quick night check on the 4x4 tent. --- Looking great in the dry tent! --- Also starting to smell dank! --- 7 more days until the big trim! - [+01:37]: Checked the 3x3 veg tent. --- Veg garden is healthy and growth is green! --- Both the Heady OG BX1 #1 and TKO mothers will need another topping soon. --- Clones in the propagation tray also look great and no need to water. --- The explant media is still looking sterile with no signs of contamination. --- Easy night in the garden. Nice! - [+01:40]: Checked the humidifiers. --- Tanks are still full and no leaks found. --- Okay! Tomorrow plan to dive back into tissue culture and prep more growth media. --- Onwards Ensign! Day 04 - Thursday - 10/16/25 - Total Days: 186 ----------------------------------- Daily Averages ~[+01:00] - Temps: 74.6°F [23.7°C] - Humidity: 62.2% - VPD: 1.11 kPa - Soil %: [46, 34, 35, 56, 43, 44, 44, 45] ----------------------------------- - [11:41]: Alright! Back to tissue culture and time to start another batch of establishment media! --- Took the plant growth regulators out of cold-storage (my fridge). ------ [ » SMOKES A BOWL « ] --- While the products warmed up, gathered the necessary supplies and setup my workstations. --- Currently, focusing on: ------ PHASE 01 » ESTABLISHMENT --------- » DAY 01 » MEDIA - PART 01 - Mixing the growth media --------- » DAY 01 » MEDIA - PART 02 - Sterilization of media and tools [via autoclaving] --- Going to use the same establishment formula, but doubling the yield. --- Also using RO water instead of distilled water. --- Here's the establishment media formula: --- [» VER.0001 |» INITIAL TROPICAL PLANTS FORMULA |» 0.5L (500mL) RO WATER «] ------ MS [Muashige & Skoog] --------- » 2.22g ------ Sucrose [Cane Sugar] --------- » 15g ------ BAP [6-Benzlaminopurine | Cytokinin] --------- » 0.5mg » 0.5mL » 500μL ------ IBA [Indole-3-Butyric Acid | Auxin] --------- » 0.05mg » 0.05mL » 50μL ------ AGAR [Jelling Agent] --------- » 3.5g ------ PH [Potential Hydrogen] --------- » 5.7 --- [» 1mg/mL CONCENTRATION ratio | 1mg = 1mL | 1mL = 1000μL «] - [12:59]: Time to prep the growth media! --- Made sure to turn OFF the lung-room's oscillating fan. --- Filled a measuring cup with 400mL of RO water. --- Dropped a clean magnetic mixing bar into the measuring cup. - [13:05]: Placed the measuring cup on the magnetic stirrer. --- Turned the unit ON and have the unit on LOW. - [13:11]: Using a precision scale (sensitive to 0.01g) along with a micro-pipette (1000μL capacity along with tips) and disposable (100mL) weigh boats, ------ Added 2.22g of MS [Muashige & Skoog] ------ Added 15g of Sucrose [Cane Sugar] ------ Added 500μL of BAP [6-Benzlaminopurine | Cytokinin] ------ Added 50μL of IBA [Indole-3-Butyric Acid | Auxin] ------ Added 3.5g of AGAR [Jelling Agent] ------ Then filled the measuring cup to the 500mL line before covering the top with plastic wrap. --- Alright! - [13:46]: Let the media mix on the magnetic stirrer for a bit. --- Have the unit set to LOW with a steady vortex. ------ [ » ~20 MINUTES LATER « ] - [14:09]: Okay! Time to pH the establishment media! --- Gently removed the bottom cap of the AC Infinity PH Meter PRO [AC-PHM7]. Placed the cap in the storage case for later. Covered the top with plastic wrap (KCL solution still inside the cap). --- Swirled the probe in a cup of RO water to rinse off the storage solution. --- Shook the excess water out and wiped the unit with a clean paper towel making sure all mineral buildup was removed (kept away from the very tip of the probe). --- Temporarily placed the meter back into the cup of RO water. --- Removed the plastic wrap of the establishment media. - [14:13]: Using the AC Infinity PH Meter PRO [AC-PHM7], --- Took the establishment media's initial pH reading. --- The pH was at 5.14 --- Using the micro pipette, ------ Added pH Up solution. --- Made sure to let the media solution mix for a bit before checking for pH readings. - [14:21]: Adjusted the media's pH until it stabilized to 5.58 --- For this batch, tried to go for a range of 5.4 to 5.8 pH. --- Also glad that I did not need to add PH down. - [14:43]: Poured the pH'd establishment media into separate polypropylene containers. --- Made sure to re-mix the media solution between container fillings. --- Ended up splitting the media solution into 12 containers. ------ 8x » 125mL Polypropylene Bottles [with screw cap lids] ------ 4x » 236mL (0.5pt) Glass Mason Jars [with polypropylene jamming lids] --- Have the lids of all vessels loosely on and set each aside for later autoclaving. --- Also filled 12 empty polypropylene bottles with RO water and placed the lids on loosely (4 bottles are re-used). - [14:58]: Prepped the tools for sterilization. --- Took a new 5.25in x 10in sterilization pouch and added the following tools: ------ 3x stainless steel forceps ------ 3x stainless steel scissors --- Before placing into the pouch, wiped each tool with a paper towel sprayed with 70% isopropyl alcohol. --- Sealed the bag and marked the date. --- Time to autoclave everything in the pressure cooker! --- Filled a Presto 23qt-Pressure Cooker with 12 cups of RO water. - [15:06]: Added a few aluminum foil balls to the bottom of the pressure cooker. --- Placed the first rack on top of the foil. --- Made sure the rack was level and stable resting above the water. --- Gently placed the containers of media into the pressure cooker and onto the first rack. Lids are still loose. --- Made sure to give space for each container and kept them away from the sides of the pressure cooker. --- Placed a second pressure cooker rack on top of the containers of media. --- Placed the containers of RO water onto the second rack. Lids are still loose. --- Placed the third rack on top of the containers of water. - [15:16]: Lastly, placed the sterilization bag of tools on top of the third rack. --- Took the pressure cooker lid and made sure the release vent was clear of debris before placing it on. --- Sealed and secured the lid. --- Pressure vessel has been sealed! --- Alright! Time to sterilize! --- While keeping the vessel level and straight up, moved the sealed pressure cooker to the kitchen for heating. - [15:23]: Placed the pressure cooker onto a butane-gas stove. --- Turned the stove ON and set it to HIGH. ------ [ » ~20 MINUTES LATER « ] --- Once steam was venting out of the release vent, --- Placed the metal rocker onto the vent. --- Shortly afterwards, the pressure top-lock sprung up to indicate the vessel was under pressure. --- Then the pressure gauge started to rise. ------ [ » ~10 MINUTES LATER « ] --- At 15psi, the metal rocker started to rock! - [15:56]: Turned down the stove down to LOW. --- Set a timer for 15 minutes and began monitoring the pressure gauge. --- Maintained the 15psi by making minor adjustments to the stove. ------ [ » ~15 MINUTES LATER « ] - [16:12]: Turned the stove completely OFF and waited until the pressure cooker's top-lock dropped down which indicated that pressure levels were safe to open. ------ [ » ~40 MINUTES LATER « ] --- Once the pressure cooker was at safe levels (0psi) and the top-lock was down, - [16:48]: Moved the pressure cooker into the lung room. --- The pressure cooker was still quite hot so was careful to keep the vessel straight up and level during transport. --- Used towels for insulation. --- Rested the hot pressure cooker onto a stack of 5-gallon buckets covered with layers of towels and folded paper bags. --- Gently opened the pressure cooker and set the lid aside. - [16:57]: While wearing nylon gloves, sprayed my hands with 70% isopropyl alcohol. --- Gently removed the bag of sterile tools placed it onto a Pyrex dish. --- Removed the top rack and set it aside. --- Then one container at a time, --- Gently tightened and secured the lids of each bottle of sterile water before placing onto the Pyrex dish. --- Removed the middle rack and set it aside. --- Then one container at a time, --- Gently tightened and secured the lids of each bottle and jar of sterile media before placing onto the Pyrex dish. --- Throughout the entire process, kept the gloves on and sprayed my hands regularly with 70% isopropyl alcohol. --- Decided to store all the bottles in the Pyrex dish. - [17:16]: Have the dish resting on a shelf in the lung room. The jars of media are set right next to the Pyrex dish on a towel. --- To prevent dust, covered everything with towels. --- Done for now and will check on the growth media tomorrow. --- If all goes well, should be taking new explant cuttings in a couple days! - [17:39]: Night check on the 3x3 veg tent. --- Looking beautiful and healthy in the veg garden! --- All moms are getting bushy and getting pretty close to the grow light. --- Since I plan to take explant cuttings soon, not going to top or train quite yet. --- Clones also looking healthy and seem unaffected by the super-cropping. Nice! - [17:57]: Checked the Ecowitt soil moisture sensor data: ------------------ [ 4x4 MAIN TENT ] --------------- ------ 45% - [CH01 FT » G30 - Heady OG BX1 #1] ------ 34% - [CH02 FB » G30 - Heady OG BX1 #1] ------ 35% - [CH03 BT » G20 - TKO] ------ 55% - [CH04 BB » G20 - TKO] ------------------ [ 3x3 VEG TENT ] ---------------- ------ 43% - [CH05 BL » GR7 - TKO] ------ 45% - [CH06 BR » GR7 - Gorilla Goat #1] ------ 42% - [CH07 FL » GR7 - Heady OG BX1 #1] ------ 44% - [CH08 FR » GR7 - Garlic Budder OG#1] --------- Veg: 38% - 45% | Flower: 45% - 55% --------- General: 30% [Dry] «| 45 - 60% [Moist] |» 70% [Wet] - [17:59]: Checked the 4x4 main tent. --- Ca-Caw!! I got Headies! --- Wow! Heady OG BX1 #1 is drying along beautifully and she is smelling dank! --- Also no signs of mold and RH levels look stable! --- 6 more days until the big trim! - [18:11]: Checked the humidifiers. --- Tanks are still full and no leaks found. --- Wow what a day! --- Still gots more to do! --- Let’s go! Let’s grow! --- Onwards Ensign! Day 05 - Friday - 10/17/25 - Total Days: 187 ----------------------------------- Daily Averages ~[+01:00] - Temps: 76.0°F [24.4°C] - Humidity: 62.0% - VPD: 1.16 kPa - Soil %: [48, 34, 35, 55, 44, 44, 44, 42] ----------------------------------- - [22:57]: Night check on the 4x4 tent. --- Ca-Caw! Headies is smelling dank! --- RH levels are getting a bit dry, but are okay. --- Wow buds are frosty with trichomes! --- With 5 days until trim day, getting stoked! - [23:04]: Checked the Ecowitt soil moisture sensor data: ------------------ [ 4x4 MAIN TENT ] --------------- ------ 47% - [CH01 FT » G30 - Heady OG BX1 #1] ------ 34% - [CH02 FB » G30 - Heady OG BX1 #1] ------ 35% - [CH03 BT » G20 - TKO] ------ 55% - [CH04 BB » G20 - TKO] ------------------ [ 3x3 VEG TENT ] ---------------- ------ 46% - [CH05 BL » GR7 - TKO] ------ 40% - [CH06 BR » GR7 - Gorilla Goat #1] ------ 45% - [CH07 FL » GR7 - Heady OG BX1 #1] ------ 50% - [CH08 FR » GR7 - Garlic Budder OG#1] --------- Veg: 38% - 45% | Flower: 45% - 55% --------- General: 30% [Dry] «| 45 - 60% [Moist] |» 70% [Wet] - [23:11]: Checked the 3x3 veg tent. --- Looking healthy in the veg garden! --- Mothers are getting bushy and tall! --- Super-cropped and trained the taller branches down to lower the canopy. --- Plan to take tissue culture cuttings tomorrow so glad there are plenty of tops to choose. Still deciding on which mother to preserve next. --- Clones in the propagation tray look healthy! --- The original Garlic Budder #2 clone needs watering. - [23:26]: Here is the starting initial watering range: ------ Garlic Budder OG#2 » 256.4g → 300.2g --------- General Solo Range: [Dry] «| [Initial Cup Weight] + ~55-100g |» [Wet] --- Took the starting weight before watering, ------ Garlic Budder OG#2 » 258.9g --- While on a scale, --- Gently misted her straw mulch with RO water. --- Tried to keep the top growth dry. --- Misted 5-10 sprays. Waited a few seconds, then misted again. --- Made sure to reference the watering weights. --- Repeated this process until the cup weighted at least 300g. --- There was no runoff. - [23:40]: Took the saturated weight after watering, ------ Garlic Budder OG#2 » [000.0]g --- Marked the watering date on the side of the cup. Also marked the saturated weight on the back. --- Placed her back into the tent. - [23:45]: Checked the humidifiers. --- Tanks are still full and no leaks found. Day 06 - Saturday - 10/18/25 - Total Days: 188 ----------------------------------- Daily Averages ~[+01:00] - Temps: 76.8°F [24.9°C] - Humidity: 60.3% - VPD: 1.25 kPa - Soil %: [47, 34, 35, 55, 44, 44, 44, 47] ----------------------------------- - [15:19]: Decided to decrease the VPD level a bit. --- Within the AC Infinity App, --- Changed the schedule name from 'Flower [12/12]' to 'Drying [0/24].' Oops. --- For the Main Tent [4x4] controller, --- Adjusted the 'Drying [0/24]' Schedule for the exhaust fan. ------ Decreased the VPD LOW trigger value from 1.5kPa to 1.4kPa --- Adjusted the 'Drying [0/24]' Schedule for the humidifier. ------ Decreased the VPD target value from 1.5kPa to 1.4kPa --- This should increase the relative humidity a bit and will maintain a 60-65% range - [16:59]: Evening check on the 3x3 veg tent. --- Wow the veg garden is raging with healthy growth! --- Even with the lower veg temps, growth has been perky and bushy! --- The TKO mother has been looking a bit on the purple-side, but I plan to increase the temps back after trim day. - [17:23]: Okay! Time to continue the tissue culture journey! --- Checked on the sterilized media, water, and tools. --- Ooo yea! The growth media in the glass jars have solidified nicely! --- The media in the bottles also look great! Found only one that did not gel properly. --- Hmm. The sterile water bottles are not looking sterile. Unlike the first batch (using distilled water), each RO bottle had tiny white particles floating in the water. --- I think this was due to the water source. The RO water used was from the plant reservoir. For the next sterilization, will try using water straight from the tap. Will discard the entire batch and try again later. - [17:34]: Anyways! Time to cut and sterilize another batch of explant cuttings. --- Using the similar protocols as last time, but with a few changes. --- Instead of distilled, using reverse-osmosis (RO) water. --- Also simplifying the workflow and will not be using the sterile water. --- Only taking cuttings from one cultivar. --- Today, attempting to preserve Heady OG BX1 #1 --- Unlike the last attempt, going to be cutting apical nodes and will leave all leaf growth on. --- Last attempt was more for monsteras and not cannabis. - [17:35]: Made sure the lung room's oscillating fan was OFF during the entire process. --- Put on a fresh pair of nitrile gloves. --- Okay! Let's grow Ensign! - [17:47]: Filled a glass beaker with 180mL of RO water. --- Using a micro-pipette, ------ Added 20mL of Clorox bleach --- Mixed the solution. - [17:52]: Poured the bleach solution into a glass mason jar. ------ Added 1 drop of Dawn dish soap. --- Dropped a magnetic mixing rod into the jar before setting it onto the magnetic stirrer. --- Turned the unit ON and set it to a low setting. --- Placed a polypropylene lid loosely on. - [18:02]: Rinsed and filled the glass beaker with 70% isopropyl alcohol. --- Filled another glass beaker with RO water before adding a drop of Dawn dish soap. Mixed the solution. --- Okay! Time to take the cuttings! --- Using a clean pair of trimmers, - [18:09]: Gently cut two clone cuttings from the Heady OG BX1 #1 mother. --- Stripped each cutting down to 2-inch apical nodes making sure to leave about 0.5 inch of stem growth for planting. ------ Prepared a total of 2 nodal cuttings. --- Dropped the nodal cuttings into the cup of soapy water. --- Swirled the cuttings in the soapy water for a bit. --- Opened the jar containing the 10% bleach solution. --- Using clean tweezers, --- Took each cutting out of the RO water and carefully submerged it into the beaker of 70% isopropyl alcohol for about 30 seconds. --- Then transferred the cutting from the isopropyl alcohol straight into the jar of bleach solution. --- Once both cuttings were in the jar, sealed the top with the polypropylene lid. - [18:23]: Flipped and set the entire bleach jar upside down onto the magnetic stirrer. --- Started using the magnetic stirrer. --- But the cuttings were getting hit by the bar so ended up turning the unit OFF. --- Instead, made sure to swirled the bottle every few minutes to agitate the cuttings. --- For a proper sterilization, the cuttings should be agitated in the hypochlorite (bleach) solution for at least 20 minutes. --- While waiting for the explants to sterilize, prepped the still air box. - [18:39]: Unfolded and placed a Safloga still-air box onto my desk. --- Thoroughly misted the inside of the air box with 70% isopropyl alcohol making sure to coat the entire chamber. --- Then isopropyl misted and placed the following items inside of the still air box, ------ x1 » Jar of Establishment Media ------ x1 » Bottle of Establishment Media ------ x1 » Glass-Bead Sterilizer ------ x1 » Roll of Plastic Wrap [pre-cut] ------ x1 » Sterilization Bag Containing: --------- x3 » Stainless Steel Forceps --------- x3 » Stainless Steel Scissors --- Made sure to fully coat the outside of the tool bag and each of the containers with 70% alcohol. --- The bag had a torn corner (Oops), so made sure to spray the inside with a few mists of isopropyl alcohol. --- For the glass-bead sterilizer, ------ Wiped the entire unit with isopropyl alcohol. ------ Before filling the unit with the included beads, misted the heating chamber with a spray of isopropyl alcohol. ------ Misted the glass beads again with a spray of isopropyl alcohol. --- Set the cleaned glass-bead sterilizer into the still air box. - [19:02]: Still air box fully prepped for explants! --- Okay! Explant nodal sterilization complete! --- While still wearing gloves, --- Misted the outside of the explant jar with 70% isopropyl alcohol before placing it into the still-air box. --- Turned the glass-bead sterilizer ON. --- Made sure to re-seal the chamber. - [19:05]: Okay! Finally time to start the tissue culture transplant! --- Let's go Ensign! --- Sprayed my gloved hands with 70% isopropyl alcohol (also put on a pair of cloth arm sleeves), --- Placed my hands through the arm holes and into the still air box to begin the process. --- Started by laying out my initial workspace: ------ » Far Left Quadrant » Jar of Sterile Establishment Media ------ » Far Center » Bottle of Sterile Establishment Media ------ » Far Right Quadrant » Glass-Bead Sterilizer ------ » Mid Center » Bleach Jar with Explant Cuttings [Main Workspace] ------ » Near Left Quadrant » Empty [Trash Area] ------ » Near Right Quadrant » Bag of Sterile Tools & Roll of Plastic Wrap --- Opened the bag of tools and placed the forceps and scissors into the pre-heated glass-bead sterilizer. --- Set the bag in the trash area (near left quadrant). --- Loosened the lids of both containers of sterile media but did not remove the lids. The lids were resting on top and could easily be lifted. --- Also took lid off of the bleach jar and gently set it on the table. --- Took the jar of sterile media and set it in the center of my workspace (to the right of the bleach jar). --- Using my left hand, took a set of scissors from the glass-bead sterilizer and gently cut the bottom of the first cutting. --- Once the bottom cut was made, placed the scissors back into the glass-bead sterilizer. --- Using my left hand, lifted the lid off of the jar of sterile media and inserted the trimmed end of the cutting straight into the growth media (using my right hand). --- Covered the jar with the lid and placed the forceps back into the glass-bead sterilizer. --- Tighten the lid of the jar and set it aside. ------ [ » REPEATED THE ABOVE PROCESS FOR THE BOTTLE OF GROWTH MEDIA « ] --- Once the last cutting was transferred from the bleach jar into the sterile media, --- Turned the glass-bead sterilizer OFF. --- Cleaned up my workplace and placed the scrap stem tips and bleach jar out of the way (near left quadrant). - [19:28]: Wrapped the lid of each explant container with plastic wrap before setting it in the center of the workspace. --- Explant transplant completed! - [19:59]: Using a label printer (Brother DT410), made a set of labels for each container: ------ Heady OG BX1 #1 | 04.24.25 | Photo | Reg ------ Formula: v0001 | ExBatch: 0002 | Lot: 01 | Pod: 01 ------ Establishment Media | Sealed On: 10/18/25 --- Opened the still air box. --- Then one container at a time, took an explant out and wrapped the lid with a label. --- Set the labeled containers onto the propagation tray (in the 3x3 veg tent). - [20:07]: Done! ------ The explants are around 37 μmol/m²/s which gives a DLI of 2.40 mol/m²/d under an 18/6 light cycle. --- Will check daily for contamination. --- Ca-Caw!! Ahh yea! --- Heady OG BX1 is now officially my first true attempt at cannabis tissue culture! --- Using this new workflow, I may try reusing the TKO media. Do plan to take new cuttings soon. May even try using the liquid media. --- Shout out to microclone and Bill Graham! His 'Tissueponics' video contains tips and tricks of the trade that have straight up changed the way I think of DIY cannabis tissue culture. --- Plan to further refine my process and will continue to refine the workflow with each attempt. - [20:15]: Checked the Ecowitt soil moisture sensor data: ------------------ [ 4x4 MAIN TENT ] --------------- ------ 54% - [CH01 FT » G30 - Heady OG BX1 #1] ------ 34% - [CH02 FB » G30 - Heady OG BX1 #1] ------ 35% - [CH03 BT » G20 - TKO] ------ 55% - [CH04 BB » G20 - TKO] ------------------ [ 3x3 VEG TENT ] ---------------- ------ 43% - [CH05 BL » GR7 - TKO] ------ 48% - [CH06 BR » GR7 - Gorilla Goat #1] ------ 42% - [CH07 FL » GR7 - Heady OG BX1 #1] ------ 45% - [CH08 FR » GR7 - Garlic Budder OG#1] --------- Veg: 38% - 45% | Flower: 45% - 55% --------- General: 30% [Dry] «| 45 - 60% [Moist] |» 70% [Wet] - [20:56]: Checked the 4x4 tent. --- Ca-Caw! Looking great my ladies! --- Humidity levels are still a bit on the dry side, but still okay. - [21:08]: Checked the humidifiers. --- Tanks are still full and no leaks found. --- Wow what a day! --- Oh yea, 4-more days until trim day!! Ca-Caw! Let’s go! Day 07 - Sunday - 10/19/25 - Total Days: 189 ----------------------------------- Daily Averages ~[+01:00] - Temps: 76.7°F [24.8°C] - Humidity: 59.4% - VPD: 1.27 kPa - Soil %: [48, 35, 35, 55, 44, 43, 44, 42] ----------------------------------- - [07:08]: Quick morning checked on the 3x3 veg tent. --- The veg garden is healthy and perky! --- All moms and clones are healthy and raging with growth! --- Both Heady OG BX1 #1 explants also look alive and green! - [19:26]: Night check on the 4x4 tent. --- Ca-Caw! We got MENDO DOPE in the trunk! --- Wow terps are getting loud and buds are drying along nicely! --- Looking frosty and coated in trichomes! --- Three more days until trim day!! - [19:33]: Checked the Ecowitt soil moisture sensor data: ------------------ [ 4x4 MAIN TENT ] --------------- ------ 46% - [CH01 FT » G30 - Heady OG BX1 #1] ------ 35% - [CH02 FB » G30 - Heady OG BX1 #1] ------ 35% - [CH03 BT » G20 - TKO] ------ 54% - [CH04 BB » G20 - TKO] ------------------ [ 3x3 VEG TENT ] ---------------- ------ 40% - [CH05 BL » GR7 - TKO] ------ 43% - [CH06 BR » GR7 - Gorilla Goat #1] ------ 47% - [CH07 FL » GR7 - Heady OG BX1 #1] ------ 41% - [CH08 FR » GR7 - Garlic Budder OG#1] --------- Veg: 38% - 45% | Flower: 45% - 55% --------- General: 30% [Dry] «| 45 - 60% [Moist] |» 70% [Wet] - [19:35]: Checked the 3x3 veg tent. --- Vegging along beautifully in the garden! --- Mothers are getting taller and probably could train, but will wait until tomorrow. --- Clones and explants also look healthy and green! --- Gorilla Goat #2 needs watering! - [19:44]: Here is the starting initial watering range: ------ Gorilla Goat #2 » 255.4g → 300.3g and was last watered 5 days ago. --------- General Solo Range: [Dry] «| [Initial Cup Weight] + ~55-100g |» [Wet] --- Took the starting weight before watering, ------ Gorilla Goat #2 » 244.9g --- While on a scale, --- Gently misted her straw mulch with RO water. --- Tried to keep the top growth dry. --- Misted 5-10 sprays. Waited a few seconds, then misted again. --- Made sure to reference the watering weights. --- Repeated this process until the cup weighted at least 300g. --- There was no runoff. - [20:04]: Took the saturated weight after watering, ------ Gorilla Goat #2 » 345.6g --- Marked the watering date on the side of the cup. Also marked the saturated weight on the back. --- Placed her back into the tent. - [21:41]: With a few days before the big trim, decided to sample a few buds! --- Cut and trimmed branch for sampling and wow she’s got terps! --- Buds are dense and have a gassy diesel funk! Ca-Caw!! Wow! --- Without even curing, pretty sure she’s the one! --- Plan to grow out another cycle (in clone of the same pheno), but I think I found my female for my first breeding project! - [22:01]: Checked the humidifiers. --- Tanks are still full and no leaks found. --- Ahh yea! Three more days until the big trim! --- Also next week will be the last for this log. --- But already stoked for the next! --- Planning on popping more seeds and continuing the pheno hunt for another female! --- Since I lost TKO this harvest cycle, plan to grow a clone cutting of the same pheno (#2). --- As for seeds, popping more regulars and going to attempt to grow some of Mr. Grow-It’s Chillout OG! --- Got a pack of F3s and am stoked to give them a try! --- Also going to sprout some beans of Dead Ops OG from Zaza Genetics! --- Chillout OG, Dead Ops OG, and another round of TKO! Let’s go! Let’s grow! --- Hunters of the dank! Ca-Caw! --- Anyways! --- Onwards to next week! [END OF WEEK 26]
Likes
31
Share
Likes
3
Share
I planted germinated and planted 4 Sucker Punch Autos on July 12th. They had all sprouted by July 13th and are just finishing their first week above ground! This is my first time growing auto flowers so I am excited to see how it goes :) They are being vegged under a 1000w MH which is dimmable and set at 600w for the time being to help with temperatures.
Processing
Likes
17
Share
Day 7. we will now move the cuts from under the t12 lights on the clone table to underneath the shade leaves of the mothers under a Mars 300 (150 hps equivalent). They will remain in the propagator until day 14 as they must wait for the girls currently occupying the pre-flower area to graduate to the flowering tent. We will still spray Clonex mist once every day until roots are visible
Likes
42
Share
@Polaskis
Follow
Well here we are with the most happiest part of growing marijuana is harvest time!!!! Good Evening Ladies and Gents, as most of you have followed ots been a pretty damn good year for cannabis growers and myself, well I seen to think so lol. In my diary I have shown 1 plant of the Zsweet Insanity..... but truth be told I had 2 more in the grou nd somewhere else. Wait until you see the picks 👀 The strain is amazing! All three ended up about 4 feet Tolland about 4 feet wide. The massive collas were everywhere. You'll see in the pics above. It stinks sooooooo bad and is frosty AF! The Sweet taste of Lemon and deisel and a woody spice on the way out. Its clearly remarkable this strain! Check it out! The best part is I weight 3/4 of a pound dry 👀 Woooooooooooohooooooooooo!!!!! Hope you enjoyed the diary!!!! 🌱🔥🤤
Processing
Likes
7
Share
@Kushizlez
Follow
Day 49-56 (Day 50) I hooked up my carbon filter to the humidity controller and it is keeping the room exactly at 65-70% RH night and day. It looks like it turns on about every 45 minutes for about 5 minutes so it allows me to run the co2 bag properly. I don’t even have to use my dehumidifier. The room is 100% dark now too. Even the small red lights on the space heaters. Not going to feed anything other than foliars this week. (Day 51) Blackberry #4 & #8 #9 and white widows #2 & #3 are all confirmed males. Chopped them down and recycled the soil. White widow #1 is the first official female and I’m starting to see pistils on the m39/zkittlez too. Plants seem to be responding to the light fairly well. It’s hung 32 inches above the canopy which is as high as it can go without strapping it to the roof, which may have to happen one day. The plant can get within 6 inches of the light so I’m probably good. The ppfd output is 1800umols which is super high so I want to hang them as high as possible in veg. I wish I could rent a ppfd meter to see if I’m in range at 32”. (Day 52) Blackberry breath #3 is the first official bbb female to show. I decided to scrap BCTG #2. It sounded like a good strain but after looking at pictures of people who have grown it online, it doesn’t look up to my standards. I found a very small patch of powdery mildew on one of the leaves so I’m not even going to start with that shit again. I’m really thinking about scrapping the m39/zkittlez and the white widow too. I’m praying that I get at least 4 females of BBB. I tried super cropping for the first time today. A few of the branches I definitely squished a bit too much as they turned quite brown and looked dead within a day. (Day 53) Despite the m39/zkittlez vigorous growth, I know it will be a shitty strain that will most likely herm as it’s from a bag seed of low grade weed. I’ve decided instead of scrapping it, I will use it for experimenting with a new chemical powdery mildew preventative. If it dies oh well. I doused it and chopped a limb off a few hours ago during lights on and it seems fine. (Day 54) I’m about 90% sure BBB 6&7 are both female. #2 & #5 are looking like males but too early too tell. #1 is really tough to say. Just gotta be patient I guess. #3 has a great spread out structure, I hope it doesn’t stretch too much. The scrogging is a priority. I put up the scrog net just to see how it fits. It’s a little small around the edges but that’s fine. So it’s looking like out the 9, I would be lucky to get 4 fems if #1 & 7 would show forsure already. If #1 is a female I have my 4 and I can throw out the white widow. The white widow is just insurance at this point. Super cropped plants have recovered nicely. Going to continue doing this more. I’ve noticed that the plants that were put into my custom soil mix have very small fan leaves compared to the fabric pots of straight promix and dry amendments. Could also be the fabric pot is helping dry downs too. (Day 56) I’m seeing some yellowing so I’m going to give a foliar spray just too keep some deficiencies at bay. All of the plants are stunted except the m39 and bbb#3. Node spacing has also reduced significantly. I can’t help but feel it’s from the intensity of my lights but maybe they just need a transplant into some new soil something. Luckily the stunt and droop is only really happening to what I suspect are male plants anyway. Leaves are looking twisted and gnarled on #5. Going to move it into the veg tent for a while. I’m going to mix up and amend my Destiny/coco blend today and transplant bbb#3 and 6 & 7 in a few days. I mixed them up in contractor bags making sure to toss and turn vigorously. Here is my blend: 2 bags 40L Destiny soil 2 bags 40L coco 700ml glacial rock dust 700ml oyster shell flour 700ml nature’s pride bloom 300ml basalt rock dust 150ml langbeinite 150ml nature’s pride veg I am also going to try the Destiny top dress as it’s only 13 bucks a bag and full of good shit. I’m trying to not feed heavy in flower other than 2 or 3 top dresses and 2 teas and nothing after week 5. Because it’s taken so long for the plants to show sex, when I transplant into the 10 gallon pots, they should have more than enough nutrients too keep them going strong all the way through flower with just water. I’m a little skeptical about that though. Besides teas and dressings are fun. Everything should be broken down by week 8 or so. Will transplant in a few days.
Likes
1
Share
Likes
3
Share
Esta será la última semana donde incorporamos Bio Vega a la dieta de alimentación. La potencia de las luminarias al 75% y regamos cada tres días aproximadamente alternando entre fertilizante y agua.
Likes
154
Share
💩Holy Crap Growmies We Are Back💩 Code Name FBT2311 Well growmies we are at 14 days in and everything is going great 👌 👉 Started to do some low stress training👈 We all ready got , some Pre-flower showing already 👌 Lights being readjusted and chart updated .........👍rain water to be used entire growth👈 👉I used NutriNPK for nutrients for my grows and welcome anyone to give them a try .👈 👉 www.nutrinpk.com 👈 NutriNPK Cal MAG 14-0-14 NutriNPK Grow 28-14-14 NutriNPK Bloom 8-20-30 NutriNPK Bloom Booster 0-52-34 I GOT MULTIPLE DIARIES ON THE GO 😱 please check them out 😎 👉THANKS FOR TAKING THE TIME TO GO OVER MY DIARIES 👈
Likes
6
Share
@Bogosi84
Follow
Pure instinto non sbaglia mai... Ottime genetiche. Fertilizzanti Noveral... Prossimamente testerò qualcosa di mio.. miscela di aloe vera...con un macerato di ortiche menta ...
Likes
9
Share
@Krissci
Follow
Now on 8x nodes per plant.x Day 1 - SB2, 1 stem got broken during training 😩😭😩😭😩... Hoping it will be saved but Day 2 - more aggressive training on both plants to level the main frame
Likes
28
Share
So this week is the start of flower !! Woooohooo finally get to show what I'm made of ! Step one ) take all the big fan leaves Step two ) establish a "light line" and take all small shoots that are unable to get the proper amount of light due to their distance from the top of the canopy. * These are the places we all wish would grow ! These are also the places that are at risk of - hermaphroditism - mold - waste of energy for the plant. ** These are also some of the best places to take clones ** Continue to tie and secure everything in preparation of massize buds ! I hope some people looked at this like " This took way too much off " I took ALOT. Yes I push , I push hard to know how much they can take . Yes I would say 60% of plants DO NOT like a massive defoliating. But, the ones who do , you will unlock a yeild like never seen . It's the risk we take . One thing I have noticed is when I'm gonna defoli , I don't combone high stress or toping + a bunch of other techniques . Should have some pretty huge plants by two months ! Thanks for stopping by more notes and pictures to follow . First week of flower was a great success!!! Unfortunately I did have covid this week so my pictures weren't exactly where I would want them . For these genetics, it's crazy , they haven't been topped or LST'd and yet they are growing flat at the top ! *** I did have covid this week so my pictures weren't exactly up to par. So I'll do my.best to make it up with notes , - this week very little flower stretch that is definitely a plus for people who want medium sized bushy plants . Not saying that this one won't stretch but so far there has been very little stretching . - there are ALOT of nice shoots throughout the canopy, plenty of places to take clones *** this genetic clones very well so that is another thing to note ! So great clonability . The end of week one I have seen very little stretching , in my opinion these could all be considered S1 . It interesting, even with no topping or training these plants NATURALLY grow FLAT! so for all you Screeners out there this is a primal genetic for that !!! In to week two !!! Here We Go !!! -------------------------- Find these world class genetics at : https://www.exoticseed.eu/products/exotic-animal#:~:text=What%20is%20Exotic%20Seed's%20Exotic,be%20cultivated%20indoors%20and%20outdoors. Or https://www.seedsman.com/eu_en/exotic-animal-feminised-seeds Find all about the nutrients that fuel this grow on here:. https://diablonutrients.com/ Absolutely a life-changing nutrient company for me really brought my game to the next level.
Likes
7
Share
Seguimos en el día 5/4/26 Lucen genial esas sativas! Me encanta la pequeña jungla,que se montó en la sala. Seguimos avanzando esta semana tuve que subir 25cm mas el foco central. Ya que las canopias se encontraban ligeramente cerca de la iluminación. Una de ellas llegó a estar tocando la barra de luz.. la distancia por lo general en el 80% de ellas es la adecuada unos 40 cm y otras 25/30cm Subimos esta semana la ec hasta los 1800 Con un ph de 6,4 que finalizando la semana subiremos. Vamos en esta semana alternando los riegos con el resto que quedan en bote de plagron green sensation y sugar royal. Y ya comenzamos con nuestro nuevo entrante de atami! Nrg flavor y bloombastic!! Los usaba hace muchos años,cuando era un joven con pocos conocimientos. Y obtenía buenos resultados ,abundante resina y buenos olores!
Likes
34
Share
@rhodes68
Follow
12/27 Week 8 ! Such lovely girls, prettiest plants we've grown to date. Pretty happy with the nuets where they are so leaving it at 850ish ppm Was continuing to occasionally throw in some Fish Sh!T but that will stop now,too close so gotta watch those terps. Lights out pics later 12/28 Last two weeks before the flush so began the Soul Peak PK/Finisher at minimum dose with regular feed. Adds almost nothing to ppm. 12/31 Last push , reduced Bloom nuets to 7ml and increased Peak to 13 which is a tad high but ppm remains under 800. Eventually it will be all Peak then flush. 1/2 Flush for Belle begins with Monday's watering at lights on. Last day for Bloom nuets on Belle and then three days of just the finisher. Annie will stay on the 5ml/15ml mix until her hairs curl sufficiently then same protocol.
Likes
Comments
Share
Final veg week
Likes
9
Share
@Siriuz
Follow
Ok guys so she was bushy again and so we did defoliation again. You can see the difference and then after that started flowering even more Plus the fact we are increasing the amount of molasses added to the soil plus the floranova bloom nutes. They are very thirsty girls, taking around 1.5-2lts per 48 hrs So almost like a 1 liter per 24 hrs Very good SoG to make them feel even more comfortable Going to change schedule from 24/0 to 19/5 and see if they evolve! Thinking about adding some humus to the soil as well, other than that they have been under good conditions Temp is steady at day time around 24C top and night time is 18-19C minimum RH around 45-60% Mostly 45% control environment with AC Cant wait to see big colas coming soon! Have fun enjoy the videos!
Likes
129
Share
@Ju_Bps
Follow
Hello growmies 👩‍🌾👨‍🌾🌲🌲, 👋 We're on the last week, Temperature are very high since few weeks and the girls didn't really appreciate.... I try to down the power of lamp to 80%, but changing nothing... Trichromes ready, no watering. Harvest tomorrow 🌲✂️ 💡Mars Hydro - SP 3000 80% 43 cm. 🔥 Thanks community for follow, likes, comments, always a pleasure 👩‍🌾👨‍🌾💚🌲. Mars Hydro - SP 3000 💡💡 https://www.mars-hydro.com/sp-3000-samsung-lm301b-greenhouse-led-grow-light Zamnesia - Frosted Guava Auto🌲🌲 Discount code -20% with GROWITGD code 🔥🔥 https://www.zamnesia.com/7679-zamnesia-seeds-frosted-guava-automatic.html
Likes
4
Share
@ZalySk
Follow
D35: Nice spacing between the nodes, nice and short, nice wide leaves. Very Indica looking. I didn't want to top her because she was so short and branchy so I just tied her down D37: can't get over how squat and wide she is. Just lovely. D40: tied her down again and cut off a fan leaf. Gave her a feed of organic grow D41: she responds to the lst well. Nice and green on top, lots of branches coming. Should extend a bit next week.