


Likes
Comments
Share


@nonick123
Follow
Día 59 (29/07) Este cultivo no es muy entretenido con solo agua, asi que...
Le hago supercropping a todas! 😁 A ver como reaccionan!
Día 60 (30/07) Las plantas se están recuperando muy bien del supercropping! 😁
Todos las puntas hacia arriba! 💥
Come onnnnnnn! A por esa floración en 2-3 semanas!
Riego 500 ml H2O pH 6,75
Día 61 (31/07) Las plantas se han recuperado genial del supercropping y están lanzando TODAS las ramas hacia arriba 😍
Un espectaculo la fuerza de estas plantas! 💥
Redistribuyo las plantas, para ver si OnionOG está más protegida del sol, ya que consume muchisima agua y voy a estar en unos días fuera...
También reubico ligeramente la malla de sombreado, debido a que en mi latitud el sol empieza a incidir lateralmente por las tardes...
Riego 500 ml H2O pH 6,55
Día 62 (01/08) Vuelvo a redistribuir las plantas en el invernadero dejando a OnionOG todavía más protegida del sol directo, para tratar de disminuir su consumo de agua estos días que no voy a estar...
Pongo una protección "visual" en el invernadero en el lado que da a los vecinos (cara norte), porque he "cazado" miradas indiscretas...
Riego 500 ml H2O pH 6,55
Día 63 (02/08) Debido a que me voy de vacaciones unos días, adelanto el riego semanal con Té y la aplicación foliar de Kelp
Riego con 1 Litro de Té Vegetativo de Lurpe Solutions. Preparación: 24 horas con bomba de aire (oxigenación) con ingredientes:
Green Sunrise 8 ml/L + Insect Frass 16 ml/L + Hummus Lombriz 8 ml/L + Melaza 1 ml/L + Kelp Hidrolizado 0,25 g/L
Aplicación foliar Kelp hidrolizado de Lurpe Solutions a 0,25 ml/l
Día 64 (03/08) Cerrado por vacaciones
Día 65 (04/08) Mi amigo viene a casa a hacer un riego con 1 Litro de H2O pH 6,5
💦Nutrients by Lurpe Solutions - www.lurpenaturalsolutions.com
🌱Substrate PRO-MIX HP BACILLUS + MYCORRHIZAE - www.pthorticulture.com/en/products/pro-mix-hp-biostimulant-plus-mycorrhizae

Likes
23
Share


@Kakui
Follow
V15, riego con pH 6.1 y EC 1.2, las plantas ya se han recuperado del stress de hace unos días atrás, desde el próximo riego el agua tendrá sus nutrientes completos. Se ajustó el LST en algunas plantas.
V17, definitivamente ya se recuperaron del stress por sobre fertilización, están creciendo al ritmo esperado, con bien color y hojas "felices".
V18, y bueno, de nuevo surge un imprevisto, intentando hacer LST a un tallo acabo de romperlo, le hice una especie de entablillado esperando que se recupere.
Hoy toco riego con pH 6.2 y EC 1.5, las plantas crecen bien.

Likes
21
Share


@3lementa1
Follow
They look great. They were thirsty this week. Ph is still lower and PPM higher on this one than the White Widow, and this one is bigger. I think it likes the spot right under the light. That air pump hose is also tighter so it probably has better aeration as well.
Likes
30
Share


@PEAKYPLANTERS
Follow
Respect for all of you, brother farmers! masters and beginners! thank you again for gathering on the pages of my diaries! we carry out our work with dedication and live on ambition! Come on guys!🙌👽🙌
WE WANTED TO CELEBRATE WITH YOU🤗
OUR 3 YEARS OF AGRICULTURE ON THE PLATFORM.🎊
GREETINGS TO THE FRIENDS OF @GROWDIARIES WHO MADE THIS POSSIBLE!👩🔬🏻


Likes
69
Share

@wolfvb
Follow
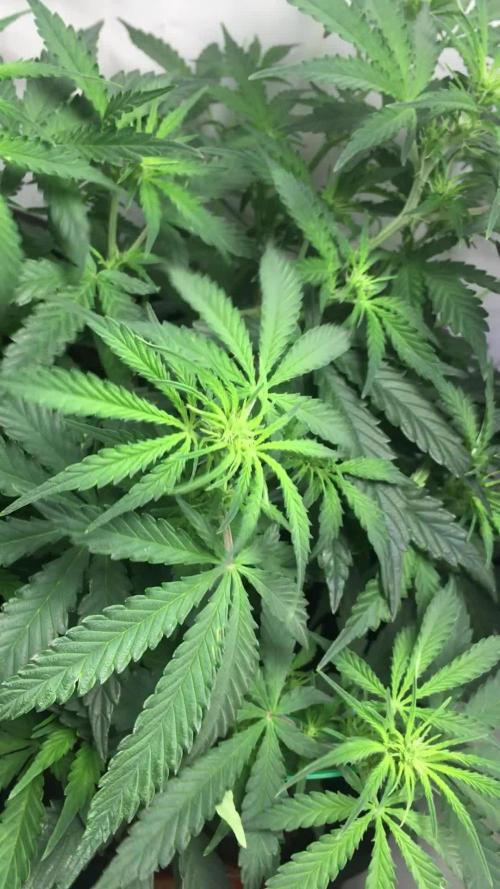
Week 5 baby! What a smooth ride this has been - these ladies are absolutely flying through veg. Gave them some cooler water today and they're vibing with it 💚 Still keeping nutrients minimal, just 1-2x weekly when they ask for it. Less is more with these girls!

Likes
11
Share


@Sawyer_grow
Follow
Hello guys !
new week and an amazing week ! Told you she was working on her buds and now you can see all of them.
It's the perfect moment for a small defoliation in order to increase the focus of the buds.
You can see the videos Before and After. I will have to add bamboo stick because the buds are starting to be too heavy !
she is gonna start to show her colors next week I think.
Hope you enjoy
Take care
Sawyer

Likes
11
Share

@TheGreenfulOne
Follow
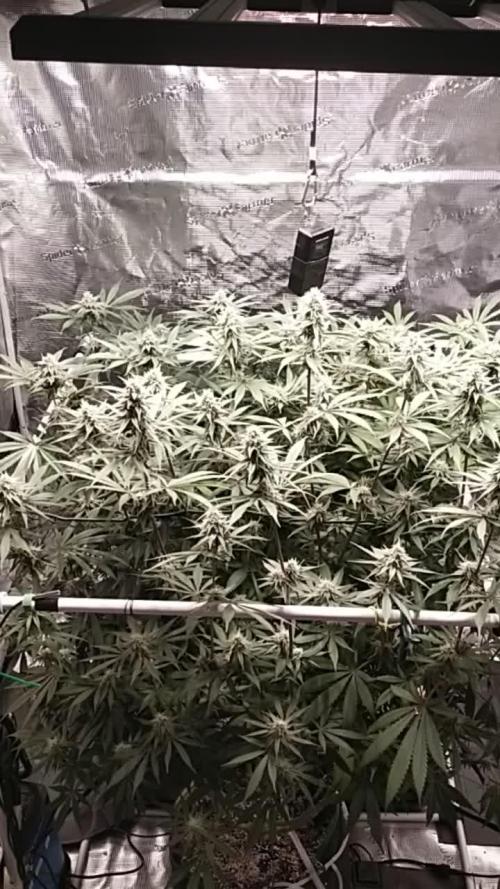
Bruce Banners are frosting up heavily and stacking dense buds, but close-ups shows tip burn and leaf clawing after the recent stress.

Likes
30
Share


@Canadian
Follow
I use all 3 General hydroponic nutrients and they are two different pot sizes the Moby Dick is in 30 liter and the blue amnesia is in 18 liters has a very strong odor and blue amnesia is maturing at a faster rate then the Moby Dick.
a scrog net is being used in order to give support to the upcoming buds.
I am also actually on week 4 I just made a mistake calculating the week.
this is my first grow ever.
also I'm not sure if using the scroll net it's a good idea for support rather than tying those branches up .
I am watering every two days feeding nutes every single time at 900 to 1000 PPM ph at 6.2 the plans have not show any signs of stress but I am worried if it is too much nutrients the plant seems to grow very fast after every watering and seems to be loving it.
the blue Amnesia XXL Auto it's growing in soil with 30% Coco and the Moby Dick XXL auto it's growing in hydroponic soil.
the seeds were germinated on jiffy's and 100% germination rate plus the genetics seems to me very resilient to heat and everything else including lots of nutrients.
the moby Dick XXL auto are the two in the front closest to the camera the two farthest to the back of the tent are the two blue amnesiaXXL auto.
today day 31 i did some pruning actually lots of pruning hopefully don't cause stress to the plants or even worse cause them not to bud that nicely regardless the scrog net seems to be working just fine helping them access more light and making it easy for cutting leaves that are no longer needed.
32 yesterday after watering and sleeping today they have show no signs of stress in fact they starting to stretch in the buds that we're not getting sufficient light have start to grow also yesterday from the 16 liters I prepare instead of 3 ml of grow formula I add 6 1/2 to compensate for stress and the need of healing and having new grow stretch. also temperature has dropped dramatically outside making my house cold down from 24 degrees C to 19° at night internal temperature is remaining the same from 30 to 26 C.
Day 33 I have been raising the scrog net every day and the light everyday this plant is growing very fast I also notice that where the fan is hitting all the time that plant is bigger I have been moving the fan to other sections of the grow tent to see if any reaction happens and it looks like it makes the plant grow faster . I will not be moving the Scrog net any higher Rather I will introduce another one once they require more support .
Day34 notice some of the top leaves are showing a curving down like over-watering without actually over water I think they're showing signs of too much nitrogen .for the next water session I will hold back on nitrogen until I see signs of a fully recovering meaning leafs pointing up.
thank you for reading have a happy grow.


Likes
5
Share


@Emiindico
Follow
Not much to say this week, plants are still stretching, buds are starting to form. Great structure and strength.

Likes
13
Share


@smokeycropping
Follow
increible crecimiento de las nenas. 5 semana ya proxima a flora como le encanta el bokashi
a estas cepas de royalqueenseeds.
se ven sanas y comen bien muy pequeñas, muy compactas me sirguen ayudando a darles mas vegeta.
Likes
13
Share




Processing
Likes
2
Share


Likes
16
Share


@EaRtH
Follow
19.1. - Plants are entering their first week of flowering as the bud sites are clearly visible and pistils are shooting up!
21.1. - Watered 💧
24.1. - Watered 💧
25.1. - Wrap-up of the week: Plants went through another successful week. Lots of bud sites are visible and already developing. I've also spot some first sugar. However, I've also managed to snap the main stem on the Gelato plant, not completely. I've fixed it back, so we'll see but I must have som bad luck as this was second time during this run 🙄
19.1. - 25.1.2024
Likes
19
Share


@420DeepGrow
Follow
Gracias al equipo de Royal Queen Seeds, Marshydro, XpertNutrients y Trolmaster, sin ellos esto no seria posible.
💐🍁 Gelato #44:
Los criadores de Tyson 2.0 criaron Gelato 44 a partir de cepas finas. Al cruzar la Sunset Sherbet y la Thin Mint Girl Scout Cookies, crearon un híbrido de dominancia índica que asesta fuertes golpes en el cuerpo y la cabeza.
Su contenido de THC del 22% crea sinergia con terpenos colocantes para ablandar los músculos
Mantenla hidratada y con una dieta constante y pasará por la fase de floración en unas ocho semanas. Las plantas de interior alcanzan una altura máxima de 120 cm y producen 400-450 g/m², mientras que sus homólogas de exterior alcanzan los 180 cm y producen hasta 600 g por planta.
🚀 Consigue aqui tus semillas:
https://www.royalqueenseeds.es/rqs-semillas-cannabis-tyson/664-dynamite-diesel.html
💡TS-3000 + TS-1000: se usaran dos de las lámparas de la serie TS de Marshydro, para cubrir todas las necesidades de las plantas durante el ciclo de cultivo, uso las dos lámparas en floracion para llegar a toda la carpa de 1.50 x 1.50 x 1.80.
https://marshydro.eu/products/mars-hydro-ts-3000-led-grow-light/
🏠 : Marshydro 1.50 x 1.50 x 1.80, carpa 100% estanca con ventanas laterales para llegar a todos los lugares durante el grow
https://marshydro.eu/products/diy-150x150x200cm-grow-tent-kit
🌬️💨 Marshydro 6inch + filtro carbon para evitar olores indeseables.
https://marshydro.eu/products/ifresh-smart-6inch-filter-kits/
💻 Trolmaster Tent-X TCS-1 como controlador de luz, optimiza tu cultivo con la última tecnología del mercado, desde donde puedes controlar todos los parametros.
https://www.trolmaster.com/Products/Details/TCS-1
🍣🍦🌴 Xpert Nutrients es una empresa especializada en la producción y comercialización de fertilizantes líquidos y tierras, que garantizan excelentes cosechas y un crecimiento activo para sus plantas durante todas las fases de cultivo.
Consigue aqui tus Nutrientes:
https://xpertnutrients.com/es/shop/
📆 Semana 6:
Buena semana, ha habido sol agradable y buenas temperaturas, empieza q tomar fuerza.
Mantengo las dosis de nutrientes a 1/3 de lo recomendada por el fabricante al estar en suelo virgen ☘️🌲🌳.
Likes
6
Share


@Dartagnan
Follow
Done some LST last week to open up the plant. The SCROG net was setup a few days after that.
This strain is showing a lot of branching, it might work really well with the SCROG method.

Likes
13
Share


@Lfuego22
Follow
Day 18 veg from clone
Water temp 69.6
Ph 5.9
Ppm 724
Ec 1.6
Room temp 66.8
Light temp 74.4
Humid in room 48
Over light 42
Day 19. Full flush.
PT 1
Start ppm of RO (filtered/nestle) 146
Ph 7+
Final ppm 880
Ph 5.9/6.0
Temp 70°
Room humidity 50%
Light 45%
Light heat 73.0
Room heat 68/70 depending on if heater on or off