


Likes
Comments
Share


@timbarin
Follow
25/Aug
Another week passed by and she is filling up the net slowly. All green and lush enjoying the notnao cool breeze from the fan. I hope the temp will drop a bit next week. Will let me increase the wattage

Likes
2
Share

@purecannabliss
Follow
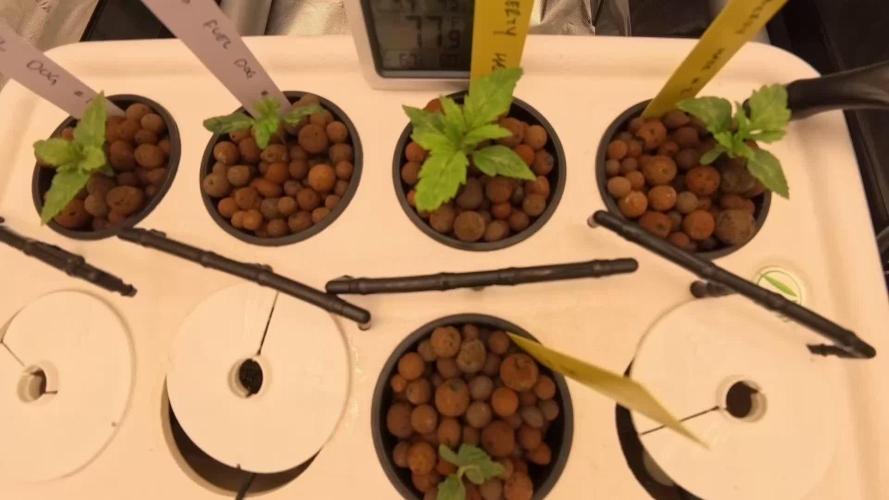
🌱 Day 8 — Veg
Nutrient strength kept light (≈180 ppm) for root development.
Water level just below net pots; bubbles lightly mist the bottoms.
Reservoir and pH stable throughout the week.
No visible roots yet.
Will transfer the 4 best plants into the alien aero system when:
Roots are long, white, and branching — at least 4–6 inches hanging freely into the SuperPonics reservoir.
Root tips are firm and bright (not soft or brown).
The plants have at least 3–4 sets of true leaves and are starting to accelerate growth.
🌱 Day 10 — Veg
Roots have finally reached the water. Will look to transplant in the next 5 days or so.


Likes
9
Share


@Smokey_J26
Follow
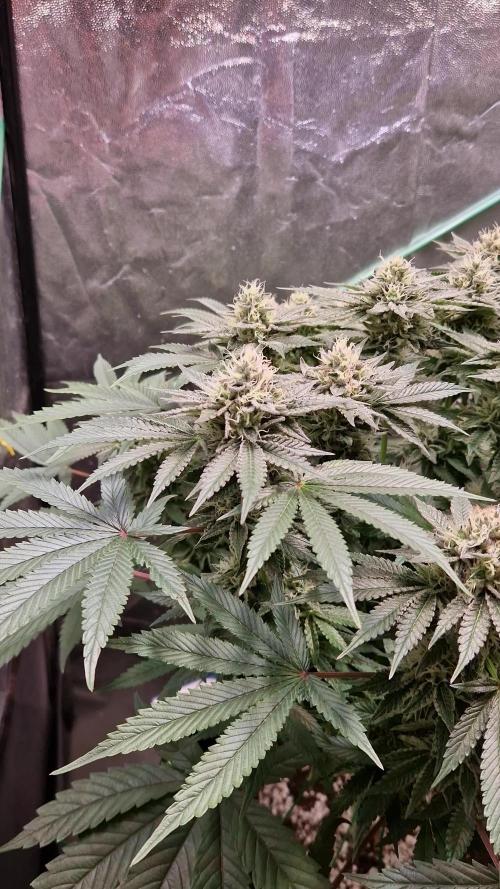
Bounced back from the repot and defoliation (to get the light penetrating the lower flower sites).
Started giving sugar royal ready to flick to flower.
Really happy with the internodal spacing on this strain. Hoping for a decent yield.
Will be flipped to 12 hours this week.
Excited about the next 10 weeks!
30/11/23 UPDATE
Added 2ft tube heater to try and bring the temps up abit.
Tied down the girls, training should've started earlier but ive struggled for time.
Last day of Veg - tomorrow will be 12/12
Gave a good feed including Power Bud and brought pH up to 6.4 (tell tale signs of deficiency due to possible low pH at the roots)

Likes
35
Share

Likes
17
Share


@PCGrows
Follow
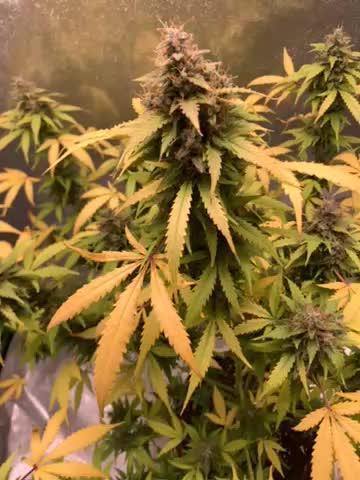
About 1 week away I think...mix of clear, cloudy trichs and a couple amber showing up...as soon as no more clear she comes down!




Likes
11
Share


@Krissci
Follow
Overall happy with the grow..
More pics to be uploaded.
This is my 1st grow using organic molasses..may have used too much and stunted the growth, but still happy
Likes
34
Share


@Bluntblazer66
Follow
Feb 22nd
Plants are doing well but they seam to have stunted
They are growing lots of branches but not growing in length
Also I have been having difficulty keeping my PH balanced out
Feb 25th
I have taken all of the tie downs off because these plants are stunted
I have decided to do a flush of the system, and put in fresh nutes.
I will also flush each plant with a few gallons of pure PH’d water
I will put the new nute strengths on next week’s update
As for now I am going to feed just PH’d water @ 6.0
Feb 28th
Plants have responded well to flushing
New growth showing so I have resumed LST

Likes
18
Share


@Pokan187
Follow
The trichomes on the Runtz are all milky and I'm getting some amber on the sugar leaves, I think the end is near 😁
The G13 is looking great and smelling wonderful, the buds are getting heavier and same for the GDP

Processing
Likes
14
Share


@mheat
Follow
She is fattening up and has a great aroma! Trichomes are super cloudy...no amber. A few more weeks..
Likes
8
Share


@Alkaline_Water
Follow
Mandarin Cookies canopy is looking nice. Wondering if I should flip to flowering soon to avoid light burn when She stretches;
Nute burned the Larry OG once again :/ ;
defoliation on both mandarin cookies and Larry OG;


Likes
26
Share


@Manis
Follow
Hell guys 👋 ☘️❤️🔥😊
- 1st day of flowering for Lava Cake (26/8)
- Expect Critical all the other flowers show their genders with the first white hairs.
- New pot 10lt for Ak
- Day 24 and LLST (Lazy Low Stress Training)
- No nutrients Biobizz at all so far.
- 1st day of flowering for Frosted Guava (31/8)
Cheers everyone ☘️❤️🔥😊

Likes
26
Share


@Highgrade_Harvests
Follow
End of week 7 of flower has come. All 3 plants are doing great. The one tall one has gotten so big it fell over and I had to tie up a bunch of colas. They all smell really good but each one has a slightly different scent to it. The runt is small but has a lot of colas. The one in between I think has the best structure out of the bunch. Almost harvest time.
Likes
48
Share


@AsNoriu
Follow
Day 88. Amazing girl. Trim jail was easy, but she needed few more weeks to properly finish even so high lolipoped colas. Sugar leave trim left for butter and freezed , the rest of foliage and trim goes for bubble hash.
Day 98. 92 g went for curing
Happy Growing !
Processing
Likes
21
Share


@Siriuz
Follow
Started Week 9
Day 57
Very proud of being a Canna Grower
Very proud of planting the first seeds
Now look what we have after almost 60 days, full of buds, crystal en resin coming deep in each flower!
Day 58
Time to feed them nutes
Going hard 1900ppm
This is my top and then going down
Then flushing so they get what they need and clean the extra for last 2 weeks
Day 59
Not bad after all, no nutrient burnt
All leaves looking good
All plants doing great
And getting closer to the harvest season!
Day 60
Probably gonna give them some tap water 143 ppm TDS reads
Ph 6 sounds good to me!
More pictures coming up soon...
Day 61.62.63
She's doing great didn't have the time to go crazy on pics lately so I owe you that guys
Sorry but for next week will have tons
Quick update
They're doing good but it was hot lately like 28/30 at night and 32 at day inside AC
Humidity lvl was 60/70%
Was Rainy outside some days
Not anymore tho
Likes
49
Share


@LockDownGrow
Follow
Coming along nicely now apart from alittle cock up yesterday where I accidentally topped her while trying too lst but I have managed too tape the stem in place so I am hoping my little cock up will force the lower branches too shoot upwards while the broken stem heals ,
This week I had too change my lighting too 600 true watts of kingbo dual optical LED range due too the temps getting closer too 30c than I would like , and by doing so I have now got a constant temp of 27c lights on and 18c lights out,
Update on day 4 or week 3 ,
My little cock up snapping the main stem while trying to lst the tape seems too have really don't the trick , and although snapping the main stem is not ideal lol ,
It seems I've managed too top this plant and still get too keep the top , the leaves all look fresh and healthy and feed so I will leave the tape on there for two weeks and then try and remove it as all I had too hand was selotape lol
The breakage really do not seemed too affect the top 2 nodes at all apart from trigger the lower plant too stretch out , as this break was bad , like hanging on by a thread bad , so really shocked it took too the repair so easily , and as always I had just been leaching the soil with a single feed that lasts them 7 days , my set up is completely automated and I only go too the grow space once a week but I have a WiFi cam inside the grow space so I can check the temps and how dry the pots are just incase I need too increase the feeding , but too be fair these autos seem too have a mad feed at week 7 and 8 and then drink one feed per week , keeping it simple has helped I think as the plants seem too love it , and I don't need too do anything apart from check the camera ,
And that's just the way I like it , I pay special attention too the temps in my grow space and a calculator in hand for the nutrients ,
Other than that I leave them alone too do what they do ,
I will take some end of week 3 pics over the weekend at some point it's abit of a drive so once a week suits me down too the ground , :)
Update on day 5 of week 3 well as you can see from the photos this week has had a huge raise in production , the breakage I did too the main stem has completely healed it's self and the plant has bushed right out at the bottom and top of the plant where it broke ,
So all in all my little cock up has actually helped the plant grow larger ,
I today gave them a smaller defoliation basically anything covering a branch that could not be tucked under it I removed ,
This is too get as much light too these spots as possible too get them too develop before flowering starts ,
But so far so good , temps are good and no nutrient burns on any of the plants ,
and the results from day one / first feed on green buzz nutrients too this photo today day 5 is dramatic , the photo of all four was before defoliation , but the defoliation has just shown how busy they have this week and the bud sites on this things already is crazy , my next plan this week is too put the net in there and space out all of the branches too give the best spacing between the breaches