


Likes
Comments
Share


@BudBeat
Follow
Auch die zweite Kabul ist bald soweit geerntet zu werden. Jetzt wird mit reinem Wasser gegossen, damit die Pflanze die restlichen Nährstoffe verbrauchen kann. Diese Woche noch und dann wird die Tanne höchstwahrscheinlich gerodet. Aber lecker wird die bestimmt! Allein ihr sehr penetrant duftender Geruch verströmt gerne mal die Wohnung, wenn man nicht aufpasst 😅
Bis die Tage
Cheers ✌️

Processing
Likes
89
Share


@biggreens420
Follow
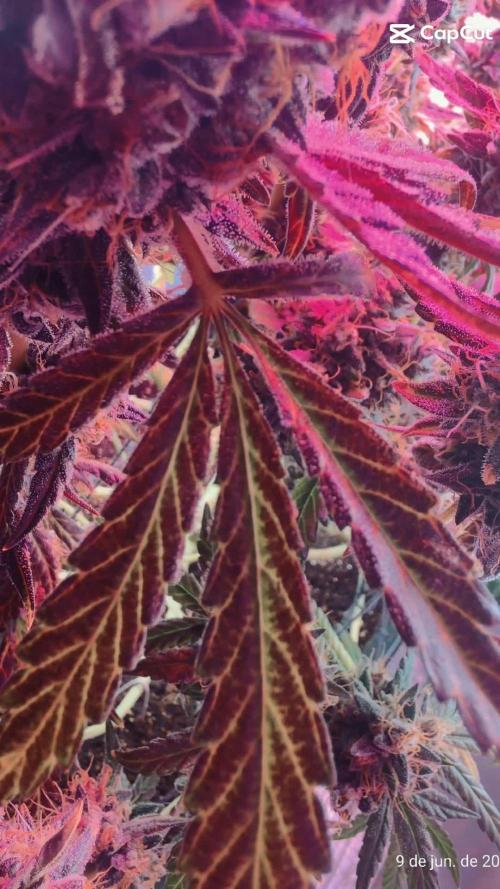
This girl is down dont do wet weight she was looking beautiful faded well smells very sweet extra sticky and buds are formed well i only remove fans when wet dry trim the rest I find it tastes and smokes better this way its cool for drying at the min so using a small heater to warm the room slightly no issues with mold looks like shes packing some weight uploaded a Christmas video dont know which one to use for the competition this or my critical will update harvest when dry and tested thanks for reading happy growing guys


Likes
7
Share


@420keef
Follow
Finally got myself a dehumidifier, now i can controll the humidity in my room because it often went above 60% 🤷♂️🏻 Also love how the big northern light is really packing some weight! & the buds on the bottom look as good as the ones more on top!! Can’t wait till i can harvest all of em😁

Likes
13
Share


@NoVC01
Follow
Moochie's Garden 7/7/2025
Big bluster - "Miracle-Gro/10 gallon, no ph, right out of the well" Wife said phuck Fox farm we are using NPK RAW, using ph watering cans to feed @ 4 gallons each and 5-gallon buckets of ph. watering. Once a week per feed/water. Following NPK feeding schedule.
AzaMax soil drench .4%, 2 gallons each plant. Still spraying neem. Next, mixing Azamax for foliar spray. If I had not taken steps to prevent pests initially, I'd be completely overwhelmed.
Likes
1
Share


@922Grow
Follow
Llegando a las últimas semanas de floración, abundante cogollo central, tornándose cada vez más marrones los pistilos, se comienzan a notar en menor medida los terpenos en la planta.
Likes
103
Share


@WhiteEdge
Follow
Day 50/51 form sprouting Bloom W4 D23/24
Defoliation on all girls. Removed all nodes and side branching. Leave only main branching from main stem. Depending on plant from 10-14 branches in total is left on girls.
About 60-65cm off usable canopy left on plants. Total 1.78m3 off canopy density.
Cut lots of buds with longer nodes, leaving only buds with short node from main branch (bottom)
Lott's off leaves removed also, good light penetration now, on lowest bud we have around 250/350ppfd
Installing another trellis net over girls
More frequent watering from this week till end off week 7
More power to light also, from 900-1250ppfd at canopy levels.
Food strength stay the same, lowering humidity a bit will trigger plants to consume more food.
Lowering day and night temperature for 1c, max temp is 26.5c in day time, in dark period it drop to 19c. Start getting little humidity spike @ 65%RH right when lights go out.
Light intensity @ 950-1250 ppfd , Light distance - 50-60cm, DLI - 50/55, Light Interval 12/12
Day RH - 50/55%, Night RH - 45/50%,
Day Temperature - 24c/26c, Night Temperature - 19/21c,
Leaf temperature 24/25c, CO2 1000/1350ppm, VPD 1.2
15s ON time, 15min OFF time @ Day misting
15s ON time, 20min OFF time @ Night misting
NT-Nutrient Tank PH - 5.99/6.20, EC -2.0/1.93, Water Temperature - 19/21
Day 52/54 form sprouting Bloom W4 D25/27
Watching girls, flower progress. Nothing to do, flight control this week. Keeping things as they are...
This days need to do branch/TOPs management, to center every top in similar distance from other.
Light intensity @ 950-1250 ppfd , Light distance - 50-60cm, DLI - 50/55, Light Interval 12/12
Day RH - 50/55%, Night RH - 45/50%,
Day Temperature - 24c/26c, Night Temperature - 19/21c,
Leaf temperature 24/25c, CO2 1000/1350ppm, VPD 1.2/1.3
15s ON time, 150min OFF time @ Day misting
15s ON time, 20min OFF time @ Night misting
NT-Nutrient Tank PH - 5.99/6.20, EC -2.0/1.93, Water Temperature - 19/21
Day 55 form sprouting Bloom W4 D28
Last days off week 4, girls stack buds nicely, frost is already on sight. Under canopy looking brutal at this time. Hope it will not bush too much in next two weeks before another defoliation in week 7. Girls stop growing vertically, only buds development😍
Light intensity @ 950-1250 ppfd , Light distance - 50-60cm, DLI - 50/55, Light Interval 12/12
Day RH - 49/55%, Night RH - 45/50%,
Day Temperature - 24c/26c, Night Temperature - 19/21c,
Leaf temperature 24/25c, CO2 1000/1350ppm, VPD 1.2/1.3
15s ON time, 20min OFF time @ Day misting
15s ON time, 25min OFF time @ Night misting
NT-Nutrient Tank PH - 5.99/6.20, EC -2.0/2.05, Water Temperature - 19/21


Likes
Comments
Share

@LoveTerps
Follow
May 26 2026
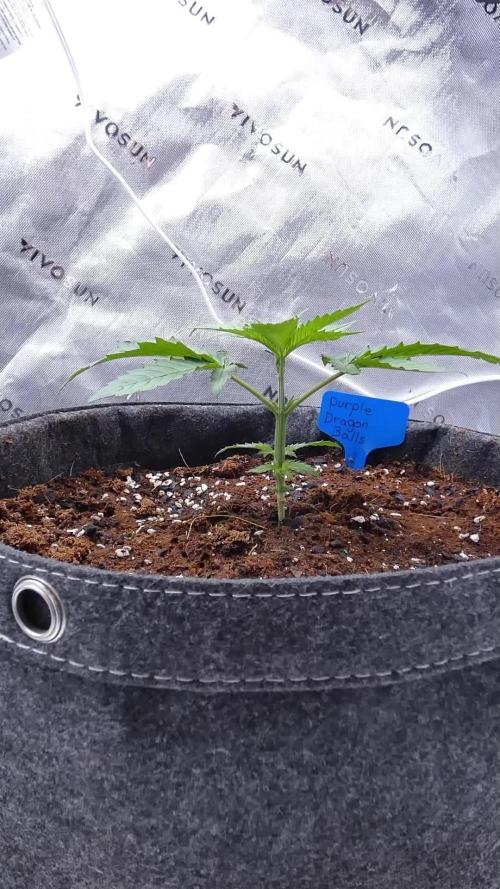
She's been repotted into a 5 gallon grow bag, and that will serve as her home for the remainder of the grow. The soil in the bottom half is pro-mix all purpose, and the top half is a combination of coco coir, perlite, worm castings, biochar, blood meal, bone meal, Epsom salts, and a bit of cal-mag.
She's making a lot of progress health-wise, and by next week she should look completely normal. I did remove a some lower fan leaves, as they were no longer of any use.
----------
On a side note:
I had originally ordered 10 purple dragon ball F5 seeds from 7East, but they only sent me 6 due to lack of inventory and substituted with a generous amount of Watermelon Dragon seeds, which I'm fine with since I had intended to order those sometime in the future anyway. That said, of those 6 purple dragon ball seeds, there were 5 that initially cracked open but the inside of the seed was rotten. The sole surviving seed germinated properly, and while these are regular seeds and could be male or female, I'm confident this one is a female based on physical characteristics and a lack of pre-flower development on the 4th node. In rare cases I've seen males develop their first pre-flowers on the 5th node, but in those cases they ended up being male herms. Fingers crossed that doesn't happen here, but the only way to find out is to wait. ⏳

Likes
7
Share

@DogDoctorOfficial
Follow
🌱 Week 3 – Transplant Time, Studio Vibes & Root Dreams
Grower’s Journal – BlueBerry by Zamnesia Seeds | Entry 004
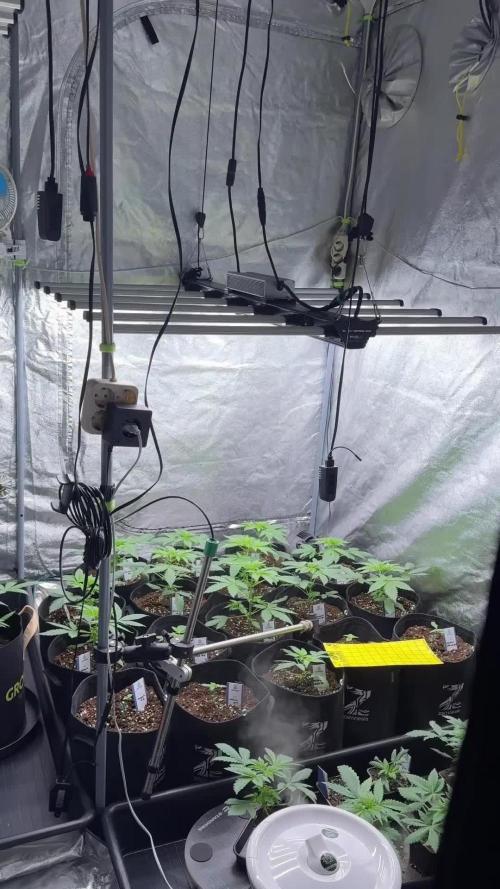
This week marks a major milestone in our BlueBerry journey, transplant time. Our three beautiful girls have been thriving, and after careful observation, we’ve selected Pheno #1 and Pheno #2 to move forward into their new homes and toward the flowering stage.
⸻
Transplanting into Fabric Pots – Why & How
We’ve moved the selected girls into 11L Amnesia fabric pots, and here’s why fabric pots are a grower’s best friend:
• Air Pruning: Fabric pots naturally prune roots when they hit the edges, encouraging a dense, fibrous root ball with no circling.
• Oxygenation: They allow more airflow to the root zone, supporting microbial activity and preventing anaerobic pockets.
• Drainage: Overwatering is much harder—excess water simply flows through.
• Temperature Regulation: Fabric helps prevent root overheating, especially important under powerful grow lights.
🧡 These pots create an environment where roots can breathe, explore, and flourish. And that’s the heart of healthy, vigorous growth.
⸻
🌿 Roots & Selection – What We Saw
Before transplanting, we gently lifted the plants to check their roots, and they were absolutely gorgeous. White, fuzzy, and lively, signaling that they were ready to stretch into something bigger.
While all three seedlings looked fantastic, BlueBerry #1 and BlueBerry #2 stood out with stronger symmetry, tighter nodes, and a more expressive posture.
BlueBerry #3 will stay behind—for now—a backup, just in case. 💫
⸻
Soil Mix & Nutrient Support
We prepped the new pots with a focused super soil mix blended with Aptus Holland amendments:
Transplant Mix Includes:
• 🌱 Super soil base (organic, airy, compost-rich)
• Aptus Mycor-Mix – inoculates roots with powerful mycorrhizal fungi
• 🌿 Aptus Micro-Mix – delivers beneficial bacteria to balance the root zone
• ⚖️ Aptus Substrate Buffer Powder – stabilizes pH & improves nutrient exchange
First Watering Feed Mix (per liter):
• Aptus Regulator – 0.15 ml
Strengthens cell walls, improves nutrient flow, and boosts stress resistance (especially post-transplant).
• Aptus CalMag Boost – 0.25 ml
Helps develop strong structure and leaf formation.
• 💧 Aptus All-in-One Liquid – 1 ml
Balanced macro and micronutrients for baseline support.
• 🌾 Aptus Start Booster – 2 ml
Stimulates root expansion and early vegetative energy.
Water Stats:
• pH: 5.83
• EC: 1.01
• Water Temp: 18.5°C
⸻
🌬️ Environment & Gear Overview
Our setup is getting tighter every day:
• Lighting: Black Series 600 LED by Future of Grow, full-spectrum, clean white light, perfect for compact, healthy growth.
• Ventilation:
• 6” Spider Farmer inline fan + (carbon filtered) – controlled by Spider Farmer GGS Controller
• 6” TrolMaster AeroFan + (carbon filtered) – linked to the TrolMaster Ecosystem
• Why carbon filters? Even at this stage, clean air = clean grow. Carbon filters reduce smells, but more importantly, they help purify the incoming and outgoing air.
• Environmental Conditions:
• Temp: ~27°C
• Humidity: ~57.4%
• CO₂: ~632 ppm
• Airflow: Gentle, consistent, and perfectly balanced
⚙️ We’re gradually dialing in the TrolMaster system, automating parts of the grow environment, like extraction, CO₂ management, and eventually irrigation. For now, everything is still done by hand-watering, feeding, and loving every single leaf.
⸻
📸 Studio Time – A Celebration of Beauty
This week, the girls got a special treat: a trip to the studio. Their energy, their posture, their color, it all deserved to be captured.
Their presence under the soft lights was stunning. These won’t be the last photos we take, we’ll be back again before they outgrow their portability. But for now, these are moments to remember. 💙📷
⸻
🔮 What to Expect After Transplant
In the next few days:
• Some slower above-ground growth is normal, roots are stretching first.
• Expect to see a new flush of leaves and stronger stems midweek.
• No training yet, just letting them adapt and settle.
🙅♂️ What NOT to Expect
• No explosive height jumps yet
• No flowering signs
• No topping until they’re fully recovered
This week is about integration, expansion, and ease.
⸻
🎥 Series Continues – Follow the Rhythm
As always, this is part of our ongoing Grow Series, an open diary of everything we do and why. Whether you’re a new grower or just here for the vibes, you’re invited to come along.
📲 Don’t forget to Subscribe and follow me on Instagram and YouTube @DogDoctorOfficial for exclusive content, real-time updates, and behind-the-scenes magic. We’ve got so much more coming, including transplanting and all the amazing techniques that go along with it. You won’t want to miss it.
• GrowDiaries Journal: https://growdiaries.com/grower/dogdoctorofficial
• Instagram: https://www.instagram.com/dogdoctorofficial/
• YouTube: https://www.youtube.com/@dogdoctorofficial
⸻
Explore the Gear that Powers My Grow
If you’re curious about the tech I’m using, check out these links:
• Genetics, gear, nutrients, and more – Zamnesia: https://www.zamnesia.com/
• Environmental control & automation – TrolMaster: https://www.trolmaster.eu/
• Advanced LED lighting – Future of Grow: https://www.futureofgrow.com/
• Root and growth nutrition – Aptus Holland: https://aptus-holland.com/
• Nutrient systems & boosters – Plagron: https://plagron.com/en/
• Soil & substrate excellence – PRO-MIX BX: https://www.pthorticulture.com/en-us/products/pro-mix-bx-mycorrhizae
• Curing and storage – Grove Bags: https://grovebags.com/
⸻
We’ve got much more coming as we move through the grow cycles. Trust me, you won’t want to miss the next steps, let’s push the boundaries of indoor horticulture together!
As always, this is shared for educational purposes, aiming to spread understanding and appreciation for this plant. Let’s celebrate it responsibly and continue to learn and grow together.
With true love comes happiness. Always believe in yourself, and always do things expecting nothing and with an open heart. Be a giver, and the universe will give back in ways you could never imagine.
💚 Growers love to all 💚

Likes
22
Share


@BB_UK
Follow
So I transfered my girls today 3 of them have 13g of RQS nutrition mixed into the soil medium and I used dynomyco in the potting hole when transferring them! I will run 3 organic and one synthetic with my usual mix of nutrients along the way (bud blood, big bud, overdrive and flawless finish) I topped the 4 side branches and left the 2 mains and will let them set into their final pot before I transition into bloom! I'm just awaiting for a couple things to arrive and I will then move them Into their final home and theyre going to love it I just know! It will be these 4 in a 90 x 90 x 180 under an FCE3000 I actually can't wait! I think this one will be my best one yet!
Likes
1
Share


@DTHGenetics
Follow
Only took one video of both of my strains black moonflower and garlic fusion at week 5 you can find the other strains diary on my page they are doing good I topped week 5 and transplanted into 1 gallon . Looking alright the ones in the back are chic lit autoflowers from mendocino twenty twenty 5 weeks old topped and ones lst. Theese videos are before topping and after


Likes
7
Share


@ShiftyGaijin
Follow
Seeing as this is my first grow, I’m still learning to read the plant and know what’s going on. Think I’ve developed some fairly advanced leaf septoria. Might not be bad enough to affect the end result, but I’m pretty clueless, so I put up a question about it. Hoping to hear back from more experienced growers about what I’m looking at. Going on week 7 of flower, week 6 if we’re going off of the first pistils, when the breeder recommends 8-9. So I know I’m coming up to the end of things.
Cutting back on nutes due to some burnt tips. Not any substantial amount, but put EC on the lower side of the range that GH recommends for its stage in life.
Buds smell amazing and seem to be developing great IMO. Had to tie a few down to bring the canopy all to one level again. Didn’t think that sticking my arm down the leaves for 2 seconds worth of tie wrapping would make my arm hair all super sticky for hours. Lol. Every experience is a good learning experience for my first grow.

Likes
14
Share


@SBCannabisCo
Follow
Enjoyed this run. Ready to harvest in about 1 and a half weeks, I actually have seeds in a couple of the plants. It happens, this is my first indoor grow so, need to get my hand on some new genetics

Likes
14
Share


@Black_Widow
Follow
Привет садоводы
процес вегитации идет полным ходом и цветку понадобится много времени , что-бы вырасти до хороших размеров
поэтому будем наблюдать, как пойдут дела

Likes
3
Share


@Joaka
Follow
se acerca la ultimas semanas, esta semana se dejo de aplicar fertilizante con nitrogeno. se ve una translocacion sana hasta el momento. se espera que en las proximas semanas incremente el nivel de tricomas.
Queda poco!!!
Pd: pido disculpas a aquellos que siguen de cerca este diario, no pude actualizar a tiempo en las ultimas semanas, espero poder actuaizar de forma oportuna las ultimas semanas.


Likes
3
Share


@French__flair
Follow
N'hésitez pas à me contacter si vous avez des questions!
Pour préparer votre solution, dans votre réservoir ou arrosoir :
Mettre en premier la base (Iguana)
Ensuite Ancient Earth
Et enfin les bactéries
ASSUREZ-VOUS D'UTILISER UNE EAU DE BONNE QUALITE (EC < 0,2) POUR DE MEILLEURS RESULTATS.
J'utilise un substrat non enrichi pour permettre le meilleur départ à mes plantes.
Il s'agit du Promix de Plagron, il a une EC proche de 0, c'est pour cette raison que je commence les engrais assez fort dès le début. Les plantes sont très gourmande sous LED haute intensité et l'enracinement est rapide.
J'arrose tous les 3 jours environ avec 2 arrosages à l'engrais et 1 à l'eau par semaine. Je n'attend pas que le substrat sèche complétement sinon ça réduit l'efficacité de l'arrosage, ça détruit la faune et éventuellement facilite la cristallisation des minéraux.
Au niveau du volume d'arrosage, il faut prendre en compte 1/3 de la taille du pot. Pour un pot de 1L je vais donc arroser environ 300ml. Pour un Pot de 10L je vais arroser environ 3L.
Il est important d'arroser doucement pour éviter que l'eau ne coule tout de suite au fond.
Il est important d'avoir au moins 15% de drain pour s'assurer d'évacuer tous les nutriments non consommé et faire la place aux nouveaux.
IL EST PRIMORDIALE D'EVACUER L'EAU AU FOND DES COUPELLES, c'est une eau qui est chargée en nutriments non consommé et on ne veut pas qu'elle remonte dans les pots car cela risquerait de créer des blocages.
Au niveau de la technique de taille de formation, je réalise tout de suite une FIM que je reproduirai dès que l'apex aura repoussé. La première FIM est la plus longue mais les suivantes sont très rapide car la plante s'habitue à la technique et cela la stress beaucoup moins. En général il faut reproduire la FIM tous les 3 à 4 jours en fonction de la vigueur. C'est une technique très facile à mettre en œuvre et ne demande aucun matériel. C'est aussi la plus rapide pour obtenir des buissons.
N'hésitez pas à me contacter si vous avez des questions concernant la FIM!
Je retire également les feuilles supérieur (pas toute pour éviter de ralentir la plante) qui cache les secondaires pour augmenter l'efficacité de la FIM sur la croissance des secondaires.
Likes
34
Share


@420DeepGrow
Follow
La segunda semana fue bien, a las plantas que estiraban más les causé Low Stress para mantener una altura igualada.
De las 3 variedades que tengo, es la que antes ha mostrado las preflores.
Un error vuelvo a repetir ha sido no tener medidor de EC-PH y otro ha sido el haberme excedido con los s riegos.
Conecto pronto el CO2 a 630ppm par ver si así logro obtener un buen estiramiento esta semana.
📅 Día 15: 🔹 Descanso
📅 Día 16: 🔹 Riego según la tabla de nutrientes. Conecto CO2 a 700ppm.
📅 Día 17 : 🔹 Low Stress para que dé más luz a las ramas bajas y tengan más espacio para desarrollar. No quito hojas ya que creo que les quitas los paneles que las alimenta. El riego de ayer las sentó muy bien y están bebiendo el agua rápido por fin.
📅 Día 18:🔹 Descanso, puntualizar que he activado el CO2 a 730ppm y decir que se han bebido todo el agua, mañana toca riego.
📅 Día 19: 🔹Riego según la tabla de nutrientes. La EC me dio 2000 y el pH 6.3