


Likes
Comments
Share


@SirBudAlotts
Follow
She is loving life!!
I decided to top her to see how she responds.
My first time topping an autoflower!!!!
I hope I didn't mess her up with that type of training 😅 😬..

Likes
19
Share


@Roberts
Follow
Super Skunk is doing good. She is starting to bulk. Everything is looking good. Thank you Spliff Seeds, Spider Farmer, and Athena nutrition. 🤜🏻🤛🏻🌱🌱🌱
Thank you grow diaries community for the 👇likes👇, follows, comments, and subscriptions on my YouTube channel👇.
❄️🌱🍻 Happy Growing 🌱🌱🌱
https://youtube.com/channel/UCAhN7yRzWLpcaRHhMIQ7X4g.

Likes
4
Share


@MoneyMorris
Follow
The plants have been flushing for almost a week now. Really starting to change colors. I can't wait to see how much I get from them.

Processing
Likes
8
Share


@Max1973
Follow
Day 35 - few pics and vids..... everything going along nicely 👍
This is a pretty big update, so i'll add to it over the next few days, as i
finish building it all....
i'm building these 2 x SS haze, the full tent, just finishing up the setup.....
trimming them, changing solutions to 12/12 and flower.....
changed the exhaust fan and filter setup to the better outside the tent method....
and installed 12v CPU computer fan, lol ("alta9" fits in 4in ducting perfectly), drops wattage on extractor fan.... 10w tops...
got a few kg of active carbon and making/replacing the carbon filter ....
i'll add afew vids of the new setup in afew days...
Day 36 - few pics/vid of new tent setup...... "alta 9" fan :)
post tomorrow after i finish trimmin and settin up night mode etc......
and into tomorrow we go, lol ... Day 37....
slowly getting there..... little bit more to go...
this should make things abit more interesting..... right tank (short babie) has : 19 lts of tap water @18oC + 150 ml -dutch master one gold FLOWER.... 6.4 PH - 1400 PPM
left tank has : 19 lts of tap water @18oC + 50 ml of elements a and 50ml of b and 10 ml of nitro and 20ml of Crystalic (molasses/pot) .... 6.5 PH - 1200 PPM
more pics / vids of the finished tent setup.... roots, transfer, etc... Day 37 is alot of vids of the clean and change to flower.....
edit - day after build noticed left tank (nutrifield) not enough bubbles..... pulled out the 4 air pump and swapped to the 2 x original oxipumps...
much better, also to fix the problem with ph goin high, and bubbles not stirin the mix, was to add another 10ml of crystallic and another 5ml of nitro...
then pumped both tanks with ph down and set em to 5.8-6.2 - both plants have fully recovered from the big trim, and bounced back within 12-24hrs,
post pics/vid in abit.....
Day 39 - made a freaky video... was curious about what the plants would see looking up at the lights...
the lights and buzzing of air compressors and bubbling tank water, and dazzling lights turned out pretty cool in vid editor,
was in selfie mode....
and final vid of the bounceback from trim :)
👍😎

Likes
7
Share


@ReefsDad
Follow
So please don"t trip out on this. I know my conditions are not accurate or my nutrient amounts. Lost my notebook with all my notes on this grow. All I have are the pics which I'll post. The dates of the pics may not correspond with the weeks in the diary. Kids, make sure you keep up to date if you are going to keep a diary online and keep a written one. I definitely learned my lesson. Several weeks of notes on 5 different strains lost. Well enjoy the pics at least.


Likes
14
Share
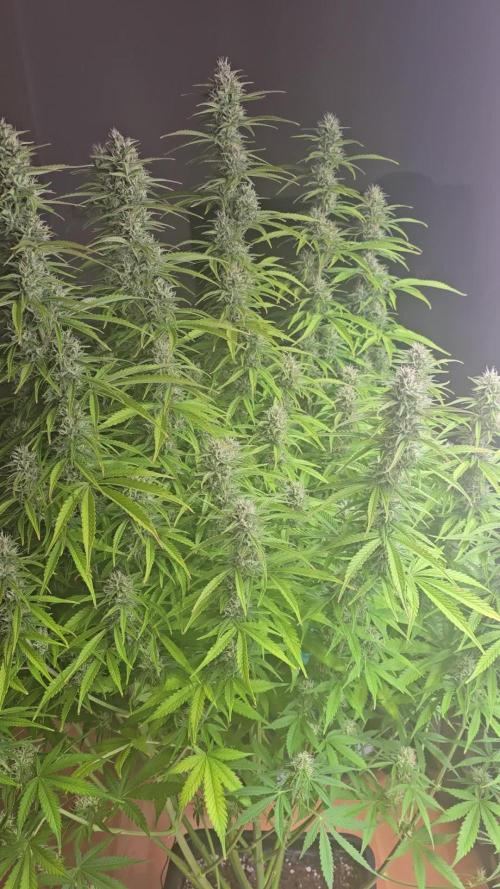

@ThatsmyGrow
Follow
Thats what i mean, she will need some more time then my other. I think its will be a 12 weeks harvest. But she will be fat too


Likes
36
Share


@TaterheadJohnson
Follow
7/19: Started new nutrients today. Filled gallon jug with new nutes. Poured half of new nute mix in half gallon jug. Poured the entire half gallon jug into reservoir.
7/20: Bumped light intensity to 50%
7/21: Filled reservoir to the 2nd line today. Added a total of 1 gallon to res to get it to that line. Poured the rest of the mixed nutes for this week (half gallon) and then another half gallon of just plain water.
7/24: Bumped light intensity to 55%
7/25: Sadness today 😞.. While in the process of doing more LST today I accidentally snapped the main stem. I Panicked! Moved plant back in opposite direction to counteract the split. Will be monitoring very closely! 🙏🏾
***** For this Grow******
“Day Air Temperature” will be the max temp of tent for the week.
“Substrate Temperature” will be the average temp of tent for the week.
“Night Air Temperature” will be the lowest temp of the tent for the week.
Likes
2
Share

@GingerGarageGrow420
Follow
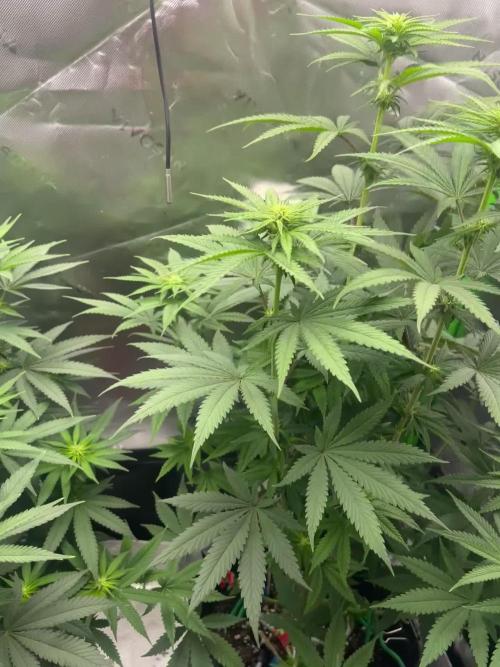
Strain: Fast Buds Rainbow Melon Photo Feminized
Day 14 of Flower
Day: 63 from sprout
Medium: Growers Gold
Light: Vivosun VS2000 at 75%
VPD: 1.3 kPa
Light Distance: 12 inches
Watering: By hand, ~16 oz daily
Nutrients: pH Perfect Advanced Nutrition Grow, Bloom, Micro 2 ml / L and 1 ml / L big bud.
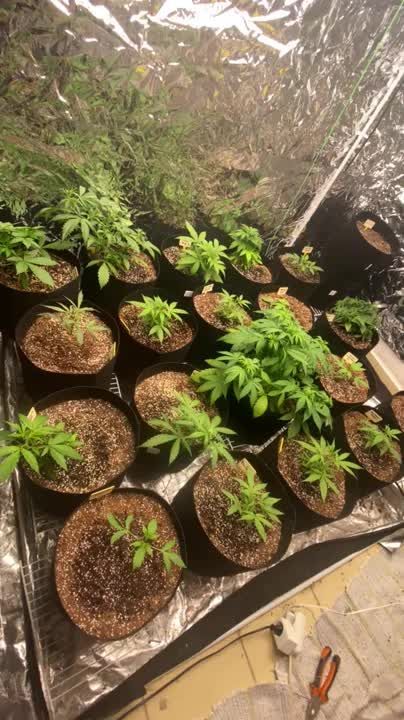
Automatic watering ready to go!


Likes
2
Share


@levensfiets
Follow
cheesy fridge is home to a new plant now. the amnesia (or is it?!) is looking damn fine!

Likes
Comments
Share


@Robom069
Follow
Day 47/48
introducing the 12/12 on high power leds on the ladies
lookin good so far
the black domians nmow oin the right and the acid dough on the left
i think both lamps work very similar

Likes
21
Share


@OGTrauma
Follow
Now it’s our POST PANDEMIC VIRGO SEASON & as Spring and ‘Fiestas Patrias’ are coming here homies!!! Have Big Gas Puff on my Behalf! 👽
Declaring on September the First, Im Setting officialy the photopheriod as 20/04 hours resting too, they start in midnight as they will help to provide an ideal temperature at night, and thats the reason why stick with covering most of the day yet respecting some time off the grid, as for both mary jane plant processes like foliar feeding or the transplant depicted below and electronics used requires a bit of resting as lifespam testing and recomendations tend to stick on ‘calm your tits homie’ even on autoflowering scenarios, last consideration is the electricity bill as can become bothersome in some countries too.
Moving on plant growth , I personally consider up to this date , a healthy growth even when i changed the substrate it has quite a possitive impact and that’s on having a number of survivors above the mínimum of plants i want to be spread each on 11 lt of ’ Organic Life Light Mix’ for the most oustanding Killer Kush FV, by using the growth vigor & not stressed AF criteria , as it’s always good to do backups in case i had a strong damping-off or like a bad germination scenario. Notice the quirk of ‘Pot on Pot’ made the transplant a bit easier, and how can make some small upgrades if added in your grow , if its on your market and fits your style as well.
Regarding to feeding, new transplant soil was watered with Hesi boost, Top candy and BAC Calmag’s 2.0 (I chose this Brand specifically as it present other useful micronutrients on its composition ), as they first ones show to have quite a stimulant and refreshing effect on the babies, considering the size of more than decent root samples took before being moved on their final containers. This experience also introduced me the carencies i must attend usually on these type of soils, who also i do consider that being this deal of too light substrate, is a deal of a trade off too , like, im saying this this Organic Life Light Mix it’s not a bad product at all but consider is way more needy unlike traditional soils or even fuck, this shit is more airy than other light soils compositions hhahah, so, final words here, like at the same time the speed gained plus not a total damping off on germination phase & good interaction with fertilizers i use as plant interaction shows quite a good evolution, specially being keen on carencies and disbalances are faster to present and faster to attend , it requires more handling specially on feeding like all shit that is making this grow go at super fast speed , as i took some pics of root mass and it’s development shows it’s quite advanced yet on the optimal point to transplant.
PS: I will stay with the non finalists , the more pansy Killer Kush aren’t totally discarded as the point of having backups to have a better coverage regarding to uncertainity of germination and the fact that still fuck up things and shit my pants in the near future, as usual, im a shitty grower if not noticed ! 😂😂😂.
HAVE A BIG DICK ENERGY SEPTEMBER MFS !!!
// i'm uploading the photos asap as possible :P

Likes
28
Share


Likes
27
Share


@Chubbs
Follow
420 Fastbuds Week 4
Blackberry Auto
This week has been awesome for these girls. They have gone into preflower showing off some amazing colors. I did add 1tsp/gal of some GH calimagic to the feeding to combat the few rust spots I saw on a couple lower leafs. Seemed to solve the issue since haven't seen any new spots show up. Will continue to keep the same routine up as it's working just great.
All in all Happy Growing
Likes
1
Share


@Huckleberry39
Follow
Getting really close now. Should be down within the week. This has been a super good grow. ILGM always comes thru with good stuff!!


Likes
11
Share


@Kitties_and_Colas
Follow
Both girls were up-potted into their final pots, one in a 5gal fabric pot and one in a 6.5gal plastic container. I planted them in fresh FFOF with a few handfuls of perlite and stopped feeding (water and 3ml/gal cal-mag only), both girls seem happy and look healthy albeit small for their age...i did a heavy defoliation on the bigger of the 2 plants and will do the same to the "runt" next week...
Edit: 5 days after transplant and brown spots have appeared, I believe it to be calcium lockout, possibly a PH drop after switching to a hot grow media..i removed effected leaves, applied a top dressing of dolomite lime (tablespoon each) and watered 1 gallon PH'd to 7.5..will update

Likes
2
Share


@KeemBboomin
Follow
Everything is not as accurate as I would like to say, but I wanted you guys to see what I can do
Likes
167
Share


@DeepWaterGrower
Follow
⭐ TrolMaster tracking ⭐
I started to track my crop during week 15, when I got the Tent-X TCS-1 by TrolMaster. First impression was: this is too professional for me, I can't handle setting it up and using it well. Then I started reading some posts on Instagram, I visited their site and in 5 minutes my cultivation experience took a huge step forward with disarming simplicity, I couldn't believe it.
I have uploaded tracking videos from the TrolMaster app for each week from the 15th to the 19th, as well as the two weeks of drying stage.
⭐ Controller Chronicles ⭐
Day after day I appreciated the clarity and precision for data, access to all settings and instant readings by connecting a WIFI router to the controller's LAN port. I loved the possibility to dim my lamps remotely, or even automatically based on the temperature in the box!
🌱 GERMINATION (2 days)
Seeds in a glass of EC 0.4 tap water for 10 hours, then in root riots and under the lamp. They sprouted after 48 hours from dry seed.
🌿 GROWING STAGE (10 weeks and half)
I decided to give these plants a long vegetative growth and this allowed me to do a lot of training on both.
Starting from the 4th veg week I started with defoliation sessions every two weeks, for a total of four during the entire vegetative phase. The last defoliation was done a couple of days before the switch, in order to allow the lower parts of the plant to get as much light as possible.
Furthermore I did Topping on week 6, cutting the apical branch, then on week 8 I did Topping again on several sites, as well as SuperCropping on the highest branches to make the canopy uniform.
The light cycle I used is 18/6 and the last two veg weeks I lowered the light hours to 16/8 first and 14/10 then.
During the veg stage I made 4 DWC change, PH was always between 5.5 and 6, about EC I started with 0.6 and was 1.4 on the last veg week.
🌸 FLOWERING STAGE (9 weeks)
I started this phase after 36 hours of darkness, I then changed the DWCs solution (adding a flowering stimulator).
Then I mounted the ScrOG-net about 50 cm from the base of the plants and I wove the phenotype #1 through the net occupying at least 60% of the available space; the phenotype #2 stretched shortly after the switch and I used the net only to widen the central branches.
They showed the pre-flowers two weeks after the switch, then I made two defoliations on week 3 and 5 flo.
During the last four weeks of flowering (weeks 6-9) I simply paid attention to the PH-EC levels to provide the roots with optimal conditions. I then kept the TEMP-RH-VPD-PPFD values under control and this also thanks to the Tent-X controller by TrolMaster which allows me to provide optimal conditions also above.
I chopped them when trichomes were about 85% milky and 15% amber.
During the flowering stage PH was always between 5.8 and 6.2, about EC I started with 2 and was 2.3 on the last week before flush.
✅ HARVEST
- From dry seed to harvest: 140 days (2 days germination + 75 days veg + 63 days flo).
- Chopped after 4 days flush and 48 hours in dark;
- Wet trim, removed fan leaves.
✅ DRYING STAGE
- Time: 14 days;
- Average: 20° C - 50% RH.
- After that I made a dry trim, removed branches and sugar leaves.
⚖️ DRY WEIGHT
- Phenotype #1: 230 gr buds + 25 gr larf;
- Phenotype #2: 105 gr buds + 50 gr larf.
So, the overall dry weight is: 335 gr buds + 75 gr larf.
✅ CURING STAGE
- Curing is done after 30 days with Boveda 62%.