
Likes
Comments
Share


@Roberts
Follow
Dos-Si-Dos auto is growing good. Her roots are about ready to get into the solution in next day or 2. She is looking healthy, and off to a great start. She will be up for training likely by next update. Everything is looking great. Thank you Athena, Medic Grow, and Zamnesia seeds. 🤜🏻🤛🏻🌱🌱🌱
Thank you grow diaries community for the 👇likes👇, follows, comments, and subscriptions on my YouTube channel👇.
❄️🌱🍻 Happy Growing 🌱🌱🌱
https://youtube.com/channel/UCAhN7yRzWLpcaRHhMIQ7X4g

Likes
49
Share


@KurbinTurbin
Follow
Average grow maintenance effort, slow growth, small canopy but not really any issues.
I will update all the weights, taste and all that crap soon.

Likes
3
Share


@BigGGrows
Follow
She has been transferred to the larger flower tent and now is on a 12/12 light cycle. It is her with 3 other girls in a greenhouser 60"x32"x80"all around the same maturity. She is now under the Sayon SH4000 at full tilt 410 watts from the wall. The light cycle was somewhat reversed, as I now have her lights off at day (6:30am) and on at night (6:30pm). Goal was to use the electric at non prime hours and be able to tend to them between work hours. So going into flower for the first day, she had a longer light period prior to rolling her into the first light flip.
I defoliated her towards the middle of the week, getting rid of all the damaged leaves from the veg mishaps. She is untrained and now enjoys a oscillating tower fan to help strengthen her stems & branching. She is nice and tall, and them fan leaves are luscious green and straight up pray to the sayhon sh4000....perking up before the light even cuts on. She is also introduced to Tps bloom at 2ml a gallon. She is doing great.

Likes
2
Share


@Little
Follow
Hola a todos!
Hace unos dias que puse la malla, y he guiado las ramas que iban creciendo, un par de veces. lo dejare 1 semana más en crecimiento y luego a floración.
Espero que la malla no se quede pequeña. ¿Qué tal lo veis?
Gracias!
Un saludo cultivador@s!


Likes
42
Share


@KrautFabrik
Follow
Day 41: nutrients like plan
---------------------------------------------
Added some non organic nuts. to boost the flower.
Can someone give me advise for an organic pk booster?
She is getting frosty ❄️🦍
Happy growing 🌱

Likes
21
Share


@OGTrauma
Follow
Big textwall incoming homies: Here Im doin some shit i knew from owning low to middle branded smd grow panels* how is that usually they come with both uv , ir, far red even newer quantum boards supplements itself with diverse chips extending their photosynthetic spectrum or making specific accesory bars / modules yet my purporse is rather focus on UV as this 15w bar (advertised as nominal 9 x 3w powered led) with UV-A 390-400nm spectrum – something that trigger some reaction to the plants with some other color son the flowering phase and trying to establish functional a ratio , as a bit of blue green and yellow have specific purposes instead of providing absurd quantities of red light , as there is some lateral cold bulbs in smaller but necessary ratios (as blue spectrum is still required on flowering , yet the original purpose was to complement mid to low branch development) in this shitty set up bonding with the upper bulbs and their colour temperature schema, every light has it's own schedule as how i suppose is a morning to night as something that cause plant resistance response (kinda noticed something i need to stimulate as i see a bit of fox-tailing but now with the uv-a i propose to build resistance and activate defense mechanisms like resin and of course, plant morphology according to its stage making bulkier , tankier , according to outdoor’s atmosphere i want to replicate as optimal weather as well – i hope this hardship make them more resilient and increase their health points as here i’s a HOT GIRL SUMMER- even indoors it rises my base temperature makes smell notorious, but as is not the usual weed smell make it and advantage in terms of discretion Killer Kush presents slight sweet tones not very prominent, the only herbal smell can be associated to pine undermining the refined coffee-like smell that is the dominant note (this selection of kush lack of lemon notes up to this point i can say it’s earthy with a bit of sour & sweetness) . Alas, as their late flowering phase and feeding schema should make chunky girls ,but the hot girl summer can become really a issue here, days and heat is something to be deal and prevent more light and food that they can chew , and this timing make me not over-do this niggas with excess of light, heat, disbalanced spectrum or extractions.
So automatizing it with some timers ( a very good hint to repurpose old shit in your house!) im doing a Schedule that turn off some lights through the course of the day switching the intensity and the spectrum itself , making a sweet morning to afternoon look alike , , making that timer looks really like a basement like a nice dream to my plants, not exposing them to very disfavourable conditions and yet controlling my electric bill peaking , by the same reason , ventilation is also measured as im relying just on ventilators to distribute and disperse heat and also doing the role of intraction / extractors, there are 9 usb fans in various levels of this weed maze <3 .
It's noticeable the quick evolution of these plants as there is no other factors to be aware except heat management as plants seem with not negative traces except some burnt leaf from previous weeks so i expect that they should be ready at the end of the month by my a personal mania of ripping shit all at once in order all to have that space at disposition for new projets , i will report stability eventually as they seemed quite rare enough when before putting to flower all, there was one already flowering AND THAT WAS FUCK THIS SHIT AND BECAUSE ITS NO CHEAP BULK TO EXPECT THIS SHIT!** ), and that shit become tears in the rain as that put me in some shit i can’t control or overcome, and just deal with in this strange lst bondage metal succubus nightmare that will be a nightmare to unmount too. Yet, i want the best conditions for her as all plants except her are ok so now the lateral bulbs also switched to give her more light (there is one on the left, right and on the back side, but i think better results with a neutral colour and using t5 led tubes with a water resistant case in each corner of the tent if i try to re do lateral lights ! )
*I still own the panels, in a next future, but not in this run i can use them as i think how i can supplement them and make them a team player as beyonding spectrum shaman shit i know now , and thankful to the chinese kids that made these fucking cheap as hell blessed bulbs,as they made me allow quickly adapt the spectrum on the main setup is 3000-4000k at the same ratio, with the addition of a cold light of 6500k on the idea of middle branching development too , and a small pint of unholy uv doing early 2000s cyberpunk shit with old trash janitor with compulsive hoarding stuff with some big gas leaks attitude niggas .
**I do second runs of plants in order reach a better result through practice - but is noticeable the lack of stability on these bastards as i was very happy with previous strains i can say this strain is a big no! , unlike their famous ones, like black Jack or sweet cheese , the former ones fast version are way more stable and they didn’t presented me autoflowering phenos in the batch … i don’t hate autos, but i hate to mix them with feminized on the same run, its like having a hermaphrodite indoors for me. 😫😫😫

Likes
16
Share


Processing
Likes
29
Share


@CANNASIM
Follow
—SETUP—
.BOSSLED LED 1800W full spectrum, real power consumption is +-250W.
.Grow space 60X100X200(a simple shower box.
.AN nutes and other simple additives.
.Grow medium is 60% peat, 30% perlite, 10% organic correction(worm castings), 5 gallon fabric pots(18l).
—BRIEF—
Hi there, I have tried already done this genetic outdoors, in poor lighting and a general purpose nute from Neudorff, yielded 25g dry, in 3gallon pots same medium.
So this is a good experiment, lets see indoors how she will compare.
—GERMINATION—
My germination process always start by scarifying the seeds, i created a little tool for that. I just a little container with sandpaper walls. Shake gently for about 60 secs+, this allows for the water to penetrate better in the seed shell, once you soak. Then i soak overnight from 12 to 20 hours max.
From there i either plant straight or use the paper towel method to see the tap root before. If you are a bit on the impatient side seen the tap root is advisable so you see some movement before planting. Lol!
—ROYAL QUEEN SEEDS . QUICK ONE . INFO —
Chose this strain because is basic and I have to travel for a month soon, and someone else is going to take care for this time. :)
Quick One is a fast-growing autoflowering strain. This was one of the first autoflowering strains developed. When it was first released, it was one of the quickest growing strains on the planet.
THC: 13%
CBD: Low
Yield Indoor : 275 - 325 gr/m2
Yield Outdoor: 100 - 150 gr/plant
Height Indoor: 50 - 60 cm
Height Outdoor: 60 - 100 cm
Flowering: 5 - 6 Weeks
Harvest month: 8-9 weeks after sprouting
Genetic Background: Strong Indica x Ruderalis
Type: Sa 10% In 60% Ru 30%
Effect: Physical
Climate: Mild
—RQS QUICK ONE GERMINATION UPDATE—
My mood said to me to plant straight, so scarify > soak 18 hours +- > plant straight.
Seedlings look a bit odd, with a yellow center, let's give her some days in and see what happens next.
Likes
79
Share

@SundancerS
Follow
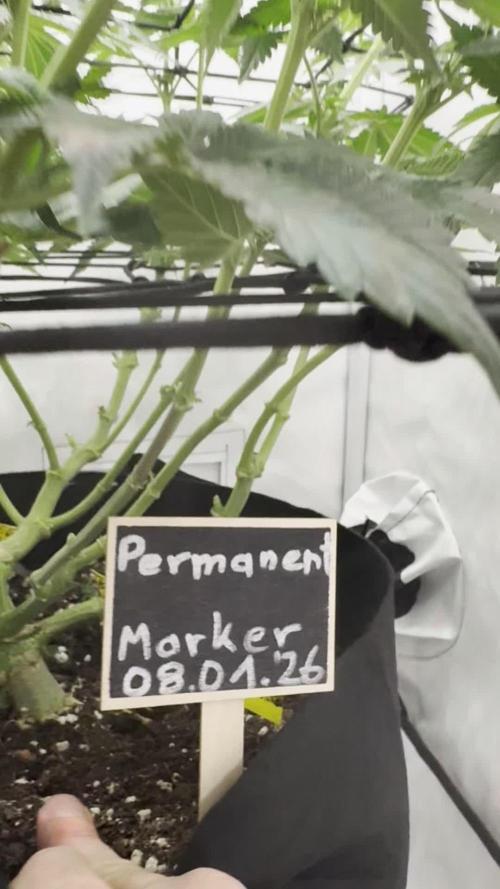
Die Permanent Marker ist sauber in die Blüte gestartet und zeigt kräftiges, kontrolliertes Wachstum. Der Stretch hat vorsichtig eingesetzt, noch moderat, aber spürbar. Das Experiment mit dem zweiten SCROG-Netz wirkt bislang vielversprechend, die Triebe nivellieren sich fast von selbst auf eine Höhe. Ein paar wenige Seitentriebe wurden noch entfernt, alles im grünen Bereich.
Dank Hy-Pro Spraymix stehen die Blätter sattgrün und vital bis in die Spitzen. Ab dieser Blütewoche, wird er jedoch abgesetzt. Mit einem EC von 2,2 und pH von 5,8 scheint die Nährlösung auch gut abgestimmt zu sein. Ihr Durst ist beachtlich: etwa 1,3 Liter pro Tag gehen problemlos durch. Insgesamt ein guter, vielversprechender Start in die Blüte.

Likes
12
Share


@valiotoro
Follow
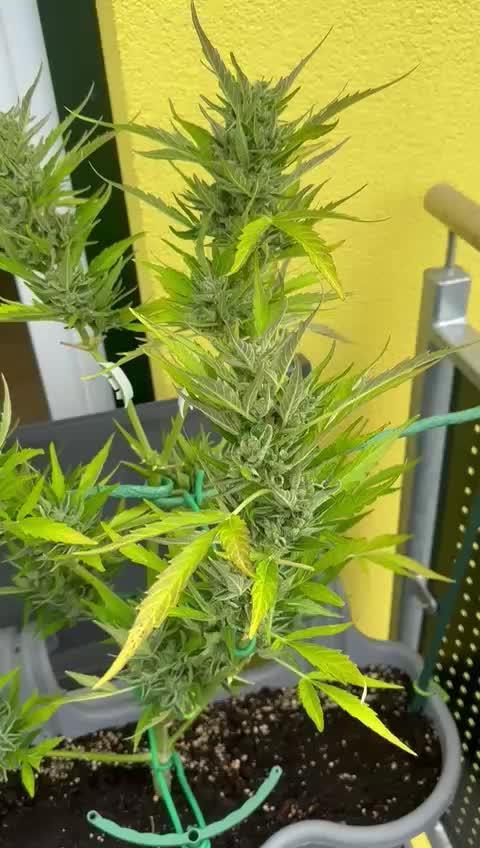
One with a topping the other one just LST both huge yield!🦖
For the smell its cookie dough,lemon & diesel🍪🍋⛽️
Super sticky buds 🤩

Likes
72
Share


@Green_Mountains
Follow
Another good week!! I need to LST and defoliate... probably going to do that tomorrow.
I fed them this week as well as watered. I will add the flowering nutrients going forward!!
Otherwise, I hope this grow continues to go well!!
Cheers!!

Likes
15
Share


@Bendedknee
Follow
All and all the 3 free seeds yielded more then I expected; I’ll update in a month or so

Likes
7
Share


@DrewbieDoobieNoobie
Follow
Happy New Year GD people, lets put this one way behind us and look forward to the light at the end of the tunnel, its darkest before the dawn so stay lifted and safe. This weeks time lapse was a big bucket of suck! the camera was not on any plant just pointed at the floor of the tent you can see a little in the corner but all in all an epic fail. The plants did not care however, they responded well to the topping and they are getting really bushy. I raised my lights to try to help them stretch. The Strawberry Ice is a tour de force in the veg stage. The Blue Dream Haze is about average and the reboot is coming along. This Royal Gold coco "Tupur" says it can be watered up to six times a day. I have not had to water these girls for about 3-4 days the media really retains the moisture I am afraid if I water more frequently I will rot the roots. My watering is based on the pot weight. If they are heavy let them dry out and water when light. I'm giving them a late veg feeding per the Emerald Harvest 3 part nutrient series feeding chart with an added blast of CAL MAG. The TUPRU says on the bag it needs the extra CAL MAG. Time to LST these ladies for the next 2 weeks then flipping them to flower. gonna adjust the camera and hope to get a good shot the the LTS bounce back. TTFN.


Likes
10
Share


@Naujas
Follow
2 weeks have passed, the girl has a little too much nutrients, but she will get through it :) the girl doesn't seem to be tall, I think she will be more like a bush :) everything looks good, good luck to everyone!

Likes
72
Share


@BodyByVio
Follow
This week I had to Lollipop again (I know is very late and I hope I didn’t stressed the plant to much).
My canopy is so tick and so many overlapping leaves and buds in the center of the plant that don’t receive enough light or any at all , n combination with the RH swings that I got going on (45 and 63 RH), I’m very afraid of mold. I should have did a better job at Lollipoping from day 21. I’m inexperienced grower and I didn’t knew better.
I decided is better to risk to shock the plant a little bit risking a reduction in yield then get mold or pests and lose it all.
My 30 pin dehumidifier works great with the AC but sometimes when the AC( compressor) stops my RH jump at 62% -63%, witch I don’t like . I’m trying to keep the humidity around 50% but in such a small room between the AC and Dehumidifier I got big swings in temp ( 75-82) and RH ( 45%-63%) witch is not ideal but is nothing that I can do. I played with the AC and Dehumidifier setting a lot trying to keep humidity around 50% and temp around 80 degrees and that’s the best I can. My AC is set at 82 degrees and my Dehumidifier is set at 45% RH.
Also during the lights off (day time) is very hard to keep the temperature In control when outside is 110-115 degrees with my portable AC (1400BTU) in the 4x 6 closet. Is crazy but I do my best to keep temp under control.
This is another rocky mistake I made is trying growing weed DWC in the middle of summer where temps are 105-115 degrees constant in a closet without centralized AC port and at second level in the building. LOL
Also I think I underfed her (630 PPM TDS, PH 5.8-5.9) ) and I got a Ca deficiency witch I think is the reason my flowers developed slower then I anticipated.
Hopefully I’m wrong and everything will be good.
P.S. I got a little bit of calcium deficiency caused by salt buildup (to much PK boost) despite my earlier belief that is underfed.
I increased the PPM from week 4 (630-640TDS) to 680 TDS) on week 5 while I kept the PK booster at 3+ml l per gallon. Slightly my PPM’s was rising in my reservoir for few days until I decided that my plant can’t take that much nutrients (PK). 2-3 days after I increased the TDS I’ve noticed more spots on the lower leaves with tip burns on top ( first signs of PK toxicity). One day later found spots and yellowing of the leaves on top of the plant that indicates Ca deficiency caused by salt buildup ( PK toxicity) and reversed osmosis (hope I’m not wrong). Going into week 6 I lowered the PK boost at 1.5ml / gallon and total TDS to 640 PPM. Seems like leaves damage to stop and my PPM to stay stabile at 630-640. Trying to keep PH at 5.8 max 5.9.
I will post pictures of my Ca deficiency/ PK toxicity.
If you guys have any suggestions please leave me a comment.

Likes
13
Share

@All_our_small_plants
Follow
1000 ml alle 2 Tage
pH-Wert: 6,1
EC-Wert: 1,2
Temperatur: 22ºC
Luftfeuchtigkeit 62%
Schädlingsbekämpfung:
PPFD: 500 µmol/m²/s
DLI: 33
Düngemittel: Mineralischer Dünger 3.5-6-6 PK 13/14
Besonderheiten: Wurden direkt in die erde gepflanzt in einer Kokos-Quelltabletten.
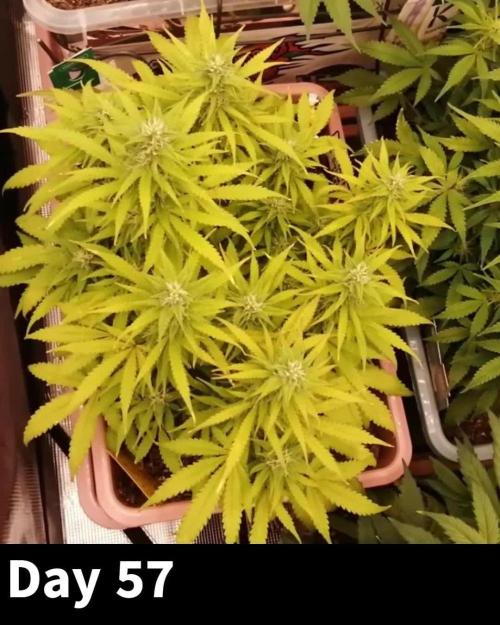
-Tag 57 Heute haben wir sie wieder gegossen und ihr Dünger gegeben. Es zeigen sich ein paar Symptome die wir noch nicht 100% zuordnen können vieleicht habt ihr ja eine idee, der Runoff zeigt keine Komischen PH oder EC werte an, eventuell kann es dann doch ein Mangel sein.
-Tag 59 Sie sieht heute etwas besser aus, hat aber noch immer sehr hellgrüne Blätter und sie hat auch Braune Blattspitzen. Wir haben ihr auch heute Mikroorganismen und wasser mi Aloe-Vera gegeben
-Tag 61 sie schient sich etwas erholt zu haben, aber zeigt noch immer Symptome von irgendwas, was wir nicht genau zuordnen können. Heute hat sie wieder Wasser und Dünger bekommen 😔
-Tag 63 Sie riecht richtig stark und ihre Buds werden auch immer dichter und Grösser, sie sieht sehr nice aus. Wir haben ihr heute Wasser mit Dünger und Nematoden gegeben 😀

Likes
23
Share


@Ctrellis90
Follow
Welcome to the first week of my Seedsman autoflower competition diary. Thats a mouthful lol.
So this is actually my second attempt at an auto grow but I have a good feeling about this one...she popped up fast and seems to be loving her medium, which is promix pm and Natures living soil, Kates vegan blend for the living aspect.
This is also my first stab at living soil so wish me luck!

Likes
25
Share

@GERGrowDesigns
Follow
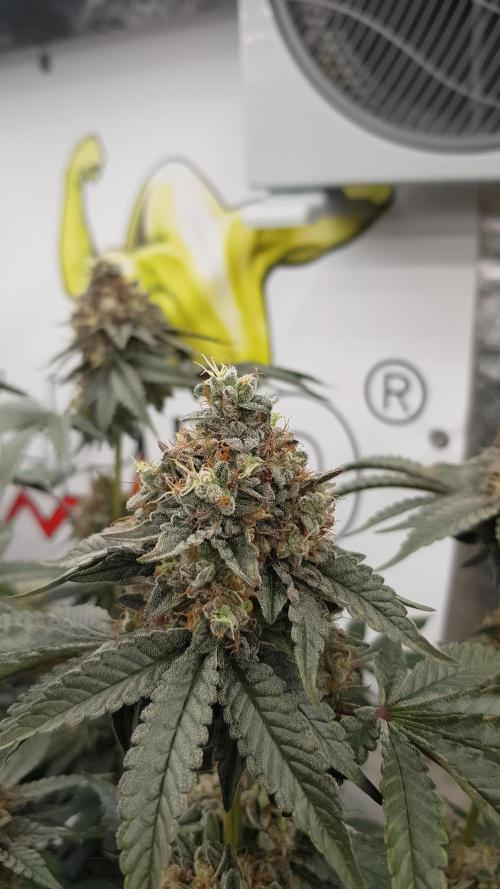
Welcome to Flower Week 7 of Kannabia Zoap Rosé
I'm excited to share my grow journey with you from my
Kannabia Seeds Project . It's going to be an incredible ride, full of learning, growing, and connecting with fellow growers from all around the world!
Check out Kannabia Seeds with my link [https://www.kannabia.com/de?ref=61966] and grab the germination device or the strains I used . Trust me – it’s worth it for sure !
Get another 20% Discount at all products using the code [GGD] at the checkout.
For this Project , I’ve chosen the Feminized Photo Strain Zoap Rosé :
Here’s what I’m working with:
• 🌱 Tent: 225x150x150
• 🧑🌾 Breeder Company: Kannabia Seeds
• 💧 Humidity Range: 45
• ⏳ Flowering Time: 56-63 Days
• Strain Info: 22%THC
• 🌡️ Temperature: 26
• 🍵 Pot Size: 20
• Nutrient Brand: Hy-Pro
• ⚡ Lights : 600W x 2
A huge thank you to Kannabia Seeds for allowing me to try my Best with this amazing collection from Photo Strains they managed to Sponsore . Big thanks for supporting the grower community worldwide! Your genetics and passion speak for themselves!
Let’s grow together – and don’t forget to stop by again to see the latest updates!
Happy growing!
Stay lifted and stay curious!
Peace & Buds!

Likes
5
Share
@Naujas
Follow
77 days, for some reason, the girl is growing without me :( the vacation was unexpectedly long, I only managed to get these photos, I'll be back to see them next week on Tuesday, I think it might be harvest day :).
Likes
165
Share


@DutchFarmer
Follow
🌿 GrowDiaries Harvest Review Runtz by Zamnesia Seeds 🌿
Participating in this contest has been an incredible journey! A massive shoutout to Plagron and Zamnesia for making this possible. Growing Runtz in a 1-liter pot was an experiment that exceeded all expectations yielding a whopping 2 ounces! 😱
Aroma & Flavor:
The scent is absolutely intoxicating: fruity candy haze with a gassy undertone that fills the room. Each puff delivers a smooth smoke, leaving behind a clean white ash, a testament to its quality.
Bud Structure:
The buds are dense and chunky, resembling big, oily nuggets. Their vibrant colors and resin coated appearance make them a visual delight.
Effects:
This strain hits hard with a potent and euphoric high, perfect for evening relaxation.
The balance between indica and sativa effects provides a creative uplift followed by a soothing body relaxation.
Final Thoughts:
From seed to harvest, this grow was a rewarding experience.
The combination of top-tier genetics and quality nutrients from Plagron made all the difference. I'm thrilled with the results and proud of what I've achieved in such a compact setup.
Thank you once again to the GrowDiaries community, Plagron, and Zamnesia for this opportunity.
Here's to more successful grows ahead! 🌱🔥
DIARY COMPLETE