
Likes
Comments
Share


@NewbieLearner
Follow
This was a beautiful strain to grow. With her flowers getting big towards the end of harvest as well as the purple colours! I would definitely recommend that you try grow this strain. The buds are super dense and very well formed. An absolute treat to smoke and look at.


Likes
22
Share


@PrairieFrostGrow
Follow
*
********* Week 3, April 25 to May 1, 2020 - Days 15 to 21 from germination **********
*
So we have been chugging along and doing well. Keeping the feeds in check and not given any waterings over 6.0pH before this week. By mid week when checking runoff numbers found they were flipping 7.2pH!!!!!! What is shooting up the numbers so high?? They were given some Epsom salt and not sure if they have been given too much magnesium. Wondering if it could be the pots? Watering patterns have not changed? Cut slits in the bottom of all the fabric pots to help with drainage and see if moisture is sitting in the bottom of the pot causing issues with pH???
They are doing well but not at the same time.....GSC girls seem a little show in veg growth at this stage.
Little more detail.......
April 25/20 - Day 15
- Mixed 1L of water with Vitathrive, Dual Fuel @ 1.5ml = 700ppm and 6.0pH.
- each girl given 0.5L feed.
- humidity a little low at 52% and bumping up to 65%
- light heights at 30” roughly right now.
- GSC outer edges of leaves getting a little light.
- GSC2 is forming a nice structure and new leaves are wider.
April 26/20 - Day 16
- no real growth and the girls don’t look happy.......not sure of the issue?
- mixed 2L water with Sensi CalMag @ 1.5ml. Sensyzime @ 2ml, Epsom Salt @ 1/4 tsp/L
- GSC fighting magnesium deficiency so adding Epsom Salt,
- increased light intensity a bit today.
April 27/20 - Day 17
- dry out day
- think the root zone is holding too much moisture and causing pH issue.
- cut long slits in the bottom of the pots to let moisture run out faster/easier.
- GSC has liked the increased lighting.
- all the girls got clockwise rotation today.
April 28/20 - Day 18
- Girl Scout girls given 3L watering with Vitrathrive @ 1.5ml = 100ppm and 5.1pH
- runoff numbers:
- GSC - 600ppm and 7.2pH
- GSC2 - 475ppm and 7.2pH
- pH is still too high!!!!
- leaf colours on all the girls look good😳
April 29/20 - Day 19
- more runoff numbers to look at
- Mixed 8L for each girl with Dual Fual @ 1.75ml - 325ppm and 5.0pH........each girl given this amount!!!!
- Run off numbers:
- GSC - in tray before feed was 7.2pH, brought down the pH to 7.0 and 525ppm
- GSC2 - in tray before feed was 7.2pH, brought down the pH to 7.0 and 500ppm
- now we see if the flush will help in the next couple of days.
April 30/20 - Day 20
- dry out day
- stems are looking thicker today. All nodes are separating and they are growing.......slowly though.
May 1/20 - Day 21
- dry out day again
- need to let the pots dry out in order to adjust the pH further.
- they are looking taller and happier today.
Sorry for running behind gang. Always so much to stay on top of😀........

Likes
3
Share

@Radagast_
Follow
07.07.
Day 36-Day flowering 19#
As for the autos, i'm changing the title to "dwarf" lol
I was not at all satisfied with the vegetation, even less so with the stretching... as far as that is concerned
the stretching is not much different from last week, they are only 5 cm bigger,streching is over,they also branched badly, although they were under heat stress almost the whole week, but let's move on.
Yesterday was the end of their fifth week.
Likes
45
Share

@SwabianMadness
Follow
They look great during the Recovery of the Defoliation.
Overall it work good. In the down Part of the Branches they let some Leaves fallen by themselves.
They focus on the Flower Production
Started the Week with 1.5l daily amount of Water
Gave them at Sunday 10ml of PK5/8 again. And once 2 tsp Bactrex in 4.5 L Water
They dry out over the Weekend, so get up two Litre and Calmag up to 1ml/l
All 3 are like Glue on whole Plant, when you come with your Arms at the Plants 🤓

Likes
2
Share


@Manoa2211
Follow
I brougt them outside when the weather Was good enough. Sie stams got mutch more resistent. Will transplant them to soll in a few days. Night temp. is not lower than 7 degree Celsius. Got a little smell when you put your nose very close to the top leaves, but nothing to intensive.


Processing
Likes
6
Share


@Flydope21
Follow
Progress is there. One of them is not doing so well but is starting to show a little bit of life. We’ll see where she is by the end of the week.
Likes
78
Share


@Hou_Stone
Follow
My 4 plants are still there, with the banana as a smile 🍌😁
I continue the defoliation, I wonder if I'm not doing a little too much sometimes.. We will soon see the result
🌗Switching to flowering this week, I reduced the length of the day by 1 hour each day until reaching 12 hours night time / 12 hours daylight on the 33rd day!🌞
🌺On the 33rd day I apply a layer of organic nutrients mixed with a little soil that I add to the top of each pot.
I added 35 grams of BioBloom to each of my pots🌺
(Pot of 7 Liters / 2 gallons)
------------------------------------------------------------
💧Watering
I water all my pots the same day but with more or less water.
Simply by lifting them;
A light pot is a dry pot and will need more water,
A heavy pot is a wet pot and will need less water.
On average I water each pot with:
Day 29 : 0.5 L
Day 33 : 1 L with 0.8 grams of bio enhancer/L
I use tap water, adjust the ph to around 6 and water
------------------------------------------------------------
🔥❄️Temperature of the week :
Day : 19-23°C (Humidity : 65-80%)
Night : 14-17°C (Humidity : 75-85%)
Outside the tent it is around 16°C with 70% humidity
The humidity is a little too high, I hope it will drop a little 🙏
------------------------------------------------------------
🚀Equipment of the week ⭐️ :
Light FC3000 Mars hydro. power 95% at 50cm
Extractor 6 inch Mars Hydro. power 1/10. ON 24/24h
2 fans to circulate the air inside the tent. Each on for 30 minutes then off for 1 hour. this rhythm repeats itself in a loop
I'm removing my heat mat this week.
------------------------------------------------------------
📜Links :
🌱Banana Krumble seeds : 👇
https://shop.greenhouseseeds.nl/feminised-cannabis-seeds/usa-genetics/banana-krumble/
Mars Hydro : 5% off with my discount code "houstone5" 💪
https://www.mars-hydro.com/?acc=hou-stone
👨🚀My Instagram❤️️:
https://www.instagram.com/hou_stone420/
------------------------------------------------------------
Thanks for your visit😀💚

Likes
33
Share


@SAC87
Follow
Week 1: All the seeds popped within 4-5 days. Everything is looking good and they are all happy. I moved them into the 2x4 tent with a Mars 300 led. I’ve sprayed daily with plain water with a couple drops of voodoo juice. They are all starting on their first set of leaves. Nothing much going on at this moment.
Happy Growing 🌱
Likes
151
Share


@BioBuds
Follow
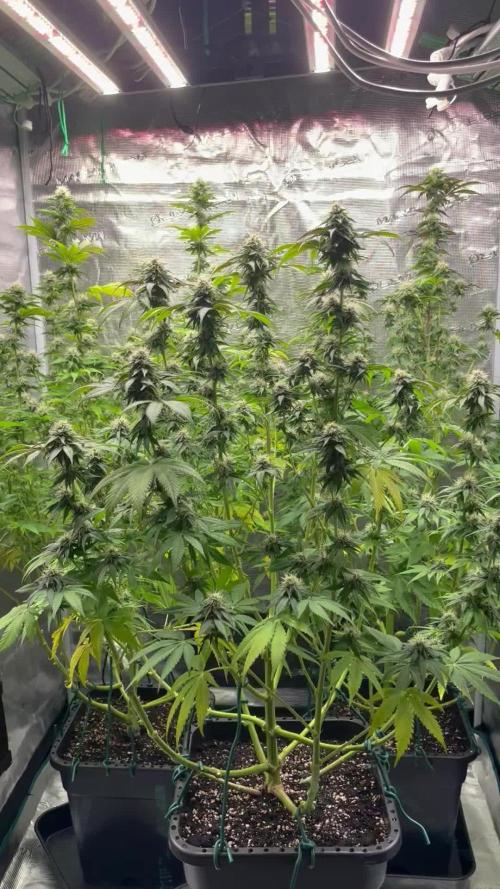
They are bulking up a bit more. Still nice and bushy both, still think both will be female. Finally, colours are getting greener and they are filling out nicely.
Last couple of weeks before harvest, when my tent is filled to the edges on all sides and the plants can only go up is the moment I will hit the switch to 12/ 12.
Thank you @MarsHydroLED, check out awesome deals on: www.mars-hydro.com
I gave them a bigger feed today, up to now I have been stingy on the water, to prevent the gnats and let the root systems develop.
Thank you for checking in on my grows and your comments and likes!
Likes
5
Share


@Mattyice
Follow
Buds are definitely getting bigger the smell is so stab you in the nose potent it almost makes me sick up close. I really can't believe this is an autoflower that I barley trained. Definitely will be producing anywhere from 80-100g+ by the time its done I think is a good estimate. What I failed to mention in the first update is every branch has outgrown the main cola. It is buried but still growing strong apparently. It's impressive actually it grew like that without training. All those branches will be thicker than the main cola by far they already are. It's got me so excited this plant is frigging huge although short it is wide. It's so big the base of the main stem is probably the size of two fingers and it has roots growing out of all sides and a mess of roots underneath the cloth pot

Likes
8
Share


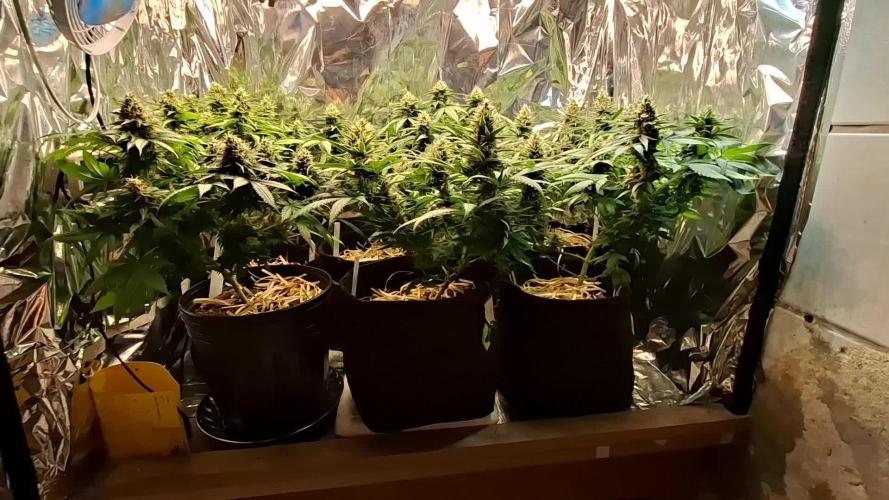
@Prof_Weed
Follow
Extrem happy ,my first Cannabonsai!
Thanks to Terra Aquatica, Bionova, AC Infinity and FastBuds!
Your products work very well together!
I think in 20 daze .....
Likes
4
Share

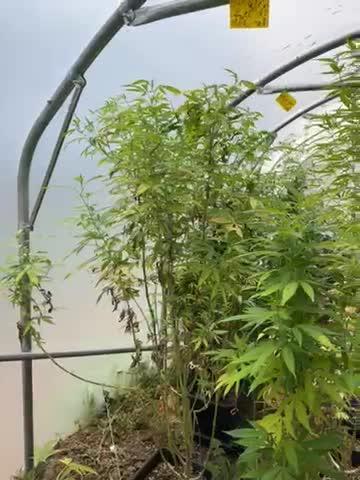
@Elemental
Follow
Air umidity is getting high, I'm a little concerned about mold. I took some leaves. Let's try getting to achieve more 15 days till chop it.


Likes
25
Share


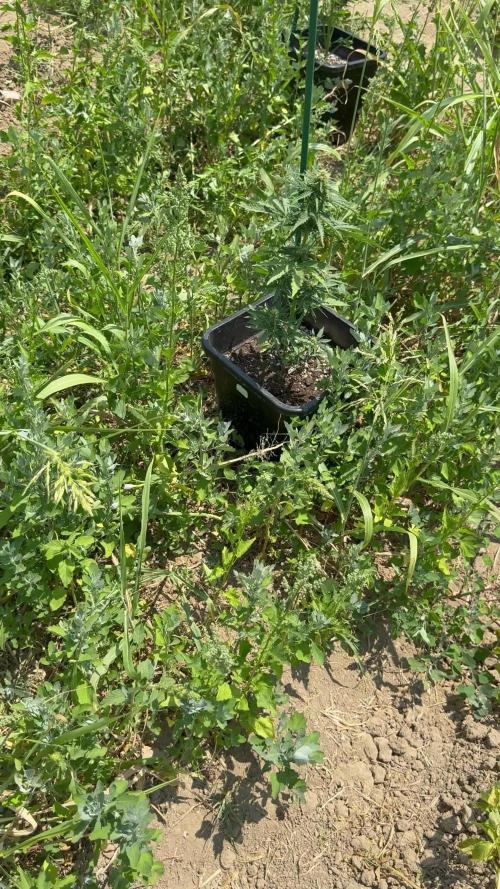
@XperencdGmanXG
Follow
got these clones of wedding cake from a local grow buddy, Thought I had room for them indoors but I was wrong. So outside they go for the year. They really wanted to reach for the sky indoors lets see how they do outdoors!


Likes
27
Share


@GrowInger420
Follow
This week was very good plants look great. Flews are gone🙏 ✌️✌️
Buds grow perfect. I am very surprised, that they go so good. Hope they will stay healthy till the end.


Likes
20
Share


@adam_pawloski87
Follow
We are in Flush !! Was giving them GH Flora series + rapid start + cal mag


Likes
6
Share

@Rko41
Follow
A part la frosty qui a fait un debut de Flo sorti de l’interieur les autres ont pursuivibleur croissance et commence leur stretch tous doucement

