Likes
Comments
Share
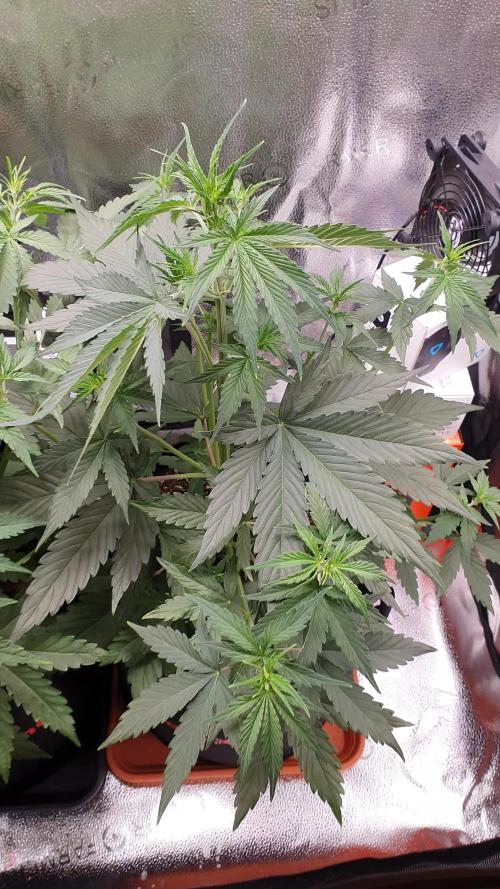
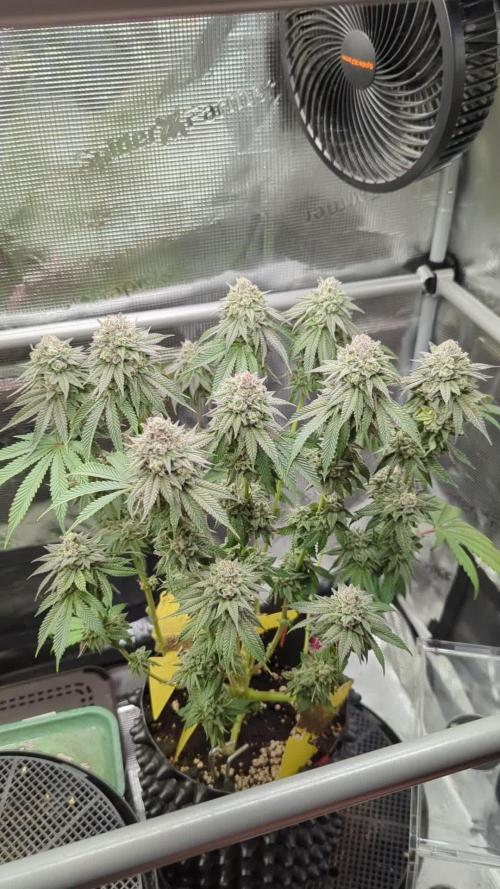
Week 13 (Aug/1/2024-Aug/7/2024) DAY85 - Nothing new. Water, check, repeat. Added Kelp Meal for nutrients this week. I am thinking how I will separate the plants this week--they're starting to bunch up together--staggered may be the best option to minimize space in the garden. DAY 89 - Gave one of the girls to my buddy. Helped with the bunching of the plants in a limited space. They're a lot to handle when you harvest alone. Kept the tall one, the short two(LST), the different one in the 45 gallon pot, and the bushy one(LST-ish). By the way: I include germination as part of the day count. So basically day 1 is when I put the seed in water. These seeds all rooted within 48 hours.
Likes
17
Share
Likes
14
Share
@BlaKX
Follow
High Growmies das RF3 hält bis jetzt was es verspricht! Es ist erstaunlich wie gut sich diese Pflanze entwickelt hat sie hat ihre Größe in diesen 7 Tagen exakt fast verdoppelt hat schon angefangen Haare zu entwickeln genau wie auch Blütenkelche die sogar schon Lila sind!!! Sie wird definitiv die 1m Marke knacken. UV:40min IR:30min Deep Red:20std. 17% statt 10% Anteil.
Likes
8
Share
@Ferenc
Follow
Purple Punch and Frosty Gelato will be harvested next week. Very hot in the tent and also it is not in my house. Summer time. Hard to look after them this way it can be seen. No problem. Next time. Still love them :) A.lot of burnt leaves removed from them every week because of heat. I can not change now I need to go this way. Starnge: Wedding Cheescake is crazy other plants are suffering because of the environmental issues she is acting like this is the best environment. Leaves hardly burn and she grows as fuck. All of them in the same environment.... Hmm.
Likes
3
Share
Very big plant, growing very well, nothing negative to report. Responding well to training. Responding well to fertilization too.
Likes
Comments
Share
@MRSGROW
Follow
Buenas, esta semana las plantas fueron defoliadas solo para mejorar la ventilación ya que e presentado problemas de temperaturas durante el ciclo diurno dado que en me encuentro en verano, se regó con 6 litros en total dividido en dos días de riego siendo el primero con ph de 5.8 y ec de 900ppm y el segundo con ph de 6.2 y 1200 ppm de ec.
Likes
4
Share
Added some potassium sulfate and they seemed to bounce back but now they want calcium and I’m pretty sure the potassium I put in is antagonistic to calcium. I might harvest early to prevent any trichome degradation due to photosynthesis being halted, trichomes are looking milky too.
Likes
97
Share
@AsNoriu
Follow
Day 57. They are running amazingly good, will leave for 7-8 days more, trim heavy, defoliate and will put them into main tent. I need this space for drying ... Today only pure water, next time I will give them feed . Happy Growing !!!
Likes
2
Share
@fabialien
Follow
Semana 5 de crecimiento, notamos ligera aparición de Araña roja, vamos a combatir con jabon potásico y neem hoy 8 de agosto se aplica jabón potásico y neem con esponja para erradicar posibles nidos.
Likes
30
Share
~ FASTBUDS TESTER #2203 ~ Well friends, here we go on another 'canna-venture' together! The grow room has had a complete remodel and some upgrades done to it including brand spanking new 4x8 and 4x4 tents and a Trolmaster Hydro X controller along with a new Control Panel. This tester strain is one of six tester strains that FastBuds has graciously provided me with and I'm looking forward to seeing what this girl has to offer when she's grown to her full potential! One drawback of 'testers' is I have little to no information on it other than its number and that it's an autoflower... 🤪 But, it's ALWAYS a blast growing them for me because not knowing a lot allows me to just concentrate on the essentials: Light, Environment, Water, Nutrients and possibly a bit of LST... not complicated, just basics like keeping a constant temperature and RH in the tent at a level that gives a good VPD, watering when almost dry and maintaining proper light levels according to their stage of growth. ____________________________________________________________________________________________________________________________________________________________________________________________________________________________________________________________________________________________________________________________________________________________________________________________ ~THE SETUP~ ~Initially seeds were lightly scuffed, then soaked for 3 hours in 78℉ distilled water after which they were transferred to moist paper towels laid out in a Jiffy Pellet plastic starter tray with lid. Underneath the tray was placed a Mars Hydro Heat Mat with Controller that was set to 78℉ where they stayed until their tap roots emerged. ~Planted into Jiffy Peat Pellets that were hydrated with distilled water warmed to 78℉ with a 7.0 ph. ~Once roots emerge from the Jiffy Pellet they're transferred to their fabric pots. ~Grown 100% organic in a 4g Gronest fabric pot and a 3g fabric pot by Wraxly filled with Mother Earth 70/30 Coco/Perlite medium and initially amended with Dr. Earth 4-4-4 / Earthworm Castings / Dr. Earth Flower Girl 3-9-4 and Coast of Maine Stonington Blend Organic Plant Food 5-2-4. ~19/5 light cycle for the entire run with supplemental UVA added during flower. Lights are controlled by a Trolmaster Hydro X controller set for a 15min Sunrise/Sunset simulation. ~Top dressing every 3-4 weeks with slow release dry amendments and Earthworm castings. ~Straight water ph'd @ 6.2-6.8 when needed and bi-weekly Compost Tea's. ____________________________________________________________________________________________________________________________________________________________________________________________________________________________________________________________________________________________________________________________________________________________________________________________ Weekly Updates: 1/19- Here we go into Week Four of flower and these testers are ON FIRE!🔥🔥🔥 Both testers are in a flower frenzy and are ready to eat! Today I gave both girls their last top dressing with Down To Earth 4-8-4 Flower Mix at a ratio of 2tbsp/g and Coast of Maine's Stonington Blend 5-2-4 Organic Plant Food at a ratio of 1tbsp/g which I simplified by using 1/3 cup of the 4-8-4 and 1/4 cup of the 5-2-4 in the 4g pot and 3/8 cup of 4-8-4 and 1/8 cup of the 5-2-4 in the 3g pot. After working the amendments into the medium, I watered it in with 1g of straight de-chlorinated water ph'd to 6.6 @ 74℉. It will take a week for the microbes to begin breaking it down and will last for 3-4 weeks after that which should coincide with them finishing up, or close to it, enabling them to naturally 'flush' themselves out. I've also increased the power to the HLG 650R's the the Trolmaster Hydro X Controller to 75% which has them pulling 990w at the wall and have them hung 32" above canopy. I also starting adding in 4 hours of UVA during the middle of the light cycle for the remainder of flower. I've been monitoring their leaf temperatures and they're running 71-73℉ which is perfect! I have the AutoPilot APC8200 co2 Controller set to 1100ppm with a 100ppm window and the AC Infinity Cloudline T6 controller set to maintain a 74℉ temperature in the tent while the lights are on. 1/21- I'm watering these thirsty girls daily with straight de-chlorinated water ph'd it to 6.6 @ 74℉ and they're both thriving! The #1 pheno stays in a perpetual state of 'praying' and remains the 'Frost Queen' in the run she is a VERY happy girl! The #2 pheno, while different from her sister, is looking gorgeous and starting to really ramp up her trichome production! 1/23- I watered/fed both testers today with 0.75g of de-chlorinated water each with GreenGro's Natures Brix, Granular Myco and Flower Finisher mixed in, after which I added 1 tsp/g of unsulfured molasses and then ph'd it to 6.6 @ 74℉. They'll be getting straight water from here moving forward as the medium has enough food in it to support them until they finish. 1/25- Daily watering continued today with both girls receiving 0.75g of straight de-chlorinated water ph'd to 6.6 @ 74℉. OMG they're both looking fantastic with both looking amazing with a generous coating of trichomes covering their flowers, especially on the #1 phenotype and both have developed a funky sweet, creamy aroma! I'm really looking forward to Week Five of flower where these ladies should start to look epic! 😍💚 😎💚 Thank you for checking out my passion in life! Please visit as often as you wish and I hope you enjoy this journey as much as I know I will! Much love 💚 and Grow Strong! 💪😎🤙
Likes
155
Share
@deFharo
Follow
Bienvenidos cultivadores de marihuana clandestinos y también a los que tienen la fortuna de no serlo!🖐️👨‍🌾👍 Este es un diario semanal de técnicas de cultivo y Bio preparados orgánicos caseros, los cuales llevo experimentando dos años en cultivos de marihuana interior. Esta semana dos en uno: 1) ELABORACIÓN DE AUXINAS EN POLVO EXTRAIDAS DE ALUBIAS NEGRAS GERMINADAS. La primera vez que hice este preparado y lo publiqué en GD fue en Octubre de 2019, lo volví a hacer en Junio de 2020 y llevo dos años usándolo, me ha costado el precio de 2kg de alubias negras. INGREDIENTES: - 1kg de alubias o frijoles negros, porque son las semillas que más concentración de auxinas contienen, comparándolas por ejemplo, con lentejas o cualquier otro tipo de leguminosas, también se puede usar granos de maíz. Preferentemente, se deben usar semillas de alubias nuevas y cultivadas cerca de tu zona. - Agua pura. PROCEDIMIENTO: - Se cubren las alubias con agua y se dejan a remojo durante una noche. - Al día siguiente se separa el agua. Esta agua la puedes usar para riegos, contienen varios minerales. - Se mantiene la humedad en el recipiente de las alubias por unos días, hasta que germinen. Se pueden cubrir con un paño húmedo y compensar la perdida de humedad rociando agua. Se debe observar que la mayoría de las semillas hayan germinado. - Cuando las alubias, en su mayoría estén germinadas, se añade unos dos litros agua pura y se bate todo. - Ahora filtramos con malla y escurrimos los restos sólidos. (Reservamos esta materia para un segundo lavado) - Dejamos reposar el líquido durante dos días, hasta que se vea acumulación de materia en el fondo. - Retirar la mayor cantidad posible de agua clara. - Dejar al sol cubierto con una malla, hasta la completa deshidratación del producto. - Moler y guardar en un sitio seco y oscuro, en estas condiciones puede ser efectivo durante años. -- A los residuos sólidos recuperados del primer filtrado, les añado agua, los bato y los filtro con doble malla, lo embotello y guardo en el frigorífico (no más de 15 días, pues fermenta), lo uso para mezclas de riego. Los residuos finales se aprovechan, para aquellos que tengan tierra en exterior o hagan compost. QUE SON LAS AUXINAS Y USOS: - Las auxinas son un grupo de hormonas vegetales naturales, que regulan varios aspectos del desarrollo y crecimiento de las plantas, en la marihuana sobre todo en el periodo de crecimiento vegetativo y en el comienzo de la floración, después no hacen falta. - Uno de los aspecto más característicos es el efecto que causan en el desarrollo del crecimiento radicular, promoviendo sobre todo la formación de raíces secundarias y adventicias gracias a la estimulación celular que provocan las hormonas. - Otro aspecto de las auxinas es que distribuye su energía principalmente al ápice primario, reprimiendo el desarrollo de las ramas laterales, lo que provoca dominancia apical, pero esto es en el caso de plantas de marihuana sin corte apical y donde se quiere conseguir un cogollo principal monstruoso, su uso puede dar muy buenos resultados en cultivos SOG... pero ¿Qué pasa si hacemos un corte apical para promover el crecimiento de ramas laterales y que por ende, de buenos cogollos en cada una de ellas? Cuando se hace un corte apical al ápice principal las hormonas se reorganizan por la planta, ahora para mandar energía a todas las ramas y sus ápices, promoviendo el crecimiento!.. es un buen momento, después de un corte apical, aplicar auxinas para potenciar el proceso. - Finalmente os dejo un gráfico de la actuación de las auxinas en las diferentes etapas de un cultivo, también se ve la importante relación con otras hormonas (Citoquininas o Ácido Giberélico) y los nutrientes claves que no deben faltar para finalizar todo el proceso hormonal. Las Citoquininas y el ácido Giberélico naturales se encuentra en el agua de coco, y es muy interesante conocer como actúan, en la quinta semana de este diario hablo sobre las propiedades del agua de coco. Bien, una vez dicho lo anterior, yo uso las auxinas en polvo de las siguientes formas. - Como mezcla del sustrato donde germino las semillas y donde mantengo las plántulas hasta el trasplante a la maceta definitiva, para potenciar el enraizamiento. - Por la misma razón, lo espolvoreo sobre el cepellón de raíces de la plántula, en el momento del trasplante a la maceta final. - Lo uso como enraizante de esquejes, impregnando el tallo de polvo antes de enterrarlo. - 10 días después de realizar el producto, todavía tenía en la nevera un litro de auxinas líquidas, provenientes del segundo lavado de los restos de las alubias molidas... y entonces pensé que sería buena idea incorporarlo a un fermentado, y de aquí vienen esta segunda parte... 2) LACTO FERMENTO DE AUXINAS ENRIQUECIDO CON NUTRIENTES Y MINERALES En esta ocasión, para la fermentación anaeróbica, elegí hacerlo con suero de leche como base de microorganismos (Ácido láctico, Bacterias Acidolácticas BAL y Lactobacillus) que harán el trabajo de solubilizar los nutrientes y quelatar los minerales, es un preparado muy eficiente para riegos y aplicaciones foliares, en este caso lo hice enriquecido, mezclando diversos materiales orgánicos con otros minerales. Puedes ver la lista arriba. Sobre esto tengo que decir que después de dos años haciendo diferentes lacto fermentos, ahora los hago más específicos, sin mezclar tantos nutrientes, por ejemplo, si quiero solubilizar guanos, harina de huesos o algas, lo que hago es crear un lacto fermento con cada uno de ellos, en el caso de lacto fermentos con minerales, sigo preparándolo mezclando varios, este preparado es muy eficiente en quelatar minerales, y sobre todo en solubilizar fósforo. PROCEDIMIENTO: A veces consigo suero de oveja de un vecino que hace quesos, a veces hago suero de leche cruda de vaca y cuando no tengo ninguna de estas fuentes, hago suero a partir de leche pasteurizada, como el caso de este. - Mezclo el suero (1l) con la melaza y la miel, lo caliento a unos 30°C. - Peso los ingredientes. Como regla general, en el caso de componentes orgánicos usar del 8 al 10% como máximo, respecto a la cantidad de líquido. En el caso de minerales del 4 al 5%. - Añado la levadura al suero con la melaza y la miel. - Añado los componentes secos al barril. - Añado el suero con la melaza y la levadura al barril y agito. - Añado el litro de auxinas líquidas y agito bien. - Lo cierro hermético con válvula de gases. - Guardo el barril a oscuras al menos durante 30 días, pero cuanto más tiempo lo mantengas cerrado antes de abrirlo por primera vez el resultado será mejor. La fermentación comienza violentamente a los pocos minutos dura varios días así y después se hace más lenta. USOS: Este es un preparado que uso como complemento a las auxinas en polvo, lo uso para hacer riegos o aplicaciones foliares de disponibilidad inmediata. - Hago aplicaciones foliares en plántulas, en las primeras semanas de vida. - Lo uso al comienzo de la etapa de crecimiento vegetativo en conjunto con agua de coco. - Riego con este preparado después de hacer cortes apicales. - Lo vuelvo a usar en riego en conjunto con el agua de coco al comienzo de la floración, y esta es la última vez que lo uso en un cultivo. Una señal inequívoca de la actuación de las hormonas, es que las plantas son más susceptibles al fototropismo, esto se traduce en una respuesta mayor a la incidencia lumínica, las plantas, sus hojas y brotes se inclinan y se dirigen hacia la mayor fuente de luz. Yo lo he visto muchas veces después de aplicar auxinas. y esto es todo por hoy... 😅 Hasta la próxima semana... GRACIAS POR ESTAR AHÍ, CULTIVADORES!!🖐️👨‍🌾💧💦🌞💡 =================================
Likes
19
Share
@Comfrey
Follow
Tangerine Dream Auto - Barney‘s Farm Mein erster Indoor Keller-Grow neigt sich dem Ende zu. Es ist bunt geworden im Zelt. Die erste Blüte habe ich bereits vaporisiert und bin ziemlich begeistert vom Geschmack und der Wirkung. Leider habe ich aufgrund persönlicher Umstände nicht im Ansatz geschafft hier ein paar Tagebücher zu führen. Es war für mich ein extrem stressiger Winter und ich bin froh, dass ich wenigstens regelmäßig ein paar Fotos machen konnte. Der Anbauraum hatte zwischen den Pflanzen gemessen eine Minimaltemperatur von 17,4 Grad und während der Vegetationszeit konnte ich die Auto-Damen Tagsüber mit bis zu 28 Grad unter einer Sanlight Evo 4-120 1,5 verwöhnen. 18/6 - Licht/aus. Die Luftfeuchtigkeit war in der Veggiephase bei ca. 65-75 Prozent im Zelt und in der Blütephase konnte ich sie Stück für Stück absenken auf 55-43 zum Ende hin. Gedüngt habe ich ein einziges Mal mit 1:20 sauberem Urin am Ende der dritten Woche. Ansonsten gieße ich auf das Terra Preta ähnliche Substrat ausschließlich mit hartem Leitungswasser mit Ph 7,6. Das Substrat wurde kurz nach der Sämlingsphase mit einer dicken Schicht Laub, Braun- und Grünschnitt Mulch abgedeckt, welchen ich zuvor dreißig Minuten bei 150 Grad im Ofen gedämpft habe (Sterilisation). Es kamen Nematoden, Raubmilben und Gelbtafeln zum Einsatz, weil wir mit einer ziemlich unangenehmen Trauermückenplage zu kämpfen hatten. Anfang der Blütephase kam es zu einer Nährstoffblokade aufgrund von Überwässerung. Das Substrat hält die Feuchtigkeit sehr lange und die Mulchschicht verhinderte ein Austrocknen des Substrats. Wir haben anfangs deutlich Zuviel gegossen und das Substrat nicht etwas austrocknen lassen. Nach Anpassung des Gießintervalls auf alle drei Tage mit ca. 2-2,5 Liter, löste sich das Problem nicht in Luft auf, aber wir konnten es aufhalten. Meine Pflanzen sind bereits geerntet und hängen zum Trocknen. Viel Spaß mit den farbenfrohen Bildern. Happy Growing! 💚
Likes
70
Share
This is how things are looking for the ladies at the end of Week 4 of Flower, not much to update, all the information is in the video I have uploaded. Any questions just ask away guys 👍🏾🌱💚
Likes
4
Share
Neuen Topf bekommen und ins Blüte Zelt eingezogen ist Platz frei geworden.
Likes
118
Share
@SwissKush
Follow
Day 50 - she is a monster! a. this plant is very large, and is producing many bud sites b. she is drinking 4L of water a day, the most ive ever had a plant drink c. the stem on her is the largest ive grown, already larger than Bruce Banner trunk d. DWC is at 6.1-6.3 PH. Very good conditions, the flowers are exploding Day 51 - HUGE a. I cannot believe how large this plant actually is b. flowering all over the place, many locations c. i start to notice a little leaf tip burn, time to change out DWC totally, and put 1/2 strength full flower blend d. water from DWC was blood red/brown, the root system is very healthy e. I tied back all the large branches, making room for everything Day 52 - she enjoyed the LST a. Her flowers are growing so fast b. She is drinking 4-5L a day of nutrients, at full flower blend during feeding @ 6.2 PH c. I like to gradually increase the nutrients after a mineral water flush mid way through the grow. Day 53 - drank 5L - 700ppm a. she is eating very well, and growing all over b. the buds are becoming fatter and fatter c. she has been increased up to full flower blend, looking great! Day 53 - drank 5L again a. she is growing so fast, and huge b. the buds are becoming very long and getting thick Day 55 - buds are growing a. her buds are so hard, becoming larger every day b. she is drinking 5L a day Day 56 - buds everywhere a. this plant is growing towers for buds b. have to use constant LST tying back everything
Likes
2
Share
@Canda
Follow
Kyneme blizny skoro všechny hnede ale trichomy zatim sklenene ale zato jich tam je tri prdele..
Likes
5
Share
@Johan2
Follow
Day 53 of flower , made the decision to harvest today . Main cola was full of amber , further down less and less amber .so I feel I have a good mix . Even the popcorn buds have filled out . Very little trimming to do . I will hang the whole plant upside down in the dark grow tent . Really looking forward to this tasty number . Will update in a few weeks post dry and trim .
Likes
4
Share
@Mrdub
Follow
This girl is zooming along she looking gourgous looks like some purple is coming in getting super frosty colas stacking nicely trichomes coverage getting thick thick lights at 100 percent doing a 2 day 24 hr cycle then 8 hrs off doing 6.2 pH round 2000 ppm it's a little high shes rocking it out the under canopy is really helping nice thick stalk and nice thick feeder roots she should finish up in about 3 or 4 weeks my autos in 5 gallons usually take about as long as a photo but come out fantastic been stretching branches out to stress her a little bit only have to defoliate a little at time looks she gonna need another round I've noticed the difference in adding the plagron I now add green sensation to every watering which I give her a gallon every other day and she sucks it up still giving her recharge and bloom city one every other week then she gets a carboload after to feed them microbes and give her more glucose for them colas upped the calmag a little bit cause I noticed that there usually a deficiency during late flowering may give a good flush just to make sure the salts aren't building up I like to do that every 4 weeks really helps so here's to another week of growing lfg
Likes
2
Share