


Likes
Comments
Share


@OldskoolHed
Follow
Used bud clips to spread the branches out after topping to the 4th node. Doing well and super vigorous. Did some minor defoliation and set up a blumat this week.

Likes
25
Share


@MiyaguiOkPolilla
Follow
Hola hola!
Aquí ya se realizó el corte final a esta mini banana purple punch con mucho cariño.
Sufrió mucho desde que nació, tardando en germinar mucho más que otras semillas anteriores y además mantuvo siempre un perfil de planta extremadamente pequeña, nunca antes había visto algo así 😝
Tuvo una estresante vida dentro del tent pero aún así ella decidió florar y luchar contra las adversidades de manera muy fluida.
Huele delicioso, un aroma dulce como de banana madura y un poco tropical con algo de diésel o kush en el fondo. Sus tricomas se ven un poco deteriorados pero quería cosechar tarde para un efecto knockout ☠️
Gracias a todos por seguir y un gran saludo.
Viejo roble del camino, tus hojas siempre se agitan algo
Nena, nena, que bien te ves
Cuando en tus ojos no importa si las horas
Bajan, la noche es día sin sol
Bajan, el día que nunca acabó
Y además vos sos el sol
Despacio también podés ser la luna

Likes
43
Share


@Le_Duc_Du_Bud
Follow
Salut amis cultivateurs ✌️✂️🌿
Aujourd'hui je pose la nouvelle semaine 🗓️
Comment vous dire que je suis impressionnée ❗
Les plante ce développement a merveille voyait par vous même 🙏
Elles ont fortement grandi, je suis monter a 1.5L par plante, elle consomme la totalité des nutriments et me le montre très très bien 😍🤗
Merci Kannabia 🙏 encore des variétés merveilleuses 😊
J'espère que dame nature sera me récompense 🌿🍁
Pour plus d'informations par rapport à ces génétique, je vous laisse cliquer ici :
https://www.kannabia.com/fr

Likes
2
Share


@KUNST
Follow
Week F1: 28/03/2025 – 03/04/2025
28/03 – Light switch completed. 1L nutes. Moderate defoliation to expose bud sites.
30/03 – 1L nutes. Topped 4 main stems. Minor defoliation.
01/04 – 1L nutes. LST via net. Heavy stretching observed.
03/04 – 2L nutes. Upping water schedule to 1L every other day.
I've included a video for this week, cannot wait to see how the flowering process looks!
Likes
17
Share


@Naujas
Follow
To tell the truth, I am very surprised myself, how amazing she is FastBuds Gorilla cookies, she copes well with a small space:) she drinks 1 liter every day :) everything looks better than expected:) good luck to everyone.
Likes
22
Share


@AlbaDiary2
Follow
Buenos humos jardineros!
Una semana más aquí, con mi jardín de las delicias, jajajaja
Como veis siguen creciendo rápido y fuerte, sin necesidad de abonos ni suplementos.
Espero que tengáis una gran semana!
A pensar en verde!😍😍😍💚💚💚

Likes
6
Share


@GrowerGaz
Follow
Yesterday the second Sweet and Sour and Blackberry gum have been harvested on day 78. The first SNS finished around day 70. The cheesy needs a few more days but it's super chunky.


Likes
36
Share


@MrJoint
Follow
🛁 Beginning to clear nutrients.
✌️🎃 Thank you for checking my cultivation.

Likes
10
Share


@AsNoriu
Follow
Day 29. Best from all but very sensitive to nitrogen, pot is still full and as she takes over all of it , she constantly have few overdose issues. Very responsive to leaf tucking , stem twisting, forms nice canopy, will be biggest producer no doubts in this run. Will try to bend main stem with some LST in few days.
Mars TS1000 - Light is solid and does job. For last week output is on max . Still rotate a lot, but am happy with development. I miss more good wind inside, but i live in shared house ;)))))))))))) even really silent air system is still loud on desired speeds ...
Hope next week ill send her to flower. Will top up with Worm Castings and Mycorrhizae during training in few days, when girls will be watered next time. Rhythm is good, every 3 days pots are light. 1.5 liters to each went straight in after photo shoot.
Day 31. Applied BioBizz Leaf Coat when lights went off. Loads of training was made today too.
Day 33. Now girls are trained daily. Top shoot twisting, leaf tucking, rotation around axis , changing positions inside of tent and so on. Always wash hands before any training, it is a must.
Still havent made mind, scrog or lst ... Think tomorrow will be watering day and i have to decide which way to go , i am fliping them at next watering 100%, otherwise again rush to harvest before late spring holidays ...
Happy Growing !!!

Likes
35
Share


@Pot_Portraits
Follow
Week 8 +-, She got another cleanup, removing lower leaves and branches.
I always keep the lower third of my plants clean, especially with hydro plants it helps with ariation.
Feeding is still the same as before, no changes, its just a case of refill the res every 3 days +- and change and clean res every 7 days roughly.
This rythm will continue till we hit a later stage of flower where we will add Green Sensation.

Likes
6
Share


@Ryno1990
Follow
Purple Lemonade from fast buds comming in nice on week 1 of veg she is missing one of her first leaves so looks a little funny but growing more every day under this fold 6 from medic grow


Likes
22
Share


@millerman543
Follow
Thanks for the help everyone looking forward to future grows. Went way better than I imagined my first grow going.
Likes
64
Share
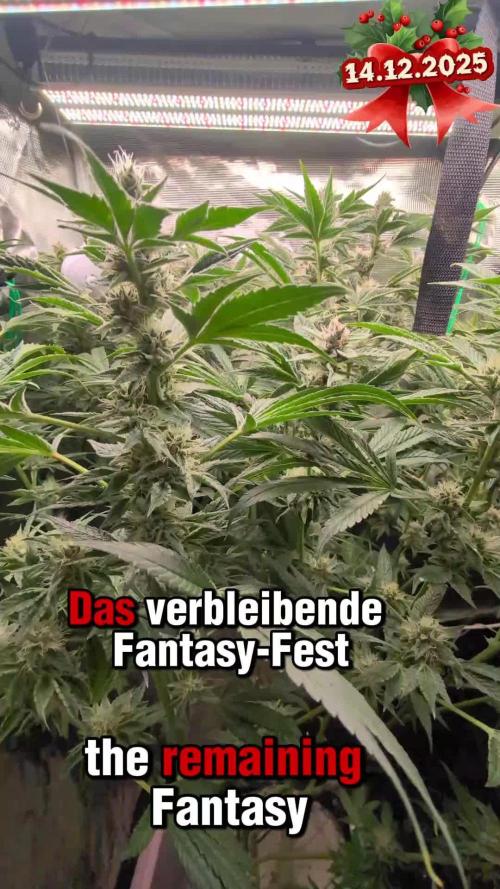

@yan420
Follow
FERMAKOR BARREL MIX – BASE IN USE
(Testing on the Fantasy Feast girl we pulled out of another diary
https://growdiaries.com/diaries/274722-grow-journal-by-yan402 )
(FERMAKOR BASE SYSTEM KOH VERSION diary
https://growdiaries.com/diaries/278391-grow-journal-by-yan402)
(Urea & Micros on the way — first week running without them)
🍶💧🍶💧🍶💧🍶💧🍶
💧 30 L Barrel – Current Working Mix
🍶💧🍶💧🍶💧🍶💧🍶
Step 1 – Calcium Nitrate (Part A)
7 L warm water (~35–40 °C) → added 45 g Calcinit, stirred until fully clear.
That’s the calcium + nitrogen backbone for the feed.
Step 2 – FERMAKOR PK Base (Part B)
15 L water in the main barrel → added 30 ml FERMAKOR PK Concentrate, mixed well.
This forms the main P + K part of the formula.
Step 3 – Combine Solutions
Slowly poured the Calcinit mix into the barrel while stirring — no reaction, still crystal clear.
That confirms the mix is stable and precipitation-free.
🌿 Step 4 – FPJ / FFJ Batch
Added 30 ml homemade FPJ (fish + veg batch) ≈ 1 ml/L.
Color shifted to a light-amber tone — looks alive and active.
🍋 Step 5 – Citric Acid Balance
Added 1 tsp citric acid after everything was blended to fine-tune pH and help chelate micros later on.
📦 Step 6 – Top Up & Check
Filled to the 30 L mark with plain water → pH tested with drops, showing yellow-green — roughly 5.8 – 6.0 range.
Nice clean look, stable smell, no residue.
💧 Current Base Ingredients (Active Mix)
Warm Water ≈ 22 L total
Calcinit 45 g → N + Ca foundation
FERMAKOR PK Base 30 ml → P + K support
Citric Acid 1 tsp → Chelation + pH balance
FPJ / Fish Emulsion 30 ml → Organic enzyme booster
Result: clean amber mix, mild and balanced.
I’ll let this version run for a week before adding anything.
👀👀👀👀👀👀
Observations and changes
👀👀👀👀👀👀
27.10.25 VW27 noticed some min burnt tips so I decreased Calcium Nitrate 45 to → 40g, decided to add two more elements micros and Epsom salts just to make sure they got everything, Fetrilon Combi 1 (Micros): 0.5 g, Epsom salts: 8 g
28.10.25 VW27 she seems devoid of any deficiencies, seems ready for the flip to 12/12
02.11.25 VW27 girl is looking good so I decided to stop making daily videos and do a standard once a week update.
09.11.25 aVW28 7 days since flip,stretch in full swing, first pistils showing, leaf color deep and healthy. Slight tip burn early week → gone after pH stabilized.
Feed stayed clear, no residue, roots clean and sweet-smelling, did what I hope is a last cleanup and pruning🎥
10.11.25 VW29 added Phosphoric acid pH down to the schedule for flowering stage.
14.11.25 FW1 FERMAKOR PK Micros 40 → 50 ml
23.11.25 FW2 got some burnt tips, observe and act accordingly in case it worsens, diluted by 25% for this week.
05.12.25 FW3 about 2 weeks ago Calcium Nitrate 35 g → 25 g, FERMAKOR PK Micros 50 ml → 60 ml
12.12.25 FW4 Calcium Nitrate 25 g → 20 g, FERMAKOR PK Micros 60 ml → 80ml
16.12.25 FW4 Calcium Nitrate 20 g → 17 g, FERMAKOR PK Micros 80 ml → 110 ml
🌱💦🌱💦🌱💦🌱💦🌱💦🌱
🌿 Day to day tasks & actions 🌿
🌱💦🌱💦🌱💦🌱💦🌱💦🌱
Fed about 5l a day of #1 and on the weekends I do a pure FERMAKOR PK flush 2l runoff
(*RUNOFF reused for tomato plants)
💧💧💧💧💧💧💧💧💧
🌱 Nutrients in 30 L #1 Veg – FERMAKOR
💧💧💧💧💧💧💧💧💧
Calcium Nitrate (Calcinit / Nitcal):
45 → 40 g → 35 g → 25 g → 20 g → 17 g
= 1.50 g/L → 1.33 g/L → 1.17 g/L → 0.83 g/L → 0.67 g/L → 0.57 g/L
= 207 ppm N / 253 ppm Ca
→ 184 / 225
→ 161 / 197
→ 115 / 141
→ 92 / 113
→ 78 / 96
PK Concentrate (FERMAKOR Base):
30 → 40 ml → 50 ml → 60 ml → 80 ml → 110 ml
= 1.00 → 1.33 ml/L → 1.67 ml/L → 2.00 ml/L → 2.67 ml/L → 3.67 ml/L
→ balanced 1:1 P:K + light micros (from extract)
Home-made FFJ/FPJ (Fish + Veg): 30 ml
= 1.00 ml/L
Epsom Salt (MgSO₄·7H₂O): 8 g
= 0.27 g/L → ~26 ppm Mg + ~35 ppm S
Fetrilon Combi 1 (Micros): 0.5 g
= 0.017 g/L
→ Fe 0.7 ppm · Mn 0.7 ppm · Zn 0.3 ppm · Cu 0.3 ppm · B 0.1 ppm · Mo 0.02 ppm
Phosphoric Acid (pH down) + Citric Acid (chelation): as needed
→ First set pH with phosphoric acid, then add a little citric only if you want extra chelation
Target pH: 5.8 – 6.0 (drop test yellow-green)
📦 TOTAL:
Liquids:
60 → 70 → 80 → 90 → 110 → 140 ml per 30 L
= 2.00 → 2.33 → 2.67 → 3.00 → 3.67 → 4.67 ml/L
Solids (CaNO₃ + Epsom + Fetrilon):
53.5 → 48.5 → 43.5 → 33.5 → 28.5 → 25.5 g per 30 L
= 1.78 → 1.62 → 1.45 → 1.12 → 0.95 → 0.85 g/L
YouTube Link: https://youtube.com/-m8h?si=A7x4Zlr2kj-_ga31
Likes
2
Share


@DurbanPoison420
Follow
Although both plants are amnesia haze, they seem to be showing very different traits already. AH#1 is forming typical Sativa like buds as expected and should be ready for harvest in the next couple weeks. AH#2, while 3 weeks younger, is much much more pungent than her older sister and the plant is already a lot bigger in size!
Likes
2
Share


@Ninjabuds
Follow
My Skunk Apple Run plant is still a bit young, but I can see those buds starting to form. It's a bit of a slow starter, with buds popping up all over the place instead of a nice even line. We'll see if adjusting the light cycle or its food might help it along. I'll keep you posted on any changes.
The past few weeks have been so beautiful, watching the plants grow and change. It's amazing how something so small and fragile can turn into something so strong and vibrant. Now that they're getting ready to bloom, it feels a little bittersweet. I'm so excited to see the finished product, but I'll definitely miss having them around while they're growing.
Likes
75
Share


@Theia
Follow
Hello if you're here👋😊
The journey continues. I have put a lot of time love and energy into this lady and she is rewarding me back by being super chill and laid back. She takes her food and just keeps getting bigger. Too many flower sites to count. She sits with her daughters and they are all growing at the same rate giving me a beautiful canopy. I have not needed to train anything as it's all growing very uniformed. I can only put this down to how even the photon distribution is on the SP3000. If anyone is looking to upgrade their lighting I can't recommend this light enough. 9 plants under it and it's at 55/60% on dimmer. 🤩🤩🤩 All plants are perfect.
I decided to do some more LST and clear some of her lower leaf. I've bent flat all 16 colas so now all the flower sites have nowhere to go except up towards the mars hydro sun god... She is huge!
I hope the flowers start to come soon.
Thanks for the visit happy grows🌱🌿🌱
Stay safe😷😷
Likes
38
Share


@Cariboo_OG
Follow
Utopia Haze is a rare heavily sativa dominant hybrid (90% sativa/10% indica) strain created through back crossing Brazilian Sativa strains. This tasty little bud took home 1st Place for Best Sativa in the 2008 High Times’ Cannabis Cup and for good reason – with its potent 18-22% average THC level and long lasting cerebral effects, Utopia Haze is one powerhouse smoke. The Utopia Haze high comes on soon after you finish your first toke, hitting you with a strong cerebral lift that infuses you with a sense of hazy relaxation.
Type: Feminised/Photoperiod
Cultivation: Indoor/Outdoor
Flowering Time (days): 70-75
Indoor Yield (g): Up to 650
Feminised Outdoor Harvest Month: October
Feminised Outdoor Harvest Month Week: 3rd-4th week
Aroma: Citrus, Woody, Pungent, Mint
Effect: Cerebral Lift, Hazy Relaxation, Sleepy
Welcome Everyone to the Final Entry of my Utopia Haze Grow !
There is so much to discuss ! I have been extremely busy as of late trying to get this Harvest together, but i am happy to have it here for you now !
I Seriously under estimated the amount of time, help from others, and my own necessary skills to pull this off.. and i still kind of screwed it up lol !
But its worth noting i have never actually done this before and trying to document it during....was extremely hard.
It is next to impossible to work an iPhone with rubber gloves on !
First I want to discuss everything step by step so before you jump straight into the comments on how the end product is so small in "quantity"
Rest assured i am happy with its"quality"...and thats all that matters to me because Life is a journey not a destination! and i have learned so much from this grow that I couldn't be any happy even if i messed some things up :)
But at the very least I hope you read through this entry in its entirety with an open mind and focus more on the process, rather than just the outcome!
I ran out of Ice & i was only able to wash three times..(normally I've heard you should go sometimes 5-6 washes)
Preparation is Key & things will be much better next round :)
Photos 1-22
These are pretty self explanatory but for those of you just tuning in now.. this is what happens to a very happy plant when you don't have the necessary tools to monitor key components of growing cannabis.. Ph, as well as EC levels play a very key role in the outcome of your grow lol that being said I was just able to save this plant by purchasing both tools but that doesn't mean the plant didn't suffer because of the prior events.. This was a Huge reason behind me choosing to turn this harvest into what i would consider
"Solventless Hash Rosin" from "Ice water extracted Bubble hash".
Pictures 23
The idea here is the process of using "fresh Frozen Cannabis" this has been discussed many a time online on such sites as instagram and here on grow diaries as well.. I personally have Never tried the process so i decided to try it out and make a judgement for myself..
Video 24
The Cannabis has now been in the freezer for 72 hours making it very well frozen.. as you can tell i struggled getting it all into the 25u Screen Wash Bag. One thing of note i would do differently is i will de-stem my next batch as i also believe this played a part in the amount of plant matter that escaped through the sieves.
Photo/Video's 25-28
The idea here is "ice water Seiving" & especially with the bags that I am using here that are only have screen material on the bottom portion of the bag it is very important to have spaces in-between the screens to allow the water to pass directly through the screens into the bottom bucket with the least amount of resistance.. because the hash is so extremely temperature dependant if it gets warm on the side of the bag.. it will stick there and not make it to the bottom to become use able product..
29
You do not need to use as much Ice as i used here lol... the idea is to keep everything very cold..i certainly achieved that but at the sacrifice of using so much that i ended up grinding product and producing "contaminants" but in the end they are just plant matter that i would be smoking when i rolled up my joint either way so.. I'm not super disappointed..
But it should be noted that what you want to achieve here is a Layering effect where you have the wash bag between two small layers of ice while the "water current" washes the Trichomes away allowing them to be separated by the screens setup below :)
Before Starting the machine you should allow some time (i.e.;10-12minutes pre soak to allow the product to become saturated) before the first cycle.
By video 32 I have just ran out of ice lol..
Video 33-34
Here I have a tip for you.. to separate the screens that you sieve through.. cut 5 gallon buckets to stretch them across nice and tight.. it'll make scooping your Bubble that much easier ! i learned this from the many "Frenchy" videos I have watched :)
Picture 35
Here in lays the problem for most people.. drying your hash without loosing vast amounts of "Terpenes" whilst also stay ever vigilant against mold !
Thanks to all those videos I've watched on youtube.. id like to think this was one of my most successful parts of this process..
Things to Note; Terpenes start to seriously evaporate at temperatures 68F or 20C
you need to stay as cold as possible whilst bringing the Relative Humidity in the space down into the 40-30% to stay away from that nasty mold !
I used my cold storage room in the basement.. with a dehumidifier running to keep the space at 45% RH & staying at a constant 15c.
All while spreading the hash as thin as possible across parchment paper, on top of the white screens with a fan moving air across both sides of the paper.
Pictures 36-38
These are some macros i took in the middle of my drying session I fell in love with the colour.
Yes i know the black spots are plant material but they will get caught when i bag the hash & squish the oil out.
Thing to Note; at this stage it is important to ensure you 'micro plane" the hash down as fine as you can whilst staying weary of the temperature... any "chunks" will hold pockets of moisture.. that lead to potential problems..ie; mold ...
Picture/Video 39-41
Successfully planed bubble hash ready to be bagged and Squished !
Picture 42
Ive decided to follow Pedro.. from Pedros Grow Room and double bag to be on the safe side so i don't have any blow outs.
So thats One 25u bag inside one 160u bag ! :)
Pictures 43
This is almost 3 grams of the bubble hash from above, already melting in the bag.. this is where i ran into trouble again lol things started getting to warm in the house and i was only able to get one of the three squish's i did on video :( things started getting sticky.
Picture 44
This is basically just a photo of the equipment I'm using; 3x5 LowTemp Cage in the frame I built myself, with a 20Ton bottle jack.
Something to note here is this is an older Lowtemp model with only a single heating zone which is which i have it closed here heating Both sides of the press :)
As well as the importance of having adequate pressure on your plates.. my rig is very overkill for the size of hash bags..lol
Video 45
Here is the lovely press video.. its didn't quite work the way i wanted either lol my directional folding wasn't quite tight enough for a big "drip" :)
&the Press was set to 65°c
Photo's 46-50 are pretty self explanatory :) I had a blow out.. but still managed to pull an 80% return from the hash once squished...& yes it tasted amazing :)
Was it worth it in the end... that could be debated.. for some..i understand..its not your thing, but for those of us that are interested in making our own concentrates.. free from Solvents...
I wouldn't make it any other way :)
If even ONE of you reading this diary finds it helpful to reference for ANYTHING.....even if its "what not to do" ill consider it a success !
Thanks again for tagging along on this garden adventure.. its been one heck of a journey !
Much Love from B.C. Canada,
Until Next time,
Cariboo