
Likes
Comments
Share


@Prilyfe13
Follow
July 7, 2024 Day 78
This week we switch to Overdrive and stop the Big Bud. It's the last 2 weeks of flower and then a week of flush. Then 2 weeks of drying and then about 3 to 4 weeks of curing. after that, I can smoke it. Lol.
All 4 ladies got a half gallon top feed with just recharge, and the reservoirs refilled with the new nutrients. I was going to water until runoff, but I think it's just a waste at this point. Plus bottom feeding doesn't require runoff. Depending on how they feel tomorrow, I might add the other half gallon to each and get that runoff. Or very close to it.
Sour Diesel A has started picking up the pace with drinking. She is drinking just as much as C and D. Super frosty and starting to really pack on the weight. A couple branches are starting to sway at the slightest touch. Hopefully the heavy buds won't pull the branch down.
Sour Diesel B is looking great! A little bit of foxtailing and larf on the bottoms, but the tops look great! Tons of bud and big buds to boot.
Sour Diesel C is also swaying a bit at the slightest touch. I expect that from her. Her branches are strong but thin and long. Her buds definitely didn't swell up like B and D, but they are solid and covered in trichomes.
Sour Diesel D was the dry one this week. I ended up dumping the whole reservoir from the other day so I could start the new regimen. She was dry and anaerobic for a bit. The half gallon of top feed really helped. It took some time to get it all wet, but in the end, the half gallon seems to be fine.
The environment is still high humidity in the morning and lower when the AC kicks on. Currently it's 81° outside and the temp in the tent is 75°. But with my personal AC on, it drives the humidity way up. Currently it's at 62% in the tent. It'll probably climb even more now that I watered everyone.
Grow System Environment:
Temp: 75.6°
RH: 58.0%
VPD: 1.24 kPa
July 8, 2024
Not much going on today. All 4 ladies have their water and feel good.
Sour Diesel A looks great! As usual, frosty and smelly as ever.
Sour Diesel B has slightly canoeing leaves. They are also starting to brighten up. Must be getting close to the end.
Sour Diesel C has drooping leaves. Not sure why. I'll have to research.
Sour Diesel D is looking super good. Lush green leaves. Huge main cola and more frost.
The environment is the same as yesterday. High humidity, but somehow today it's below 60%. Hopefully it will go below 50% this afternoon.
Grow System Environment:
Temp: 74.6°
RH: 57.5%
VPD: 1.21 kPa
July 9, 2024
It's picture day! Not much else going on though. Just a check up on the plants and that's it.
Sour Diesel A looks great! One issue I know I'm going to run into is sagging branches. One of her branches already needed to be pulled back up and tied to a bigger branch. The buds just weight a lot for the branch. Funny though, I've been using silica and that should have strengthened the branches. Not that they are super weak, but they are thin. I'll have to keep an eye on her.
Sour Diesel B is outstanding. Huge solid buds. Tons of frosty frost. I'll probably start checking trichomes next week. It's too early to see anything significant.
Sour Diesel C is a little lighter than the other 3. She also has some seriously droopy leaves and I have no idea why. I don't think it's a lighting issue. Underwatering could also be a thing, but she got top fed 2 days ago as well as the bottom feed system. It's moist, but definitely not as wet as I would have hoped on the bottom. I think I'm going to actually have to water to runoff with her. I don't really know what else to do.
Sour Diesel D is looking good as well. Super fat buds and super hard to boot. And it hasn't even been 3 days of the Overdrive. I can only imagine how hard the buds will be at the end.
The environment is starting to calm down a bit. Unfortunately I have to keep my crap ass AC on and it's bringing in humidity as always. So the humidity in the tent is around 59% to 60%.
The temp was high this morning at 80°. A bit warm for this stage. It should be around 74° to 75°. But it's back to the mark now.
Grow System Environment:
Temp: 76.1°
RH: 56.2%
VPD: 1.31 kPa
July 10, 2024
Watered all 4 ladies today. Each got a half gallon full nutrients with Recharge. Only 1 needed to get a reservoir refill.
Sour Diesel A is looking super good. I had to tie another branch up today. The frost on her buds is super insane. I'm loving it. I'm sure there is better frosty plants, but this is awesome.
Sour Diesel B is looking super good. Her leaves are canoeing and starting to point up. A sure sign she's starting to finish up. She also has 1 purple sugar leaf. So it looks like the fade is also starting as well.
Sour Diesel C is looking kind of weird. Her top fan leaves are droopy and the bottoms are fine. But it's only the big top leaves. Strange indeed. If anyone is reading this, any insights? Comment below with what you think it may be.
Sour Diesel D is super frosty as well. Her buds are massive and heavy. It seems like her side branches are starting to get weighed down a little bit. She's not even close to fading, but her leaves are a beautiful lush green. She needed a full reservoir top off today. The rest are about half empty now.
It's super humid today. 79% outside. Her temp is still right where it needs to be, but the humidity is higher than it has been lately. Obviously due to the super humid day.
Grow System Environment:
Temp: 74.4°
RH: 58.7%
VPD: 1.17 kPa
July 11, 2024
It's picture day! Not much going on today.
Sour Diesel A is looking really good with her super frosty buds. She seems to be holding the water from yesterday and also trimming from the reservoir. Looking good.
Sour Diesel B is amazing. Her buds are all dense and bright green like Sour Diesel is supposed to be. She's super frosty, but she is also canoeing. Not sure why. Maybe too much light? I doubt it though. The DLI is around 45 mol/m²/d.
Sour Diesel C needed more water. She was already half the weight she was yesterday after watering. She's also drinking the reservoir. So she got another half gallon top feed today. I even got some runoff. She should be good for the next couple of days. Her buds are super frosty, just like A. Honestly, I think they are the same phenotype. I thought A was more similar to B in the beginning of the grow, but the bud structure and leaves are all the same between A and C. Smaller tight buds. Tons and tons of frost.
Sour Diesel D is looking pretty good. I really wish she had taken off like she should have. I expected a much taller plant without training. It's fine though. The massive cola is making up for it. Maybe it will be a 2 oz cola. Lol.
The environment is still a mess. It's rainy and humid today, but not too warm. The humidity in the tent currently is 66%. Ridiculously high. The temp is around 79 for now. I need to turn my AC back on I think and just deal with the humidity. The temp can't stay over 78° if I want super frosty buds.
Grow System Environment:
Temp: 75.6°
RH: 60.2%
VPD: 1.18 kPa
July 12, 2024
Not much going on today. Just the daily picture. Some observation and that's about it. No watering is needed and the reservoirs are all filled with water.
Sour Diesel A is looking great! Her buds are definitely getting super fat and swelling up. A couple tops are making little flowers all around. It makes them look even fatter.
Sour Diesel B is happily starting the fade. Just one leaf for now, but the rest aren't far behind. I'm guessing over the next week, we will get a beautiful fade. Hopefully the buds stay lime green. They are so pretty.
Sour Diesel C is looking good as well. The top leaves are still drooping, but not quite as bad as they were yesterday. I'm guessing it's a mix of underwatering and nutrient deficiency. Which nutrient, I don't know. But the top feed was the full nutrient regimen. So she should be good.
Sour Diesel D is looking super hefty. She has plenty of water and is super a healthy green. No fade though. It's only B that's fading.
A note about the lighting. I'm going to check the DLI. It should be at 45 mol/m²/d. That's the deepest red spectrum I can pull out of my light. I think I now understand the difference in wattage for wavelength. I'll learn more about this for future runs. I think I'm fine, but if I'm right, I may be able to increase the power back up to 80%, but we will see. I do t have room for the light to go up anymore, so I have to be really careful. Unless I decide to put the exhaust fan outside of the tent. Then I'll have about 6 inches of space. That may be the best plan of action if need be. The light is still 22" from the main canopy. Bringing it up to 28" will give me the ability to increase the power and get the lowers lit up as well. The supplemental lighting is or isn't working. I honestly cannot tell. I really wish I had added the bars in again weeks ago. It's too late now. I just don't have the want to do it.
The environment was way off this morning. The temp was at 78° and the humidity at 66%. So I turned my AC on and dropped the temp back down to 76° but the humidity stayed roughly the same. Now the central air kicked on so the humidity should drop fairly quickly for the rest of the day.
Grow System Environment:
Temp: 75.4°
RH: 62.7%
VPD: 1.09 kPa
July 13, 2024
Picture Day! And this week's video.
Sour Diesel A looking really good. Super dense buds and tons of frost. Not much else to do. Her reservoir should be empty tomorrow. If not later tonight.
Sour Diesel B is definitely starting to fade. Her leaves are rapidly changing color all over. Not much, but you can absolutely tell she will have a really nice fade in the end.
Sour Diesel C emptied her reservoir pretty quickly and is still holding her weight. What that means is the plant is finally drinking. I added the rest of the half gallon from the other day. The half gallon should line up with the rest of the reservoirs.
Sour Diesel D has this stupidly massive cola for the size of the plant. Her color is still a super lush green. The frost is pretty good, but still not as good as A and C, but she has the largest cola of the bunch. Not as many colas as the rest, but still the biggest.
The environment is still just a mess. Mornings suck. Currently the humidity is at 62% with a near perfect 76°. The humidity will of course drop down in an hour or 2.
Grow System Environment:
Temp: 75.4°
RH: 58.9%
VPD: 1.20 kPa

Likes
Comments
Share


@Elguacho420
Follow
Buenas a tod@s... Seguramente ya estamos en la ante última semana... Están espectaculares todos los frutos, tanto de esta variedad como las otras, muy muy pretos como rocas, delicioso aroma y muy grandes, han crecido una exageración en una semana, se nota que comieron bien, no hay queja de mi parte hacia este cultivo, este riego con nutrientes será el último, el próximo ya es de limpieza de raíces y lo de más ya sabemos...😉 En el próximo cultivo se vienen cosas nuevas... Mientras tanto... A disfrutar está última etapa... Siempre se disfruta haciendo esto q nos gusta, con dedicación, esfuerzo y trabajando duro siempre... A seguir creciendo 🧠😎🙌🏻.
Buenos humos para tod@s nos vemos la semana q viene... 😎💀🇦🇷🤝🏻🇪🇦

Likes
6
Share


@Sup3rNov4
Follow
She is absolutely beautiful and refuses to give up! She is still producing new pistils and she has only just started to get a little cloudy.
The grow shall go on
She has just produced one last wave of pistils and the trichomes are finally turning amber as you can see in the new picture


Likes
Comments
Share


@GreeneScene
Follow
WEEK#9
DAY#56 :She could use some water . Easy going grow , slow vertical climb multi-lateral branching . I could selectively prune to encourage vertical growth but at this time I think the grow is going fine . I anticipated the plant being larger at this time athough I’ve never grown this strain before to know what to expect I think another 4-6 weeks of VEG will do her nothing but JUSTICE .
Still watering to make those dry amendments available . After these 28-31 days we’ll transplant her into her final 6gallon pot . Or atleast I think that will be her final pot I see the benefit of stepping up pot size gradually and honesty think the growth is healthier when done that way I’m just being lazy and don’t feel like up-potting 3 or more times . I just wanna make small adjustments and move on ya know ?
Week#9Day#56Update: 2/3 older girls showing signs of flushing, there’s heavy yellowing top of the plant & purple hues beginning to show. The two of them should have 3-4 weeks left & the buds have not even began to swell yet so I’m worried I missed my feeding time after I gave them nute burn beginning of flower so my fear is that my bud won’t swell & I’ve just jacked up my harvest the last half of flower. I’m going to try & get small amounts of nutes in there to help the bud develop without giving too much to mess up the end of flower flush .
The final older girl isn’t showing any signs of flush it is the smallest of the 3 & therefore perhaps did not consume as much food as the other 2 girls is all I can think considering all three ladies soil came from the same batch of premixed “soil” they weren’t individually mixed
It’s almost time to get these older girls out & get some note-worthy shots of “Cellie” growing All ALONE into this 5x5.
Heavy heavy heavy defoliation. Will pony-tail when the fan leaves grow back out
Week#9 Day#63 Update: started pony tailing her tops that are large enough to pin back without decapitating/severing the top . The top dress feeding I gave her still hasn’t become plant available yet. She’s still yellowing . I’ll be glad to see her park back up & continuing growing on. I purchased some worm castings I’ll top dress with a few tablespoons before watering her in & see if that perks her up until the Gaia Green is broken down.
Shes almost tall enough to come down off that 1gall bucket even before transplant into a 6gal planter like the older girls finishing up .

Likes
79
Share


@Salokin
Follow
Hello Growmies,
We're in the third week of vegetative growth with our Epic Buzz plants by Anesia, and they are a sight to behold with their rich green leaves signaling strong health. The growth has been consistent, with new leaves unfurling and the central stem gaining girth, ready to support future flowering.
The root development, while not visible, is indicated by the stable and healthy growth above ground. Our watering schedule is on point, with the roots expected to be expanding in kind to support the lush foliage.
Feeding these plants has been a regimented process. We've been nurturing them with a mix of Orca, Rhizotonic, and pH-ed water, providing 100 ml of this concoction every three days. The plants are responding well, showing no signs of nutrient burn or deficiency, which is exactly what we want to see at this stage.
There have been no issues with pests or environmental stressors, which is a testament to the vigilant care they've been receiving. As we keep our environment stable, we'll continue to see such positive trends in their growth.
Looking ahead to the fourth week, we'll keep a close eye on how the plants are reacting to their nutrients. Adjustments will be made if necessary, and we may start to think about training techniques to help them grow wide and ready for a bountiful flowering period. Regular updates will guide us through this process, ensuring that we meet the needs of our Epic Buzz plants and keep them on the path to success.
Stay lifted,
Salokin

Processing
Likes
10
Share


@Geewiz
Follow
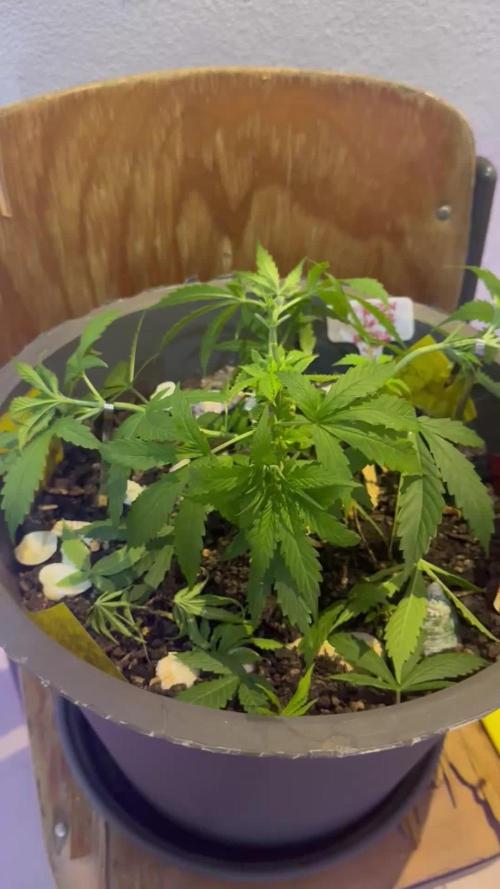
Hey guys! Thanks for stopping in to check out my babies! This is week 2 of flower (days 8-14).
This week things really seemed to take off! 🔥 Plants were happy all week long and seemed to grow almost an 1” per day if not more.
Buds are developing nicely, no smell yet but nice to see them stackin’. I cut out anything under the trellis that would end up being popcorn buds so the plants could focus on the main colas. Hoping I’ll just have to pull a few leaves here and there from now on.
The New Floraflex drip system has been nice! 💯 It has made watering easier and more automated. Water distribution isn’t perfect but I’m sure they aren’t 100% level either.
Plants should stop stretching after this next week and should start putting on some size! Stoked to see what these girls can do in week 3!
Day by day break down:
Day 8
Cut out some lower growth/ leaves blocking bud sites
Day 9
Fed all 6 plants. PH: 6.11, PPM: 1136
Day 10
Plants look great. Let them do their thing.
Day 12
Fed al 6 plants. PH: 6.05, PPM: 1264
Day 14
sitting at 29” tall right now. Not so stressed on height being be issue. Thinking they might be around 35-40” tall at the max.
Stay tuned for next weeks post to see how much these ladies have thickened up!


Likes
18
Share


@The_Stoned_Samurai
Follow
A bit frustrated that I don’t see flowers yet :( I defoliated quite a bunch of leaves that were taking all the space (see pictures). I hope flowers will appear soon after it!

Likes
6
Share

@Elguacho420
Follow
Buenas a tod@s... Otra semanita más para las niñas, se supone q es la anteúltima semana pero siempre queda algún día más seguro... Está semana se quitaron y agregaron nutrientes nuevos para esta etapa de la floración, de momento todo en orden, este rmario salió muchísimo mejor a comparación a otros diarios, eso desde mi punto de vista. Tanbm le quité varias hojas, haciéndole hueco para que entre más luz x debajo, ya había aquitado pero tenía bastantes otra vez. De momento todo en orden... La semana q viene ya vemos q tal van... Un saludo y buenos humos para tod@s... 💨💨💨🙌🏻👍🏻
😎💀🇦🇷🤝🏻🇪🇦

Likes
127
Share


@Tropicannibis_Todd
Follow
💩Holy Crap We Are Back💩
Well i had so much fun the last round , that we are going at it again 😁 OUTDOOR GROW👈
So super happy to be trying this one out , can't wait😝 .....The hope here is to do better then last summers outdoor grow ..👍
Seed soaked for 48 then placed in a tub with paper towels , once it cracked and rooted , placed into its little pot until ready for final placment 👌
👉NutriNPK NUTRIENTS USED FOR FEEDING 👈rain water to be used entire growth👈
👉www.nutrinpk.com right now get 10% off using SPRING2022 as the coupon code👈

Likes
11
Share


@Ananas_Comosus
Follow
Sunday, 14-08-2022
Plant continuing to look good and is in flower. Secondary stems from mainlines so tall I decided, in the moment and not planned at all, to tied them down yesterday. I realize this is not fully in keeping with quadlining but I went for it. Broke one of the lower mainlines where it attaches to the stem 😞. Supplemented feed today with my Beneficial Booster. Foliar sprayed the last two nights with The Amazing Doctor Zymes Eliminator for IPM. Except for testing before use, I followed instructions exactly and have noticed no phytotoxicity. Will report on effectiveness next week after completing initial 3 day treatment tonight.

Likes
Comments
Share

@Simba732
Follow
🔘Week 4 Over for Lady North
🔘 Her growth was steady and constant so I went in for a full defoliation LST
🔘The goal is to level up the canopy to the same level so the tops all get the same light priority
🔘 I introduced nutes to the feed schedule around week 3’s end going into week 4
🔘Let’s see how she handle this

Likes
23
Share


@DeepRootsGrowTrees
Follow
MATARO BLUE by KANNABIA
Week #14 Overall
Week #13 Veg
This week she's doing really well dealing with the heat and elements it's still hot here and she starting to pre flower towards the end of the week hopefully the weather's going to cool down as she starts to flower. Stay Growing!!


Likes
5
Share


@thevalar007
Follow
Week 1 of flower and she started her stretch. Using General Hydroponics Trio for feed along with TPS Signal and Recharge for soil. I'm considering adding a 2nd trellis, but it depends on how the next week or two goes. Did some light and final defoliating. Could have went more but I didn't want to risk overdoing, not until I'm more experienced anyway. Plus I recommend having a plant to experiment on and take some high-reward risks concurrent with your main grow.

Likes
18
Share


@Canadian
Follow
This one has been delightful to grow full of buds everywhere with very little Fan leafs can't wait to cure and tested.
I have cut down in jar everything the wait was 97 grams please consider that when they comes to my scale weight i wait until the main stem breaks with a loud crunch and the buds are really dry to the touch reason for it I have a very busy life and at the end of the day this is just a hobby so I cannot be opening those jars many times a day at most one in the morning and one in night so I want to avoid mold on them.so I push in a Boveda pack to keep them nice
Thank you for reading I will update the other details when ready have a happy grow.

Likes
6
Share


@Dieselnutz
Follow
Gettin a lot of rain this week struggling w humidity when lights go out. Everything is still chugging along buds starting to swell a bit more feel nice and dense.

Processing
Likes
12
Share


@Studabaker
Follow
Growing good letting soil dry out a little due to some pest. Are you guys sure the color is fine ?

Processing
Likes
3
Share


Likes
34
Share


@SalocinSpecial
Follow
D54 (14/01/2021): First day for week 4 of bloom. I gave them tap water cause last time the PPM run off was a bit high. The PPM run off for Banana Kush today was higher then the run off for Glue Gelato. It's not the first time I see that so I think I can say that Glue Gelato uptake more nutrients compared to Banana Kush. If it become a problem I might consider doing two separate nutrients mix.
- temp: 24-27C light ON ; 21-23C light OFF
- water: PH6.7, 128 PPM approx. 4L per plant
- run off: PH7 and 830PPM for Glue Gelato ; PH6.9 and 1220 PPM for Banana Kush
- RH: 55% for light ON and OFF
D55 (15/01/2021): I saw some brownish spots on small leaves for Glue Gelato. Last feed, Glue Gelato was the one with the lower PPM run off. I think the brown spots are due to calcium deficiency. Glue Gelato is an heavy feeder, I might give a good dose of nutrients next feed. Glue Gelato PH of the run off was on the high acceptable range. So it might also be a nutrient lock due to inappropriate soil PH. I need to check that closely...
- temp: 24-27 C light ON ; 21-23C light OFF
- no water
- RH: 54% light ON ; 50-52% light OFF
D56 (16/01/2021): I fed with 3/4 of the recommended dose for mid late flower. Run off for Banana Kush is still high. I will see how she react but so far she's the one who look the healthier! Maybe she doesn't mind having a ''hot'' soil. It's been 3-4 weeks since I did check the accuracy of my PH meter. I checked yesterday and I was off of PH0.4 (reading higher that it was suppose to be). I have a cheap PH pen so I need to check that often. Maybe the little brownish spot on Glue Gelato is due to incorrect PH in water or soil over the last week.
- temp: 24-27C light ON ; 21-22C light OFF
- water: PH6.2, 913 PPM less then a gallon per plant
- run off: PH6.7 and 1200PPM for Glue Gelato ; PH6.8 and 1700 PPM for Banana Kush
- RH: 53% light ON ; 51-52% light OFF
D57 (17/01/2021): There's sing of nutrient burn on Banana Kush. It was expected. I consider doing a flush for this gal.
- temp: 24-26C light ON ; 21-23C light OFF
- no water
- RH: 54% light ON ; 57% light OFF
D58 (18/01/2021): I mixed 1/2 of the recommended dose of Max Minerals. I flushed the Banana Kush until the run off passed below 1000 PPM. I did not flush the Glue Gelato since there is no sing of nutrient burn. They don't smell that much. When I open the tent, there is a weak smell but when I play with the leaves or shake the stems now I can smell them properly. Glue Gelato have a strong pine-citrus-fruity pungent smell and Banana Kush have a smooth tropical-fruity-candy smell. Both smell soooo good and the buds are starting to look really appealing 😍😋
- temp: 24-26C light ON ; 21-22C light OFF
- water: PH6.3, 325 PPM
- run off: PH6.9 and 1010PPM for Glue Gelato ; PH6.9 and 920 PPM for Banana Kush
- RH: 55% light ON ; 51-52% light OFF
D59 (19/01/2021): After 12 days of not removing any leaves today I did removed approx. 20 leaves on each plant. From now on I will continue to remove the leaves that are blocking bud site from having enough light.
- temp: 23-25C light ON ; 20-21 light OFF
- no water
- RH: 53-54% light ON ; 54-55% light OFF
D60 (20/01/2021): I gave full recommended dose of Max Minerals, half of the recommended dose of Max Grow and 3/4 of the recommended dose of Max Bud. All base on the recommended dose of nutrients for mid late flower. I was aiming for a lower PPM level then last Banana Kush run off. I dropped de lamp of 1 inch height to be around 13-14 inches from canopy.
- temp: 23-25C light ON ; 21-22C light OFF
- water: PH6.0 , 775 PPM
- run off: PH6.7 and 1200PPM for Glue Gelato ; PH6.6 and 1060 PPM for Banana Kush
- RH: 51-52% light ON ; 45-49% light OFF
