


Likes
Comments
Share


@Krisis
Follow
7/1 Chopped these babies down. Now they’ll be hung in the dark (full plant) at about 60/60 until they’re ready to go in jar. Hopefully about ten days, but these are small so idk if they’ll go that long. Will update when we get there
Tried to update smoke report but it just keeps erroring out. I’ll try it again another time. :/
Meanwhile, I’ll leave some info here.
This hasn’t even cured yet and wow. Wasn’t thrilled with what I could see the yield would be.. still not thrilled, but damn. The shits good. Perfect density, smell, and taste. It’s loud af and definitely potent. It’s pungent with a hint of sweet but not too much.
Would absolutely grow again, but would grow more plants since the yields not there .. at least for me.
5.2 ounces - 2 plants. Buds no trim ;(

Likes
5
Share


@2x2UkGrow420
Follow
3 weeks in already, plants seem to be looking good, little bit of Nute burn on the plant on the right but only on 1 of the older leaves so not too concerned. Fastbuds GSC starting to smell, piney fresh ganja smell, are are now stretching a bit more. Really happy so far and loving my new hobby, excited to see what the next weeks brings! Happy growing!!!


Likes
30
Share


@DrewbieDoobieNoobie
Follow
Well The stretch has begun, I got one Lady boy in the mix not sure how it happened. see the week 6 time-lapse plants look good lollopped the bottom 3rd of all of them and gave them their early flower feeding week 2 per the Emerald Harvest booklet. So will this Hermie produce Feminized pollen ? looking for some feedback from ya all. or should I pull it from the garden before it shoots its wad? let me know.

Likes
49
Share


@masterofsmeagol
Follow
6/15. Glad I listened to my intuition and held off watering. IT Rained andctheb again last night. Plants seem to be doingvreal well. Slight burn on lower leaves where it was before from being in the garage and I found on spot that LOOKED like it could've been caused by a pillar but it's right on a burn. I sefoliated one leaf. This is minor stuff. Next watering I'll be adding silica. I'm not giving nutes until the plants tell the need them. The 3 gallon ones may receive nutes first as they'll run out. I'll update as I progress.
Went back over at 8:30. It's just overcast with showers. Plants seemed to like it. They all look good. Noticed a chunk out of a leaf and a POSSIBLE pillar spot. I'm going to have to get the BT out and and give the girls an application. I'm waiting until they settle in a bit more though. I need to start LST as well AND the light dep. Unfortunately "life" has made things difficult. I'll get back over there today though and I'll start the light dep. Kinda makes me wonder though. The 1pth planet I wanted to light deo is tge same size as the others in the much bigger containers. The thought came that maybe I should just hold on to them as extras in case something happens. I also am going to start silica next watering but it will be a few weeks before any nutes are given.
UPDATE: WENT BACK OVER AT FIVE AND TOOK ACSHOT TON OF PICTURES. IM TRYING TO UOLOAD NOW. THINGS ARE POPPING OFF AND IM GETTING A NICE SWEET SKUNKY ODOR. WHILE I WASCTHERE WE GOT A QUICK SHOWER. DIDNT LAST MORE THAN TEN MINUTES BUT IT RAINED HARD. I FOUND A TEMPORARY SPOT TO LIGHT DEP THE TWO PURPLE PUNCH AND THE ONE TENTH PLANET. I DONT SEE ANY LIGHT LEALS AND ITS SURE AS HELL DARKER THAN IT IS AT NIGHT. I'LL SEE HOW IT GOES LEQVING THE COVER ON ALL NIGHT. IF IT DOESNT WORK I MAY JEED TO ADD A FAN OR CHANCECTHE SPACE. I ALMOST DIDNT WANT TO DO THIS AS THE 10TH PLANET IS KEEPING PACE WITH ITS SISTERS, DESPITE THE SMALLER POT. OH WELL I WANT TO GIVE IT A SHOT AND I DONT WANT MY CAGE OVER CROWDED. I'M LOOKONG TO DO A 6:30 TO 6:30 SCHEDULE.
6/16 First night of light dep for the three little ones. I won't be able to call them that soon. I'm currently trying to upload a video. My grow buddy mentioned the droopiness of a couple of my plants in this video and how I hadn't been watering. This kinda scared me so I ran over and checked the too few inches on the two that had a little droop and came out dry. I had some water already phed ready to go (I'm hoping that the ph doesn't change if it's stored a day or two) and used the gallon to moisten the dry topsoil. Looking back over my diary we have had nothing but rain. I then tried the "lift the pot method" and came to the conclusion that these bags were indeed still holding moisture. I assumed they would be considering the thunderstorms we've had. I held off on fullt watering because the weather said the next dry day is going to be Monday. Today is Friday so thats two solid days of rain. Three if you count today through the night. I concentrated my watering of the one gallon on the couple plants that appeared to droop. If it doesn't rain like they say it will I will need to water. I need to set up a decent watering schedule but I need it to hold off raining long enough to do so.
UPDATE: I WENT BACK OVER AND PUT THE 3 GALS IN FOR BED AND CHECKED OUT THE REST OF THE GARDEN. I WATERED THE 3 GAL GIRLS A LITTLE MORE SINCE THEY WONT BE OUTSIDE. THE BIT OF WATER I GAVE SEEMED TO HELP LIFT SOME OF THE GIRLS. AT LEAST I THINK IT DID. THE RAIN SHOULDVE COME ALREADY. I WOULDVE WATERED MORE HAD THE BAGS NOT BEEN SO HEAVY.
6/17 Rained all night which is good. Brought the three transplants out but left them under the overhang so they. Dont get soaked. So far light depoing is going good. Well its only been two nights but we'll see. I'll update as I go. Not feeling well today. Went back over and checked on the plants and did a video. Probably won't get uploaded until tomorrow. I'm giving it a shot. It's raining in good shape. Plants looked fine when I was there. I need to get my supports and my trellis in place. Video won't upload. No suprise. I'll get it tomorrow.
6/18 Uploaded videos if they fuck up from me editing I'm gonna be pissed. Anyway it's still pouring with high winds. I added a couple supports where it looked like it needed it. I need to put my trellis up. I've been able to keep up with the light dep and those plants haven't been used and abused. They stay in the building facing the sun when the weather is this bad. I think they're looking great. I may start a new diary just for them. Sun came out around four. Trying to upload a couple videos but doesn't look like it's going to happen. Tucked the three little ones in at six. It had stopped raining and the wind died down some. If adverse conditions create good plants then I'm on the way to a great harvest. Minor bleaching and burns on a few lower fan leaves and some wrinkling on some from wind burn other than that plants seem to be acclimated. Did a video but will have to wait until tomorrow to upload
6/19 It's not raining! We got four inches this past storm lol. Having the bags raised on pollens I believe has greatly helped. As did the high winds that help dry the soil in the bag. Had to add a few temporary supports. Light dep is going good. Adjusted amd found a better spot. I'm considering getting "pool noodles" or some other thing like a Hulu hoops or pvc pipe and making either a frame on the roof for the entire cage or on top of each individual plants posts so I could roll clear plastic over it when it rains. I'm thinking about later on in the fall when this could really help. I found a roll of plastic. Also thought about putting that up on the back wall but I didn't. What I'm doing right now is working. I just need to keep up with it. I also need a solid watering schedule to stick too. It's hard when each plants needs are different. Oh well. I'm just happy to be growing again. I pray to the cannabis gods and the Lord above himself that I'm not plagued with the problems of last year.
6/20. I'm sick as fuck but I got the little girls out in the sun. Light dep is going good. Plants look great. I'll update when I feel better and if I do anything. Still feel like shit. Luckily I looked up just in time to get to the grow and put the little ones to bed. They were thirsty (especially the bushy 10th planet so I gave them about 3/4 of a gallon of water. Got lots of run off from 10th planet. Didn't notice as much from the others but I was hurrying. I'll upload later. Still sick.
6/21 Plants seem to be doing great. I removed some lower growth on a few just to see how they respond. I'm going to do some defoliation down low and I want to see how the plants respond. I'm planning my first full watering Thursday as we have a real good stretch of weather after that. Grow bags are still heavy as hell so they have sufficient water. I'll be adding silica nextcl watering. Not time for nutes but I think it would be okay to start the silica and in another week I might start small doses of nutes. The light dep on the little girls is go8ng great! It's cool I'll get to sample some of these strains before fall. I'll update after I do something. Tucked the girls in at 6. I might need to think about transplanting that 10th planet in the 3 gallon. I watered until runoff yesterday and it's light as hell today. Plus I fimked it and it's bushy as hell. I've Bern turning it si it gets all angles of the sun. I have a bag of 707 left and a 5 gallon bucket with holes drilled all over it like an air pot and a ten gallon grow bag. This will take some thought. Hot af today. I wad able to lift the grow bags so I decided tomorrow will be the girls first real watering. I think I'll be adding silica and possibly kelp me kelp you due to the heat stress I've been noticing. Nothing bad just a few tacoed leaves. I've had several people that have seen my grow in person tell me that this is by far the healthiest (not biggest I've had bigger) but by farcthe healthies5 crop I've grown. They believe I'll have my best year ever this year. I hope they are right. Vid won't be uploaded until tomorrow.
6/22 WATERED TODAY. I'm still a little gun shy with watering. That fusarium last year pretty much traumatized me. I left the container plants alone. I gave them a little water but not enough to do much. I used a pump sprayer on a mist setting and went one by one and back around gently watering the entire medium. This took forever and I'll be finding a different way to water. I hope this was enough water. I'll check later on and if they look like they want more I give it to them. I started LST on the light dep 10th planet and tucked some branches of a another under the tomato cage. I had missed that earlier. I also went around and cleaned up the bottoms on most. Getting rid of things that will amount to nothing. I noticed what looked like thrip damage on ONE leaf on ONE plant. I also saw a chunk missing from a grasshopper bite and a finger of a fan leaf petiol was broken so I'm going to need to get my ipm up and running. I'm unsure whether I'll be using chemicals or predators. Probably BT and spinosad. That's what I've had the best luck with. I also noticed bottom leaves dying off on the bottom of a couple plants. It was where the burns were though so I'm almost 100% its just related to the light burns they got when i first put them up. I'll be updating the diary as I do more stuff.

Likes
29
Share


@Grow_for_Happiness
Follow
Well she all done, now it's just time to dry her out and get her trimmed and cured. Was a great grow, can never complain when you max out your tent lol. High humidity last 2&3 weeks at night, up around 70% even with the tent walls sucking in hard and fan at full speed. Didn't see any issues while cleaning them up for dry (knock on wood), but did have to move my humidifier to be directly beside the tent with its dry air outflow blowing into the tent intake to get the environment down to 60% for drying.
Can't wait to take a taste before curing in 7-14 days once dry is done
Ladies and gentlemen we have a new winner! My new PB per plant . It didn't quite hit the pound mark but what a great turnout none the less! I'm guessing if I had the same plant in a 4x4 it would have been over, just not enough light penetration in the 3x3. Top 2/3 were solid big ol' buds but bottom third was not nearly as dense, most of which went to trim. But hey, over a pound of trim after drying will make a good amount of dry sift/hash . Great colouring and very nice purple/berry smell. Can't wait to cure it up for a true taste cause she's already tasty


Likes
4
Share


@lotero
Follow
Puse a germinar una amnesia, una haze y una Rocky, en una servilleta mojada en enraizante de lentejas dentro de un tupper.
La Rocky nunca llegó a germinar, así que entonces puse la segunda amnesia.
Las plántulas se han pasado a la maceta, con tres días de retraso para la haze y la segunda amnesia.

Likes
2
Share


@knicko
Follow
ab der Woche 3. (1.11.24) kriegen die Ladys ihren Dünger dieses mal von Advanced Nutrients das starter kit bin gespannt auf die Ergebnisse (gedüngt wird nach düngeshema)


Likes
18
Share


@eLBowAutoGrows
Follow
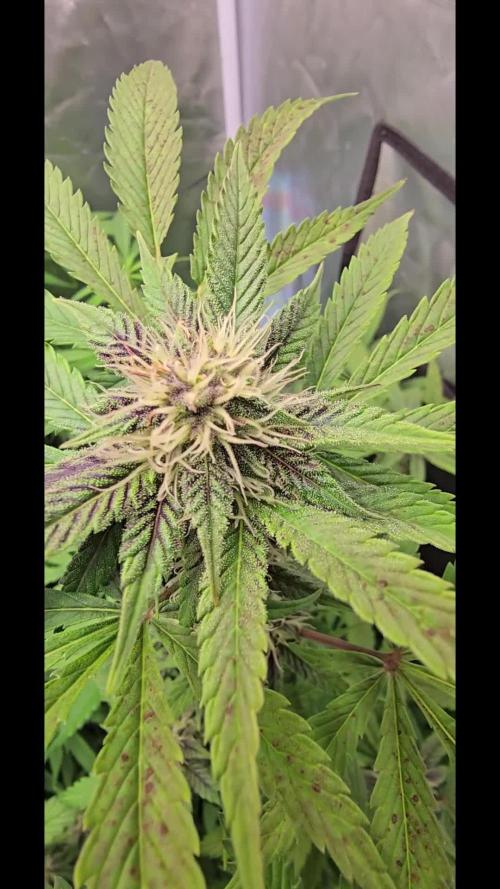
Day 57 about to do my first schwazz
Day 60 did a heavy defoliation. Not quite a schwazz. Almost Filled a 2 gallon bucket up with clippings a lot more light and air penetration is available. I think she’ll bounce back nicely
Day 64. As the week comes to an end. I am very pleased with the progress. Canopy is nice and even. You can’t tell which one is the main cola. And for a little 300 watt light even the lower flowers are getting pretty dense. Still a long way to go. I would imagine this one will take over 90 days before see Amber. But we shall see

Likes
6
Share


@Hash_bear
Follow
My bad for not updating the last couple weeks but here an update of the flower stage. 2 pheno of the gorilla punch are turning amazing purple color thank to @42fastbuds for letting me test out there genetic.
Nutrients are
Fishshit farm
Simply professionals formula
The light is
Marshydro Ts600
The soil is
Fox farm soil
Go check out my instagram and social club and YouTube channel @Toxicity_cannabis please it really helps me grow and gets seen more I would really appreciate everyone who come and support my channel/brand
P.s video are coming soon for YouTube channel bare with me and please let’s me know what kinda of video anyone would like to see it would help out a lot thank you everyone
Likes
3
Share


@4D2
Follow
Transplant ..... Grow BIG ROOTS !!!!!!!!!!!!! 😋 Keep it simple ...maybe!!!
VIVA LA MOTTA
Likes
23
Share

@PapaBlob
Follow
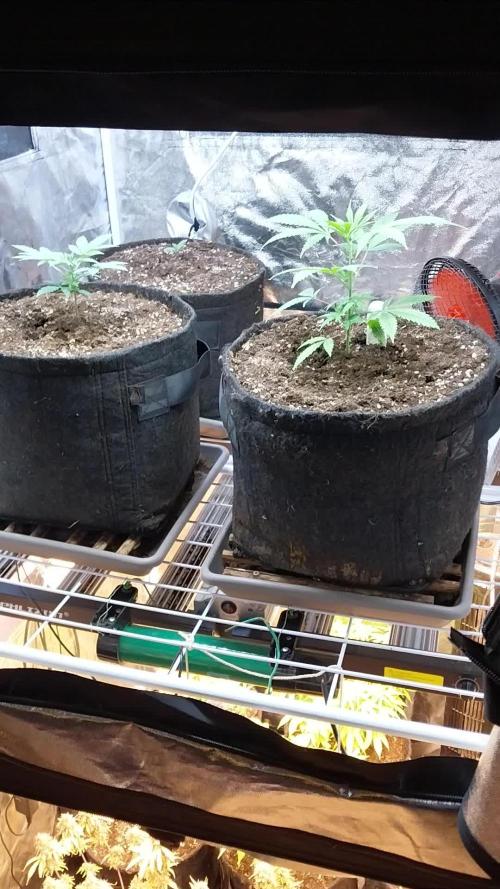
02/11 Elle se porte assez bien je pense. 😁👍
Merci encore à Divine Seeds pour toutes ces superbes souches. Que l'ont peut trouver là : Divine Seeds : https://divineseeds.net/

Likes
68
Share


@Sparkles
Follow
Got bud rot. It was foggy and raining second last week before chop….and not gonna lie, prolly cuz it was sitting under the carbon filter. I haven’t changed or washed the pre-filter in a year, just a light tap and I can see dust flying everywhere.
Prolly tossed 1/3lb into garbage. Harvested prolly 1/2lb of tops and mids. And threw all the larf into the freezer for bubble hash.
Will update in a few weeks after cure.
This was a fun run. Mars Hydro for the win!

Likes
17
Share


@Dark_Shadow_420
Follow
El olor que genera esta gemetica es delicioso y muy fuerte, salgo al patio y disfruto mucho su olor.

Likes
13
Share


@Brujo_grdn
Follow
first I shed the substrate with 400-500 ppm feeding short fertilizer
The seed is sent to a glass of water 200ml / 6.5ph / 200ppm for 12 hours
after - the seed is sent to wet cotton pads for 2-3 days
Likes
2
Share


@DeepSouthDank
Follow
Day 24 of Bloom!
Stretch is done and flowers are forming fast!
Happy with everything thus far. No issues :)
VPD: 1.25 -1.35
EC 2.5
PH: 5.9-6.1

Likes
7
Share


@NCgrower252
Follow
44oz of plant food mix is given to 5 plants (3- Colombian Gold, 2- Grandaddy Purple). All 3 of the Alcapulco Gold plants are still receiving pH balanced water- no nutrients. They’re measuring 10” tall.
Colombian Gold and Grandaddy Purple measurements range from: 12.5”-18.5”

Likes
38
Share


@Zurban_Poison
Follow
Hello everyone, people!
This is the largest Autoflowering plant that I have ever grown!)) The photo still does not convey the entire volume and its size .. it is just gigantic! fills a 1 square meter grow tent .. flowering started well! and develops without any problems .. received the first doses today Nirvana and Big Bud from advanced nutrients!!
