Likes
24
Share
@BearBuds
Follow
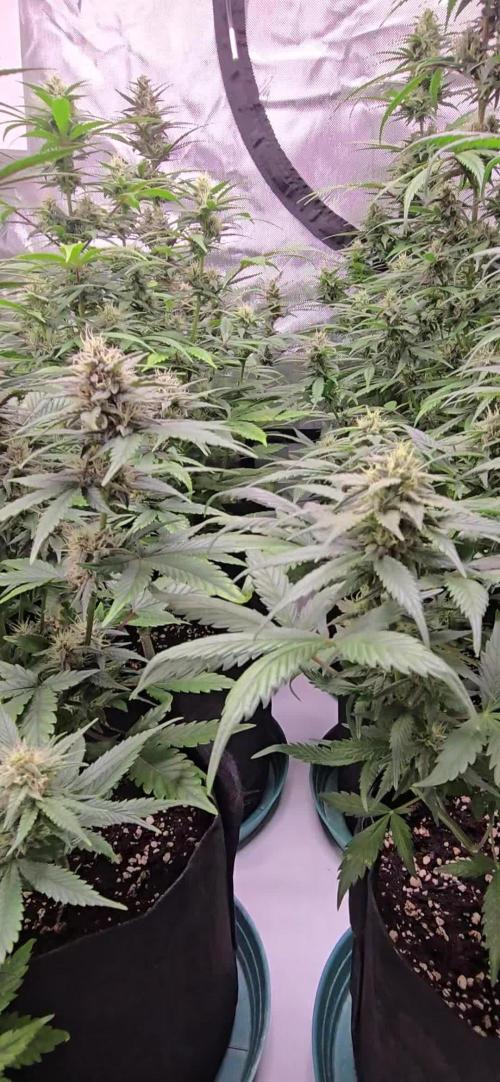
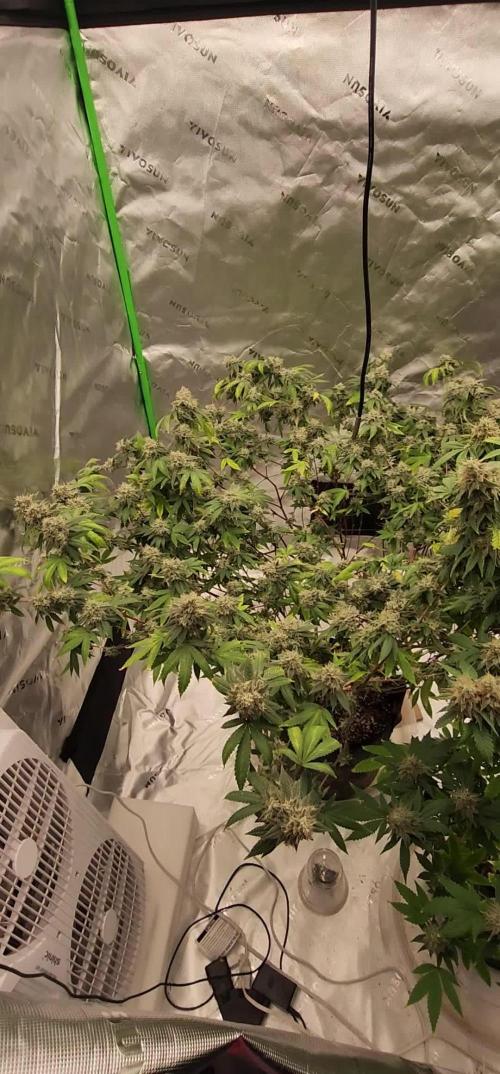
We have made it to the end of Week 6. Conditions in the tent have improved DRAMATICALLY. The heat wave has finally passed and the temperature has finally leveled out. Not only that, the super weird monsoon weather that we were having has also passed and now the humidity is not rising above 60%. This turn for the best is really showing and also fixing the pH problem I had also probably helped a lot. The color of the buds is really coming through now. They are showing lots of light blues and a little orange and I am loving it. I am planning on pushing the nutrients a little higher these next two weeks, around 750-850 PPM. Hoping to give them a larger shot of overdrive to keep them pushing these last 2 or 3 weeks. Overall I am SO excited for this plant, I can't wait to see what her harvest will bring!!!
Likes
22
Share
@Selkot
Follow
the week started with a novelty for me: the appearance of nematodes in my tanks... strange little worms, which gather in the water and move in little spasms (see video 👆) When I started growing, I bought a whole range of products against infestations, paranoid as I was (I'm sure others have experienced this 😅); Among other things, I bought NeemAzal, neem oil in emulsion. So I took a chance. I emptied my tanks, cleaned and dried the bottom, without much conviction as the worms must have been in the coco already. I made a new soup with my fertilizer, adding 20ml of neem per 10 litres. Well, I don't know if it was really the right product, but for the last 5 days there has been no trace of nematodes! The water seems soapy, the grease film is more important than without the neem, but if it takes the small sacrifice of a conscientious cleaning once a week, I'll gladly do it! In any case, my plants are doing absolutely no worse : the first one got its leaves back in 2 days, already forcing me to a small pruning 4 days later, now showing well several colas; I also defoliated the 2nd one for the first time, which produced leaves already bigger than my hand in 2 weeks of life! happy with this hydroponic experience so far 😊
Likes
5
Share
Likes
3
Share
Lil younging coming good cant complain.... last two are 2 of 6 mothers for the lil youngin which I took when they were about that size with a bit more aggressive training.....big girl flourishing looking like they due a cut....happy growing
Likes
1
Share
Salut les growmies , la course continue les Red Hunter Devil ont ete toppé une deuxieme fois. Les Hellcatz ont eu leur premiere coupe d apex. Les 7 Circles montrent un peu moins de vigueur dans leurs croissances. Mais il est encore trop tot pour juger car c est les dernieres a avoir germé
Likes
4
Share
@Ensign420
Follow
|»» LOG DISCLAIMER: Not intended as a grow guide. Grow log entries are usually posted 3 weeks later and are for my learning reference. ««| Introduction - Week 15 Summary - Ensign's log, stardate 17541.8, Wow what an epic grow week! First week within a 12/12 light cycle and lots of training got done! Ca-Caw! Heady OG is blowing up with tops and been tucking to spread the canopy out a bit in the front left quadrant. But also started to let the right side grow through the netting. As for TKO, been training growth upwards as she stretches through the scrog netting. Towards the end of the week, her top soil sensor started to cut out and had to swap it out with a new one. Both the Heady OG and TKO clones have been transplanted into solo cups, but Heady OG is clearly struggling. To prevent the potential loss of the genetics, decided to take two more Heady OG cuttings. Started my first batch of lactobacillus (LAB) serum and am waiting for the water to activate. Also been researching about tissue culture and think this can be the solution to preserving genetics when space is limited. Anyways, Onwards Ensign! [START OF WEEK 15] ========================================================== ---------- [ 4x4 MAIN TENT ] ---------- Heady OG BX1 #1 [Round4 ~Wk8] - WEEK 15 - Pre-Bloom [Stretch Wk1] TKO [Round2 ~Wk13] - WEEK 15 - Pre-Bloom [Stretch Wk1] ----------- [ 3x3 VEG TENT ] ------------ Garlic Budder OG#1 - WEEK 07 - Full Veg Garlic Budder OG#2 - WEEK 07 - Full Veg Gorilla Goat #1 - WEEK 07 - Full Veg Gorilla Goat #2 - WEEK 07 - Full Veg 07/28/25 → 08/03/25 This Week's Estimated Goals ---------------------------------------------------------------------------------------------- DLI: ~13 mol/m²/d PPFD: ~300 μmol/m²/s VPD: ~1.0 kPa This Week's Meter Readings & Averages ---------------------------------------------------------------------------------------------- Light On/Off: 19:00 - 07:00 | Wattage: ~326.5W [LV04] Distance From Canopy: ~31”, 27” DLI: ~15.60 mol/m²/d PPFD: ~361 μmol/m²/s VPD: ~0.71 kPa Soil %: [49.6, 36.1, 49.0, 47.1, 42.6, 43.0, 43.0, 44.6] ========================================================== Day 01 - Monday - 07/28/25 - Total Days: 106 ----------------------------------- Daily Averages ~[+01:00] - Temps: 83.6°F [28.7°C] - Humidity: 82.0% - VPD: 0.72 kPa - Soil %: [50, 36, 49, 47, 43, 43, 43, 45] ----------------------------------- - [+04:07]: Ca-Caw!! Let’s get this flower cycle started! --- Time to switch the clocks from 18/6 to 12/12 which will begin the stretch to flower! Let’s go! --- Within the AC Infinity App, --- For the Main Tent [4x4] controller, --- Changed the schedule from 'Vegetative [18/6]' to 'Flower [12/12]' --- Also made sure to sync the settings for each device. The current settings are: ------ GROW LIGHT (MARS HYDRO FC-6500): --------- The Mode is set to ‘ON MODE’ --------- The START/END times are set to 07:00PM/07:00AM --------- The SUNRISE/SUNSET Duration value is set to 20Min --------- The MAX value is set to 4 ------ EXHAUST FAN (AC INFINITY CLOUDLINE T6): --------- The Mode is set to ‘CONTINUOUS AUTO’ --------- The Temperature HIGH/LOW trigger’s value are set to 85°F/OFF --------- The Humidity HIGH/LOW trigger’s value are set to 87%/OFF --------- The MIN/MAX values are set to 1/8 --------- The Temperature Dynamic Transition buffer value is set to 2°F --------- The Humidity Dynamic Transition buffer value is set to 2% ------ HUMIDIFIER (AC INFINITY CLOUDFORGE T7): --------- The Mode is set to ‘CONTINUOUS TARGET’ --------- The VPD target value is set to 1.0kPa --------- The MIN/MAX values are set to 0/8 --------- The VPD Dynamic Transition buffer value is set to 0.2kPa ------ HEATER (AC INFINITY THERMOFORGE T3): --------- The Mode is set to ‘CONTINUOUS TARGET’ --------- The Temperature target value is set to 78°F --------- The MIN/MAX values are set to 0/8 --------- The Temperature Dynamic Transition buffer value is set to 2°F --- The only difference is the ON/OFF times for the grow light. Now lights will be on from 7pm to 7am (19:00 – 07:00). --- Everything else is identical to the previous veg schedule. --- Anyways, --- LET THE TWO-WEEK STRETCH TO FLOWER BEGIN!! - [+00:55]: Night check on the 4x4 tent. --- Ca-Caw! Looking great my ladies! --- Heady OG (BX1 #1) is continuing to blow up with more tops! The canopy is looking incredible! --- TKO is also looking great with tops everywhere! She has taken over this grow and hyped that - [+01:54]: Trained and tucked the top growth under the netting. --- Canopy is flat and even again. Great! --- Day one into the 12/12 flip and growth is looking great! - [+01:56]: Checked the Ecowitt soil moisture sensor data: ------------------ [ 4x4 MAIN TENT ] --------------- ------ 46% - [CH01 FT » G30 - Heady OG BX1 #1] ------ 36% - [CH02 FB » G30 - Heady OG BX1 #1] ------ 50% - [CH03 BT » G20 - TKO] ------ 47% - [CH04 BB » G20 - TKO] ------------------ [ 3x3 VEG TENT ] ---------------- ------ 40% - [CH05 BL » GR7 - Garlic Budder OG#1] ------ 41% - [CH06 BR » GR7 - Garlic Budder OG#2] ------ 40% - [CH07 FL » GR7 - Gorilla Goat #1] ------ 44% - [CH08 FR » GR7 - Gorilla Goat #2] --------- Veg: 38% - 45% | Flower: 45% - 55% --------- General: 30% [Dry] «| 45 - 60% [Moist] |» 70% [Wet] - [+01:59]: Checked the 3x3 veg tent. --- Mothers are all vegging along and the canopy is bushy and beautiful! --- Pots also look good too. No gnats! - [+02:01]: Checked on the propagation dome (in the 3x3), --- To refresh the air, lifted the top off for a bit. --- Clone growth looks great for the most part and getting curious on root growth. --- Heady OG looks green, but she has been very droopy the entire time. Not sure if this cutting will root, but there is no yellowing. May have messed up something in cloning. --- The TKO clone looks beautiful. incredible! --- Using a spray bottle, misted the top growth with RO water. - [+02:05]: Checked the humidifiers. --- Tanks are still full and no leaks found. --- Over the past week or so, been research about Lactobacillus and the organic benefits. Plan to give it a try and will start the process tomorrow. --- Shout out to Jeremy at BuildASoil for the YT videos and the Lacto recipe! --- LOYAL TO THE SOIL FOR LIFE! --- Anyways, Onwards Ensign! Day 02 - Tuesday - 07/29/25 - Total Days: 107 ----------------------------------- Daily Averages ~[+01:00] - Temps: 83.3°F [28.5°C] - Humidity: 80.4% - VPD: 0.78 kPa - Soil %: [50, 36, 49, 47, 43, 43, 43, 44] ----------------------------------- - [14:24]: Okay! Time to start some Lacto Serum! --- This lactobacillus serum is used to improve soil health and nutrient availability. This LAB serum can also be used to create fermented plant or fruit juices (FPJ/FFJ). --- Anyways, --- First need to make the rice wash solution! --- Filled a mini wide-mouth mason jar with 1 cup of White Rice. ------ Added 1 cup of RO Water --- Mixed the rice and water for a bit. --- Covered the jar with a paper towel and rubber-band. ------ [ ~10 MINUTES LATER ] - [14:38]: Great! --- Mixed the rice and water again before pouring a little over 1/4 cup into a mini wide-mouth mason jar. --- Covered the jar with a paper towel and rubber-band. --- The current room temps are around 80°F --- To start the microbial activation, going to let this rice water solution sit for a few days. - [14:45]: Smelled the solution through the paper towel. --- The solution smells like flour. Nothing foul. --- From what I understand the process is pretty simple: ------ Create the rice wash solution and let it sit for a few days to activate (white or brown rice). ------ Mix 1 part activated rice wash solution to 10 parts whole or raw milk. Then let it sit for a few more days for the lacto cultures to proliferate. ------ Once the milk separates into essentially curds and whey, strain out the curds and the extracted whey is the finished Lacto Serum. ------ This serum should remain shelf stable in the fridge for several months. ------ Alternatively, black strap unsulfured molasses can be added to the serum at 1 part molasses to 4 parts serum. This will make the product stable enough for non-refrigerated storage (lasts several months). ------ As for application, the serum can be used as a soil drench or foliar feed at 4mL (~1tsp) per gallon of water. --- Anyways, --- Will check on this in a day or so and am waiting until the solution turns from a flour odor to more of a sweet aroma. - [19:35]: Night check on the 4x4 tent. --- Ca-Caw!! Looking great my ladies! --- Both Heady OG and TKO are raging with more tops! -- [20:37]: Trained the top growth. --- Now starting to tuck mainly tucked Heady OG to spread growth out under the netting. --- Letting TKO stretch through the netting and only tucked the taller tops. Mainly trained the back area (won’t be able to train this once growth starts to ramp upwards) and made sure each square has at least one apical top. --- Also plucked and defoliated the Heady OG’s lower growth. Cleaned her legs and now she’s nice and smooth! --- Wow TKO’s main stalks are huge! Can really reach back area now so going to let her grow. - [20:47]: Checked the Ecowitt soil moisture sensor data: ------------------ [ 4x4 MAIN TENT ] --------------- ------ 45% - [CH01 FT » G30 - Heady OG BX1 #1] ------ 36% - [CH02 FB » G30 - Heady OG BX1 #1] ------ 45% - [CH03 BT » G20 - TKO] ------ 46% - [CH04 BB » G20 - TKO] ------------------ [ 3x3 VEG TENT ] ---------------- ------ 42% - [CH05 BL » GR7 - Garlic Budder OG#1] ------ 40% - [CH06 BR » GR7 - Garlic Budder OG#2] ------ 47% - [CH07 FL » GR7 - Gorilla Goat #1] ------ 41% - [CH08 FR » GR7 - Gorilla Goat #2] --------- Veg: 38% - 45% | Flower: 45% - 55% --------- General: 30% [Dry] «| 45 - 60% [Moist] |» 70% [Wet] - [21:34]: Checked the 3x3 veg tent. --- Ooo yea! All veg mama’s are thriving and bushy! --- Getting close to the grow light again so time for more training! - [21:53]: Super-cropped and trained the top growth. --- Pinched and bent the taller branches and lowered the canopy by 5-6 inches. - [21:58]: Checked on the propagation dome, --- To refresh the air, lifted the top off for a bit. --- Clones are growing along and hopefully rooting. --- Heady seems to be struggling, but she is still green. --- TKO is looking great and she is starting to get taller! --- Plan to check for roots in a couple days. --- Using a spray bottle, misted the top growth with RO water. - [23:07]: Time for a mini upgrade! Got a set of magnetic levels. --- Attached two levels to both the main tent and veg tent’s grow lights. --- Not really necessary, but the added levels will be useful during height adjustments. - [23:23]: Checked the humidifiers. --- Tanks are still full and no leaks found. Day 03 - Wednesday - 07/30/25 - Total Days: 108 ----------------------------------- Daily Averages ~[+01:00] - Temps: 83.6°F [28.7°C] - Humidity: 82.1% - VPD: 0.72 kPa - Soil %: [49, 36, 48, 46, 43, 43, 43, 44] ----------------------------------- - [23:36]: Night check on the 4x4 tent. --- Ca-Caw!! Looking beautiful my ladies! Wow! This is why we grow! --- Both Heady OG and TKO are looking healthy and tops are bursting through the netting! - [23:54]: Trained the top growth. --- Mainly tucked and continued to spread Heady OG out to fill in more squares in the front left quadrant. --- Did minimal training on TKO. Just letting her grow through the netting and wow growth is raging! --- Wow! The canopy is looking beautiful! - [23:59]: Checked the Ecowitt soil moisture sensor data: ------------------ [ 4x4 MAIN TENT ] --------------- ------ 55% - [CH01 FT » G30 - Heady OG BX1 #1] ------ 36% - [CH02 FB » G30 - Heady OG BX1 #1] ------ 49% - [CH03 BT » G20 - TKO] ------ 46% - [CH04 BB » G20 - TKO] ------------------ [ 3x3 VEG TENT ] ---------------- ------ 42% - [CH05 BL » GR7 - Garlic Budder OG#1] ------ 47% - [CH06 BR » GR7 - Garlic Budder OG#2] ------ 47% - [CH07 FL » GR7 - Gorilla Goat #1] ------ 40% - [CH08 FR » GR7 - Gorilla Goat #2] --------- Veg: 38% - 45% | Flower: 45% - 55% --------- General: 30% [Dry] «| 45 - 60% [Moist] |» 70% [Wet] - [+00:03]: Checked the 3x3 veg tent. --- Wow mother growth is raging again! --- Really wish I can flip these ladies to flower, but don’t have the space. --- Plan to start another round of mother cycling soon. Will probably super-crop tomorrow. - [+00:04]: Checked on the propagation dome (in the 3x3), --- To refresh the air, lifted the top off for a bit. --- Wow clones are growing! --- Heady OG is definitely going through some sort or rooting issue, but growth is still green. She is now starting to show signs of yellowing, so there may be roots, but not sure. --- On the flipside, TKO is crushing it! She looks healthy and perky! The yellowing of the lower growth along with the healthy and perky top growth means there’s successful rooting and the clone is translocating nutrients to produce root growth. I think. --- Using a spray bottle, misted the top growth with RO water. --- Oh! Also continuing to research tissue culture (TC) and have decided to give it a potential go. --- Shout out to Laur and ‘Plants In Jars!’ Her incredible YT videos have been a huge game changer and a highly recommend free resource for anyone trying to get into DIY tissue culture! --- Pretty much now I think tissue culture is the solution to my mother plant issue. --- From the little I understand, tissue culture is basically an advanced form of plant cloning and can be done quite safely at home. --- If done properly, plants suspended in tissue culture can be propagated and maintained indefinitely until needed. --- Each TC sample is basically a mini self-contained mother plant pod. --- Once needed, a TC sample can be brought back to a clone-like state for planting into solo cups. --- Aside from the technical process (which is going to be fun to learn), the largest challenge is maintaining a sterile environment during propagation. --- Anyways! - [+00:10]: Checked the humidifiers. --- Tanks are still full and no leaks found. Day 04 - Thursday - 07/31/25 - Total Days: 109 ----------------------------------- Daily Averages ~[+01:00] - Temps: 83.5°F [28.6°C] - Humidity: 81.2% - VPD: 0.75 kPa - Soil %: [49, 36, 49, 46, 43, 43, 43, 44] ----------------------------------- - [08:42]: Checked on the 3x3 veg tent. --- Both growth and pots are looking great! - [08:43]: Checked on the propagation dome, --- Clones both look bad and good. --- Concerned about Heady OG, but TKO has been healthy and perky the whole way. - [08:45]: Time to check for roots. --- Heady OG had one tiny root. Not ideal, but was actually surprised to find any root growth. Nice! --- Woah! Nice! TKO is bursting with roots! She’s definitely ready to be transplanted! --- Decided to plant both clones. Hoping that Heady OG will do better in the soil. --- Time to transplant the rooted cuttings! - [09:13]: Took 2 used solo cups (has bottom corners cut for drainage) and labeled each cup (Heady OG BX1, TKO). --- Partially filled each with some fresh (dry) BuildASoil 3.0 potting soil. --- Made sure that the soil was well packed. --- Inoculated each cup with Great White mycorrhizae along with a bit of Beauveria Bassiana. --- Misted the dry soil with a bit of RO water (~3 sprays each). ------ Sprinkled 1/64tsp of Beauveria Bassiana Plus ------ Sprinkled 1/16tsp of Great White - [09:26]: Time to plant! One clone at a time, --- Placed each clone into solo cups (also removed the clone tag). --- Made sure each solo cup had enough room for more soil. - [09:32]: Inoculated each Coco Coin with Great White mycorrhizae. ------ Sprinkled about an 1/16tsp of Great White onto each Coco Coin. --- Made sure to get the top and sides evenly. - [09:35]: Gently filled each solo cup with more soil. --- Completely covered the top of each Coco Coin and made sure to tuck the sides fairly snug with soil. --- Evened out the top soil. Each Coco Coin is about 1/4-1/2 inch below the top soil. - [09:44]: Added some BuildASoil Organic Straw Mulch to the top. --- Using the small straw bits at the bottom of the bag is great for solo cups. --- Time to water! - [09:51]: Filled a measuring cup with 2 cups of RO water. ------ Added 1/64tsp of Quillaja Saponaria Extract [60] ------ Added 1/16tsp of Horticultural Coconut ------ Added 1/16tsp of Horticultural Aloe ------ Added 1/8tsp of Mycrobe Complete --- Mixed and poured the solution straight into a spray bottle. - [09:54]: Took the dry soil weight of each pheno before watering, ------ Heady OG (BX1) weighed 261.4g ------ TKO weighed 240.9g --- Marked the starting weight on the back of each cup. --- While on a scale, --- Gently misted the straw mulch of each cup. --- Focused on the straw and sprayed as evenly as possible. --- Misted 5-10 sprays. Waited a few seconds, then misted again. --- Repeated this process until both cups weighed at least 300g --- There was no runoff. --- Oops! --- Had to slightly extend the day period (Lights usually turn off at 10:00). - [10:04]: Took the weight of both phenos after watering, ------ Heady OG (BX1) weighed 301.2g ------ TKO weighed 301.4g --- Marked the saturated wet weight on each cup. - [10:12]: Placed both cups into the propagation dome. --- Removed the side extensions along with the plug tray and have the cups resting in the main drip tray. --- Have the lid and lights suspended above the tray (~00 inches). --- Also increased the propagation dome’s bar lights. ------ Increased the intensity from 1 to 5 - [10:13]: Took general PPFD readings. ------ Clones were around 109 μmol/m²/s which gives a DLI of 7.06 mol/m²/d under an 18/6 light cycle. --- Turned the lights off and made sure that both were back to an 18/6 cycle (on from 16:00 to 10:00). --- Ca-Caw!! Done! --- Not worried about TKO, but getting concerned about Heady OG. Not sure if she is going to make it. - [14:23]: Checked on the Lacto Serum. --- The solution has been resting for 2 days. --- Smelled the rice wash solution through the paper towel. --- The odor has changed from the original flour odor but has not become sweet. However, the smell is getting there. I think. --- Will continue to check and still waiting until the solution changes into a sweet aroma. - [19:24]: Night check on the 4x4 tent. --- Ooo yea! Growth is looking beautiful and raging along! --- Both Heady OG and TKO are thriving with growth! The stretch is definitely ramping up! - [20:08]: Trained and tucked the top growth. --- Mainly focused on the Heady OG and spread her out a bit more evenly to fill in more squares. --- Wow TKO by far going to be the largest plant I’ve grown in a 4x4 tent. She’s extremely dense with healthy tops shooting up everywhere! --- Since I’m not tucking TKO anymore and she is getting taller, need to take readings and measurements. - [20:38]: Took the weekly general PPFD readings. ------ Heady OG (BX1 #1) was still around 361 μmol/m²/s which gives a DLI of 15.60 mol/m²/d under a 12/12 light cycle (at ~326.5W). ------ TKO was around 365 μmol/m²/s which gives a DLI of 15.77 mol/m²/d under a 12/12 light cycle. - [20:40]: Took the weekly height and light distance measurements. ------ Heady OG (BX1 #1) was still about 21.5" tall. ------ TKO was about 26" tall. ------ Heady OG (BX1 #1) was about 31" away from the grow light. ------ TKO was about 27" away from the grow light. --- Since Heady OG is clearly struggling to root, going to take a few more lower cuttings to make sure the genetics survives. - [20:52]: Filled a measuring cup with 1.5 cups of RO water. ------ Added 1/8tsp of Horticultural Aloe --- Mixed the solution and poured it straight into a solo cup. - [20:56]: Time to take the cuttings! --- Using a pair of trimmers (AC Infinity), --- Gently cut 2 small cuttings from Heady OG (BX1 #1). Took lower branches that did not reach the top canopy level. --- Trimmed and cleaned most of the nodes leaving the top node or two. --- Did not cut any leaf fingers. --- Made sure the tip of the stalk had a slanted cut (about 45-degree). - [21:02]: Placed both cuttings into the cup of aloe solution. --- Also made sure the cuttings were tagged. Not really necessary, but why not. - [21:05]: Placed the cup into the 3x3 veg tent. --- Have the cup resting in the propagation dome next to the planted clones. --- Going to let these cuttings soak for a day before refreshing with straight RO water. --- Let the two-day soak begin! - [21:06]: Checked the Ecowitt soil moisture sensor data: ------------------ [ 4x4 MAIN TENT ] --------------- ------ 47% - [CH01 FT » G30 - Heady OG BX1 #1] ------ 36% - [CH02 FB » G30 - Heady OG BX1 #1] ------ 50% - [CH03 BT » G20 - TKO] ------ 46% - [CH04 BB » G20 - TKO] ------------------ [ 3x3 VEG TENT ] ---------------- ------ 44% - [CH05 BL » GR7 - Garlic Budder OG#1] ------ 41% - [CH06 BR » GR7 - Garlic Budder OG#2] ------ 43% - [CH07 FL » GR7 - Gorilla Goat #1] ------ 46% - [CH08 FR » GR7 - Gorilla Goat #2] --------- Veg: 38% - 45% | Flower: 45% - 55% --------- General: 30% [Dry] «| 45 - 60% [Moist] |» 70% [Wet] - [21:08]: Checked the 3x3 veg tent. --- Looking great in the mother tent! --- Was planning on defoliating and taking new veg cuttings, but since Heady OG is struggling, going to wait a bit longer to start the mother cycling process. - [21:18]: Super-cropped and trained the top growth. --- Lowered the canopy a good 4-5inches. - [21:19]: Checked on the clones, --- Looking great! --- Heady is still struggling, but hoping she’ll perk up soon. --- TKO is looking perfect! She’s perky and I have no doubt that she’ll root just fine. --- More worried about Heady OG. - [22:08]: Checked the humidifiers. --- Tanks are still full and no leaks found. Day 05 - Friday - 08/01/25 - Total Days: 110 ----------------------------------- Daily Averages ~[+01:00] - Temps: 83.4°F [28.6°C] - Humidity: 83.0% - VPD: 0.68 kPa - Soil %: [51, 36, 49, 46, 42, 43, 43, 45] ----------------------------------- - [22:10]: Night check on the 4x4 tent. --- Ca-Caw! Let’s go ladies! Wow the garden is packed and looking incredible! --- Heady OG and TKO are looking perky and stretching through the netting with nodal growth everywhere! --- By far my healthiest grow cycle yet! - [22:21]: Did a bit of training. --- Slightly tucked and spread Heady OG a bit more to fill in the front left quadrant. --- Just going to let the rest grow! - [22:25]: Checked the Ecowitt soil moisture sensor data: ------------------ [ 4x4 MAIN TENT ] --------------- ------ 52% - [CH01 FT » G30 - Heady OG BX1 #1] ------ 36% - [CH02 FB » G30 - Heady OG BX1 #1] ------ 54% - [CH03 BT » G20 - TKO] ------ 46% - [CH04 BB » G20 - TKO] ------------------ [ 3x3 VEG TENT ] ---------------- ------ 44% - [CH05 BL » GR7 - Garlic Budder OG#1] ------ 41% - [CH06 BR » GR7 - Garlic Budder OG#2] ------ 46% - [CH07 FL » GR7 - Gorilla Goat #1] ------ 48% - [CH08 FR » GR7 - Gorilla Goat #2] --------- Veg: 38% - 45% | Flower: 45% - 55% --------- General: 30% [Dry] «| 45 - 60% [Moist] |» 70% [Wet] - [22:34]: Checked the 3x3 veg tent. --- Ooo yea! The veg garden is beautiful and wow growth is raging! --- Wow! The canopy is already stretching upwards and will probably need to train again tomorrow. --- Checked on the clones, --- Nice!! Growth is all around healthy and looking great! --- Heady OG looks less droopy. I think. --- TKO is looking perfectly healthy and already getting taller! Wow! --- Nice! Both Heady cuttings are looking healthy and not droopy. - [22:38]: Time to swap the aloe water out! --- Replaced the solo cup with a clean one filled with fresh RO water (1.5cups). --- Going to let this soak for another day before transplanting into Coco Coins for rooting. - [22:44]: Checked the humidifiers. --- Tanks are still full and no leaks found. Day 06 - Saturday - 08/02/25 - Total Days: 111 ----------------------------------- Daily Averages ~[+01:00] - Temps: 82.6°F [28.1°C] - Humidity: 83.2% - VPD: 0.66 kPa - Soil %: [50, 36, 50, 47, 42, 43, 43, 45] ----------------------------------- - [07:59]: Quick morning check on the propagation dome (in the 3x3 veg tent). --- Ooo yea! The clones and cuttings are looking healthy and green! --- Heady OG (BX1 #1) is droopy and seems to be recovering. I think? --- TKO is looking healthy and looking beautiful! --- Nice! Both Heady OG (BX1 #2 and #3) cuttings are looking good! These cuttings are quite a bit smaller than the last round, but they are healthy and green! - [20:06]: Night check on the 4x4 tent. --- Ca-Caw! Wow the canopy is thriving! --- Heady OG is looking healthy and perky! --- Wow! TKO is stacking up with nodal branching and crowning is everywhere with perky tops! - [20:13]: Did a bit of tucking on the front left quadrant. --- Could have trained Heady OG another week in veg before flipping to flower, but oh well. TKO needed to be flipped. - [20:32]: Checked the Ecowitt soil moisture sensor data: ------------------ [ 4x4 MAIN TENT ] --------------- ------ 45% - [CH01 FT » G30 - Heady OG BX1 #1] ------ 36% - [CH02 FB » G30 - Heady OG BX1 #1] ------ 66% - [CH03 BT » G20 - TKO] ------ 47% - [CH04 BB » G20 - TKO] ------------------ [ 3x3 VEG TENT ] ---------------- ------ 47% - [CH05 BL » GR7 - Garlic Budder OG#1] ------ 44% - [CH06 BR » GR7 - Garlic Budder OG#2] ------ 42% - [CH07 FL » GR7 - Gorilla Goat #1] ------ 43% - [CH08 FR » GR7 - Gorilla Goat #2] --------- Veg: 38% - 45% | Flower: 45% - 55% --------- General: 30% [Dry] «| 45 - 60% [Moist] |» 70% [Wet] --- Needed to swap out the batteries for TKO’s top soil sensor (CH03). --- Apparently there is a slight flaw with the programing on the WittFlows. Since the watering function is based on the channel and not the sensor, when TKO’s top sensor cuts out, the new CH03 (which is TKO’s bottom sensor) takes over. --- Anyways, - [20:38]: Checked the 3x3 veg tent. --- Veg garden is looking beautiful and wow top growth needs more training! - [20:53]: Super-cropped the top growth a bit. --- Lowered the canopy a few inches. --- Growth is getting out of control! Wow! Need to take cuttings soon to start the cycling process. --- Anyways! - [20:54]: Checked on the clones, --- Wow clone growth is looking very good! --- Heady OG seems to be recovering nicely in the soil and I’m getting more confident that she’s going to make it. Nice! --- TKO is looking great! She’s going to root and will be ready for transplant in a week or so. --- Both Heady OG cuttings are looking healthy and ready to be rooted! --- Time to plant the second round of Heady OG (BX1) cuttings! - [21:13]: Filled a measuring cup with 1.5 cups of RO water. ------ Added a pinch of Quillaja Saponaria Extract [60] ------ Added 1/64tsp of Horticultural Aloe ------ Added 1/32tsp of Mycrobe Complete --- Mixed the solution thoroughly. - [21:17]: Dropped 2 Coco Coins into the measuring cup. --- The coins immediately started to expand. ------ [ ~10 MINUTES LATER ] --- Took each fully saturated Coco Coin and temporarily placed them in half-cut solo cups. --- Using a squeeze bottle filled with Clonex, - [21:38]: Gently filled each pre-made hole with Clonex rooting gel. --- Time to plant the cuttings! - [21:43]: Using a pair of clean trimmers, made a final 45° cut. --- Also stripped and scrapped some of the stem’s outer membrane. --- To help with planting, gave each Coco Coin a squeeze to loosen the coco. --- Made sure to insert each stem straight and snug with the tip about a 1/4 inch from the bottom of the Coco Coin. --- Also secured the stem by pinching and pressing in the sides of the Coco Coin. --- After both cuttings were planted, --- Temporarily took the clones out of the propagation tray. Also placed the plug tray back in. - [21:53]: Placed both Coco Coins into the propagation dome’s tray. --- Since these cuttings are both identical cultivars, no need to really name. --- Added 1/2 cup of RO water to the bottom of the tray. --- Since I’m not using the dome lid (which is currently hanging above the tray), misted a couple of clear cups with RO water. - [21:55]: Covered both cuttings. --- Will need to mist the cups for the first few days in the tray. --- While rooting the cuttings, noticed that both clones (Heady OG BX1 and TKO) need to be watered already. --- Let’s go! - [22:02]: Took the initial starting weight range of both clones before watering, ------ Heady OG BX1 #1 » 261.4g → 301.2g ------ TKO » 240.9g → 301.4g --- General Solo Range: [Dry] «| [Initial Cup Weight] + ~55-100g |» [Wet] --- All phenos were last watered 2 days ago. --- Took the starting weight of both clones before watering, ------ Heady OG BX1 weighed 278.2g ------ TKO weighed 253.5g --- While on a scale, --- Gently misted the straw mulch of both cups with RO water. --- Focused on the straw and sprayed as evenly as possible. --- Misted 10-20 sprays. Waited a moment, then misted again. --- Repeated this process for both cups. --- There was no runoff. - [22:18]: Took the saturated weight of both clones after watering, ------ Heady OG BX1 weighed 278.2g ------ TKO weighed 253.5g --- Marked the final wet weight on the back of each cup. Also marked the watering date on the front. - [22:27]: Placed both phenos back into the tent. --- Done! Grow strong little ones! - [22:33]: Checked the humidifiers. --- Tanks are still full and no leaks found. Day 07 - Sunday - 08/03/25 - Total Days: 112 ----------------------------------- Daily Averages ~[+01:00] - Temps: 83.1°F [28.4°C] - Humidity: 83.0% - VPD: 0.68 kPa - Soil %: [48, 37, 49, 51, 42, 43, 43, 45] ----------------------------------- - [08:13]: Quickly checked on the propagation dome (in the 3x3 veg tent). --- Wow the clones are looking incredible! --- Heady OG is looking better and she’s still recovering. --- TKO is looking healthy and getting bigger. Nice! --- Both Heady OG cuttings are also looking healthy and look better than the first attempt (the recovering clone). --- Misted both cups with RO water. - [19:06]: Night check on the 4x4 tent. --- Ca-Caw!! Woah these ladies are definitely in full stretch! These girls are getting taller by the hour! Wow! --- Heady OG is looking beautiful and she is exploding with upwards growth! The middle of the canopy is basically at the same height as TKO. Incredible! --- Ooo yea! TKO is crushing it! Wow! She’s a good 7 inches above the scrog netting! --- The canopy is getting stacked with nodal growth! This garden is ramping up to be my best grow cycle yet! - [19:14]: Checked the Ecowitt soil moisture sensor data: ------------------ [ 4x4 MAIN TENT ] --------------- ------ 54% - [CH01 FT » G30 - Heady OG BX1 #1] ------ 37% - [CH02 FB » G30 - Heady OG BX1 #1] ------ 50% - [CH03 BT » G20 - TKO] ------ 41% - [CH04 BB » G20 - TKO] ------------------ [ 3x3 VEG TENT ] ---------------- ------ 41% - [CH05 BL » GR7 - Garlic Budder OG#1] ------ 47% - [CH06 BR » GR7 - Garlic Budder OG#2] ------ 47% - [CH07 FL » GR7 - Gorilla Goat #1] ------ 49% - [CH08 FR » GR7 - Gorilla Goat #2] --------- Veg: 38% - 45% | Flower: 45% - 55% --------- General: 30% [Dry] «| 45 - 60% [Moist] |» 70% [Wet] - [19:16]: Checked the 3x3 veg tent. --- Wow veg growth is raging with health and vigor! --- Mothers are looking beautiful and canopy is bushy! --- Nice! Clones and cuttings are looking healthy! --- Misted the cutting’s cups with RO water. - [19:46]: Back in the 4x4 main tent, --- Decided to tuck Heady OG a bit more and tried to spread the growth in the front left quadrant. --- Growth is going to be uneven but I think the left side will eventually even out. I think. - [19:54]: Quickly checked on the auto-watering system. --- System is still charged and no leaks or kinks found in the tubing. - [19:58]: Checked the humidifiers. --- Tanks are still full and no leaks found. --- Another week done and the garden is vibing and thriving! --- Next week will be the end of the stretch phase and as growth slows down, will hopefully see signs of budding. --- Ca-Caw! Stoked for this grow and can’t wait until these girls start to flower. - [+02:20]: TKO’s soil sensor cut out again.. --- Swapped out the unit with a new one and re-synced the channel to correct sensor ID. --- The old sensor got water damage. Going to try to dry it out, but really glad I have a couple spare units. --- Also glad that TKO seems to be taking the extra watering without any issue! May try to increase the soil moisture average next week for both pots. --- Anyways! Onwards Ensign! [END OF WEEK 15]
Likes
29
Share
@Omisan
Follow
OOOOOH at this time i love all of you, growmie 😍 200gr of pure happiness, never before! 🙌 Buds are compact like rock, shine like diamond...it's unbelivable, looks perfect! At last, mold take me about 20g of buds 😩 But it is ok, the jar is overfull and i'm so happy XD Now let's wait for the right taste......for now is greatful! 😜 Thanks to Dutch Passion for this opportunity, i'm really proud!! 🙏 Thanks to all of you growmie, for your support 🙏 to the next adventure!
Likes
24
Share
@Zegr8
Follow
Jungle is growing on top of my washing machine! On the last day of week 6 I lowered lights to 35cm from canopy, this week I’m going to monitor that number and adjust as necessary because the plant is still in stretching + bud setting phase. I’m feeding with high N+mag and I’ll continue until growth slows down, than I’ll switch to megacrop 2parts. I expect that to happen end of this week, 10 days max. Day 42 - changed the fan Day 44 - finally installed the blumat auto irrigation system. It wasn’t that easy since branches are really near the substrate but at least I had the carrot already placed so I was able to do it. High frequency fertigation on coco is a must, you can’t take advantage on coco great qualities watering 1 or 2 times a day. My system has 5 drippers placed in a Pac-Man shape, more or less. Day 45 - This is an important day since it marks the halfway point of this crop, based on my previous results. Coincidentally I’ve also spotted few small trichomes on a leaf, I guess the plant is now ready to build up mass and flavors. I did a minor defoliation to open up the inner canopy and to get rid of some plant’s nitrogen reserve. I prepared 20L of my bloom solution and mixed that with the veg solution in the reservoir. For a week I’m going to use this transitional feeding. Lots of sulfur, seems to be on a volcano 🤣 Day 46 - spotted a minor P deficiency. There is probably too much calcium in my solution that is antagonizing P absorption. I mixed another batch, this is the ppm breakdown N 100 P 100 K 280 Mg 85 Ca 150 Before I had P 40 and Ca ~190, my tap water has 80ppm of Ca that is already counted it. I’ll keep this value for a couple of weeks than I’ll lower everything except K. (Edit from the future - K is too high) Day 47 - plant looks happy and bigger, it drunk 3+ liters yesterday. There is no need for humidifier anymore so I’m getting rid of it. Temperature is 30-32C with 50-60% humidity. Day 48 - buds are swelling, some branches are already showing the spiral structure. Plant drunk 5 liters yesterday, impressive.
Likes
19
Share
@Papa_T
Follow
This was my very first international trip outside of North America. This was in March 2023. I’m off to Tenerife. Here are just a bunch of photos from that trip. I had a great time.
Likes
5
Share
@tuzeus
Follow
All looking healthy and they’re thriving. Just waiting for defol day. I do leaf tucking from time to time. I will change nutrients starting week 4 and add green sensation as give in the plagron feeding schedule.
Processing
Likes
14
Share
Week 15 Day 99 (20/11/2020): Unfortunately did not have time today to take pictures or check them because have been quite busy. Day 100 (21/11/2020): Woow day 100 today, which seems a bit crazy but I think the girls just need another month and they will be ready for harvest. It has been a great grow so far and although 100 days seems like a lot, the girls have definitely come really far. I did notice that the leaves on the top of both of the girls are getting a bit more yellow and less of that deep green colour. After searching what could be the cause for the top leaves turning yellow, it seems that it is because they are too close to the lamp. They have grown super tall so the lamp is currently at its highest so unfortunately there is nothing we can do but hopefully it won’t affect them too negatively. Day 101 (22/11/2020)💧: Measured the pH of the girls today before watering and RHC1 was at 5.76 and RHC2 was at 5.92 which means it needs to be increased slightly. I wonder why it keeps dropping because apparently the BioBizz soil is supposed to maintain the pH pretty well but I guess these are big girls and they must be taking in more nutrients. So I watered them with the usual 1.5ml of BioGrow, 4.5ml of BioBloom, 1.5ml of TopMax. And on top of that I gave RHC1 0.75ml of pH+ to increase the pH by 0.5 points and gave RHC2 0.5ml of pH+ to increase it by roughly 0.3 points which should take them both to 6.2. The buds are definitely fattening up more and the trichomes are looking like lovely purple snow on the buds! Day 102 (23/11/2020): Not that many updates today, but they are doing well after the watering and some of the flowers at the very bottom that always kind of wilt on the day of watering are back up again. I should have thought of cutting them off before maybe... Day 103 (24/11/2020): Girls are looking beautiful, managed to get a close-up picture that shows how red the buds are quite well. I really need to look for my loupe because I want to see those trichomes closer up and see if it’s the trichomes or the actual buds that are red. The buds of the two girls do look quite different from each other though, definitely easy to tell them apart. Day 104 (25/11/2020)💧: Today I watered the girls with 1.5ml of BioGrow, 4.5ml of BioBloom and 1.5ml of TopMax . The lower leaves and buds of girl #1 are definitely not strong enough to hold themselves up just before the watering. I think also because the buds are taking up the most nutrients and towards the end of the 2 days it is not enough for the lower stems. So not sure what to do about these but I guess I can cut them off if they do not recover tomorrow. Day 105 (26/11/2020): Took some lovely videos of the girls today 😍 they are growing so big they should be ready in just a few more weeks I think.
Likes
27
Share
@MrJones
Follow
OSS Cheese XXL ╰⊰🔹Started 03.10.24🔹╰⊰ 🌾 - Popped The Seeds On 03.10.24 🌞 - Environment - 80F / 65% RH 🌾 - Training - Defoliating the buds as needed, a little at a time; they should be pretty clean by the time harvest comes. ⚱️ - 2-Gallon 📊6.2 PH 💧 - Feeding - Using Horti Late Bloom 0-24-26, Cal 12-0-0 🌞 - Mars Hydro FC-4800 🕷️ - IPM - CannControl from Mammoth and Mosquito Bits ╰⊰🔹WEEKLY REPORT🔹╰⊰ 📝 Notes - This ends the two weeks of using the High Fortified P&K of the Horti-Late Bloom 0-24-26; you will be watering with H20 PHed to 6.2; when growing this strain, you are going to want to pull the branches down so buds at the nodes have plenty of airflow, stay on top of the defoliation, as this cultivar appears to be a leafy one, with that said these girls are worth growing the terpenes are strong with a foul citrus, definitely a likable skunk smell! 🗓️06.08.24 Feeding 2x Dail with Horti Cal and Horti Late Bloom 🗓️06.09.24 Feeding 2x Dail with Horti Cal and Horti Late Bloom 🗓️06.10.24 Feeding 2x Dail with Horti Cal and Horti Late Bloom 🗓️06.11.24 Feeding 2x Dail with Horti Cal and Horti Late Bloom 🗓️06.12.24 Feeding 2x Dail with Horti Cal and Horti Late Bloom 🗓️06.13.24 Feeding 2x Dail with Horti Cal and Horti Late Bloom 🗓️06.14.24 Feeding 2x Dail with Horti Cal and Horti Late Bloom 📝Fertigation injects fertilizers into an irrigation system to supply dissolved nutrients and water to crops. ╰⊰🔹STRAIN INFO🔹⊱╮ Cheese XXL cannabis seeds are a unique blend of Afghan Kush x Super Skunk, producing the most pungent dank weed. Cheese XXL is the third commercially available edition released by Original Sensible using and developing these Afghan and Skunk genetics. The first release of these genetics was their Skunk Afghani. The second improved version was Stinkin' Bishop, which had an enhanced and more potent THC content and was more intense in terms of smell. The third and improved release on a similar theme is this Cheese XXL, which has a similar THC content but an enhanced heavier yield. The smoke is incredible, with an outstanding flavor of pungent skunk and spicy, extra strong mature cheese created by the dominant terpene myrcene with its earthy solid scent accompanied by caryophyllene and pinene, which combine to create a peppery acrid cheesy odor. THC levels are exceptionally high in this Cheese strain, and the effect is well-balanced, developing mental and body relaxation with a remarkable alleviation of stress and depression. The intense solid aroma starts early in the flowering period; if you're growing Cheese XXL indoors, you'll need plenty of ventilation to disperse these babies' stinky "road kill" aroma! Cheese XXL is a cheese strain suited to indoor setups and thrives outdoors well. These feminized marijuana seeds are incredibly resistant to mold and disease and produce a substantial harvest that professional and amateur growers can quickly achieve. These Cheese weed seeds are outstanding. Break open the buds ready for use, and you'll see why the stench will make your eyes water! Cheese XXL from Original Sensible Seeds is a great choice to break into the commercial market of growing cannabis, so if you're looking to buy something special with extreme yield, potency, and flavor, Cheese XXL cannabis seeds are simply the best choice.
Likes
1
Share
I am currently looking for the best chronic weed. No idea
Likes
55
Share
@valiotoro
Follow
Week 9!🤩 Light off I had like an illumination 💡 She looks like the Starry Night(Vincent Van Gogh June 1889) ⭐️🌗 Covered in trichomes❄️ I can harvest the super soil now for more « safety » but it’s not my style I prefer to push the plant until the limit🤠 Light at 100% In the light soil max 2 more weeks✂️ In coco she s flyiiiing buds are forming everywhere🤩
Likes
8
Share
@Max1973
Follow
Day 35 - few pics and vids..... everything going along nicely 👍 This is a pretty big update, so i'll add to it over the next few days, as i finish building it all.... i'm building these 2 x SS haze, the full tent, just finishing up the setup..... trimming them, changing solutions to 12/12 and flower..... changed the exhaust fan and filter setup to the better outside the tent method.... and installed 12v CPU computer fan, lol ("alta9" fits in 4in ducting perfectly), drops wattage on extractor fan.... 10w tops... got a few kg of active carbon and making/replacing the carbon filter .... i'll add afew vids of the new setup in afew days... Day 36 - few pics/vid of new tent setup...... "alta 9" fan :) post tomorrow after i finish trimmin and settin up night mode etc...... and into tomorrow we go, lol ... Day 37.... slowly getting there..... little bit more to go... this should make things abit more interesting..... right tank (short babie) has : 19 lts of tap water @18oC + 150 ml -dutch master one gold FLOWER.... 6.4 PH - 1400 PPM left tank has : 19 lts of tap water @18oC + 50 ml of elements a and 50ml of b and 10 ml of nitro and 20ml of Crystalic (molasses/pot) .... 6.5 PH - 1200 PPM more pics / vids of the finished tent setup.... roots, transfer, etc... Day 37 is alot of vids of the clean and change to flower..... edit - day after build noticed left tank (nutrifield) not enough bubbles..... pulled out the 4 air pump and swapped to the 2 x original oxipumps... much better, also to fix the problem with ph goin high, and bubbles not stirin the mix, was to add another 10ml of crystallic and another 5ml of nitro... then pumped both tanks with ph down and set em to 5.8-6.2 - both plants have fully recovered from the big trim, and bounced back within 12-24hrs, post pics/vid in abit..... Day 39 - made a freaky video... was curious about what the plants would see looking up at the lights... the lights and buzzing of air compressors and bubbling tank water, and dazzling lights turned out pretty cool in vid editor, was in selfie mode.... and final vid of the bounceback from trim :) 👍😎
Likes
15
Share
@Miketama
Follow
What can I say—I absolutely loved growing this strain. The plant has a great natural structure and didn’t really need any low stress training. Even while staying relatively compact in height, it tends to spread out a lot, which slightly reduces g/m², but makes up for it with beautiful elongated buds. I harvested her on day 76, at around 5% amber trichomes, to preserve that uplifting effect I was aiming for.
Likes
22
Share
12/25/2023-Germination Day 1 Merry X-mas 2023 I decided to start a run of SolFIre Gardens Hoodz Candyz S1. I am going to do a cup filled with RO water a touch of Hydrogen peroxide and let it sit for 24-48 hours until I see tap root then I am going to put it into a rapid rooter.. Tap root Down and put it about 1/4 of the say down the Rapid rooter. I made some modifications to my basket on this run.. I have taken a few Pods that I use for my cloning machine and decided that I am going to try and use them as sure plants, so that I can take my water right up to the bottom of the basket this time and see if these can make my planting more consistent.   12/26/2023-Germination Day 2 Tap root achieved Planting Commencing 12/27/2023-Germination Day 3 Misted the dome lightly misted the rapid rooter and added a little water to the bottom of the pan to encourage root growth to the pan. 12/28/2023-Germination Day 4 Ground Hogs day 12/29/2023- Germination Day 5 She is up, she has broken surface, I misted the root riot, and around the bottom of the tray to try and entice root growth down rapidly. 12/31/2023- Germination Day 6 Ground Hogs Day 1/1/2024-Germination Day 7 HAPPY NEW YEARS!!.. I did it I planned it out so my planting day would fall on New Years and it worked.. Yay!!! 1/2/2024- Germination Day 8 Since the roots are not to the water yet, I am pouring one cup of water lightly on the hydroton around the lady to try and encourage root growth down to the water.. 1/3/2024- Germination Day 9 Ground Hogs day, will continue until roots hit the water. 1/4/2024- Germination Day 10 Ground Hogs day, will continue until roots hit the water. I will just continue to top feed until roots are in the water.. Shouldn't be more than a few more days. 1/5/2024- Germination Day 11 Ground Hogs day, will continue until roots hit the water. I am going to change the water Sunday and kick off Week 1, I will just continue to top feed until roots are in the water.. Shouldn't be more than a few more days. 1/6/2024- Germination Day 12 Ground Hogs day, will continue until roots hit the water. I will just continue to top feed until roots are in the water.. Shouldn't be more than a few more days. 1/6/2024- Germination Day 13 Ground Hogs day, will continue until roots hit the water. 1/7/2024- Germination Day 14 Ground Hogs day, will continue until roots hit the water.