Likes
Comments
Share


@Ms_Herbalist
Follow
So cant explain much about dogma nutrients as everything is in grams not ML 🤣
But it is highly recommended, had no issues of nut burn with it and plants seems to enjoy organic grows

Likes
31
Share


@MMSC16
Follow
Nov 13 - Day 94 - More bulking up, girls are holding water longer. Watered Older plant at 7.45PM. Started defoliating withered leaves with trichomes, I'm keeping those for now, and will combine with bubble hash trim.
Nov 14 - Day 95 - Both pots aren't super light so I'll wait until tomorrow and water both at the same time. Starting to think about drying and harvest, I suspect there to be a fortnight between each harvest - but unsure if I can afford the tent space with next run growing. I think I'll water either as lights turn off (if humidity wont rise) or first thing on Nov 15.
Nov 14 - Trichomes are milky with the speckle of clear and amber. Lets hope the lagging cola fattens up in the week to come.
Nov 14 - WATERED Younger plant at 10.30PM.
Nov 15 - Watered Older plant at 3PM
Nov 16 - Watered Younger plant at 5PM
Nov 17 - Woke up to 80F. Likely at higher temp for 1 hour before noticing. Defoliated a few leaves, including one or two with trichomes, of which I've saved.
Nov 18 - Watered Older plant at 6AM. Younger plant pot is light at lights off- will water first thing in the morning. Also removed dead tips and accidentally chopped a healthy fan leaf. I was hoping to chop today, but it might be another week before the younger plant is ready.
Nov 19 - DAY 100 - Watered Younger plant at 10.30AM. Trichomes are developing nicely, I suspect 1 more week with younger plant which makes me wonder when to chop older plant.
Likes
Comments
Share


@BeggarsBelief
Follow
So everything took off in flower, I was super harsh with the defoliating which initially I regretted, but was surprised with how they packed out during the following weeks. In general it's impressive how hardy these plants are. Even the outdoor grows yielded some quality. Add some more nuets (overdrive and carbo load), before flushing about 14 days before harvest, next time I'll do this earlier and really the Runtz could have gone another week but my drying needs to happen in the same space as my growing for now. Apologies for the quality of image, I'm just using my phone and some bits I have to document, I collect records too, so expect weird noises lol. Build a rotating plat from a lazt susan I found, has been the best piece of kit added this season.

Likes
9
Share


@masterofsmeagol
Follow
6/22 Some pictures didn't upload but that's probably a good thing. As long as the video went up its good. I need to take less pictures. I'm glad I watered the plants in the back with a premixed gallon last night as we didnt get nearly the rain I thought we would. It's small showers throughout the day. The plants are getting enormous. A couple have revegged. Mostly the 10th planet. The others aren't anywhere near as impacted. Boy are some of these stalks thick. I chose to keep a couple plants that could be grown naturally without topping or fimming. I like to see the structure of the tree bit with humidity like this 98%rh it's easy to get botrytis. That's why it's good sometimes to have multiple bid sites so your proverbial eggs aren't all in one basket. But you do end up with a massive cola. I think that mk ultra with the big fan leavescis just going to be one giant bud. That's what it's looking like. Oh and today is the summer solstice. Longest day of the year.
6/23 WATERED EVERYTHING. USED FIVE AND A HALF GALLONS. EVERYTHING GOT AT LEAST A HALF GALLON. Despite the rain we got and the bags still having some heft I decided to water. It's 80 at 9am. It's supposed to he in the upper 90's today and coukd break 100° tomorrow. I hate that the grow bags are black. That's way to hot for the plants. I should find some empty soil bags and wrap the black fabric for a couple days. A sunscreen might help but I doubt much. We'll see how it goes.


Likes
12
Share

@Ms_Herbalist
Follow
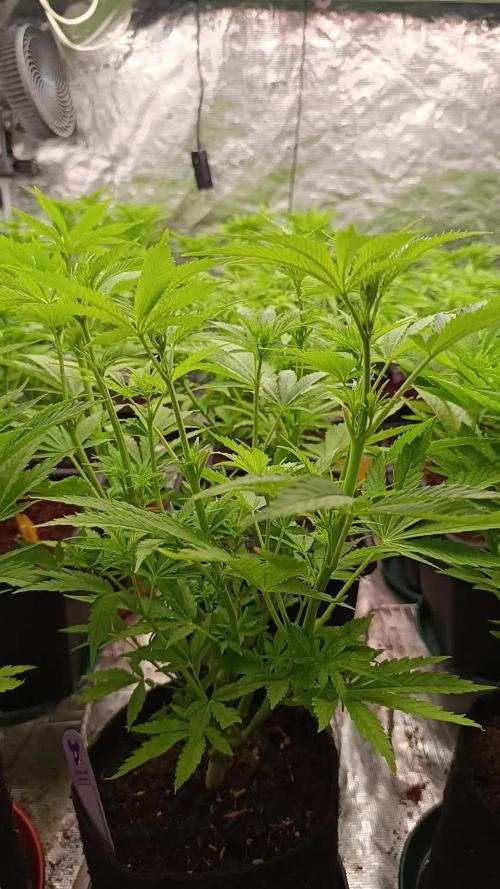
Did a lot of training and defoliation.
I will move her into a bigger tent now as shes about to start flowering hopefully by end of next week 😍.
Will also be using scrog net and will add Bud Candy along with the other nutrients : PH perfect Micro,Grow, Bloom


Likes
15
Share


@Marsgenetic
Follow
Really impressed with this strain it was slow at first and took off and never stopped got about 4.4 oz would of been more if i didnt test it
Likes
147
Share


@MrJones
Follow
MrJones Black Berry OG
🔹🔹🔹🔹🔹🔹GOALS🔹🔹🔹🔹🔹🔹
🌞Flowering Environment - 75/80℉ and 50% Humidity
💧 Feeding - Advanced Nutrients Bloom Regiment - Great APP!
🍃Training / Added the second trellis last week, it is doing a great job with support, SCROG process makes it hard to defoliate the plants.
🕷️ IPM - Will be using Green Cleaner" 1 OZ per Gallon, and CannControl from Mammoth alternating between product each month for Integrated Pest Management.
💡Mars Hydro LED / Veg TS-1000 / Flower 480W FC 4800, this light is just performing very well!
🔹🔹🔹🔹🔹🔹🔹🔹🔹🔹🔹🔹🔹🔹🔹🔹🔹🔹
📝 Rambling - With week 14 here, will be the last week of nutrients and will be starting with PH H20, the buds continue to get fat!
🔹🔹🔹🔹🔹🔹🔹🔹🔹🔹🔹🔹🔹🔹🔹🔹🔹🔹
▶️ Friday - 04.16.21 / Feeding 40 OZ of Advanced Nutrients
▶️ Saturday - 04.17.21/ Starting to Flush with H20 PH 6.2
▶️ Sunday - 04.18.21/Just feeding H20 PH 6.2
▶️ Monday - 04.19.21/Just feeding H20 PH 6.2
▶️ Tuesday - 04.20.21/Just feeding H20 PH 6.2, the buds are still getting fatter, they are looking amazing!
▶️ Wednesday - 04.21.21/ Just feeding H20 PH 6.2, the buds are still getting fatter, they are looking amazing!
▶️ Thursday - 04.22.21/Just feeding H20 PH 6.2, the buds are still getting fatter, they are looking amazing!🔹🔹🔹🔹🔹🔹🔹🔹🔹🔹🔹🔹🔹🔹🔹🔹🔹🔹
📜 Cultivar Information - We have created this strain by crossing the best Black Domina available with Very Berry and our own Lost Coast OG Kush, this plant produces large colas with a super intense sweet berry flavor with a sweet-smelling aroma that varies from fruit and berries to sweet candy. This lady offers tight internal stacking giving a perfect structure for those super heavy colas, which is perfect for growth both indoors and out, if grown outside she is fairly resistant to mold and powdery mildew which is a real bonus with such large colas.
🔹🔹🔹🔹🔹🔹🔹🔹🔹🔹🔹🔹🔹🔹🔹🔹🔹🔹

Likes
10
Share


@Cannabot
Follow
Stalks getting thicker ,seem to all look pretty uniform in growth.Waiting
Likes
8
Share

@Ninjabuds
Follow
Code ; NINJABUDS for a discount on ELUFAH lights
The spectrum from ELUFAH is really making the plants grow really well
My papa Payton I have growing under the ELUFAH uap-1500 along with the ELUFAH Saturn ring under canopy light. I recently put the plant back in a 2x2 I did have 2 plants but the other plant needed up being male. No need for the larger tent still.
Likes
128
Share


@Tropicannibis_Todd
Follow
💩Holy Crap We Are Back At It And Loving It💩
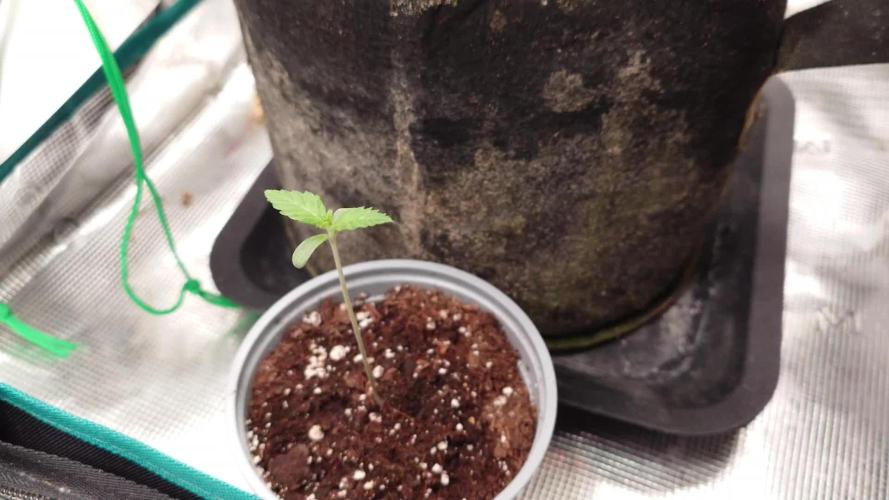
Growing in a 11 ounce pot 👈 👀 👀 👈
Growmies we are at DAY 49 and she's just killing💀it👌 TALK ABOUT FROSTY 👈 Amazing results thus far for the Tiny Pot 😀
👉Added straws within the Tiny pot to help watering in week 4 👈
So I'm starting to see she needs watering every single day and now need nutrients 🙃
Lights being readjusted and chart updated .........👍rain water to be used entire growth👈
WATERING SINGLE TO TWICE DAILY 😋
👉I used NutriNPK for nutrients for my grows and welcome anyone to give them a try .👈
👉 www.nutrinpk.com 👈
NutriNPK Cal MAG 14-0-14
NutriNPK Grow 28-14-14
NutriNPK Bloom 8-20-30
NutriNPK Bloom Booster 0-52-34
I GOT MULTIPLE DIARIES ON THE GO 😱 please check them out 😎
👉THANKS FOR TAKING THE TIME TO GO OVER MY DIARIES 👈
Processing
Likes
10
Share


@DrDuhboto
Follow
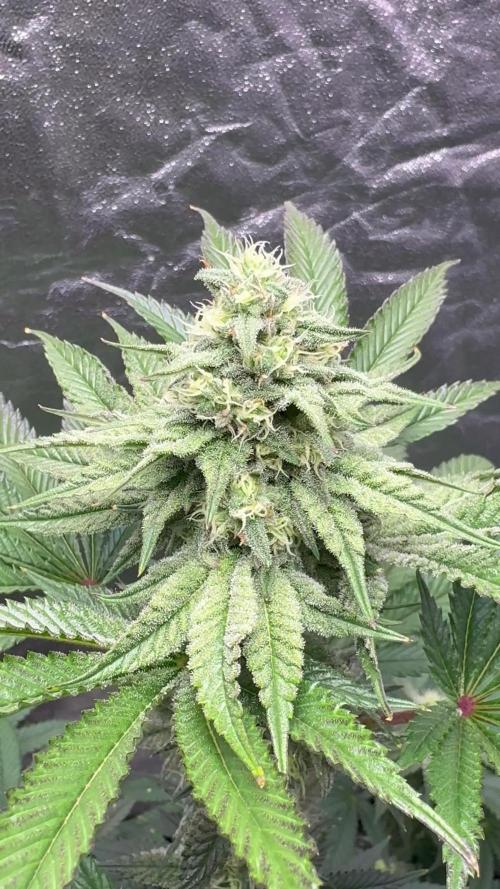
Very Happy plants, soaking up the rays.
When you place your face near the buds you get an amazing sweet fruity aroma, the leaves smell like skunk and cheese.
Each plant is getting 10 liters every 4 days. I water with 6.3ph tap water twice for every time I add nutrients.
I use Alaska fish fertilizer when its been a few times since a nutrient feed but the plants are showing no deficiency's.
They are Fed by a drip system which takes 16 hours to deliver the 10 liters to each plant, this works really well in the Fabric smart pots.
I use metal racks to keep the plants off the ground then place a drip tray underneath each plant. When using the drip system very little run off occurs.
I added a spider farmer sf-1000 to the room, it is full spectrum and ir, and is great for getting the corners of the room or the less dense areas of the canopy.


Likes
13
Share


@GrandmasBoy2021
Follow
I had a fun experience growing this strain. She started out strong and finished pretty strong! The buds are covered in THC and smells sweet. The only thing I would really do better next time is trying not to nutrient burn her as much as I did towards the end. I also experimented with harvest time and came to the conclusion that the it's best to harvest a few weeks after their recommended time if you want denser buds (in my opinion). I do wish the buds were a bit more dense but I'm not a pro grower and that could be the reason for that. It's all a learning experience. It could be the strain because I'm going a Gorilla Cookies (FastBuds) and those buds are huge and don't have as many leaves. Overall I'm blessed with the outcome and I'm going to enjoy the perfectly dried buds soon :D
I hope you all enjoy the little videos and music! haha I've only grown one plant before this which resulted in less than an eighth of bud so I'm beyond happy to say the least lol
Let me know if you have any questions regarding growing and for some possible tips! Happy growing Growmies!
Likes
5
Share


@Unnamed
Follow
Added KMPS once a day to the Reservoir to reach ~450 mV ORP.
Added Yara Kristalon Blue and Calcinit 1:1, no ml values, used the fertilizer to reach stated EC values.
PH correction with Phosphoric Acid.
Some roots are showing but hard to see on pictures due to my bad endoscopic camera.
PPFD 300, DLI 19
Values are average of the day.
DATE - °C - RH% (Tent Temp/RH)
20241007 21.7 63.6
20241008 24.1 63.0
20241009 24.1 63.1
20241010 24.0 60.6
20241011 24.1 58.5
20241012 23.5 58.3
20241013 23.7 58.0
DATE - PH
20241007 5.50
20241008 5.67
20241009 5.52
20241010 5.40
20241011 5.53
20241012 5.86
20241013 5.81
DATE - ORP (mV)
20241007 263
20241008 192
20241009 289
20241010 230
20241011 194
20241012 131
20241013 202
DATE - EC(us/cm)
20241007 664
20241008 687
20241009 714
20241010 734
20241011 837
20241012 981
20241013 992
DATE - CF
20241007 6.64
20241008 6.87
20241009 7.14
20241010 7.34
20241011 8.37
20241012 9.81
20241013 9.92
DATE - °C (Reservoir)
20241007 20.5
20241008 21.8
20241009 22.4
20241010 22.5
20241011 22.0
20241012 21.7
20241013 21.6
Likes
2
Share

@420DeepGrow
Follow
📆 Semana 3
El estiramiento empieza a estabilizarse y los botones florales ya se agrupan con más claridad en cada punta. Los pistilos se multiplican y la planta redirige progresivamente la energía hacia la construcción floral.
La estructura queda bien distribuida, con buena penetración de luz y hojas sanas, manteniendo el equilibrio nutricional. Sticky Finger acompaña ahora con más protagonismo, apoyando la formación y futura carga resinosa sin excesos.
Semana de consolidación floral.
Seguimos creciendo fuerte 💪!

Likes
209
Share


@BioBuds
Follow
It was a week with a lot of activity. First of all, she had her first full week of flowering and did a bit of a stretch. Also I switched her to the left side of the tent, to space the plants more evenly. We are getting to a canopy, although one of her roommates probably is male and will be removed. More about this when I update my Xtrakushh Diary.
Also had time to fit the scrognet. It fits way better than last grow, much tighter.
We had some problems with the lighting. I probably hit my timer with one of my sausage fingers, making my lights turn on in the middle of the night, thank god I found it out in time. They maybe had an hour or two of light for one night. Still something she really doesn't need with this strains tendency to hermie under stress.
She still looks happy. Did some gentle leaf tucking, some LST under the net, and a little defoliation. The branches might be short but they are very sturdy and should be able to carry large and heavy buds.
And we had won the @Sweet_Seeds Halloween give-away and got to choose three of their legendary strains: Tropicanna Poison, Red Hot Cookies and Runtz XXL auto!! Thanks guys!!!
We shall see where it leads...
Thank you for checking in again and don't forget the Black Friday Superdeals on https://www.mars-hydro.com!!
See you at other diaries or next week! Hug Bud and Sunshine