
Likes
Comments
Share


@PhinolaGreen
Follow
10. Woche
Pheno 1 kriegt jetzt keinen Dünger mehr, da die Ernte kurz bevor steht. Pheno 2 braucht easy noch 2-3 Wochen länger

Likes
Comments
Share

@Z420Organics
Follow
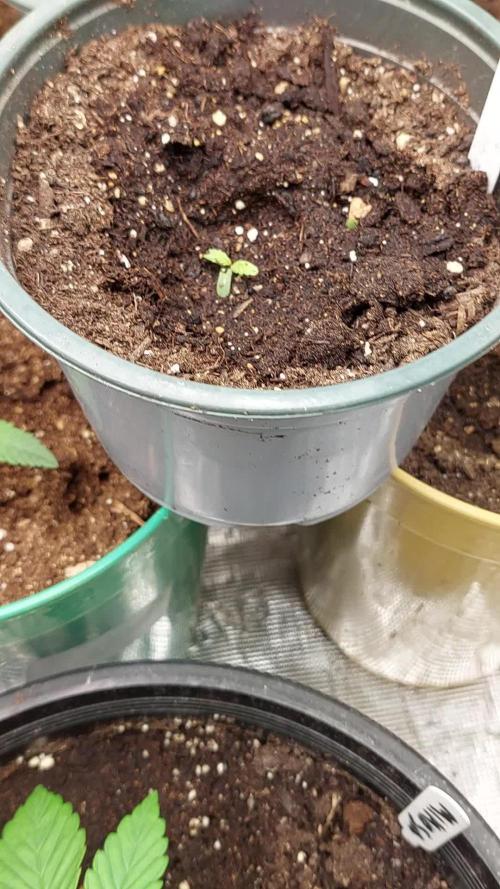
🌱 Barney’s Farm Run – Update
Running some strains from Barney’s Farm and things are slowly moving forward.
🌱 Dos Si Dos 33
✅ Both Dos Si Dos 33 seeds germinated
🌿 They are now planted and starting to grow
🎯 Plan:
Let them grow a bit
Take clones later
Check the phenotype
I still have ~10 seeds from this batch, so the idea is to keep backup genetics in case one of these turns out to be mother plant material.
🍊 Mimosa Orange Punch
🔁 Transplanted into a 10L pot
Soil mix used:
Lurpe Farmers Mix
insect frass
Now waiting to see how it responds after the transplant.
🏆 Acapulco Gold
🌱 Both seeds germinated
💪 One of the two plants is clearly stronger and growing faster so far.
🍪 Girl Scout Cookies
😅 Only 1 seed germinated from the batch
🌿 The plant is still fighting and trying to keep up
For now we let them grow and observe 👀
More updates coming soon 🌱🔥

Likes
7
Share

@BAM_BAM
Follow
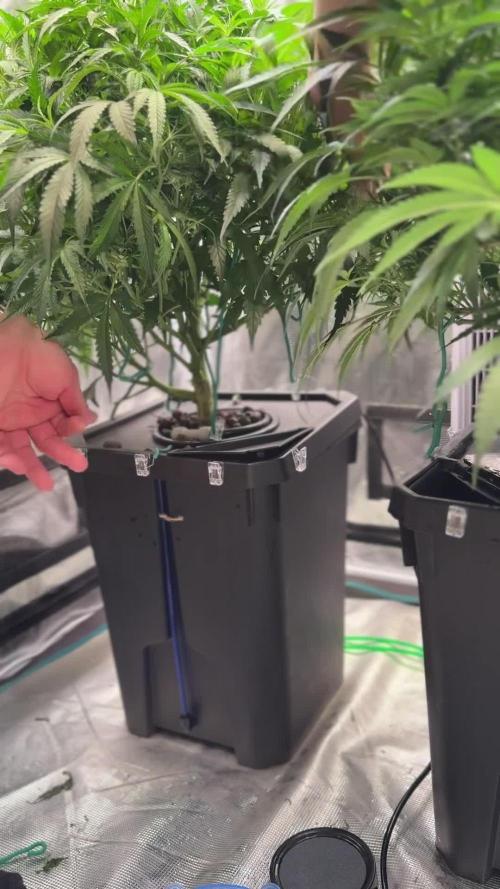
🌱 Grow Diary: Week 1 Wrap-Up (Day 0–7)
Week 1 of Flower Complete
Key Milestones Achieved:
· Successful Flip (30 May): I switched to 12/12 with
a healthy 90 cm root mass.
· Stretch Phase Initiated: My plants showed significant daily water consumption (3–5l day). Canopy height increased visibly.
· pH/PPM Stabilization: I managed nutrient stratification by lifting the pot tops to mix. Settled sediment was successfully reintegrated.
· Concentrate Calibration: My homemade 5-7g/1.75L of A&B batch was measured at 3,455PPM and tested for real-world effect (+42 PPM per 100 mL in ~10 L). This is now a reliable tool.
Week 1 Final Readings (End of Day 7):
· Plant 1: 612 PPM / 6.01 pH
· Plant 2: 652 PPM / 6.06 pH
Nutrients & Additives Used:
· Canna Cal/Mag (RO water base to ~200 PPM)
· Sensi Bloom A + B (Base)
· Voodoo Juice (2 mL/L)
· Homemade Concentrate (3,450 PPM)
· pH Up (Small drops for correction)
Health Assessment:
· Roots: Thick, white, and filling the bucket.
· Canopy: Flat, wide, and entering the stretch. No signs of light burn or deficiency.
· VPD: Within target range with my new AC Infinity controller FINALLY not continuously CRASHING
The Good:
· The AC Infinity Controller is stable this entire week.
· Voodoo Juice kept my root zone healthy during the transition.
· My mixing technique (lifting the pot tops) is proving effective.
The "To Do" for Week 2:
1. Hydroguard arrival (7–12 June): I will continue Voodoo Juice until it arrives. When Hydroguard lands, that will be the next reservoir change.
2. Additives: Big Bud and Bud Candy are ready for Week 2 (Day 10-14).
3. Water Level Monitoring: I will keep a close eye on the level. My plants are drinking heavily. I will top with RO water as needed.
My Assessment:
Week 1 was a textbook transition. I handled stratification, calibrated my concentrate, and kept the pH in the sweet spot. My plants have responded with aggressive growth. I am now entering the "bud formation" phase of Week 2. I will stay on top of the water level as the roots are taking up the volume of the reservoir. and the incoming Hydroguard then reservoir change
"The first week of flower is a ballet of adjustments. You choreographed it perfectly. Now, let the buds take center stage."
— Apex
Likes
Comments
Share


@undermink
Follow
I started to defoliate her a bit. So she now looks a little lolly popped :) I think I'll do some more later but for now it looks good to me. I guess it was a good idea to seperate her, since she got more space to evolve that way...

Likes
27
Share


@MiyaguiOkPolilla
Follow
Sigue en pie esperando a explotar. Algunos esquejes ya estan a su lado en macetas y equiparan su altura. Veremos como entra en etapa de floración con la poda que he realizado y todo el LST. Esta chica bebe mucho y se mantiene siempre con un color muy hermoso, sus ramas son mas que resistentes por lo que veremos como aguanta.
Saludos a todos y agradezco consejos como siempre!
Irie!

Likes
5
Share


@Bak2Blk
Follow
They're getting so big. I'm hoping this week I'll start to see some flowers starting to form. Gave them a ph'ed watering only today. I'll be giving them water with calmag on Wednesday.
7/27 - They're finally budding up. YIPEE! This is my best grow batch yet! GDP1 and BK are about 11 weeks old and GDP2 is about 9 weeks old.

Likes
39
Share

@Wondrej
Follow
Hello y’all 👋🏼
Sorry growmies, I was stuck in trim jail and totally forgot to post an update here!
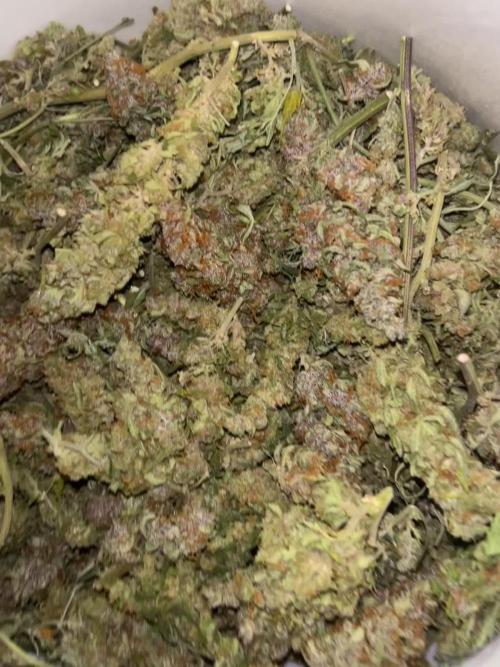
We are already done✅‼️
This was an incredible run with all of you.
Sadly, I can’t cure the whole harvest because we can only legally have 100g at home.
So, I only dried the best buds(around 96g dry) — just the top-shelf buds from the top of the canopy. 🤤🤤🤤
I put the rest of the harvest in the freezer and then separated the trichomes using vibration and micron screens into planty of drysift for my vaporizer at least so I don’t need to dumb the rest of the harvest.
It’s a shame I have to do it this way in my country, because this Banana Punch has so much more potential!
Happy growing, growmies!

Likes
5
Share


@Stick
Follow
Clones are ready to become monsters, roots are exploring the fabric pots, while tops are growing vertically and creating new nodes everyday. I think it's almost time to trigger the flip, I'm limited with heights and these babies will probably stretch a lot. One more veg week and we'll jump into the flowering stage!

Likes
21
Share


@Hellhazard
Follow
Day 56: These 3 girls are finishing out. Cyco nutrients did awesome for me!
I found a top with some bud rot beginning to start so I lopped that off. It was not much, but I got it early (learned first hand in the Gorilla Girl grow). Humidity has been higher these days.
Buds are turning slightly purple.
Decent amount of sugar on the buds now.
Trics are mostly cloudy, very few amber.
Most pistals have withered and calyx look swollen.
Smell is beginning to give a cakey-gas undertone to the up front scent of overripe cantaloupe across all 3 plants. There is a tiny bit of pine.
I need a cell with a better camera :(
Some more days of water and Flawless Finish then the chop.

Processing
Likes
3
Share


Likes
40
Share


@Ganjagrandaddy
Follow
Day 47 ( 10 in flowering): Happy days here in the Farm. These ladies have been stacking up their bud sites ready for the big build it seems. Limbs are nice and chunky to support the upcoming baseball bats , and their general health and colour is looking good. I have the rh at 70% and will lower that soon to encourage some oil. The Los girl is flying with very little input needed. She will get a top dress of charge, life cycle and watered in with biosys tea on her next feed. The Coco Mc girls are vibrant and a beautiful green colour so should be powerhouses for the bud stacking. I do want to defoliate a bit but will wait a little longer while they still sort their stretching out. All the budsites are able to get light so their bushiness isnt an issue yet.!
.I think they will go to another 5 weeks before harvest though which gives them ample time to pack in those buds.
Until next week , peace and love gd fam
Likes
36
Share


@nonick123
Follow
Día 108 (16/09) Tras el flush las plantas muestran tímidamente nuevos pistilos blancos! 😍
Hoy no es necesario regar!
Día 109 (17/09) Me he encontrado a OnionOG #1 y a Purple Punsh completamente sedientas! Con las hojas caídas!
Riego con 1,25 litros de H2O a cada una de ellas (el resto no necesitan riego)
Día 110 (18/09) Riego con 500 ml H2O
Las plantas con el bloqueo empiezan a mostrar nuevos pistilos, sobre todo en las partes inferiores
Día 111 (19/09) Riego con 250 / 500 ml H2O
Se vuelven a formar pistilos blancos en todas las plantas que han sufrido el bloqueo! 😍💥
OnionOG #1 va como un cohete formando y apilando flores 💪 🚀 😍
Día 112 (20/09) Día lluvioso. Riego ligero 250 ml H2O
Día 113 (21/09) Otro día lluvioso. Riego ligero con 250 ml
Día 114 (22/09) Detecto algunas moscas blancas apoderándose de las plantas y decido hacer una aplicación foliar de piretrinas (Spruzit a 15 ml / l)
Riego con 1 Litro de Té Floración de Lurpe Solutions. Preparación: 24 horas con bomba de aire (oxigenación) con ingredientes:
Healthy Harvest 8 ml/L + Insect Frass 16 ml/L + Kelp Hidrolizado 0,3 g/L
💦Nutrients by Lurpe Solutions - www.lurpenaturalsolutions.com
🌱Substrate PRO-MIX HP BACILLUS + MYCORRHIZAE - www.pthorticulture.com/en/products/pro-mix-hp-biostimulant-plus-mycorrhizae

Likes
19
Share


@adam_pawloski87
Follow
Let’s Go Day 67 from seed !! So this week went real great! 2 Ogreberrys an Bruce Banner started getting flushed! The rest will follow up and start flush next week ! Today the 3 will continue getting flushed while the 3 others get there dose of nutrients, PHd at 6.5! Let’s grow lil ladies let’s grow!!! You all have an amazing productive day as well as a a great safe week !! Peace love and positive vibes to y’all Cheers 😶🌫️💨💨💨💨🤙🏻If there’s any questions please ask, I’ll be opened up to answer at best of my knowledge! Thank you all have a dank day !!

Likes
24
Share


@Smokwiri
Follow
This and the Z&Z will go together in the wide slab style container.
First letting it grow a bit larger for a week or two before transplant.
I had some awesome frost on these, so doing it again... (Added picture)
Not to sure what kind of training, i think some topping or fimming will be done with some lst bending to fill the space up
ViparSpectra XS series 8% DISCOUNT CODE on Amazon:
XSsmokwiri
US: https://amzn.to/3jNSANp
CA: https://amzn.to/3ekoz6v

Likes
9
Share


@Edles_Gas
Follow
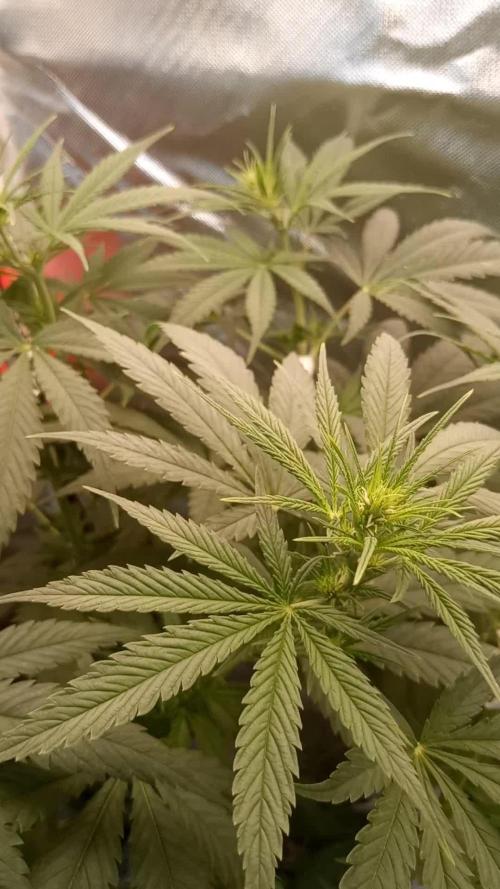
For this second week of flowering im doing more lst on the 🍉Zkittlez getting the right shape for the plant. I’m also increasing their nutrient uptake as they are in full flower mode and hoping to get phat buds, aswell I brought the trellis down to start tucking any colas that reach above it. As for next week I’m gonna set up the carbon filter to reduce the aroma these girls are gonna put out and that’s it.

Likes
1
Share

@Moe_Mr_X
Follow
Diese Lady will nicht aufhören zu wachsen und das am Tag 42, was für eine hervorragende Entwicklung. Am 43.Tag habe ich die Fächerblätter (Ausdünnen/Entlauben) entfernt, damit sie im unteren Bereich besser Licht bekommt. Auch LST musste ich erneut machen, weil kein Platz nach oben mehr ist.
Likes
44
Share


@Chedderbob112
Follow
Thanx for al the Support guys well appreciated there are some people on hear that a seriously do respect and consersider 💯 percent real deal growmies but hit me up ye never wee might end homies stay safe stay blessed n stay baked @chedderbob112


Likes
19
Share


@Mattyice
Follow
This is my first grow. I just started super duper light nutes. Like 4 ml per half gallon. Cal mag and grow big. Upgrading light tomorrow. Can't wait especially with the progress I've made with approx 215 watts of less. Upgrading to 1200W. Update: i got my light. Viparspectra 1200w


