


Processing
Likes
Comments
Share


@I_roll_my_own_420
Follow
And the week 3 has started. Buds started to grow. Plants are looking strong, looks like the PH is optimal finaly. There is a nice, citrusy and skunky smell already. Tough colas.


Likes
23
Share


@Ararhiel
Follow
Only got to start this diary on the third day of germination after I’ve moved the seeds from the toilet paper wrapping to plastic cups.

Likes
7
Share


@Guerillafarm
Follow
Day 94 Harvesting and making Hash with the cut leaves.
5weeks of veg and 9,5weeks of flowering
Pot size 6L


Likes
7
Share


@Mommaorganica
Follow
Discovered preflower on June 6. Started light bloom feed on #1 and will compare to #2 in one week for further feeding. Will run second soil test at same time.

Likes
4
Share

@Ensign420
Follow
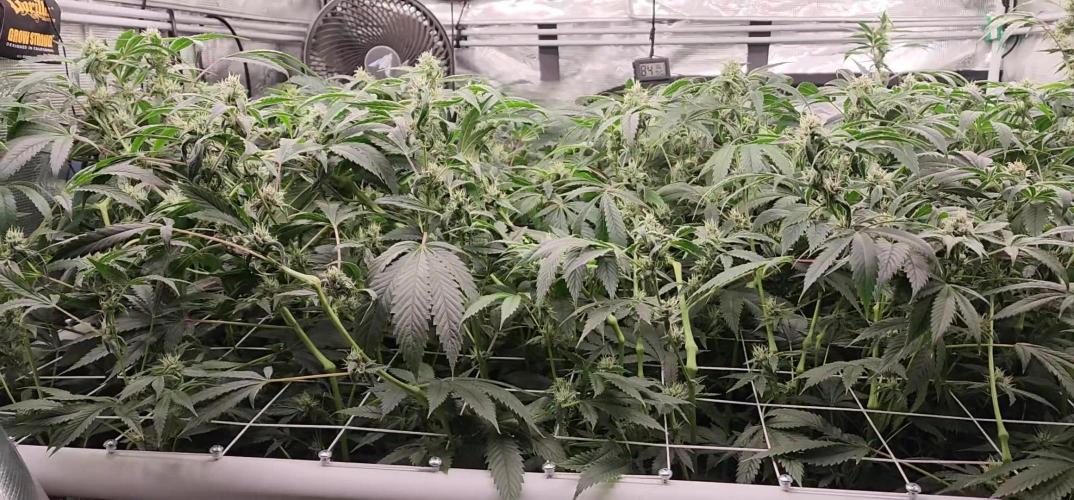
|»» LOG DISCLAIMER: Not intended as a grow guide. Grow log entries are usually posted 3 weeks later and are for my learning reference. ««|
Introduction - Week 20 Summary -
Ensign's log, stardate 17572.0,
Ca-Caw!! Another great grow week in the garden!
Slightly increased the PPFD and evened out the canopy with a bit of super-cropping.
In the veg garden, mainly been tending to the clones and watering as needed. Topped both Heady OG clones along with both mother plants (Heady OG and TKO).
Been a pretty easy week in the garden and the both gardens are thriving with growth! Let’s go my ladies!
Onwards to next week!
[START OF WEEK 20]
==========================================================
---------- [ 4x4 MAIN TENT ] ----------
Heady OG BX1 #1 [Round4 ~Wk13] - WEEK 20 - Full Bloom Wk4
TKO [Round2 ~Wk18] - WEEK 20 - Full Bloom Wk4
----------- [ 3x3 VEG TENT ] ------------
TKO - WEEK 03 - Full Veg
Heady OG BX1 - WEEK 03 - Full Veg
09/01/25 → 09/07/25
This Week's Estimated Goals
----------------------------------------------------------------------------------------------
DLI: ~35 mol/m²/d
PPFD: ~810 μmol/m²/s
VPD: ~1.0 kPa
This Week's Meter Readings & Averages
----------------------------------------------------------------------------------------------
Light On/Off: 19:00 - 07:00 | Wattage: ~390.1W [LV05]
Distance From Canopy: ~7”, 7”
DLI: ~37.32 mol/m²/d
PPFD: ~864 μmol/m²/s
VPD: ~0.61 kPa
Soil %: [49.4, 41.0, 29.3, 51.7, 43.0, 40.0, 38.3, 42.3]
==========================================================
Day 01 - Monday - 09/01/25 - Total Days: 141
-----------------------------------
Daily Averages ~[+01:00]
- Temps: 84.1°F [28.9°C]
- Humidity: 85.1%
- VPD: 0.59 kPa
- Soil %: [49, 42, 31, 52, 43, 41, 42, 44]
-----------------------------------
- [09:45]: Quickly checked on the 3x3 veg tent.
--- Looking good ladies!
--- Mothers and clones all look healthy and perky!
- [19:42]: Night check on the 4x4 tent.
--- CA-CAW!! This is why we grow!
--- Wow both Heady OG and TKO are looking absolutely incredible!
--- The canopy is even and buds are swelling up starting to stack up!
- [19:44]: Checked the Ecowitt soil moisture sensor data:
------------------ [ 4x4 MAIN TENT ] ---------------
------ 54% - [CH01 FT » G30 - Heady OG BX1 #1]
------ 42% - [CH02 FB » G30 - Heady OG BX1 #1]
------ 30% - [CH03 BT » G20 - TKO]
------ 53% - [CH04 BB » G20 - TKO]
------------------ [ 3x3 VEG TENT ] ----------------
------ 42% - [CH05 BL » GR7 - TKO]
------ 41% - [CH06 BR » GR7 - Pheno #2]
------ 41% - [CH07 FL » GR7 - Heady OG BX1 #1]
------ 44% - [CH08 FR » GR7 - Pheno #4]
--------- Veg: 38% - 45% | Flower: 45% - 55%
--------- General: 30% [Dry] «| 45 - 60% [Moist] |» 70% [Wet]
- [19:48]: Checked the 3x3 veg tent.
--- Wow growth is healthy and green.
--- Both Heady OG and TKO mothers are looking beautiful
--- The spare Heady OG clones need watering! Let’s go!
- [19:52]: Here are the starting initial watering ranges:
------ Heady OG BX1 #1A » 237.7g → 300.3g
------ Heady OG BX1 #1B » 244.4g → 305.6g
--------- General Solo Range: [Dry] «| [Initial Cup Weight] + ~55-100g |» [Wet]
--- Both cups were last watered 2 days ago.
--- Took the starting weight of both clones before watering,
------ Heady OG BX1 #1A » 225.5g
------ Heady OG BX1 #1B » 238.4g
--- While on a scale,
--- Gently misted the straw mulch of both cups with RO water.
--- Focused on the straw and sprayed as evenly as possible.
--- Misted 10-20 sprays. Waited a moment, then misted again.
--- Made sure to reference the watering weights.
--- Repeated this process until both cups weighted at least 300g.
--- There was no runoff.
- [20:16]: Took the saturated weight of both clones after watering,
------ Heady OG BX1 #1A » 340.1g
------ Heady OG BX1 #1B » 340.2g
--- Marked the final wet weight on the back of each cup. Also marked the watering date on the front.
- [20:18]: Decided to also top both clones.
--- Using a pair of trimmers, cut the main stalk down to the bottom 2-3 nodes.
--- Mulched the trimmings.
--- Placed both phenos back into the tent and onto the veg pots.
--- Great! Since these clones will be vegging in solo cups for a while, trimming the top growth should reduce root bound stress.
--- Okay! The clones in the propagation tray look thirsty as well!
- [20:32]: Here are the starting initial watering ranges:
------ Gorilla Goat #1 » 256.1g → 300.4g
------ Gorilla Goat #2 » 255.4g → 300.3g
------ Garlic Budder OG#1 » 263.5g → 305.2g
------ Garlic Budder OG#2 » 256.4g → 300.2g
--------- General Solo Range: [Dry] «| [Initial Cup Weight] + ~55-100g |» [Wet]
--- All cups were last watered 4 days ago.
--- Took the starting weight of all clones before watering,
------ Gorilla Goat #1 weighed 269.2g
------ Gorilla Goat #2 weighed 253.7g
------ Garlic Budder OG#1 weighed 259.5g
------ Garlic Budder OG#2 weighed 264.3g
--- While on a scale,
--- Gently misted the straw mulch of all cups with RO water.
--- Focused on the straw and sprayed as evenly as possible.
--- Misted 10-20 sprays. Waited a moment, then misted again.
--- Made sure to reference the watering weights.
--- Repeated this process until all cups weighted at least 300g.
--- There was no runoff.
- [20:56]: Took the saturated weight of all clones after watering,
------ Gorilla Goat #1 » 315.2g
------ Gorilla Goat #2 » 315.1g
------ Garlic Budder OG#1 » 315.3g
------ Garlic Budder OG#2 » 315.3g
--- Marked the final wet weight on the back of each cup. Also marked the watering date on the front.
--- Placed all cups back into the tent and onto the propagation tray.
- [21:07]: Checked the humidifiers.
--- Tanks are still full and no leaks found.
Day 02 - Tuesday - 09/02/25 - Total Days: 142
-----------------------------------
Daily Averages ~[+01:00]
- Temps: 84.4°F [29.1°C]
- Humidity: 84.3%
- VPD: 0.63 kPa
- Soil %: [49, 42, 31, 52, 43, 41, 43, 43]
-----------------------------------
- [16:39]: Evening check on the 3x3 veg tent.
--- Veg garden is looking beautiful!
--- Heady OG and TKO mothers look healthy!
--- All clones look great and no need to water!
- [16:42]: Checked the Ecowitt soil moisture sensor data:
------------------ [ 4x4 MAIN TENT ] ---------------
------ 52% - [CH01 FT » G30 - Heady OG BX1 #1]
------ 42% - [CH02 FB » G30 - Heady OG BX1 #1]
------ 34% - [CH03 BT » G20 - TKO]
------ 55% - [CH04 BB » G20 - TKO]
------------------ [ 3x3 VEG TENT ] ----------------
------ 43% - [CH05 BL » GR7 - TKO]
------ 41% - [CH06 BR » GR7 - Pheno #2]
------ 44% - [CH07 FL » GR7 - Heady OG BX1 #1]
------ 43% - [CH08 FR » GR7 - Pheno #4]
--------- Veg: 38% - 45% | Flower: 45% - 55%
--------- General: 30% [Dry] «| 45 - 60% [Moist] |» 70% [Wet]
- [19:57]: Checked the 4x4 tent.
--- Wow the canopy is blowing up!
--- Ca-Caw!! Both Heady OG and TKO are thickening up with bud growth!
--- Easy day in the garden and don’t need to do anything!
--- Grow strong my girls!
- [20:19]: Checked the humidifiers.
--- Tanks are still full and no leaks found.
Day 03 - Wednesday - 09/03/25 - Total Days: 143
-----------------------------------
Daily Averages ~[+01:00]
- Temps: 84.8°F [29.3°C]
- Humidity: 85.5%
- VPD: 0.59 kPa
- Soil %: [50, 41, 29, 52, 43, 40, 42, 43]
-----------------------------------
- [+01:00]: Night check on the 4x4 tent.
--- Woah these ladies are getting tall!
--- Heady OG and TKO are both looking healthy and buds are starting to stack!
--- Getting a few orange hairs, but still mostly white and looking beautiful!
--- With at least 4-5 weeks before harvest, both stoked and curious for this grow cycle!
--- Also the terps are starting becoming more distinct. Heady OG’s lemon gas profile has turned into more of a pine-sol gas profile!
--- TKO terps are ripening up nicely and the earthy profile is more distinct. She definitely has similar Garlic Budder-like terps! Nice!
--- Ca-Caw!! Let’s go ladies!
- [+01:04]: Checked the Ecowitt soil moisture sensor data:
------------------ [ 4x4 MAIN TENT ] ---------------
------ 49% - [CH01 FT » G30 - Heady OG BX1 #1]
------ 41% - [CH02 FB » G30 - Heady OG BX1 #1]
------ 30% - [CH03 BT » G20 - TKO]
------ 53% - [CH04 BB » G20 - TKO]
------------------ [ 3x3 VEG TENT ] ----------------
------ 41% - [CH05 BL » GR7 - TKO]
------ 40% - [CH06 BR » GR7 - Pheno #2]
------ 44% - [CH07 FL » GR7 - Heady OG BX1 #1]
------ 42% - [CH08 FR » GR7 - Pheno #4]
--------- Veg: 38% - 45% | Flower: 45% - 55%
--------- General: 30% [Dry] «| 45 - 60% [Moist] |» 70% [Wet]
- [+01:05]: Checked the 3x3 veg tent.
--- Wow the veg garden is healthy and perky!
--- Both mothers and all clones are vegging along beautifully!
--- May need to water the clones soon, but another easy night in the garden and nothing to do!
- [+01:06]: Checked the humidifiers.
--- Tanks are still full and no leaks found.
Day 04 - Thursday - 09/04/25 - Total Days: 144
-----------------------------------
Daily Averages ~[+01:00]
- Temps: 83.9°F [28.8°C]
- Humidity: 84.0%
- VPD: 0.63 kPa
- Soil %: [49, 41, 26, 51, 42, 40, 43, 42]
-----------------------------------
- [09:34]: Decided to increase the PPFD a bit.
--- Within the AC Infinity App,
--- For the Main Tent [4x4] controller,
--- Adjusted the 'Flower [12/12]' Schedule for the grow light.
------ Increased the MAX intensity from 4 to 5
--- Plan to take PPFD readings later and will adjust the levels back if growth gets worse.
- [20:58]: Night check on the 4x4 tent.
--- Ca-Caw!! Looking beautiful my ganja queens!
--- Both Heady OG and TKO are soaring upwards again and wow buds are looking frosty!
- [21:14]: Trained and super-cropped the taller branches.
--- Nice! The canopy looks nice and even!
--- Time to take the new PPFD readings and height checks!
--- Let’s go!
- [21:18]: Took the weekly general PPFD readings.
------ All phenos were around 864 μmol/m²/s which gives a DLI of 37.32 mol/m²/d under a 12/12 light cycle (at ~390.1W).
--- Also starting to notice that the LEDs are not at the same intensity. Several sections of the grow light (Mars Hydro FC-6500) are dimmer and have a few broken ones. Most likely this is due to general wear and tear. Overall the light is still fine and don’t really plan to upgrade anytime soon.
--- Anyways!
- [21:23]: Took the weekly height and light distance measurements.
------ All phenos were about 47" tall.
------ Both Heady OG (BX1 #1) and TKO were about 7" away from the grow light.
- [21:27]: Checked the Ecowitt soil moisture sensor data:
------------------ [ 4x4 MAIN TENT ] ---------------
------ 51% - [CH01 FT » G30 - Heady OG BX1 #1]
------ 41% - [CH02 FB » G30 - Heady OG BX1 #1]
------ 23% - [CH03 BT » G20 - TKO]
------ 50% - [CH04 BB » G20 - TKO]
------------------ [ 3x3 VEG TENT ] ----------------
------ 40% - [CH05 BL » GR7 - TKO]
------ 40% - [CH06 BR » GR7 - Pheno #2]
------ 41% - [CH07 FL » GR7 - Heady OG BX1 #1]
------ 42% - [CH08 FR » GR7 - Pheno #4]
--------- Veg: 38% - 45% | Flower: 45% - 55%
--------- General: 30% [Dry] «| 45 - 60% [Moist] |» 70% [Wet]
- [21:41]: Checked the 3x3 veg tent.
--- Ooo yea! Looking healthy in the veg tent!
--- Both Heady OG and TKO mothers are ramping up with vertical growth!
--- Going to need to top these ladies again soon.
--- All clones look healthy and no need to water quite yet. Great!
- [23:25]: Checked the humidifiers.
--- Tanks are still full and no leaks found.
Day 05 - Friday - 09/05/25 - Total Days: 145
-----------------------------------
Daily Averages ~[+01:00]
- Temps: 83.9°F [28.8°C]
- Humidity: 85.3%
- VPD: 0.58 kPa
- Soil %: [50, 41, 32, 52, 43, 40, 36, 42]
-----------------------------------
- [22:53]: Night check on the 4x4 tent.
--- Looking and smelling dank in the garden!
--- The canopy in nice and even!
--- Both Heady OG and TKO look incredible and buds are swelling up and colas are starting stack!
--- Ca-Caw!! Grow strong my girls!
- [23:01]: Checked the Ecowitt soil moisture sensor data:
------------------ [ 4x4 MAIN TENT ] ---------------
------ 49% - [CH01 FT » G30 - Heady OG BX1 #1]
------ 41% - [CH02 FB » G30 - Heady OG BX1 #1]
------ 26% - [CH03 BT » G20 - TKO]
------ 52% - [CH04 BB » G20 - TKO]
------------------ [ 3x3 VEG TENT ] ----------------
------ 41% - [CH05 BL » GR7 - TKO]
------ 40% - [CH06 BR » GR7 - Pheno #2]
------ 35% - [CH07 FL » GR7 - Heady OG BX1 #1]
------ 41% - [CH08 FR » GR7 - Pheno #4]
--------- Veg: 38% - 45% | Flower: 45% - 55%
--------- General: 30% [Dry] «| 45 - 60% [Moist] |» 70% [Wet]
- [23:02]: Checked the 3x3 veg tent.
--- Wow the veg garden is looking beautiful!
--- Both mothers look healthy and wow the left side of the tent is already getting pretty full!
--- Both Heady OG clones along with mother clones in the propagation tray need watering!
--- First the ones in the propagation tray! Let’s go Ensign!
- [23:08]: Here are the starting initial watering ranges:
------ Gorilla Goat #1 » 256.1g → 300.4g
------ Gorilla Goat #2 » 255.4g → 300.3g
------ Garlic Budder OG#1 » 263.5g → 305.2g
------ Garlic Budder OG#2 » 256.4g → 300.2g
--------- General Solo Range: [Dry] «| [Initial Cup Weight] + ~55-100g |» [Wet]
--- All cups were last watered 4 days ago.
--- Took the starting weight of all clones before watering,
------ Gorilla Goat #1 weighed 270.4g
------ Gorilla Goat #2 weighed 252.4g
------ Garlic Budder OG#1 weighed 257.6g
------ Garlic Budder OG#2 weighed 272.3g
--- While on a scale,
--- Gently misted the straw mulch of all cups with RO water.
--- Focused on the straw and sprayed as evenly as possible.
--- Misted 10-20 sprays. Waited a moment, then misted again.
--- Made sure to reference the watering weights.
--- Repeated this process until all cups weighted at least 300g.
--- There was no runoff.
- [23:26]: Took the saturated weight of all clones after watering,
------ Gorilla Goat #1 » 300.2g
------ Gorilla Goat #2 » 315.1g
------ Garlic Budder OG#1 » 315.1g
------ Garlic Budder OG#2 » 300.1g
--- Marked the final wet weight on the back of each cup. Also marked the watering date on the front.
--- Placed all cups back into the tent.
--- Since both Gorilla Goat #1 and the original Garlic Budder #2 soil was not completely dry, decided to water less.
--- Growth is all around looking healthy and almost ready for transplanting! Need to still decide which two will be the next mothers.
- [+00:05]: Checked the humidifiers.
--- Tanks are still full and no leaks found.
Day 06 - Saturday - 09/06/25 - Total Days: 146
-----------------------------------
Daily Averages ~[+01:00]
- Temps: 83.3°F [28.5°C]
- Humidity: 84.9%
- VPD: 0.59 kPa
- Soil %: [50, 40, 31, 52, 43, 39, 32, 41]
-----------------------------------
- [19:56]: Night check on the 4x4 tent.
--- Ooo yea! The garden is looking incredible!
--- Heady OG and TKO are healthy and green!
--- The canopy looks pretty even and bud growth is ramping up!
- [19:59]: Checked the Ecowitt soil moisture sensor data:
------------------ [ 4x4 MAIN TENT ] ---------------
------ 46% - [CH01 FT » G30 - Heady OG BX1 #1]
------ 40% - [CH02 FB » G30 - Heady OG BX1 #1]
------ 33% - [CH03 BT » G20 - TKO]
------ 55% - [CH04 BB » G20 - TKO]
------------------ [ 3x3 VEG TENT ] ----------------
------ 41% - [CH05 BL » GR7 - TKO]
------ 39% - [CH06 BR » GR7 - Pheno #2]
------ 32% - [CH07 FL » GR7 - Heady OG BX1 #1]
------ 41% - [CH08 FR » GR7 - Pheno #4]
--------- Veg: 38% - 45% | Flower: 45% - 55%
--------- General: 30% [Dry] «| 45 - 60% [Moist] |» 70% [Wet]
- [20:00]: Checked the 3x3 veg tent.
--- Wow the veg garden is thriving with health!
--- Both Heady OG and TKO mothers along with all clones look green and perky!
--- Another easy night in the garden!
--- Need to decide which clones to transplant soon.
- [20:06]: Checked the humidifiers.
--- Tanks are still full and no leaks found.
------ [ » SUPPLEMENTAL LIFE ENTRY « ]
--- Shaka, when the wall fell..
--- My fully custom built PC rig died!!
--- Tried to start the computer today and heard a loud pop and now she’s not booting..
--- DAMNIT ENSIGN!
--- Really hoping that the issue is just the power-supply unit and already have a replacement order and on it’s way.
--- Life happens, damnit.
------ [ » SMOKES SEVERAL BOWLS « ]
Day 07 - Sunday - 09/07/25 - Total Days: 147
-----------------------------------
Daily Averages ~[+01:00]
- Temps: 84.1°F [28.9°C]
- Humidity: 83.4%
- VPD: 0.67 kPa
- Soil %: [49, 40, 25, 51, 44, 39, 30, 41]
-----------------------------------
- [19:14]: Night check on the 4x4 tent.
--- Ca-Caw!! The garden is looking dank and buds are continuing to stack up!
--- Heady OG’s canopy is mostly even. She has a few tops that are starting to soar upwards towards the grow light and may need to be trained down later.
--- TKO is doing her own thing in the back and staying quite even!
--- Let’s go my girls!
- [19:17]: Checked the Ecowitt soil moisture sensor data:
------------------ [ 4x4 MAIN TENT ] ---------------
------ 52% - [CH01 FT » G30 - Heady OG BX1 #1]
------ 40% - [CH02 FB » G30 - Heady OG BX1 #1]
------ 24% - [CH03 BT » G20 - TKO]
------ 50% - [CH04 BB » G20 - TKO]
------------------ [ 3x3 VEG TENT ] ----------------
------ 40% - [CH05 BL » GR7 - TKO]
------ 39% - [CH06 BR » GR7 - Pheno #2]
------ 29% - [CH07 FL » GR7 - Heady OG BX1 #1]
------ 41% - [CH08 FR » GR7 - Pheno #4]
--------- Veg: 38% - 45% | Flower: 45% - 55%
--------- General: 30% [Dry] «| 45 - 60% [Moist] |» 70% [Wet]
- [19:21]: Checked the 3x3 veg tent.
--- Veg garden is green and wow moth growth is raging!
--- Both Heady OG and TKO have reached the grow light!
--- Using a pair of clean trimmers,
- [19:28]: Topped and removed a good 5-6 inches of top growth.
--- Mulched the trimmings.
--- Only cut the main stalk and now the canopy is looking a lot better!
--- All clones are looking perky and green!
--- No need to water. Great!
- [19:39]: Checked the humidifiers.
--- Tanks are still full and no leaks found.
--- Another grow week done!
--- Need to still decide which clones to transplant.
--- Currently between the 4 phenos, plan to transplant Gorilla Goat #1 and the original Garlic Budder #2, but this may change.
--- The Gorilla Goat #1 (currently at ~5 month cure) is by far the loudest pheno of the lot and has a lemon chem gas profile when has made her a keeper!
--- The one I’m still deciding on are the Garlic Budder phenos (also at ~5 month cure). Both are unique in their own dank way. The #1 pheno has a smooth sweet ‘purple’ terpene profile with a hint of fuel while the #2 is more earthy and gassy.
--- Anyways!
--- Onwards to next week Ensign!
[END OF WEEK 20]
Likes
1
Share


@Cannabinatek
Follow
Uma das sementes atrofiou nos primeiros dias e já foi substituída por outra blue skunk… Aguardemos novos desenvolvimentos 💚💚💚. Tudo a andar

Likes
16
Share


@Dr_Rook
Follow
Contando ya los días..
Prácticamente está todo hecho y sólo queda esperar.
Ya sólo estoy regando con agua pura con el ph regulado. Estoy haciendo un lavado de raíces de dos semanas ya que busco el sabor lo más limpio posible.
El clima del exterior está ayudando mucho y he podido mantener la humedad en los parámetros correctos.
Espero cortarlas sobre el finde que viene
Muy contento con lo que veo, la calidad promete 🤩

Likes
63
Share


@MrHightimes
Follow
Holy Chunkers!
I know I had been noticing some nice phat buds forming but DAMN!
I had to get in there and throw another pack of bamboo supports in b/c the nugs are soooo damn heavy!
It was much needed too and the canopy looks much better for it, there was some droopy shit up in there!
I see some spots that i should definilty defoliate a bit but i'm sorta just letting the girls ride it out!
Always shooting for about 12 weeks and for most of the plants i think that is about on schedule!

Likes
15
Share


Likes
2
Share

@LordNugz
Follow
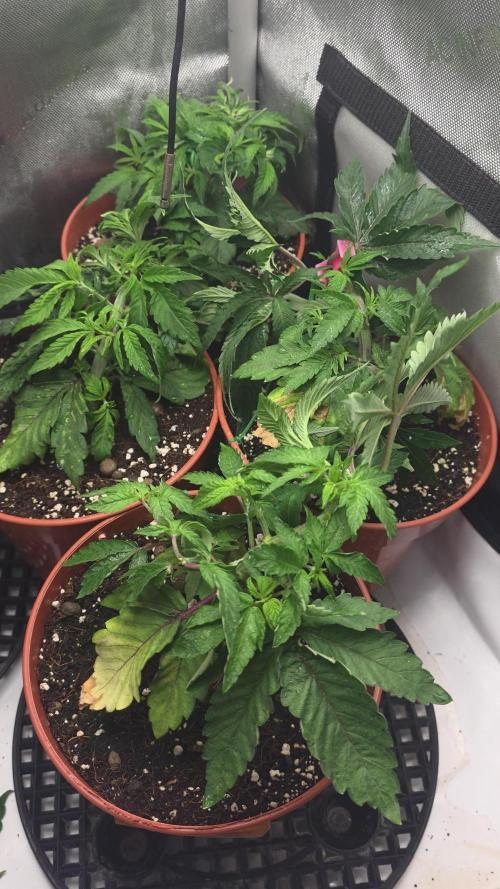
Back from near death. The plants are doing well now. Hopefully a couple more weeks and I can move into flower


Processing
Likes
5
Share


@Major
Follow
this week we went into flowering the plants are in shape and growing day by day I am waiting to repot them one last time in 13 l pots with Guano Bat Mix from Plagron finally all is well than happiness 🤞🏻 🤞🏻🤞🏻🤞🏻🤞🏻🙏😃


Likes
4
Share


@AustinRon
Follow
OG 4Q24 Flower Week 9
Orangegasm (Fem) [ IRIE Genetics ]
12/12 @ Bolt (Day 21)
Germination: 20 November 2024
#3A Earliest Harvest Date: 9 February 2025
#3B Latest Harvest Date: 19 February 2025
_________________________________________
Start of Week: [Wed Feb 5, 2024 CR2 4Q24 57:F:8:1]
End of Week: [Tue Feb 11, 2024 CR2 4Q24 63:F:8:7]
OrangeGasm Fertigation:
- MAX: EC: [ 2.4, mS] #Ramping Down
- LightIntensity MAX: [ 850, µMol/m2/s]
______________________________________
OBJECTIVES
- Ramp EC from 2.4 - 1.0
- Start rolling off Primer A&B/Silica Skin to Resin Bloom . . .
__
Wed Feb 5, 2025
OG 4Q24 57:F:8:1
EC: 2.3
Notes:
#5 looks like a 60 day plant, if so - consider Saturday Harvest …
Runoff
- [x] Amount: [ 0.125 , gal]
- [x] EC: [ 4.4 , mS/cm]
- [x] EC∆: [ 2.5 , mS/cm] # Fried Yet? ;-}
Harvest Dehu
- [x] Amount: [ 1.5 , g]
__
Thu Feb 6, 2025
OG 4Q24 58:F:8:2
EC: 2.3
Refresh Reservoir
- [x] Amount: [ 2 , g]
- [x] EC: [ 2.3, mS/cm]
- [x] Primer A&B: [ 31, ml]
- [x] Silica Skin: [ 15 , ml]
__
Fri Feb 7, 2025
OG 4Q24 59:F:8:3
EC: 2.3
__
Sat Feb 8, 2025
OG 4Q24 60:F:8:4
- [x] Disassemble, Clean Reservoir and Pumps, Reassemble
Refresh Reservoir
- [ ] Silica Skin: [ 15 , ml]
- Dropping Silica Skin due to (sparse to medium) granular precipitate
- [x] Amount: [ 6 , g]
- [x] EC: [ 2.1, mS/cm]
- [x] Primer A&B: [ 100, ml]
EC: 2.1
@1900 - Clear Manifold Filter. (Mainline should be cleared on 1845 feed
__
Sun Feb 9, 2025
OG 4Q24 61:F:8:5
- [x] Dilute to EC 2.0
- Flooded Tent, 2 Gallons PLUS of Runoff. Happy Plants.
- Shout Out Shop-vac. ;-}
EC: 2.0
__
Mon Feb 10, 2025
OG 4Q24 62:F:8:6
EC: 1.8
HAND APPLICATION
Prepped One Gallon of 12-8-7-5 @ 1.8 mS/cm w/ PhotoSynthesis Plus, SLF-100
Reclaimed Dehu Water, ~2 Gallons
Refreshed Reservoir, 2 Gallons Rooted Leaf Hydro no Silica Skin, EC: 1.8 mS/cm
Reduced watering to 5 min, then 1 - 1 -1 -1 -1 -1 -1 -1
(It’s not like they’ve been under-fertigated)
__
Tue Feb 11, 2025
OG 4Q24 63:F:8:7
EC: 1.7
- [x] EC: [ 1.7, mS/cm2]
- [x] Refresh Reservoir
- [x] amount: [ 2.5, gal]
Runoff
- [x] Amount: [ 0.5, gal]
- [x] EC: [ 3.6, mS/cm2]
- [x] EC∆: [ 0.9, mS/cm2] # Better than 2.5!
PLANT POSITIONS
3 5 1 7
4 2 6 8


Likes
8
Share


@Australianbuds
Follow
Start week 6! Looking nice and starting to fatten out! Can’t wait for harvest time! PATIENCE! Very happy so far with how they are all doing!


Likes
5
Share


@GODAXE
Follow
21.07.2024
we finaly had a sunny week with a nice day and night temp. The camper berry look have nicely recover from the last week lack of sun. with this better condition the 300ppm nuts solution was just fine. as the roots has show nice developement they wiil hit their final dwc setup tomorow.