


Likes
Comments
Share


@WeedleyScott
Follow
Woche 12:
Sie Blühen schön vor sich hin, aktuell sehe ich wenig Veränderung, die Blätter haben etwas Braune spitzen bekommen, eventuell wegen der Trauermücken, die Larven gehen die Wurzeln an. Ich habe bereits Nematoden bestellt und werde diese in die Erde geben soweit diese da sind.
Licht Stas:
12h: 82,3 DLI / mol/m^2/d
1.839 PPFD umol/m^2/s
53000 LUX

Likes
15
Share


@Siriuz
Follow
Very good very fast and very smelly
Some lemony smell I can pick
But also very sweet so we are really down to try this one from sweet seeds
I think I could have waited two more weeks.
But then again I ran out of soil and had to recycle this one to get red poison auto going on this big pot all set with mega super mix soil and nutes
The red poison was amazingly F1
Growing on roots super heavy rooting
And yes we finally got her on this pot
So yeah that's why we took gelato out
And also because it got 9 weeks flowering so it's actually set
If maybe one more week or two could have change the high potency or effect we will discover on our next grow stay tuned and always check on my Instagram
@cannagrowersiriuz
For real time activity and blazin
Also talking sht and what not
Come along leave your comments
Blaze it and just let us know what the f is
Up my dudes
Keep growing and thanks again sweet seeds and grow diaries for everything always you rock and the community as well is dope
UPDATED MAY 8TH 2021
FINALLY GOT MY DRY BUDS
TOTAL WAS 30G
FOUND OUT MY GROW LIGHT IS NOT FULL SPECTRUM SO I AM TRYING TO UPGRADE SINCE I ALREADY KNOW IM GETTING TOP QUALITY BUDS WITH MY TECHNIQUES BUT NOT QUANTITY DUE TO LIGHT ISSUES OF COURSE PHLIZON IS NOT FULL SPECTRUM AND FOR A INDOOR GROW YOU NEED THAT MUCH FOR YIELD
ANYWAYS TASTE IS BOMB
CURING ONE JAR FOR A MONTH TO EXPOSED FLAVOR AND HIGHNESS
AS IT IS RIGHT NOW YOU GET A VERY GOOD HIGH AND ONE G CAN GET YOU TWO TO THREE JOHNSONS WHICH IS AWESOME
ON THE OTHER HAND IS ORGANIC
AND IM FLATTERES WITH MYSELF FOR THIS ACHIEVEMENT BUT I DO NOT FORGET AND I THANK TO ALL COMMUNITY AND JAYPP FROM SWEET SEEDS WHO HAS HELPED ME OUT SO FAR IN GETTING STRAINS AND TIPS
I APPRECIATE KINDLY ALL GROWERS IN THE COMMUNITY WHO ADDED ME OR FOLLOWED ME AT THE INSTAGRAM CANNAGROWERSIRIUZ ALSO THANKS TO ALL THE FORUM GROUPS AND WHAT NOT
JUST ONE WORD
THANKFUL FOR THIS DREAM COME TRUE
I WILL KEEP GROWING KEEP SHARING
KEEP LEARNING AND TEACHING
GOOD VIBES JAH BLESS WEED
BLESSINGS TO YOU ALL
SWEET GELATO IS BOMB
TO ME SCORE IS 9/10


Likes
46
Share


@Juschiln420
Follow
6/4 ph lst Defoliation
6/5 added 1.2L banana, 1L runtz and cookies.
Added
1ml gro
1ml micro
1ml bloom
To all
6/6
Added 1L to runtz and cookies
Lowered light to 22"
6/7 ph lst Defoliation
6/8 ph lowered light to 20"
6/9 didn't make it in room today
6/10 (Day 82)
nutrient solutions
Bloom-Full strength/ 3gal 11.5L
Micro 0.75/L =8.6
Gro 1.0/L =11.5ml
Bloom 0.75/L=8.6ml
Cal mag 1/L = 11.5ml
Bud candy 1/L= 11.5ml
Big bud 1/L = 11.5ml
Hydroguard 2ml/gal=6ml
Lowered light to 18"
Defoliation
Records kept here
https://1drv.ms/x/s!AmTQ-7u9iyH6kDFcBT1QhRk7ttv4


Likes
4
Share


@knnabisgrower
Follow
En la 6ta semana de vegetación hicimos una poda de bajos y desfoliación en general para potenciar el crecimiento de los brotes superiores, mejorando la iluminación y ventilación en el cultivo. También hicimos unos cuantos amarres (lst).
Likes
21
Share


@Sweetspot88
Follow
So I did a late top I know right? Not a perfect thing to be doing I’m allowing for another week of vegging though maybe 2.
Photos this week are a bit shitty due to high pressure lighting I will try getting some better mid to late week ones though so here is the ladies this week so far


Likes
23
Share


@gottagrowsometime
Follow
Welcome to my Apricot Auto Diary sponsored by Fastbuds & Xpert Nutrients, with Spider-Farmer lights from sponsored last Yr.
Days 49-56 Week 8, 2nd Fattening Week
She's bulking up nicely. Buds are swelling by the Day, armoa is super fruity. Defo lives up to its name. Hints of fuel (associated with a strong THC pheno). Sticky Fingers + Sugar Shot is making a huge difference in the aroma. Extremely frosty, Resin glands popping.
Nutrients
[ Master Bloom + Bloom Booster 1.5ML/L 550 core NPK grow + Bloom Stimulate, Ph 6.1 to 6.7 ]
[ Enzyme + Master Root 1ML/L 400 ppm PH 6.4, PH'ed to 6.8 ]
[ Sticky Fingers / Sugar Shot 1ml/L 300ppm PH 6.2 to 6.7 ]
[ Slica .8ml/L 200ppm 8.9 ph'ed to 6.7 ]
[ Water 105ppm PH 6.7 ]
700ml of each solution given weekly. Master Bloom + bloom booster 2x a week
DLI 52 1050PPF for 14hrs a Day.
Thanks to my sponsors, much appreciated for allowing to test your products
Appreciated to my viewers also. DISCOUNT CODE FROM XPERT NUTRIENTS 20% (code:ggst). Thanks for stopping by.
Processing
Likes
6
Share


Likes
141
Share


@Eyeduno
Follow
I hope they don’t stretch no more otherwise I’ll have bleached tops and I don’t want that anyone else stoped stretching yet what week did they stop ?
Likes
11
Share

@CannaArchive
Follow
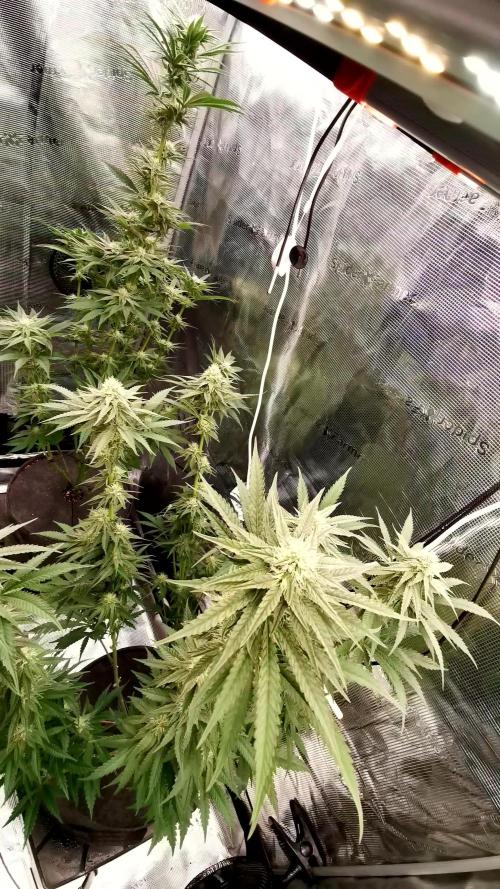
With the stretch now fully completed, the plant shifted all focus toward flower production and resin development 🌸 The overall structure remained unchanged throughout the week, confirming the end of vertical growth.
• Height remained around ~110 cm
• Stretch finished
• Bud sites developing steadily across the canopy
The plant keeps its very characteristic structure, growing compact around the main stem with shorter side branches and long stacked internodal flower sites 🌿
Resin production increased noticeably this week ✨
The sugar leaves are already heavily coated and frost development is progressing quickly for this stage of flower.
Light intensity remained high at:
• ~950–1000 PPFD ☀️
Water demand stayed consistent:
• ~4L every 2 days 💧
Feeding this week matched the Jelly Donutz schedule:
• RO water + BioBizz CalMag
• 1x Greenhouse Bio Enhancer, 1x Biotabs bio PK 5-8
Environmental conditions:
• ~24°C temperature
• 50–55% RH 🌡️
The aroma started developing more noticeably this week 👃
While still not extremely loud, the scent profile is becoming sweeter and shares similarities with the Jelly Donutz, likely due to the shared genetics.
No additional training or major structural work was needed this week, allowing the plant to fully focus on flower and resin production.
Overall the plant looks healthy, stable and very resinous already, with promising flower development going deeper into mid flower ?🔥

Likes
16
Share


@Prop207
Follow
30 grow
20 Micro
10 bloom
15 cm
15 sb
Heavy growth, robust stems, great plant all around so far, considering it emerged from its shell with a snapped stem

Processing
Likes
2
Share


@LRseries9
Follow
LA PLANTA MOSTRABA LINDOS PISTILOS . TODO ABONADO NATURALMENTE
Processing
Likes
9
Share


@Kushizlez
Follow
Day 69 (March 6th)
Just gave everyone their last watering. I’m going to harvest and wash everything tomorrow night on day 70. I‘m not going to do that whole 48 hours of darkness thing because I didn’t see a difference last time I did it. In fact, it made my plant under watered before drying which caused it to dry too fast. Slurricane and cheese will be washed with h2o2 and the rest will just be rinsed off in warm RO water and hung up. Before and after washing I’m going to go over each branch with a flashlight and make sure there is no dog hair or debris in or on the buds. I will be drying in my spare bathroom (that no one uses!) from hangers. Aiming to keep it around 60-62F and 50-60 RH. Hoping for that 10-12 day dry. I wanted to do a full plant hang but the tent got pretty dirty and I would feel more comfortable just cutting and rinsing everything off branch by branch. I’m going to try my best to keep the full plant intact. Got my humidifier hooked up and running RO water because with tap water it deposits calcium and lime all over the buds and walls. For air flow I’m just indirectly running a small usb fan. I’m not worried about air flow in the bathroom honestly. It stays nice and breezy down there anyway.
Got the food grade peroxide and RO water to wash up the slurricane and cheese. Everything except for the cheese and garlic#1 is looking more than done. Trichomes all look pretty well done. Some of them have even burst open. Smells are all super ripe and mature too. Can’t wait to smell each individually in jars.
Next week I will recap what went wrong and what I will do differently next time to keep it from happening again.
(Day 70F) Just got everything chopped, washed and hanging. The vast majority of the PM was washed out but I can still see very small amounts. When they dry out I can shake the branches a bit to get the rest off. At very least it’s sterile now. There is no question I lost some potency while washing but the amount is negligible for a much cleaner product.
I could see lots of dirt and other debris float to the surface of the water after being washed. And no those are not trichomes, those sink to the bottom. I could put that nasty water through a bubble bag and wouldn’t get all that much. Although it probably does remove a lot of the actual trichomes heads. I’ll have to check with the microscope.
Everything is rigged up for a nice slow dry. Temp is sitting at 64 and RH is at a nice 60%.


Processing
Likes
1
Share


@Dooda_mf
Follow
Grown outdoors no nutrients just tap water (about 1Gal/day) on the days with no rain... usually around noon when I can see them sag and the weather forecast doesn't predict rain for the rest of the day.
I add Terpinator (30mL/Gal) when I water manually.
•This week, since they're in full bloom and the weather cooperates (plants are outside and shouldn't rain for at least the next 24h) I will give them a dose of SuperThrive...
2020 was an exceptionally warm summer in Quebec.
Seeded on May 20th
Sprouted on May 23rd
Kept in nursery (watered with tap water + B1 vitamin (3ml/L) until
Transplanted outside June 16th
Bloomed August 19th @ 6' tall
No Technique applied, she grows as she feels the needs.

Likes
33
Share


@BADKUSS
Follow
Hello everyone!
here it is, the time has come to spend all this beautiful world in bloom ...
although one of the small is typically indica, the others int a more sativa phenotype, there is just a look at the leaves ....
here I water this week with plagron terra grow at a rate of 5ml per liter ...
here is now room for photos ...
peace ...




Likes
2
Share


@TheBudWhisperer
Follow
12 days to full transplantable roots. Right on schedule as expected. Moved 6 of the 12 clones (1 per plant) into a new 45L Rez that I cobbled together in an evening. Just small enough to fit into the cabinet. Hopefully the roots don’t choke each other out for territory while we work to reveg, re-flower and ultimately seed em all for the new F3 line. We’ll pick the best buds from the lot for the next testing run once we see what the pheno variation looks like from the main run in the tent. It’s a process and annoyance not to be yielding bud off a grow cycle but it is what it is if you want your own signature stuff. Alls good for now. Let’s just hope that the 6 coats of paint I threw on the lid is enough to keep out the grow light penetration🤞. Shoulda used black, whatever.
Likes
1
Share

@ChronicNerve
Follow
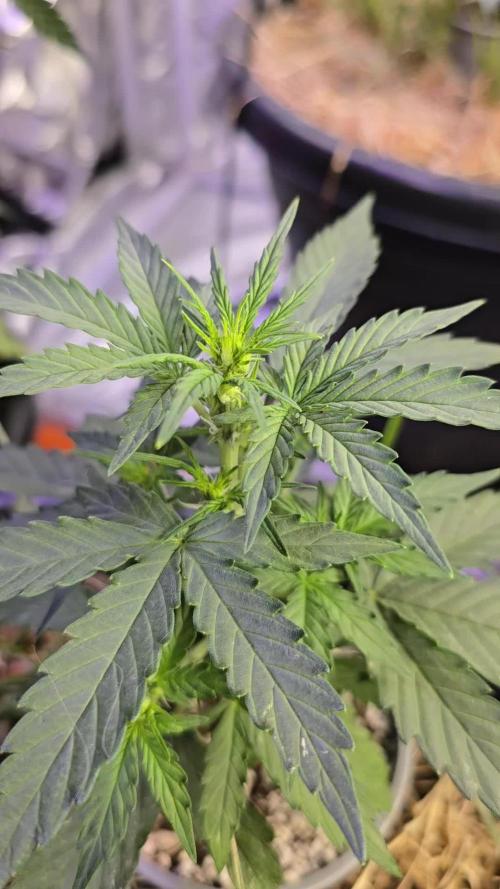
Looking nice and Uniform again. Now that they need more light than the Spider farmer 100w can give I haven now moved them into the main tent. I also sprayed them with a fish mix and alg-a-mic formulae in which they both seem to react to rather well.
Likes
5
Share


@Lazuli
Follow
I flush this plant tommorow with 40 liters rain, then ill feed her again with finalpart another 10 days and we harvest