


Likes
Comments
Share


@Filiaes
Follow
23.06
Day 59 of bloom, from now on I check the trichomes more often.
26.06
Cleaned the tank and prepared a new solution, to flush the plants, since I see enough amber trichomes developing. I still add some major nutrients. EC level is at 0.6. I will continue to flush until 04.07 - day 70 of bloom, afterwards I will waterstress them, if they are not ready already.


Likes
14
Share


@SunshineBud
Follow
This week went fairly well, but I became concerned with some leaves appearing crispyfried along the edges and some looking deficient.
I finally started cutting my girls and I have to say, I felt ashamed at wounding my babes but hopefully it'll go the right way, guess we'll see!!!
I also flushed my plants with ph Balanced water this week and going to only provide this to water/feed them for another few days for fear of nutrient burn and simply following the feed schedule for my nutrients.
Also, I took some pics for the Christmas contest for Crop King Seeds lol hope you like them more than my Paw did!
I want to send a big shout out to my Dad who is giving me advice based upon his UNCA Biology BS experiences... Thanks Paw!!!
I also want to say thank you for all the likes and interest in my grow, much love yall! See you next week!!!
What follows below is the transcribed daily notes from the images above!
12/9 Plants looking good, I fed/watered w/Sunday's Ph 6.2 6tsp/ga Big Bloom & 3 tsp ga Grow Big. Next time I'll flush. I don't know if my runoff ph is bad or good because the plants are eating leaving acidic runoff
12/10 Plant 1 looks so Good, might be time for LST soon
12/11 Plants all showing Improvement/Growth Plant 3 still slowest but she's still growing. Under grow lights I think I see fringe yellow tips. Still on track to flush w/Plain H2o next watering.
12/12 Flushing w/ PH Balanced H2O no noots. Plant 1 has a leaf turning yellow on half so went with ph balanced water w/no nuets to flush all. 3 Growing ok but still a little off looking
12/13 Moved inlet vent to point up and clip on fan to blow on girls. Plants look great after a day of plain H2O.
12/14 Plant one having a small bit of leaf burn on widest leaves and a weird dying on lower leaf. They looked bad under light so I pruned em. Turned up humidifier to 65% been running low.
12/15 Topped Plant 2 Rinsed all w/PH Balanced H2O. Nervous I took too much from #2 But my thinking was I went easy on 1 yesterday so go aggressive on 2 to view effects.
12/16 Trimmed 2 crispy leaves off Plant 1 used Bonsai paste to cover wounds, Plant 2 stem looks narrow@ base wider up top. Trimmed 2 sucker leaves (1st leaves) from Plant 4 Rinsed all w/ PH Balanced H2O
Thats it! Thanks yall, see ya next week!

Likes
2
Share

@PEAKYPLANTERS
Follow
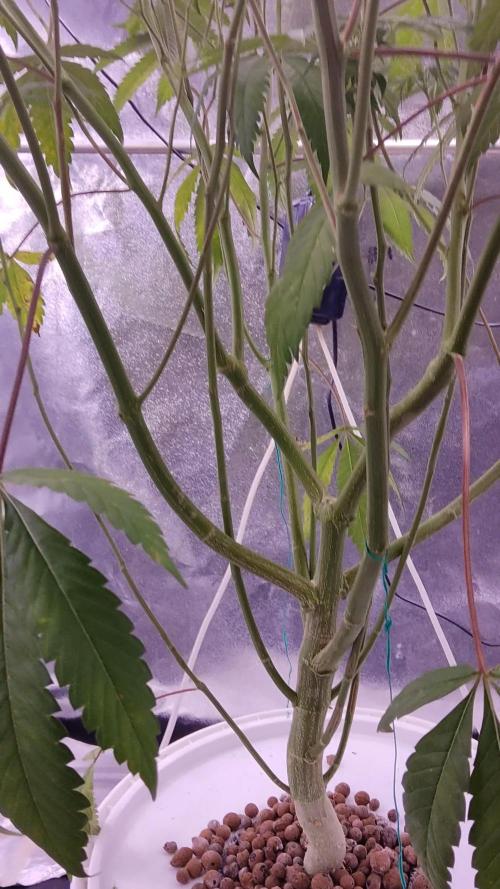
Welcome back, brothers of cultivation, here is the moment long awaited by me and this little jewel of mine, the large tent has given us the right space for flowering....we will see beautiful things
Likes
12
Share


@PhinolaGreen
Follow
10. Woche
Ich weiß noch nicht ob ganz, was ich von der Pflanze halten soll. Sie wächst ähnlich wie Apple Strudel Auto von Fastbuds und bis jetzt lassen die prächtigen Buds noch auf sich warten. Aber ich denke mal, es dauert jetzt auch easy noch 5-6 Wochen, ehe sie fertig ist. Bis dahin halte ich die Düngerlinie aufrecht. Ich verwende auch schon den Boost von Hesi, da alle Pflanzen unterschiedlich weit sind. Bei Glowberry Rush Auto muss man ja dazu noch sagen, dass die eigentlich paar Tage hinterher hinkt so 5 Tage, weshalb es auch einfach daran liegen, dass sie noch nicht soweit aussieht wie die anderen. Ich vergesse das immer wieder 😅😊💚


Likes
55
Share


@Max1973
Follow
Day 57 - The girls are bursting with flower....... looked abit light (the main tops looked a light green, showed signs of nutrient deficiencies), so upped the Dutch Master Gold One Flower, it's 1000 ppm now.... thinking about Defoliation... outside temperatures are middle of winter, 0oC to 20oC (32oF to 70oF) .... but typical high low is 5-15oC (40-60oF)......... surprisingly the LED's warm the tent upto 20-24oC,
this is important point.... i am running the lights, 6 pm to 6 am... 12hrs lights on all night, and all day is night mode...... during the day is the highest temps of the day... and during the lowest temps, they have the light heat .......
Day 61 - I trimmed em .... this was the third defoliation..... things are starting to get sticky..... ah i'm just going to wing it.... they are 2 months (8 wks) from seed.... idk what i'm doing.......
i did some serious stress bending today, and had to put afew tie downs in..... my theory is to hurt em as much as i can without killin em....
to make em harder, stronger, faster, more stressed, so they can survive anything..... grow em stronger......
the smell is zero in the home, but once i got them out for their 2 week haircut, they started producing some strong wet kisses, that were sticky and wet.... the
aroma of heavenly ladies was abundant...... 😎😎
idk... this tastes so good.... it's like some kind of weird berry combo goodness.... i'm vaping vanilla custard atm and this is so good with vanilla custard.... vanilla custard kush n cookies... haha
watch the video......... 😎
Likes
2
Share

@Growfather2
Follow
Hello everyone,
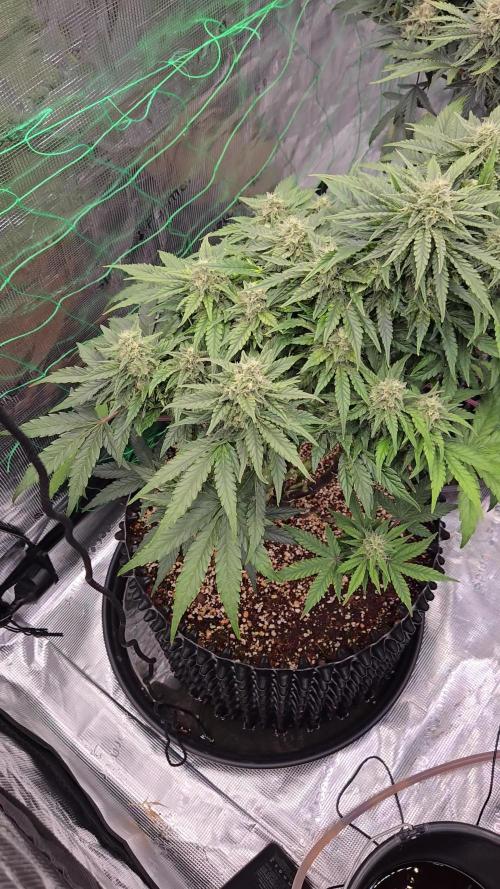
The 3 weird mystery plants are doing their thing and are still under 24 hours of light per day.
One of the 3 did receive 15ml of pk13/14 per 10 liter water the other 2 only get 3 ml per 10 liter water.
So i checked the expert seeds catalogus and don't see Afghan skunk auto seeds only feminized seeds but my 3 plants are clearly automatic flowering.
Let's see how they look next week.
Best regards,
Growfather

Likes
15
Share


@vibealive
Follow
Just started this one off... Not much to say so far.
This is a coco grow. I started off with an amended Coco using Gaia Green 4-4-4 and power bloom 2-8-4.

Likes
10
Share


@Eldorado_ed
Follow
Transplanted these ladies to there new pots and on to there new home everything looking good on to the next week see y’all then 🌱😬✌️🏻


Likes
57
Share


@MadeInGermany
Follow
Hey everyone 😀.
Another veggie week goes by and they are developing surprisingly well 😃.
Both phenotypes look very nice and have a perfect leaf green.
Both were topped again.
I wish you lots of fun with the update, and stay healthy 🙏🏻🍀
You can buy this Strain at :
https://sweetseeds.es/de/red-mandarine-f1-fast-version/
Type:
Red Mandarine F1 Fast Version
☝️🏼
Genetics:
Red Poison Auto®️ (SWS39)
X
Tangie (California Orange x Hybrid Skunk)
👍
Vega lamp:
2 x Todogrow Led
Quantum Board 100 W
💡
Bloom Lamp :
2 x Todogrow Led
Cxb 3590 COB 3500 K 205W
💡💡☝️🏼
Soil :
Canna Coco Professional +
☝️🏼
Fertilizer:
Green House Powder Feeding
☝️🏼🌱
Water:
Osmosis water mixed with normal water (24 hours stale that the chlorine evaporates) to 0.2 EC. Add Cal / Mag to 0.4 Ec Ph with Organic Ph - to 5.5 - 5.8 .
Likes
6
Share


@GoodTimesOrganics
Follow
Hi liebe Community! 💚 Heute (26.09.25) ist es Zeit die Ice Cream Haze in die Blüte überzuleiten.
Sie hat in den letzten 2 Wochen nochmal ordentlich an Höhe gewonnen und wirkt jetzt insgesamt homogener.
Der Wuchs ist sehr kräftig, daher wird der lütedünger erst nach der ersten Woche der Blüte eingepflegt.
Außerdem habe ich nun nochmal die Sonnensegel zurückgeschnitten und die unteren Triebe auf etwas 1/3 der oberen Höhe zurück geschnitten, damit die Pflanze ihre kompaktere Wuchsform beibehält.
Insgesamt ist die Pflanze sehr Vital und hat eine sehr schöne Wuchsform😉
Die Wachstumsbedingungen im Growschrank sind weiterhin am Optimum und Stabil:
———————
🌞 Temp: 26°C
🌚 Temp: 20 °C
💨 RH: 68%
VPD: 0,7 kPa
———————
Stay Tuned! 💚

Likes
144
Share


@roro_204
Follow
I received the clones from An out of province breeder.
It reached me after three days of driving on the road with no light. Their future was not certain.
I didn’t think I would need that many fans for the clones because they are so tiny, I figured they didn’t need that much maintenance.
I was 100% wrong when I’m working with this many plants.
I ended up getting mild mildew on top of the soil on the first week because there was barely any air circulation.
At this point I didn’t have any Ventilation put up yet. And one fan on the floor. I ended up installing three fans in one room. No issues


Likes
42
Share


@Siriuz
Follow
Hey guys whats up?
Weve been adding nutes
Around 600/800PPPM
And lately around 800PPM
She is growing fast and very good
RH %65/50.
Temp around 25 at day/19 at night
Happy growing everybody!!!
Enjoy :) sorry for the late update
Likes
39
Share


@eldruidamx
Follow
Day 64. Watering with fertilizers.
Day 65. Watering with clean water.
Day 66. Watering with fertilizers.
Day 67. Watering with clean water.
Day 68. Watering with fertilizers.
Day 69. Watering with clean water.
Distinct sweet smell.
Day 70. Watering with fertilizers.

Likes
3
Share


@Kingmecoop
Follow
I'm switching my nutrients from Foop to ILGM Bergman's Plant Nutrients. Shouldn't be a problem Foop works well with other nutrients. However, my irrigation lines were getting clogged and the smell. I think because I'm using small lines... Regardless I'm using 1/8 of 800ppm level=100 ppm.

Likes
40
Share


@MrJones
Follow
47th Parallel Crowly's Comet
🔹⊱╮🔹╰⊰🔹 GROW Started 03.10.24 INFORMATION 🔹╰⊰´🔹⊱╮🔹
🌞Environment - Maintaining 80F and 65%Humidity
🌾Training - Nothing this week, just letting the seedlings veg out.
⚱️3-Gallon 📊6.2 PH
💧 Feeding - Using Horti Grow 8-11-21, Bloom 5-15-26, Late Bloom 0-24-26, Cal 12-0-0
🌞Medic Grow Smart 8 760 Watts
🕷️ IPM - CannControl from Mammoth and Mosquito Bits as needed
🔹⊱╮🔹╰⊰🔹 PLANT UPDATES 🔹╰⊰´🔹⊱╮🔹
📝 Notes - These girls are killing it; they are ready to push into flower!
📝Fertigation injects fertilizers into an irrigation system to supply dissolved nutrients to crops.
🗓️04.20.24 Today I flipped the ladies into flower, Ihave let them veg out as much as I feel the grow space can hendel, I am sure there will be a bit of pruning and duper cropping in the near future, these girls will grow un touched other then the 2x daily fertigation but switching out the Horti-Grow with the Horti-Bloom, feeding at Hort-Bloom @ 2.7 GRMS Per Gal and Horti-Cal @ 2.5 GRMS Per Gal.
🗓️04.21.24 Today fed with Hort-Bloom @ 2.7 GRMS Per Gal, and Horti-Cal @ 2.5 GRMS Per Gal.
🗓️04.22.24 Today fed with Hort-Bloom @ 2.7 GRMS Per Gal, and Horti-Cal @ 2.5 GRMS Per Gal.
🗓️04.23.24 Today fed with Hort-Bloom @ 2.7 GRMS Per Gal, and Horti-Cal @ 2.5 GRMS Per Gal.
🗓️04.24.24 Today fed with Hort-Bloom @ 2.7 GRMS Per Gal, and Horti-Cal @ 2.5 GRMS Per Gal.
🗓️04.25.24 Today fed with Hort-Bloom @ 2.7 GRMS Per Gal, and Horti-Cal @ 2.5 GRMS Per Gal.
🗓️04.26.24Today fed with Hort-Bloom @ 2.7 GRMS Per Gal, and Horti-Cal @ 2.5 GRMS Per Gal.
╰⊰🔹╰⊰´🔹⊱╮🔹╰⊰🔹╰⊰🔹STRAIN INFORMATION🔹⊱╮🔹╰⊰🔹╰⊰🔹╰⊰🔹⊱╮
Crowley's Comet / https://www.47thgenetics.com/product-page/crowley-s-comet-10-fem-birdseeds
It's everyone's favorite piece of space rock, Crowley's Comet! The culmination of reversing our Matterhorn cut off Mr. Crowley to Intergalactic Runtz, and the results were out of this world (I had to do it). These ladies were slow to start, but once they hit their stride, they put any worries we had to rest. Compact, short-framed, and robust. They pack beautifully boulder-like flowers that reek of garlic and sickly sweet cotton candy. Dark green to a mosaic of purples, yellows, and silvers. Frost production is off the charts, the internode spacing is tight, and they certainly will impress in their last few weeks of flower. This is one of our favorite crosses in the new fem lineup. If you're looking for your hype fix, here you go.
Yield: Heavy to XL
Flower Time: 63 days
Feeding Schedule: Heavy
Likes
9
Share


@GYOweed
Follow
Caught the ladies trying to sell themselves in the red light district.
Gonna givem cytokinins so they stop stretching for attention.

Likes
5
Share


@GrowinMyOwn
Follow
I like my grows to be simple, clean and efficient. The Mars 2000 plus RQS top-shelf genetics, combined with the super-simple RQS organic "Easy" line of nutes is making this beautiful grow! 6 strains, 6 healthy, thriving girls. I intentionally set 2 seeds at 3-4 intervals so I can rotate air space and have 2 harvested every 4 weeks.
The organic Easy line of nutes is simple to use, clean, organic and delivers lush, healthy growth. No more mixing liquids. I feed sparingly but always give cal/mag with all waterings/feedings. I pH down water ONLY at the beginning (before feeding starts) or in between if pH runs high and I won't be feeding within 2-3 days. Feeding drops pH in coco and as nutes are consumed pH rises back to coco's neutral 7.0. Simple. I rarely water "till runoff". Lighter feedings mean less buildup. Clean. Abundant, tasty, smooth harvests is my goal and this combo delivers! I'm still enjoying last Fall's harvest of Green Gelato 😎

Likes
12
Share


