Likes
Comments
Share
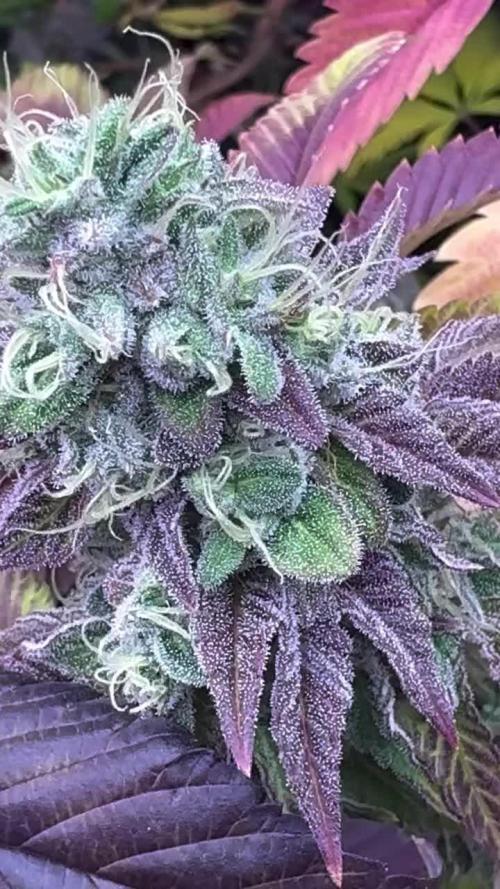
Best bud I’ve grown to date hands down. Creamy cake terps + A heavy high!!
Likes
43
Share
Day 9: they are all looking super healthy and ready to explode! I’ll just veg these fast. Let them grow a node or two more then top them all and wait some days then switch to 12/12. I’m having 9 plants in the same tent.
Likes
6
Share
Diese Woche wird weiter heruntergefahren. Die Pflanze braucht nun nicht mehr so viele Nährstoffe wie in den Wochen zuvor! Übrige Salzablagerungen werden jetzt gelöst, das führt zu einem Drift im Ph, weshalb ich mein Wasser nun auf ph5,6 senke. Inzwischen sieht es wieder besser aus, die Zkittlez nimmt wieder Nährstoffe auf und die Symptome verstärken sich nicht mehr. EC Drain - 1,5mS, Ph 6,5
Likes
24
Share
@Daweed83
Follow
Entering the last 2 weeks of nutrients before flush. Still looking very healthy to me. Growth of buds look a bit slower now but other than that all good here! :) This pollen is getting me supeeer excited 😍 🖖🏽🖖🏽
Likes
45
Share
Info: Unfortunately, I had to find out that my account is used for fake pages in social media. I am only active here on growdiaries. I am not on facebook instagram twitter etc All accounts except this one are fake. Hi everyone :-) Another great week that is going by. I still haven't started exercising that's what I'm doing this week. I will also repot it again in 15 liters this time so that my assistant has to pour less on vacation :-). Otherwise, as always, everything was cleaned and refilled. Have fun and stay healthy 🙏🏻 You can buy this Strain and Nutrients at : https://greenhouseseeds.nl/ ☝️🏼☝️🏼☝️🏼☝️🏼☝️🏼☝️🏼☝️🏼☝️🏼☝️🏼☝️🏼☝️🏼☝️🏼 Green House Seeds Company Cup Clone 🏆 Type: Wonder Pie ☝️🏼 Genetics: Wedding Cake x OG Kush 👍😍 Vega lamp: 2 x Todogrow Led Quantum Board 100 W 💡 Flower Lamp : 2 x Todogrow Led Cxb 3590 COB 3500 K 205 W 💡💡☝️🏼 Earth: Canna Coco ☝️🏼 Fertilizer: Bio Grow Feeding ( GHSC ) , Enhancer ( GHSC ) , Bio Bloom ( GHSC) ☝️🏼🌱 Water: Osmosis water mixed with normal water (24 hours stale that the chlorine evaporates) to 0.2 EC. Add Cal / Mag to 0.4 Ec Ph with Organic Ph - to 5.8
Likes
13
Share
@Mastr
Follow
This week they preflowering and this strain very fast flowering just bit short and she won't strech much in preflowering Day 49 end week 7 both plant very bushy and healthy
Likes
5
Share
@SgtDoofy
Follow
Mar 14 Looking okay. Flowering started this week! Some leaves are looking like they are being sacrificed by the plant. The top leaves being so thin makes me wonder if the lights are too intense. I've lowered them from 80% to about 60%. Fed 3/4 gallon of RAW GROW 6 days ago. Seems to have taken it well. Getting close to needing another drink.
Likes
20
Share
🇩🇪 22.2. Tank war leer also neu aufgefüllt wir haben beginnen mit Fade und dem spülen der ladies. 18.2. die Endphase läuft, Blüte Dünger weiter reduziert und nochmal PK erhöht. 🇬🇧 2.22. The tank was empty, so we refilled it and started with the fade and flush the Ladys. 2.18. the final phase is underway, flowering fertilizer further reduced and PK increased again.
Processing
Likes
6
Share
Likes
15
Share
Height growth has stopped completely on plants 2, 3, and 4. Plant 1 is now at 22inches and most main tops breaching the trellis. Picked up some Full Tilt from FloraFlex to start throwing at them this week as they begin flush and start to finish out. Still running 3 grams per gallon(0.6 tsp per gallon or about 1 tbls per 5 gallons) of the B1&B2 from FloraFlex. This week I will begin cranking the tsw2000 from 75% slowly to 100% over the week and try to finish these girls out under the full 310 watts. Today I put it at 80% resulting in the highest tops on plant 4 around 500-550PPFD while the tops on 2 and 3 are receiving about 350 and plant 2 is receiving about 250. Will continue to increase the intensity and monitor their response. Hopefully in the next week or so we will start to see some color change and perhaps that runt will show us what she's been hiding. See ya in week 10!
Likes
Comments
Share
@deseed_uy
Follow
Llegó la cosecha, salió poco por factores climaticos pero muy buena calidad y exquisito a pesar del poco lavado. Muy contenta con el resultado iremos mejorando
Likes
3
Share
Día 36. Estamos en 6ta semana. Los esquejes se atrasaron debido a que han sido días muy fríos y no he logrado enraizarlos. Decidí poner el extractor de aire junto con la bomba de aire, así solamente se prende 15 minutos cada hora. Así estoy logrando temperaturas mayores a 24°C en el indoor y así voy a lograr el enraizado. La planta ya tiene un tamaño que ocupa casi todo el indoor. Pero lo importante es que la voy guiando y ya estoy proyectando como va a ir cada rama. El tamaño va a exceder lo que esperaba, pero aún así creo que si logro lo que tengo en mente, voy a sacar muy buenos resultados. Igual no me voy a arriesgar demasiado, así que si contando 10 días desde ahora, no logro que los esquejes enraicen, voy a pasar la madre a floración sola. Cómo pueden ver, las ramas están bastante gruesas, y el la ramificaciones van ganando su lugar cada una. Las raíces son demasiado grandes, aunque sé que voy a poder poner la planta en el sistema de arriba igual, aunque me voy a tener que ayudar de algo para meterlas. Es importante no utilizar las manos, ya que se pueden transmitir muchos hongos. Voy a seguir actualizando e ir viendo que pasa. Pero ya estamos en los últimos días de crecimiento, haya o no esquejes. Incluso puede que ya pase la planta al indoor de arriba para darle mayor libertad de crecimiento. Esto me va a servir para tlmar en cuenta en la próxima camada que se vendrá. La idea de esto es hacer las cosas rápido, y no en gran tamaño. Pero siendo que ya estoy en el baile, no me queda otra que bailar. Día 40 Los esquejes no estaban enraizando, así que decidí cambiarlos de lugar y los puse arriba de la luz, donde les da calor y luz tenue. Espero que ahora si agarren. Y hoy fue el gran día, pasé la planta madre al módulo de arriba. Pero lo voy a dejar una semana más creciendo. De esa forma veo si los esquejes llegan a agarrar a tiempo. Y además tuve un problema en el trasplante. Primero que la planta se hizo más grande que lo esperado, y la raíz también. Cuando la pasé, hubo contacto de la raiz con prácticamente todo lo que había cerca. Sumado a que se enredó en el oxigenador, así que quedó una pidra difusora en la raíz. Dado el alto riesgo de haberla contaminado con algún hongo, le puse una solución de agua con agua oxigenada, recirculando continuamente, para lavar las raices y de paso bajar el stress de teansplante. Mañana veremos cómo arranca el día. En el aprendizaje me llevo que en la madre, es mejor hacer un corte en el primer nudo, o dejar las ramas del segundo y quitar las del primero. Y así que queden sólo dos ramas, para luego dejar a los esquejes en el medio. Eso planeo hacer con la próxima variedad. Entre tanto ahora sólo me preocupa que la raíz no se haya contaminado en el traspaso. Ya en 8 días estaré pasando a floración si no hay esquejes. Si llegan a agarrar, habrá que dar unos días de crecimiento hasta que alcancen a la madre en altura. Pero ya está todo en definición. Ahora sólo queda esperar y seguir guiando a la planta. Ya tengo ganas de poner la próxima, pero falta bastante para eso. Tengo 10 semanas de flora, así que recién en 5 semanas voy a poner la nueva madre.
Likes
5
Share
@Ensign420
Follow
Greetings fellow growers 🖖 and welcome to my first grow ever. This adventure actually started several months ago when I decided to stop buying flower from dispensaries and just grow my own bud. How hard can it be!? This is actually my second seed of this strain. The first bean sadly died due to over watering (sorry girl, RIP). I was literally watering the cube to the point where water was dripping from the bottom, then heavily sprayed the humidity dome and tray with the vents completely closed. Everyday. Multiple times. I never let the dome or try dry out. So after about 8 days of not sprouting, there was a funky smell of rot. So that was that. Later I learned that rockwool retains a lot of water and can easily drown seeds. So a wet/dry cycle is best for rockwool germination. So even after hours of researching and digging through forums and tutorial videos, I was still under prepared for this journey. Did not consider how delicate the germination phase is. Oh well. Lesson learned. Reset and try again! I hope everyone is safe and stoned during this corona crisis. Just like everyone else in the world, I want this pandemic to be over with. But in the meantime, let's grow some weed! 🖖 [START OF WEEK 01] Day 01 - Monday - 08/03/20 - Total Days: 001 ----------------------------------- - [0830]: Light Schedule: 24Hrs/0 --- Soaked cube in 5.5 PH water for 10 min. Did not shake water out. --- NO NUTES! Only PH'd down to control the PH levels. --- Did not use the default hole (way too deep). --- Flipped cube upside down and made a shallow hole for the seed (less than 0.25" deep). --- Placed seed in and pinched hole close. No additional water added. --- Sprayed the tray and dome with straight water (5.5 PH). --- Vents are cracked opened a for ventilation (about 1/4 opened each). --- Distance between the light and tray was 53" --- AC was set to 80 °F --- Exhaust fan was set to 86 °F --- Room average temp was at 85 °F --- Dome humidity was at 85-99% when sprayed. --- Allowing to completely dry before respraying. - [2200]: Dome and tray were completely dry! Sprayed only tray and dome with more water. Day 02 - Tuesday - 08/04/20 - Total Days: 002 ----------------------------------- - [0845]: Sprayed dome and tray in the morning. Everything was dry. --- Hoping for the best! - [2130]: Everything was dry again, so sprayed dome and tray at night along with a light spray on the cube. Day 03 - Wednesday - 08/05/20 - Total Days: 003 ----------------------------------- - [0830]: Everything was dry again. Resprayed dome and tray. Slightly sprayed cube. - [2125]: Hooo damn!! She popped! Am little stub is visible! Resprayed dome and tray again. --- Still going 24/0 for lights. - [+0033]: Just checked up on her and I swear she grew a bit taller! Getting excited! Day 04 - Thursday - 08/06/20 - Total Days: 004 ----------------------------------- - [0845]: Wow! Went from a little stub to fully sprouted overnight! Everything was pretty dry again so resprayed dome and tray. - [2200]: Tap root is visible! Over 1" long too! Just resprayed dome and tray again. -- Going to prep for hydroton transplant tomorrow! Day 05 - Friday - 08/07/20 - Total Days: 005 ----------------------------------- - [0930]: She keeps growing! -- Added a bit of CalMag to the spray bottle (8 drops to 650ml of distilled water). Resprayed dome and tray. Water was at a 5.4 PH with 141 PPM. - [1045]: Prepped the bubble bucket with 4.5gal of water. Water is high enough to reach about 0.25" above the bottom of the net pot. --- Added 3 drops of Superthrive --- Added 3.5ml of CaliMagic --- Added 2ml Hydroguard --- Then PH'd down to 5.6 --- Solution Strengh: 120 PPM --- Water chiller is set to 20 °C - [1100]: Transplant time! --- Filled the net basket 1/3 with hydroton. When placed in the bucket, air bubbles are not visible, but are slightly below the surface (slight digging will reveal the water/bubbles below). --- Removed plastic on rockwool cube and placed in basket, then filled around and covered with hydroton. Making sure to block any light from passing through the net pot and into the nutrient solution. --- Covered with a half-bottle dome sprayed with the CalMag water from earlier. --- Hoping for the best! - [1300]: Raised Bucket 5" higher. Now light distance is 48" to top of bucket. - [1820]: Lowered tent exhaust temp to 76 °F --- Lowered AC to 75 °F --- Raised bucket even higher so light distance is 30" to top of bucket. - [2300]: Looking good! --- Sprayed dome and surrounding hydroton with more CalMag water. --- Attached timer to light! So new 18 Hrs On/6 Hrs Off light schedule. --- Lights On: [1600] (4pm) --- Lights Off: [+1000] (10am the next day) --- Decided to go with lights on during the evening/night and off during the later mornings/afternoon (the hottest part of the day) to see if temps can be controlled better. --- Please survive girl! Day 06 - Saturday - 08/08/20 - Total Days: 006 ----------------------------------- - [0800]: Everything was dry. Resprayed hydroton and dome. - [2000]: Here first night cycle seemed to go well! Get'n taller! --- Dry again. Removed the dome. --- PH went up to 6.5 so PH'd down to 5.7 --- Ran the top feed drip ring for a bout a minute to wet the hydroton and rockwool with the nutient solution. ---Too scared to leave the top feed on 24hrs (I don't want over water her and cause dampening-off). Will let dry before re-watering. - [2100]: After closer inspection, I think she's looking a bit yellow. --- Decided to add a bit of grow nutes to the bubbler solution. --- Added 2ml of Sensi Grow A --- Added 2ml of Sensi Grow B --- Solution strength after adding more nutes: 176 PPM --- PH went up to 6 --- I hope that the extra chelating properties of the 'PH Perfect' solution is enough of a buffer for proper nutrient uptake. Day 07 - Sunday - 08/09/20 - Total Days: 007 ----------------------------------- - [0800]: Water dropped a bit (mostly due to evaporation) so solution strength was at 190. --- Checked PH again. Was still at 6, so PH'd down to 5.4 --- Ran the top feed for a minute to wet the hydroton a bit. - [0915]: Since she's looking perky but still a bit yellow. So decided to up the nutrient concentration even more before lights out. --- Added 2ml more of Sensi Grow A --- Added 2ml more of Sensi Grow B --- Solution strength after adding more nutes: 199 PPM --- PH went up to 5.8 - [1700]: Checked nutrients. --- PH: 5.9 --- Solution strength: 202 PPM --- Added 4ml of Voodoo Juice --- Added 4ml of B-52 --- PH after adding more nutes: 5.9 --- Solution strength after adding more nutes: 238 PPM - [2130]: Decided to make a new foliar spray to address the continued yellowing. --- Started with 500ml of distilled water. --- Added 3 drops of CaliMagic --- Added 3 drops of Sensi Grow A --- Added 3 drops of Sensi Grow B --- Added 3 drops of B-52 --- Added 1 drop of Superthrive --- Solution strength: 164 PPM --- PH was at 5.9 and did not adjust. --- Gave her one spray. --- Also sprayed the surrounding hydroton. [END OF WEEK 01]
Likes
5
Share
My first outdoor grow. This is around week 9 of growth. I got these 2 clones from someone and grew them indoors for about a month or so before hardening them off. They have been through plenty of training and topping and even more since this picture. As of 5 days ago they were nice and wide so I'm excited to see the growth since the. I have done a great deal to keep deer and bugs at bay. Neem oil, dog and human urine, dried blood, ground pepper and powdered, oregano, garlic and onion. The site is very difficult to access. Poison ivy, thorns, steep ravine and large logs to climb over. No paths there and I take different ways constantly, as well as through some fertilizer in my wake. There's a small creek near by and a larger one it fees into about 75 yards away. There's 3 bags of FFOF and 1 bag happy frog between the 2 holes, with amino acids and great white mixed in as well as some water polymer crystals.
Likes
9
Share
Ciceklenmenin 4. Haftasina girerken fosfor ve potaayum agirlikli gidilip azot gubresi artik azaltilicak. Herhangi bir sorun yok isigin tek bitkiye yetersiz kalmasi ve koku problemi disinda :)
Likes
6
Share
Que pasa familia, vamos con la quinta semana de floración de estas Drizl Pickl feminizadas de Seedstockers. Vamos al lío ,se trasplantaron en macetas de 7 litros definitivamente. El ph se controla en 6.0 , la temperatura la tenemos entre 24/20 grados y la humedad ronda el 50%. El ciclo de floración puse 12h de luz, el foco está al 80% de potencia. De momento van creciendo a buen ritmo y tienen un buen color. La flor coge forma y se empieza a. Llenar de tricomas. Agradecer Agrobeta por el envío del kit gold series para esta temporada, son unos jefes 🙏 - os dejo por aquí un CÓDIGO: Eldruida Descuento para la tienda de MARS HYDRO. https://www.mars-hydro.com Hasta aquí todo, Buenos humos 💨💨💨
Likes
8
Share
Only Compost tea mix Worm,cow,fish, rabbit, chicken, two pieces deployed late
Likes
2
Share
@EtnoGrow
Follow
bueno se hizo una por primera vez una cosecha por partes, como indicamos en el post anterior, se cosecho los cogollos donde la luz pegaba mas al parecer y estaban mas desarrollados, la cosecha fue con tricomas blancos tendiendo a transparentes con pocos ambar, en opinion ya luego de una semanas y una segunda cosecha, es que cosechamos pronto por temor al pasarnos al ser primera vez, entonces posiblemente nos apresuramos un poco ligeramente o confundimos los tricomas tendiendo a ser transparente por los blancos que es lo que indica la teoria el punto de corte, pero no nso quejamos quedo genial! subiremos el segundo punto de corte luego de 2 semanas . LAS ULTIMAS FOTOS LAS DE LAS 2 SEMANAS MAS 2DO CORTE.
Likes
8
Share
All photos are fromDay 35 for Sour Jealousy from FB, the growth is absurd, she is already 5ft tall, no LST, no Defoliation at all!! Pre flower stretch is going on, which scaries me, is she going over my tent size? hahaha
Likes
24
Share
NOTES: Keeping the pH between 5,8-6,0 and EC at around 1,4-1,6 depending on system. EC at 1,5 seems to be optimal and my measurements are staying pretty steady at that level. Humidity is lowered to around 50% if I can. The tops are now at around 45-60cm height from the soil. Continuing the last heavier defoliation/pruning process that I started yesterday at the end of 2nd flowering week. I saw no signs of mold or any other issues as I went through the plants. After this week I'm going to change the nutrient solutions on the tanks and fill them with fresh nutrients with minor changes: Dropping the amount of Grow from 1,5ml to 0,5ml and increasing the amount of Bloom from 1,5ml to 2,5ml. After the change I'm only going to refill the tanks without adding any Grow and will instead increase the amount of Bloom to 3ml. Propably a one more change of fresh nutrients until flushing with Final Solution prior harvesting. Day64 (19.12.) Some more defoliation focusing on the upper growth revealing bud sites below them and keeping off the moisture. Already got a trash bag almost full of leaves since they've been pretty bushy plants on average. Day65 (20.12.) Continuing the last defoliation process. Day66 (21.12.) Continuing the last defoliation process, pretty satisfied with the results so far. Light penetration and airflow have increased greatly so I don't have to worry that much about humidity or possible mold any longer. Each strain has started flowering, all plants are females and buds have started to develop. Defoliating didn't seem to stress the plants as much as I thought it would. Day67 (22.12.) Day68 (23.12.) Refilled and added some nutrients with a stronger Bloom/Grow -ratio (~4:1) and left my girls to enjoy the Christmas Holidays as I did. I'll be gone for around three days, after that I'll change to new fresh nutrients as I mentioned before. One Ayahuasca Purple seems to be ahead of others, and a few other ones have clearly started to develop some buds too, rest of the plants are following closely behind. Each strain has some truly astonishing individuals, and I think Ayahuasca's have shown most variety between different plants. Overall everything looks pretty good I think. Hopefully can say the same after a couple of days as I come back. Happy holidays everyone! Day69 (24.12.) Day70 (25.12.) I added another Led light to my tent just before the lights turned off. Everything looks amazing!