


Likes
Comments
Share


@Stecl
Follow
hätte den Pflanzen 1 Woche mehr Zeit geben sollen für das reifen der Trichome

Likes
13
Share


@caliboyyy22
Follow
what's up people I'm back whit another grow sorry it took so long but I am officially back with the weekly updates in this video the girls are a day old. but thanks for stopping by and stay tuned for the next update✌️


Likes
5
Share

@BasedBuds_89
Follow
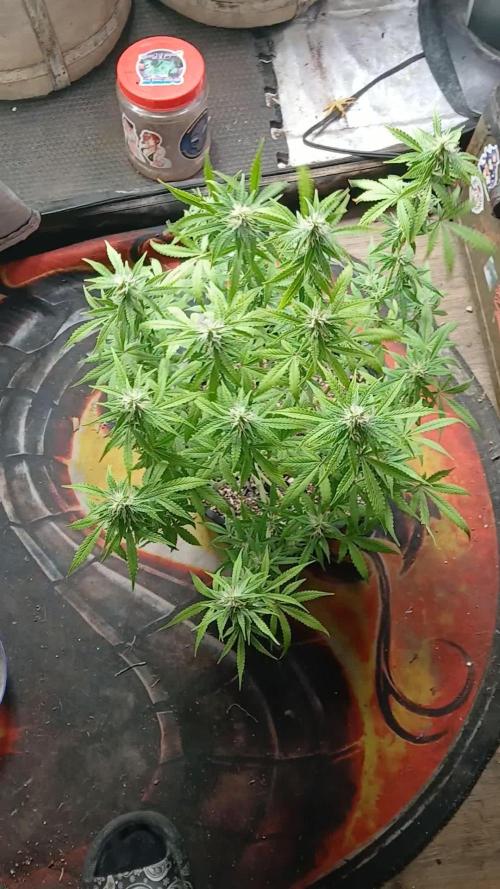
So I added a bit of calmag and nitrogen with little to no results. I let the roots soak overnight as well. Im convinced that it's the grow medium, I plant to transplant into a bigger pot with fresh soil to see if it helps the lockout. Im running out of room in my tent lil.

Likes
14
Share


@Curbyourenthusi
Follow
********************************************************************
START OF WEEK
Went to the grow store and wound up with an AC Infinity EVO6. It should be a nice light for the future, and when my warranty replacement comes back, assuming that won't be an issue, it'll be nice to have a decent back-up. That's the bright side, but I am a little bummed about laying down the cash with ten to 14 days left. That part is the kick in the nutes. Fine, moving on.
As for the grow, it's plowing forward. These plants are doing all the things we want them to do right now. They're getting fat, they're getting sticky, and the fade is fading away. Some branches may call for some last minute support, but for now the sucked-in tent walls will continue to suffice. The feed is still at 1100ppm and pk boosted, but the plan is to finish this week around 750.
********************************************************************
END OF WEEK
Day 63 of flowering has arrived. I've backed off the nutrients. We're now sitting at 850ppm with about 6-8 gallons in the system remaining. This should equate to a Thursday refill with no feed, and then a Saturday or Sunday chop. VPD has been running a touch high this week, but that's not a concern. It's staying in the ideal range for most of the lights on period, and then trailing up in the last few hours to around 1.7-1.8. No biggie. The new light is really nice, but it runs hotter than the combo of the S22 and S44 (500W total), and that's with the EVO6 driver outside of the tent. This also isn't a big deal. The max tent temp is around 84, and before that wouldn't get past 82. Not a huge difference, and potentially better for the plants with the additional heat. I've got two CO2 mushroom bags in there, so more temp should mean more production at that level.
I'm excited for this grow to finish and I'm looking forward to sampling the variety. I'm definitely using half, if not more, to make bubble hash. I'm probably just going to run it all together, as opposed to having runs for each pheno. I'll sample the tops independently, and smash rosin by pheno, but I'm not sold on isolating the hash. Seems like triple the work, but I've got a week to make further considerations, so we'll see.
This will be my last grow until I sell this place and move into my next place. I'm going to miss growing. It's brought me a ton of peace by giving me something to anticipate, study, and take pride in. It's such an enjoyable hobby. I'll miss it in the time being, but I'm grateful that I won't need to step foot inside of a dispensary in 2024. Big win there! Everyone should grow their own.

Likes
7
Share


@StonedandSteady
Follow
Happy Growing Everyone!!! It's been a few days since I gave the Ladies thier 1st Feed of #HumboldtCountysOwn Nutrients and some Loved it a little Better than others but that's Alright! We'll definitely Grow back to everything here soon! I can't Wait for May 1st to Flip to Flower and to Celebrate my Wonderful and Beautiful Wife's Birthday!
10th w/ Veg Update #Pre-Sexed🚺 #SuperCropped
Good Day and Happy Growing Everyone! These Ladies are Growing into thier 11th Week of Veg and Looking Totally Tight and Phenomenally *Femed* from the Right!
#Pre-Sexed 4/9/21 #Opium/#PabloEscobar *Fems* breed by Team #DivineSeeds #DivineSeedsSquad #DivineSeedsBreedingCompany and #SuperCropping continued! I'm Very Excited and Extremely Gracious!!!
Heck Yeah Growmies and Growmets!!! Check Out these Confirmed Females with thier Wild Pistol Hairs popping and I'm still Training and Widening them Out with #SuperCropping Everything looks Expanded and Growing Great!
After #SuperCropping the plant will Grow Bushier, Produce More Buds, and possibly even Produce More THC! This is how the plant naturally responses to danger and protects itself! Growers take advantage of this technique to get Bigger Yields and More Potent Buds than would be produced otherwise!
Getting Trained out into thier 9th Week of Veg and Looking Mighty Fine!!! Thier getting Humongous and Hearty in thier 10 gallon Grow Bag from Broski #www.as420.ca These Cannabis plants are Camping out in the Closet for a week or so! Lol
This is my 2nd run using the Osree.Light QB1000w and Everything is Mesmerizing!!!
My #Opium and #PabloEscobar *Fems* from #DivineSeeds Regs: SalamiLegF3's×2 and FireAlienRomulan look$ Outstandingly Awesome and Growing Up Phenomenally Fine into thier 11th week of Veg in our 2- 10 gallon The Grow Bags from Broski #www.as420.ca and also 2- 5 gallons as Well! Our others are Super and Breed by #thehumancannabiniod #AlienBloodGenetix #TNBNaturals #Foop
Yo!!! Thanks Again for All the Love and Support my fellow Growmies and Growmets!!! These Magnificent and Magical Ladies were Growing in our 48×24×60 ViparSpectra Official Club 🌿 ®️ Grow Tent and under our #Osree QB1000w and #GrowStarStore Kokokala QB1000w and our Lavender×3, Sunflowers×5 and The 6 Brand New and Fresh Starts are Wonderful with a Huge Hint of Fantastical Fire is my #SalamiLegF3×2 by Broski #thehumancannabiniod #DankFlowGenetics #EastCoastSeedBank #FireAlienRomulan by Broski #AlienBloodGenetix my #PabloEscobar and #Opium by Team #DivineSeeds #DivineSeedsBreedingCompany We Grow with #Growatt 600w with #FoopOrangicBioSciences and #TNBNaturals The Enhancer Co2 Despersal canister and ph'd them w/ Declorinated watering w/ TNB ph Up and Down! Totally Top Quality Topz all Around! Thanks Again #GallowGlas420 #HarleyGrower #thehumancannabiniod #AlienBloodGenetix #TNBNATURALS #FoopOrangicBioSciences #www.as420.ca #divineseeds #divineseedssquad #divineseedsbreedingcompany #BioFlux Family's and Teams!!! Your Genetics are Merry Magnificent, Mega Marvelous and Mighty Medical! Love um!!! I really Can't stress enough how Thankful and Grateful I am of All of you and what you've Shared with Us! Means the World!!! It's definitely a Pleasure being able to Grow with these Phenomenal Grow Lights! Please Enjoy! BudBrothers4-Life! Cheers Famz!!! Much Props and Much Topz!💯🔥 #Osree #GrowStarStore #Growatt #TNBNaturals #TNBTeam #FoopOrangics #GrowYourOwn #Bliss
HumboldtCounty'sOwn:
Email: info@humboldtbottling.com
Phone: (707) 725-4119
Toll free: (866) 872-9434
Humboldt Bottling
Po Box 429 · Fortuna, CA 95540
HumboldtCounty'sOwn Website Link: https://humboldtcountysown.com/
HumboldtCounty'sOwn Instagram Link: https://instagram.com/humboldtcountysown?igshid=1qj809qkkwych
https://instagram.com/divine.seeds?igshid=1r90iwe9xiwz8
https://instagram.com/thehumancannabinoid?igshid=17k159pumklkq
https://www.instagram.com/alienblood_genetix_official/
https://instagram.com/as420.ca?igshid=1f116alw054wp
The Grow Bags: https://www.as420

Likes
39
Share


@eldruidamx
Follow
Day 57. Watering with clean water.
The light schedule has been changed (12x12). Replaced lamp.
Day 58. Watering with fertilizers.
Day 59. Watering with clean water.
Day 60. Watering with fertilizers.
Day 61. Watering with clean water.
Day 62. Watering with fertilizers.
Day 63. Watering with clean water.
Likes
5
Share


@420DeepGrow
Follow
📆 Semana 6
¡Qué semanita se ha marcado la Grease Monkey!
Ya se nota que está bien metida en floración: los cogollos empiezan a coger buena forma, cada vez más apretados y resinosos. Tiene ese rollo pegajoso que tanto nos gusta, y las hojas cercanas a las flores ya brillan con tricomas por todos lados.
Estoy siguiendo con la gama de XpertNutrients, que le está sentando de lujo. No he tocado mucho la receta esta semana, solo afinando un poco el riego para adaptarme al ritmo que lleva. Se nota que está en su punto dulce.
Los Adlite siguen demostrando que son una inversión top. Gracias a la buena distribución de luz, incluso las ramas secundarias están desarrollando cogollos decentes, no solo las puntas.
En cuanto al ambiente, las temperaturas se han mantenido suaves, entre 22 y 25 °C, y la humedad está en torno al 55%, un poco más alta de lo ideal, pero por ahora sin señales de problemas. Estoy ventilando bien y con el ojo encima por si acaso.
El aroma empieza a ser un espectáculo: dulce y cremoso, con ese fondo a gas tan típico de la Grease Monkey. Los tricomas están en su mayoría lechosos, así que aún queda tiempo para que siga engordando y afinando perfil.
Crecimiento firme, flores con presencia y resina a punta pala…
¡Seguimos creciendo fuerte! 💪

Likes
13
Share


@CanabisLoverHobbyGrower
Follow
Great week,.. put some real size on and can honestly see the buds growing daily, check and feed in a morning and at night and can visibly see a difference,.. ones gone purple ones stayed green but both look healthy, really happy so far, roll on next week 👌

Likes
2
Share

@blaze_fpv
Follow
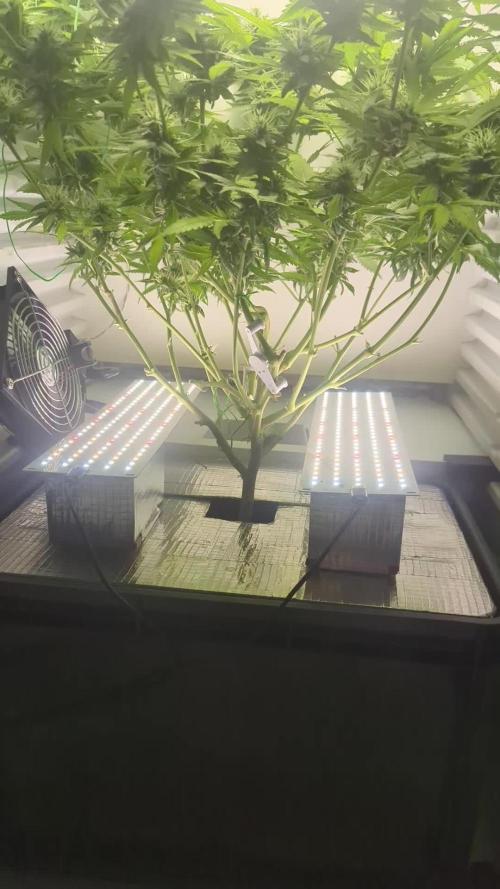
Pictures are from end of week 6 | buds are insanely fat 🤘🏼 | the plant is an absolute beast compared to my last run | buds are still growing each day | used some yoyos to adjust the canopy a bit | under canopy light seems to do its job quite well | lower buds are also developing really well | I think this will be a huge harvest

Likes
10
Share


@Dthebudguy
Follow
We got life and two are getting closer I’ll use this diaries for one only


Likes
9
Share

@All_our_small_plants
Follow
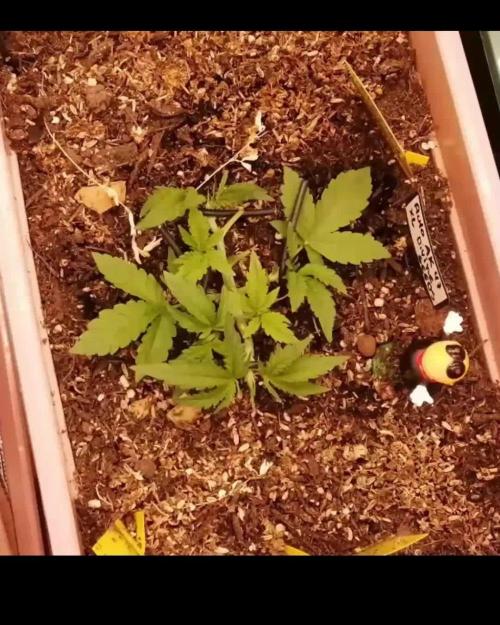
Bewässerung: 1000ml
pH-Wert: 5,8
EC-Wert: 0,6
Temperatur: 30ºC
Luftfeuchtigkeit 55%
Schädlingsbekämpfung:
PPFD: 200 µmol/m²/s
DLI:
Düngemittel:
Besonderheiten: Wurden direkt in die erde gepflanzt in einer Kokos-Quelltabletten.
-Tag 23 sie hat heute etwas Wasser mit Effektive Mikroorganismen bekommen und sie war beim Friseur 😍
-Tag 25 Sie hat sich gut vom LST erholt und Wächst weiter sehr schnell, so konnten wir heute schon wieder mit dem LST weiter machen.
Sie hat heute Wasser mit Dünger bekommen.
-Tag 27 Sie hat heute wieder etwas Dünger bekommen und war beim Friseur 😋
Likes
23
Share


@Firepharmer
Follow
Everything’s looking beautiful !! 2 weeks in .. not a lot of different between the two nutrients canna and remo , I cut of the canna rhizotonicxp and cannazym just using canna coco A&B and canna boost I’ll use canna pk1314 half way through week 4 and half too the end of week 5 .. remo nutrients I use all 6 nutrients...

Likes
8
Share

@eldruida_lamota
Follow
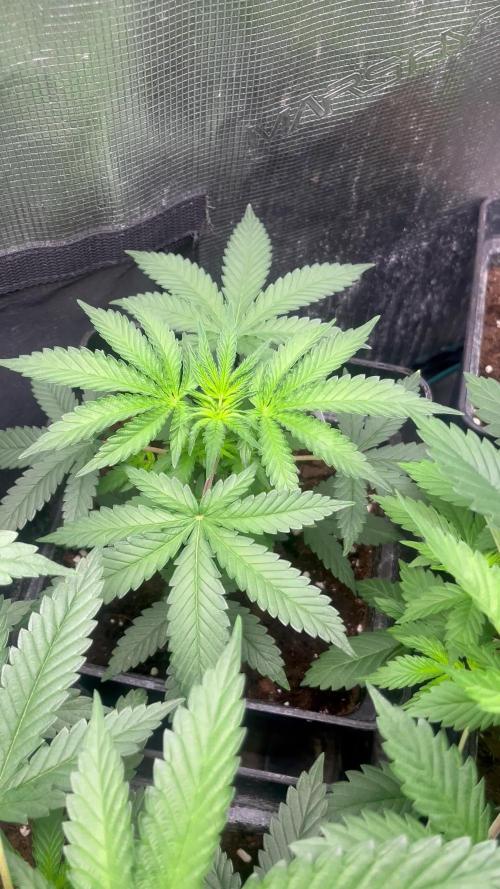
Venga familia que vamos con la quinta semana de vida de estas Wedding Cake de RoyalQueenSeeds.
Al lío, Las plantas están en macetas de 7 Litros, con tierra top crop mezclada con fibra de coco 90/10, y tienen un color verde espectacular.
El ph se controla en 6.5 la temperatura la tenemos entre 23/25 grados y la humedad ronda el 50% gracias al humidificador.
Los riegos actualmente se aplican 600 ml cada 48 horas, y suelo alimentar una vez a la semana.
El ciclo de luz se cambiará la próxima semana a 11/13 por probar algo distinto, el foco está al 65% de potencia.
Estoy utilizando preventivos una vez a la semana y coloque tiras de color azul y amarilla, no tengo plagas pero para prevenir que nunca se sabe.
- os dejo por aquí un CÓDIGO: Eldruida
Descuento para la tienda de MARS HYDRO.
https://www.mars-hydro.com
- los nutrientes directamente desde https://agrobeta.com/agrobetatiendaonline/36-abonos-canamo
Hasta aquí todo, Buenos humos 💨💨💨

Likes
36
Share


@Grey_Wolf
Follow
High Level Again
Eva seeds High level
17th January 2022
We had an awesome thunderstorm yesterday afternoon ( see video ) it was amazing how quickly
the temp dropped when that rain started . 😍 sweet relief!!
Paying for it today a little because it is quite humid but in this area it will be very dry again before long.
I gave it some enhancer from greenhouse feeding along with the weekly myco 👊
Did a little defol of the older leaves and lowest branches .
Thanks for stopping by 👍

Processing
Likes
22
Share


@CenturionGrower
Follow
19/07/20 (Sunday)
7AM - Set 4 seeds to germinate in cups of water (Trinidad and Tobago, St. Vincent and the Grenadines, Jamaica, Columbia)
7PM - St. Vincent and the Grenadines seed shows taproot
9PM - Trinidad and Tobago seed shows taproot
10PM - Seed from Jamaica shows taproot
11PM - Set the 3 germinated seeds into individual half gallon pots filled with promix.
20/07/20
11AM - SVG seed rises to the soil level
8PM - Jamaican follows suit
11PM - TT also exposes itself
21/07/20
The weather and forecast for the week show scattered showers and the seedlings are showing early signs of stretching so I decide to build a makeshift grow tent to supplement their light cycle while bringing them outside for a minimum of 4 hours every day to acclimate them. I decided on a 75W output LED bulb with a temperature of 6500K and 1055 lumens while using my room fan to simulate wind for healthy stem growth.
22/07/20
The plants show slowed stretch symptoms but still not to the level I want, so I revamp the 'grow tent' with reflective material (crumpled aluminium foil for more reflective surfaces) and upgraded the bulb to a 100W output LED with the same temperature and a higher luminousity of 1350. One cotyledon on the SVG strain was broken but not completely sheared off, but I'll leave it to its own devices.
23/07/20
Columbian seed has yet to germinate so I added another from my backups.
24/07/20
Seedlings have shown normal rates of growth so I think the current grow tent is sufficient. When I took them outside they endured light gusts and rainfall for a half hour during their sun bask. I decided to add foil to the door of the tent to trap more light in.
25/07/20
Tropical Storm Gonzalo may make landfall today and the skies are set up for thunderstorms so I decided to keep the plants in their indoor setup for the full 18hrs of their light cycle. Since both Columbian seeds still show no signs of germination, I decide to go collect another strain. I got my hands on a 21 day old Dominican Republic strain that was grown in a seedling tray and left there; It was fed once with 20-20-20 and calmag. The cotyledons were white, the stem red between the top nodes and yellow the rest of the way down, the leaves a light green, and it was no taller than 2 inches excluding it's 1 inch sq root cube. I immediately transplanted it into my remaining half gallon pot upon returning home, dampened the soil with my spray bottle and left it to sit with the others and finish the light cycle.
Likes
241
Share


@Tropicannibis_Todd
Follow
💩Holy Crap We Are Back At It And Loving It💩 👉WE R ALMOST AT THE FINISH LINE👈
Growmies we are at DAY 63 and there just killing💀it👌
👉We are in full on flowering , gotta say the pink to redish hairs have gone away which is a bummer 😕 but the frost 🍦 is strong 💪
So Shit , I gave them just a tad to much nutes on the first few feeding 👈 But I have since fixed it
So I'm still doing some low stress training 🙃 and some defolation 😳
Lights being readjusted and chart updated .........👍rain water to be used entire growth👈
👉I used NutriNPK for nutrients for my grows and welcome anyone to give them a try .👈
👉 www.nutrinpk.com 👈
NutriNPK Cal MAG 14-0-14
NutriNPK Grow 28-14-14
NutriNPK Bloom 8-20-30
NutriNPK Bloom Booster 0-52-34
I GOT MULTIPLE DIARIES ON THE GO 😱 please check them out 😎
👉THANKS FOR TAKING THE TIME TO GO OVER MY DIARIES 👈


Likes
11
Share


@Bluntblazer66
Follow
Mar 10th
Week 13
Plant is doing great filling out nicely with with bud
Mar 13th
Fresh nutrients today
A little bit more defoliation
Plant is healthy happy filling out nicely

Likes
4
Share

@KannaGrowing
Follow
Esta semana, tenemos que conectar el tercer Led LazerLite Pro 720W para que no se tapen luz entre las plantas más crecidas.
También aumentamos la potencia al 50% y seguimos con riegos alternos con y sin fertilizante.
Tratamos con Propolix vía foliar como preventivo todo el cultivo.

Likes
14
Share


@MG2009
Follow
05/27/2021
Its been a while but all is well, the red light only seems to have encouraged lots of new growth. But I think I'm going to stick with 25-50% blue spectrum and 100% red for the finish.
I'm kind of disappointed that she has no distinguishing smell, but she was bred for resistance to PM specifically. All the good stuff will come once i have stabilized consistent PM resistance.
(Work in progress)
Then the good stuff will be worked in..... If needed.
Ps.
I do believe it will likely be 12+ weeks of flowering to finish
(Hope she has a racy/trippy sativa side) fingers crossed🙏